Marking perfect circles on wood can be tricky, especially if you want your project to look sharp and professional. You might have struggled with uneven lines or wasted materials trying to get it just right.
But what if you could learn simple tricks that make this task easy and precise every time? You’ll discover practical tips that save you time and frustration, helping you create flawless circles for your woodworking projects. Keep reading, and you’ll never have to guess how to mark circles on wood again.

Credit: www.familyhandyman.com
Essential Tools For Circle Marking
Marking circles on wood needs the right tools to get clean and accurate lines. Using proper tools helps avoid mistakes and saves time.
Simple tools like compasses and pencils work well. Some other tools can also help with precision.
Choosing The Right Compass
A good compass is important for drawing perfect circles on wood. It must be sturdy and easy to adjust.
Look for a compass with a sharp point to hold it steady. The pencil part should be firm to avoid smudges.
- Metal compasses last longer and hold better
- Adjustable arms allow different circle sizes
- Sharp points prevent slipping on wood
Using A Pencil And Marker
Start with a pencil to mark circles lightly. Pencils make it easy to erase mistakes before cutting.
Once you are sure of the circle, use a fine marker to darken the line. This makes it easier to see while working.
- Use a sharp pencil for thin lines
- Choose markers with fine tips for detail
- Test marker ink on scrap wood first
Alternative Tools For Precision
Sometimes, other tools can help mark circles with more accuracy. A beam compass is good for large circles.
A template or stencil can speed up marking if you need many circles the same size.
- Beam compass for large radius circles
- Stencils for repeated circle shapes
- Protractors help check angles and arcs
Credit: www.familyhandyman.com
Preparing The Wood Surface
Marking circles on wood needs a smooth and clean surface. Proper preparation helps you draw clear and accurate circles.
Taking time to prepare the wood makes your work easier and improves the final look.
Sanding For Smoothness
Sanding removes rough spots and splinters. It creates a flat surface for marking circles.
Use fine-grit sandpaper to get a smooth finish. Sand in the direction of the wood grain to avoid scratches.
- Start with medium-grit sandpaper (around 120 grit)
- Finish with fine-grit sandpaper (220 grit or higher)
- Check the surface by running your hand over it
Cleaning Dust And Debris
Dust from sanding can blur your pencil lines. Clean the surface before marking circles.
Use a soft brush or a cloth to remove dust. A damp cloth can pick up finer particles.
- Brush off large dust particles
- Wipe with a dry or slightly damp cloth
- Let the wood dry completely if using a damp cloth
Securing The Wood In Place
Keep the wood steady while marking circles. Movement can cause inaccurate lines.
Use clamps or a workbench to hold the wood firmly. This helps you mark circles with confidence.
- Place the wood on a flat, stable surface
- Use clamps to secure the wood tightly
- Check that the wood does not move before marking
Simple Techniques To Mark Circles
Marking circles on wood is a common task in woodworking. Using simple tools and methods can help you draw perfect circles with ease. This guide shares three easy techniques to get clean circle markings on your wood projects.
Each technique fits different needs and tools you may have. Choose the best one for your project and skill level. Let’s explore how to mark circles accurately and simply.
Using A Compass Correctly
A compass is a classic tool for drawing circles. It has a sharp point and a pencil holder. Here are tips to use it right:
- Place the sharp point firmly on the center spot of your circle.
- Adjust the pencil arm to the radius you want.
- Keep the compass upright and steady while drawing.
- Move the pencil slowly in a smooth circle.
- Check the pencil lead is sharp for a clear line.
Diy Compass With String And Pin
You can make a simple compass with string and a pin. This method works well if you don’t have a compass. Follow these steps:
- Cut a piece of string longer than your circle’s radius.
- Tie one end to a pencil.
- Pin the other end on the wood center point with a thumbtack or nail.
- Hold the string tight and pull the pencil out to the right length.
- Keep the string tight and move the pencil around the pin to draw the circle.
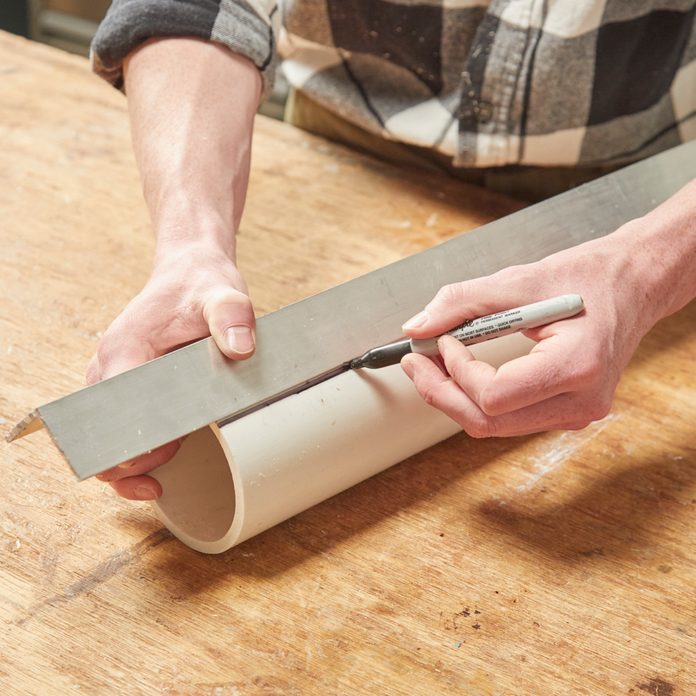
Tracing Objects As Templates
Using objects as templates is a fast way to mark circles. Find round items close to your desired size. Common choices include lids, cups, or jars. Here is a table of common objects and their approximate diameters:
| Object | Approximate Diameter |
| Small jar lid | 3 inches (7.5 cm) |
| Drinking glass | 4 inches (10 cm) |
| Plate | 8 inches (20 cm) |
| Large bowl | 10 inches (25 cm) |
Place the object on the wood and hold it steady. Trace around the edge with a pencil for a clean circle. This method works well for quick, consistent shapes.
Advanced Methods For Accuracy
Marking perfect circles on wood can be tricky. Advanced tools help improve accuracy and save time.
Using precise methods ensures your project looks professional and fits well.
Using A Beam Compass
A beam compass has a long adjustable arm. It can mark large circles with good accuracy.
You fix a pencil on one end and a sharp point on the other. Adjust the arm to the circle’s radius.
- Allows marking circles larger than a regular compass
- Good for woodworking projects needing big round shapes
- Adjustable arm helps keep the radius exact
Employing A Circle Cutting Jig
A circle cutting jig attaches to a saw or router. It guides the tool in a perfect circle path.
This method cuts circles directly with high precision. It is ideal for making round wood pieces.
- Attach jig firmly to your tool and wood
- Set the radius by adjusting the arm on the jig
- Slow and steady cuts improve accuracy
- Works well for repeat cuts of the same size
Laser Marking Options
Laser marking tools project a circle outline onto wood. This helps you trace perfect shapes.
They offer high accuracy and reduce human error. Some lasers connect to digital measuring tools.
- Project clear, sharp circle lines on wood surface
- Adjust circle size with digital controls
- Useful for complex projects needing exact shapes
- Safe use requires eye protection and stable setup
Common Mistakes To Avoid
Marking circles on wood looks easy but can be tricky. Avoiding common mistakes helps you get clean, accurate lines.
Simple errors can cause uneven or wrong circles. Watch out for these common problems to improve your work.
Uneven Pressure On Tools
Applying uneven pressure with your compass or pencil changes the circle shape. Too much pressure can dig into the wood.
Too light pressure makes faint lines that are hard to follow. Keep your hand steady and pressure even for smooth circles.
- Hold tools firmly but gently
- Keep a steady hand while drawing
- Practice on scrap wood to feel the right pressure
Incorrect Center Point Placement
Placing the center point off your intended spot creates a circle in the wrong place. This mistake wastes wood and time.
Use a sharp point or nail for the center. Double-check the spot before starting to draw your circle.
- Mark the center clearly with a fine point
- Measure twice before placing the center
- Secure the center point to prevent slipping
Skipping Surface Preparation
Drawing circles on rough or dirty wood leads to uneven lines. Dust and bumps affect tool movement.
Clean and sand the surface before marking. A smooth surface helps your tools glide evenly for better accuracy.
- Remove dust and debris with a brush or cloth
- Sand rough spots gently with fine-grit sandpaper
- Check the surface for bumps before marking

Credit: www.youtube.com
Tips For Marking Large Circles
Marking large circles on wood can be tricky without the right tools. Using proper techniques helps you draw accurate and smooth circles.
These tips will guide you through ways to mark big circles easily and clearly on your wood projects.
Extending The Compass Reach
Standard compasses may not reach the size you need for large circles. You can extend their reach with simple tools.
Attach a pencil to the compass arm using tape or a small clamp. This increases the radius you can draw.
- Use strong tape to hold the pencil firmly
- Measure the new radius before drawing
- Keep the pivot point steady while drawing
Using Flexible Measuring Tapes
Flexible measuring tapes help mark large circles by acting like a giant compass. You can measure the radius and mark points.
Pin one end at the center of the circle. Hold the tape tight and mark points around the radius to guide your drawing.
- Fix the tape end firmly at the center
- Mark multiple points around the circle edge
- Connect points smoothly with a pencil or flexible curve
Segmented Circle Marking
Segmented marking breaks the circle into smaller parts. Mark the circle in sections and join the lines for better control.
This method works well for very large circles or uneven surfaces where a full sweep is hard to make.
- Divide the circle edge into equal segments
- Mark each segment carefully with a ruler or tape
- Draw smooth curves connecting each segment mark
Maintaining Your Marking Tools
Keeping your marking tools in good shape helps you draw perfect circles on wood. Proper care saves money and improves accuracy. This guide covers simple ways to maintain pencils, markers, and compasses.
Regular upkeep means less frustration and better results. Follow these tips to keep your tools ready for any woodworking project.
Sharpening Pencils And Markers
Sharp pencils and markers make clear, precise lines. Dull tips cause uneven marks and mistakes. Use the right sharpener for your tools and sharpen often.
- Use a quality pencil sharpener for wooden pencils.
- Keep marker tips clean by wiping with a soft cloth.
- Replace marker tips if they become too worn or frayed.
- Avoid over-sharpening to prevent breaking the lead.
Calibrating Compasses
A compass that is out of calibration will create inaccurate circles. Check your compass before each use to ensure it measures correctly.
| Calibration Task | Method | Frequency |
|---|---|---|
| Check hinge tightness | Tighten or loosen screw for smooth movement | Before each project |
| Test radius setting | Compare circle to ruler measurement | Weekly |
| Clean pivot point | Remove dust and apply light oil | Monthly |
Storing Tools Properly
Proper storage protects your marking tools from damage and drying out. Keep them organized and safe to extend their life.
Follow these storage tips:
- Store pencils and markers in a dry place away from direct sunlight.
- Use cases or holders to prevent tips from breaking.
- Keep compasses in a padded box to avoid bending or misalignment.
- Do not leave markers uncapped to prevent drying.
Frequently Asked Questions
How Do I Mark Perfect Circles On Wood?
Use a compass or a homemade jig with a nail and pencil. Secure the wood, set the radius, and carefully rotate the compass to draw a smooth, even circle on the wood surface.
What Tools Are Best For Drawing Circles On Wood?
A compass, circle cutter, or a flexible curve ruler works best. These tools provide accuracy and control for marking precise circles on wood surfaces.
How Can I Avoid Mistakes When Marking Circles On Wood?
Measure twice, mark lightly first, and use sharp pencils. Secure the wood to prevent movement and double-check your radius before drawing the final circle.
Can I Mark Circles On Wood Without Special Tools?
Yes, you can use a string and pencil tied to a nail. Fix the nail at the center and pull the string taut to draw the circle.
Conclusion
Marking circles on wood can be simple with the right tools. Practice makes it easier. Use a compass for accurate circles. A pencil or chalk works well for marking. Ensure your wood is stable before marking. Try different tools to find your favorite.
Remember, precision matters. Clean your tools after use. This keeps them ready for next time. With these tips, your wood projects will look neat and professional. Enjoy the process and have fun crafting!