Are you struggling to get the perfect angle on your furniture projects? A bevel gauge might be the tool you’re missing.
Knowing how to use a bevel gauge can transform your work, helping you measure and transfer angles with precision. Whether you’re building a chair, a table, or a cabinet, mastering this simple tool will save you time and frustration. Keep reading, and you’ll discover easy steps to use a bevel gauge like a pro, making your furniture stronger and more beautiful.
Your next project is about to get a lot easier.
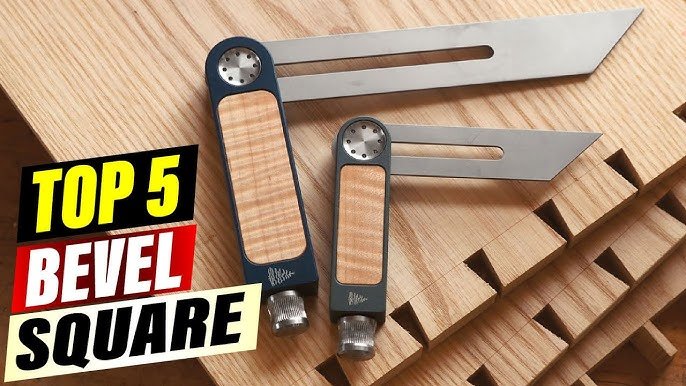
Choosing The Right Bevel Gauge
A bevel gauge helps measure and copy angles in furniture making. Picking the right one is important for accuracy.
Different bevel gauges suit different tasks. Knowing their types, materials, and sizes helps you choose well.
Types Of Bevel Gauges
Bevel gauges come in several types. Each type fits different woodworking needs and styles.
- Sliding Bevel:Has an adjustable blade that locks at any angle.
- Fixed Bevel:Set at one angle, used for repeated cuts.
- Digital Bevel:Shows angle readings on a small screen.
Sliding bevels are the most common for furniture making. They offer flexibility for many angles.
Material And Build Quality
The material affects the tool’s durability and accuracy. Look for strong, stable materials.
- Wood:Traditional look but can warp over time.
- Steel:Very durable and resists bending.
- Aluminum:Lightweight and rust-resistant.
- Plastic:Affordable but less sturdy and less accurate.
A solid build with a tight locking mechanism keeps the angle steady during use.
Size Considerations
Size affects how easy the bevel gauge is to use and store. Choose a size that fits your projects.
- Blade Length:Longer blades measure larger angles but may be harder to handle.
- Handle Size:Should feel comfortable in your hand for better control.
- Portability:Smaller gauges are easier to carry on job sites.
Pick a size that matches your workspace and the furniture pieces you build.

Credit: paulsellers.com
Setting Up The Bevel Gauge
Using a bevel gauge correctly helps you measure and copy angles for furniture making. Setting it up right ensures your cuts fit perfectly.
This guide covers three key steps to prepare your bevel gauge for accurate work.
Adjusting The Blade Angle
First, loosen the locking mechanism to move the blade freely. Hold the stock firmly and adjust the blade to the desired angle. Use a protractor or angle finder if you need a precise measurement.
Locking Mechanism Tips
After setting the angle, tighten the locking screw to hold the blade in place. Avoid over-tightening, which can damage the gauge or make adjustments hard.
- Turn the screw until the blade feels secure
- Check if the blade moves slightly; it should not
- If stiff, loosen and try tightening again gently
- Keep the mechanism clean and free from dust
Calibrating For Accuracy
Calibration helps confirm your bevel gauge shows the correct angle. Regular checks keep your tool reliable for every project.
| Calibration Step | Description |
| 1. Set blade to 0° | Align blade flush with the stock edge |
| 2. Tighten locking screw | Secure blade without shifting angle |
| 3. Check with a square | Blade and stock should form a perfect right angle |
| 4. Adjust if needed | Loosen and reset blade to exact 0° |
Measuring Angles On Wood
A bevel gauge is a simple tool used to measure and transfer angles. It helps woodworkers create precise cuts and fits for furniture projects.
Using a bevel gauge saves time and reduces mistakes. It works well for many types of angled joints and edges.
Transferring Angles From Plans
Start by loosening the bevel gauge’s locking screw. Adjust the blade to match the angle shown on your furniture plans. Tighten the screw to lock the blade in place.
Then, place the bevel gauge on your work surface to transfer the angle. You can draw a line along the blade for accurate cutting guides.
Marking Workpieces Precisely
Hold the bevel gauge firmly against the edge of your wood piece. Use a sharp pencil to trace the angle along the blade. This mark guides your saw or router.
- Ensure the bevel gauge blade is tightly locked.
- Keep the gauge steady while marking.
- Use a fine pencil for clear lines.
- Check the mark before cutting.
Checking Existing Angles
Place the bevel gauge blade against the existing angle on your wood piece. Adjust the blade until it matches the angle perfectly. Lock the blade and remove the gauge.
| Step | Action |
| 1 | Loosen the blade locking screw |
| 2 | Fit the blade to the wood angle |
| 3 | Tighten the screw to lock the blade |
| 4 | Remove the gauge and measure angle with a protractor if needed |

Credit: paulsellers.com
Common Furniture Applications
A bevel gauge is a simple tool that helps measure and transfer angles. It is useful in many furniture projects. Using a bevel gauge improves accuracy and fit.
This tool is handy for tasks that need precise angled cuts. It works well with wood joints, edges, and fitting parts together.
Creating Miter Joints
Miter joints connect two pieces of wood at an angle. Usually, the angle is 45 degrees to form a 90-degree corner. A bevel gauge helps set the exact angle for cutting.
Use the bevel gauge to copy the angle from the project or measure a specific angle. Then transfer this angle to your saw for precise cuts. This ensures the joint fits tight and looks clean.
Shaping Beveled Edges
Beveled edges are angled cuts on the wood edge, not at 90 degrees. These edges add style and reduce sharp corners. The bevel gauge helps measure the exact angle needed for the edge.
Set the bevel gauge to the desired angle. Use it to guide your hand or power tool while cutting the wood edge. This keeps the bevel consistent across all pieces.
Fitting Angled Components
Some furniture parts join at unusual angles. A bevel gauge helps measure these angles accurately. This makes cutting and fitting easier and more precise.
Adjust the bevel gauge to the angle between parts. Transfer the angle to your cutting tool. This ensures the components fit well and the furniture is stable.
Maintenance And Care
Taking good care of your bevel gauge helps it last longer. Proper maintenance keeps it accurate for furniture making.
Clean and store the tool correctly to prevent damage. Avoid common mistakes that cause wear and tear.
Cleaning Techniques
Remove dust and debris from your bevel gauge after each use. Use a soft cloth to wipe it clean gently.
- Use a dry cloth to remove sawdust and dirt
- Apply a small amount of oil to metal parts to stop rust
- Do not use water or harsh chemicals that can damage wood or metal
Storage Tips
Store your bevel gauge in a dry place away from sunlight. Keep it in a protective case or pouch to avoid scratches.
| Storage Method | Benefit |
| Protective case | Prevents physical damage |
| Dry environment | Stops rust and wood swelling |
| Flat surface | Keeps the tool aligned |
Preventing Wear And Tear
Handle the bevel gauge carefully to avoid dropping it. Tighten screws gently to keep the tool stable.
- Check screws regularly and tighten if loose
- Avoid exposing the gauge to extreme temperatures
- Do not force the tool beyond its limits
- Keep the bevel gauge away from moisture
Troubleshooting Tips
Using a bevel gauge correctly is important for good furniture making. Sometimes, you may face issues while using it. These tips help fix common problems fast.
Check these tips to keep your bevel gauge working well and avoid mistakes in your work.
Avoiding Slippage
Slippage happens when the bevel gauge blade moves while measuring. This causes wrong angles and wasted material.
To stop slippage, tighten the locking screw firmly. Hold the gauge steady when marking or transferring angles.
- Clean the blade and handle to remove dust or grease.
- Tighten the locking knob enough to hold the blade.
- Use gentle pressure to keep the blade in place.
- Avoid over-tightening to prevent damage.
Dealing With Inaccurate Readings
Inaccurate readings cause poor-fitting furniture parts. Check the gauge often to keep it correct.
Make sure the blade aligns perfectly with the handle. Adjust it if the angle looks off before use.
- Check the blade for bends or damage.
- Test the gauge against a known angle, like a square.
- Calibrate the blade if your gauge allows adjustments.
- Store the gauge in a dry place to prevent warping.
When To Replace Your Gauge
A bevel gauge wears out over time and loses accuracy. Replace it if you see signs of damage or it does not hold angles.
Regular use can cause loose screws or rust. If repairs do not fix these, get a new gauge for better results.
- Blade is bent or cracked
- Locking screw no longer tightens
- Rust or corrosion affects movement
- Gauge shows wrong angles after calibration

Credit: www.reddit.com
Frequently Asked Questions
What Is A Bevel Gauge Used For In Furniture Making?
A bevel gauge measures and transfers angles accurately. It helps woodworkers replicate angles for precise joints and cuts. This tool ensures consistency and quality in furniture assembly. It is essential for angled cuts, miters, and custom designs.
How Do You Adjust A Bevel Gauge Correctly?
Loosen the locking mechanism to set the blade angle. Align the blade with the desired angle or edge. Tighten the lock to fix the blade in place. Always double-check the angle before marking or cutting wood.
Can A Bevel Gauge Improve Woodworking Accuracy?
Yes, a bevel gauge enhances precision in angle measurements. It helps maintain consistent angles across multiple pieces. This reduces errors and waste in furniture making. Accurate angles lead to better-fitting joints and professional results.
What Materials Are Bevel Gauges Made From?
Bevel gauges are commonly made from metal, wood, or plastic. Metal versions offer durability and precise calibration. Wooden gauges provide a classic feel and easy handling. Choose based on your comfort and workshop needs.
Conclusion
A bevel gauge is essential for precise furniture making. It helps create accurate angles. Easy to use and adjust. Practice makes perfect. Start with simple projects. Gain confidence with each use. You’ll see improved craftsmanship. Accurate measurements matter for quality furniture.
The right tools make a difference. Patience and practice lead to success. Embrace the learning process. Enjoy creating beautiful furniture. With a bevel gauge, your projects will shine. Keep honing your skills. Craftsmanship grows with experience. Happy woodworking!