Are you tired of guessing measurements and ending up with parts that just don’t fit? Using a caliper can change that.
It’s a simple tool that gives you precise, reliable measurements every time. Whether you’re working on a DIY project, fixing something around the house, or handling professional tasks, knowing how to use a caliper correctly will save you time and frustration.
In this guide, you’ll learn step-by-step how to get the most accurate readings from your caliper—making your work easier and more exact. Ready to master this essential skill? Let’s dive in.
Credit: aci24.com
Choosing The Right Caliper
Using a caliper helps you get exact measurements. Picking the right caliper makes your work easier and more accurate.
There are different types of calipers. Each type suits different tasks and users.
Types Of Calipers
Calipers come in several types. The most common are digital, vernier, and dial calipers. Each type has its own way to show measurements.
Choose the type that fits your needs and skill level. Some are easier to read, while others are more traditional.
- Digital calipersshow measurements on a screen.
- Vernier calipersuse a sliding scale for readings.
- Dial calipershave a dial with a needle to show numbers.
Material And Build Quality
Calipers are made from different materials. Metal calipers are strong and last long. Plastic ones are lighter but less durable.
Look for calipers with smooth sliding jaws. Good build quality means better accuracy and longer use.
- Stainless steel is common and rust-resistant.
- Carbon fiber calipers are light and strong.
- Plastic calipers are cheaper but less precise.
Digital Vs. Vernier Vs. Dial
Digital calipers are easy to read. They give a quick and clear measurement. They often have buttons to switch units.
Vernier calipers need you to read the scale carefully. They do not need batteries but can be hard for beginners.
Dial calipers use a needle on a round dial. They are faster to read than vernier but need careful handling.
| Feature | Digital | Vernier | Dial |
|---|---|---|---|
| Ease of reading | Easy | Hard | Medium |
| Power needed | Yes (battery) | No | No |
| Durability | Medium | High | Medium |
| Price | Higher | Lower | Medium |
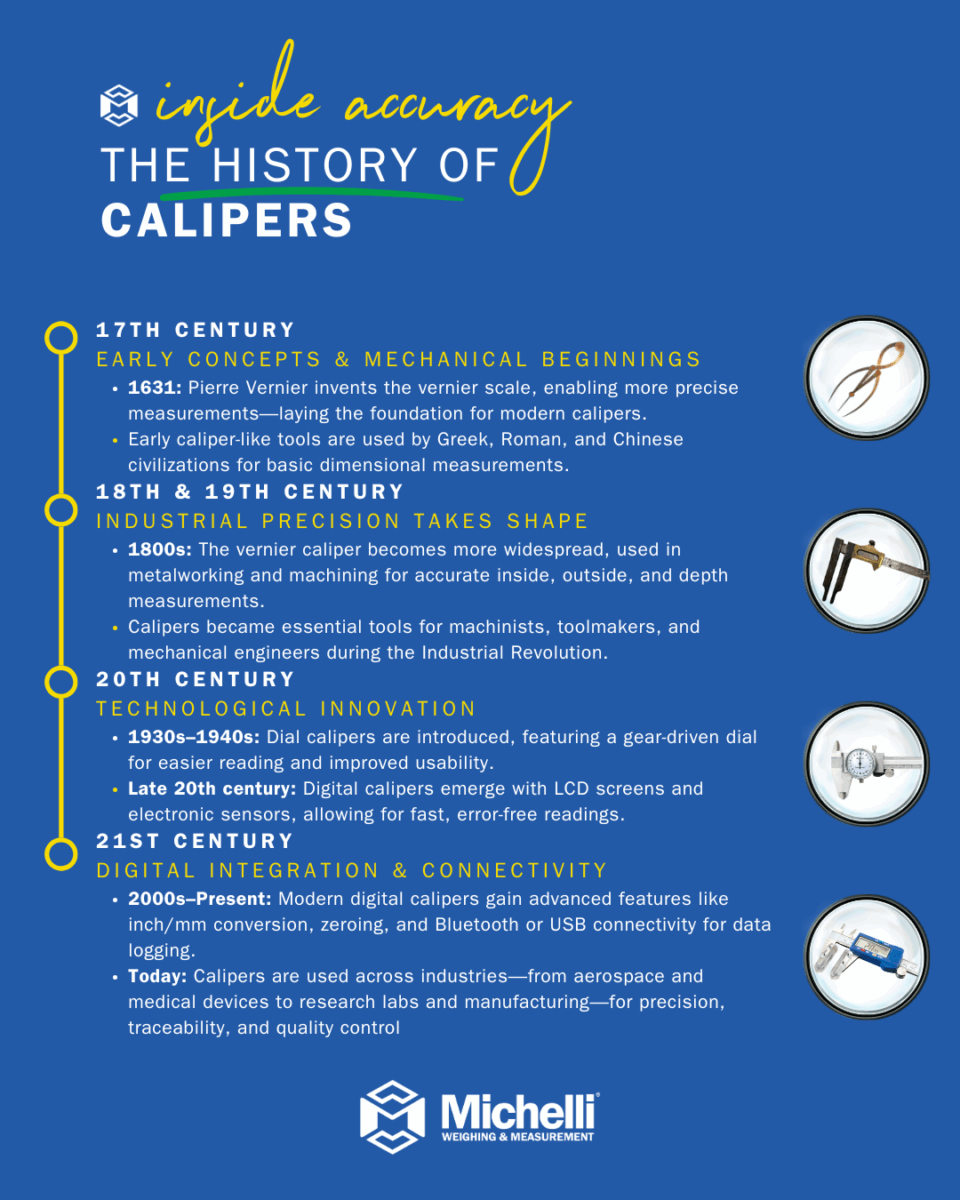
Credit: www.michelli.com
Caliper Parts And Functions
A caliper is a tool that measures objects with high accuracy. It has several parts, each with a special job. Knowing these parts helps you use the caliper correctly.
This guide explains the main parts: jaws and depth gauge, main scale and vernier scale, locking screw and thumbwheel.
Jaws And Depth Gauge
The jaws are the parts that touch the object you measure. The inside jaws measure the inside width. The outside jaws measure the outside width or length.
The depth gauge is a thin rod that slides out from the end. It measures the depth of holes or slots. It gives measurements that other parts cannot reach.
- Inside jaws: measure internal dimensions like holes
- Outside jaws: measure external dimensions like thickness
- Depth gauge: measures depth of holes and recesses
Main Scale And Vernier Scale
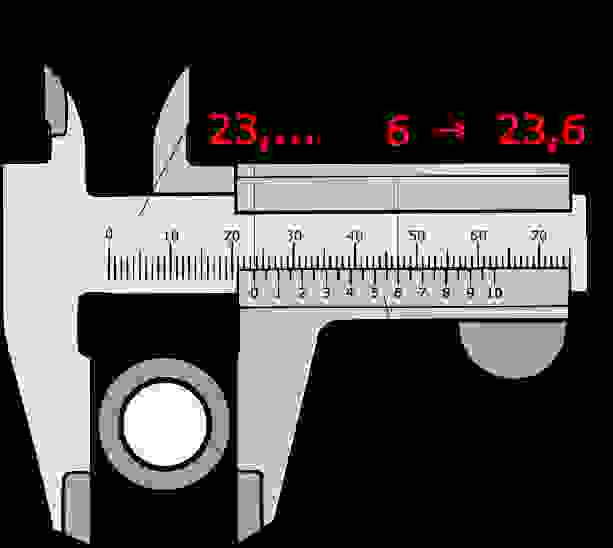
The main scale is the fixed ruler on the caliper. It shows measurements in millimeters or inches. The vernier scale slides along the main scale.
The vernier scale helps read smaller units between marks on the main scale. It makes your measurements more precise.
| Part | Function | Unit Type |
|---|---|---|
| Main Scale | Shows basic measurement length | Millimeters or Inches |
| Vernier Scale | Shows precise fractions of main scale units | Fractions of Millimeters or Inches |
Locking Screw And Thumbwheel
The locking screw stops the sliding part from moving. It keeps your measurement fixed so you can read it easily.
The thumbwheel helps you slide the jaws smoothly. It makes small adjustments easier and faster.
- Locking screw: holds the measurement in place
- Thumbwheel: allows fine, easy movement of jaws
Preparing The Caliper
Using a caliper correctly starts with good preparation. This helps you get precise measurements every time.
Before measuring, clean and adjust the caliper. Check its accuracy and handle it carefully.
Cleaning And Zeroing
Clean the caliper jaws to remove dust and dirt. Dirt can cause wrong readings.
After cleaning, close the jaws gently. Set the caliper to zero before starting measurements.
- Use a soft cloth to wipe the jaws
- Remove any oil or grease
- Close jaws fully and press the zero button
Calibration Checks
Check the caliper’s calibration often to keep it accurate. Use a standard object with a known size.
If the reading is off, adjust the caliper or have it calibrated by a professional.
- Measure a gauge block or calibration standard
- Compare the reading to the known size
- Repeat checks regularly for best results
Proper Handling Techniques
Hold the caliper firmly but gently. Avoid dropping or knocking it to keep it precise.
Use smooth motions when opening and closing the jaws. Store the caliper in its case after use.
- Hold the caliper by its body, not the jaws
- Move the slider slowly to avoid damage
- Keep the caliper in a dry, clean place
Measuring External Dimensions
Using a caliper helps measure the outside size of objects with accuracy. It is important to know how to position and read the caliper correctly.
This guide focuses on measuring external dimensions using a caliper. Follow the steps to get precise results.
Positioning The Object
Place the object on a stable surface. Hold it firmly to avoid movement while measuring.
Make sure the part you want to measure is clean and free from debris. This ensures accuracy.
Aligning The Jaws
Open the caliper jaws wide enough to fit around the object. Close the jaws gently until they touch the object’s sides.
- Hold the caliper steady without tilting it.
- Ensure the jaws are perpendicular to the object’s surface.
- Do not squeeze too hard to avoid damaging the object.
Reading The Measurement
Look at the scale or digital screen on the caliper. Read the number where the jaws meet.
| Type of Caliper | How to Read |
| Vernier | Match the zero on the vernier scale with main scale markings. |
| Dial | Read the dial pointer position against the scale. |
| Digital | Read the digital display directly for the measurement. |
Measuring Internal Dimensions
Using a caliper helps measure inside spaces like holes or slots. This is important for fitting parts together.
To get correct internal measurements, use the right parts of the caliper carefully.
Using Inside Jaws
Inside jaws are the small upper jaws of the caliper. They measure the space inside objects.
Open the inside jaws enough to fit inside the hole or slot. Then gently close them until they touch the sides.
- Keep the caliper perpendicular to the surface.
- Do not force the jaws to avoid damage.
- Read the measurement on the scale or digital display.
Avoiding Common Mistakes
Many people make errors that cause wrong measurements. Avoid these mistakes for better results.
- Do not tilt the caliper inside the object.
- Make sure the inside jaws are clean before use.
- Avoid applying too much pressure on the jaws.
- Do not measure near edges or uneven spots.
- Check that the caliper is zeroed before measuring.
Tips For Accuracy
Follow these tips to get exact internal dimension measurements with a caliper.
- Hold the caliper steady while measuring.
- Use a slow and gentle closing motion on the inside jaws.
- Measure multiple times and take the average.
- Keep the caliper clean and well-maintained.
- Practice measuring different objects to improve skill.
Measuring Depth And Step
Calipers are useful tools for measuring many things. They help get exact depth and step measurements.
Knowing how to use a caliper right makes your measurements accurate. This guide shows how to measure depth and step.
Using The Depth Rod
The depth rod is a thin metal bar at the caliper’s end. It slides out to measure the depth of holes or grooves.
To use it, place the caliper’s main body on the surface. Then, push the depth rod into the hole until it touches the bottom.
- Make sure the caliper is straight and steady
- Read the measurement shown on the scale or digital screen
- Check the depth in millimeters or inches
Measuring Steps Accurately
Steps are small ledges or changes in height on an object. Calipers measure these by using the jaws carefully.
Open the jaws and place them on each level of the step. The difference between the two jaws shows the step height.
- Close the jaws gently to avoid bending the object
- Make sure the jaws touch both step levels fully
- Read the measurement on the caliper scale or screen
Practical Applications
Depth and step measurements are important in many jobs. Mechanics, woodworkers, and metalworkers use calipers daily.
Measuring hole depths, groove sizes, or step heights helps ensure parts fit well. It improves quality and safety.
- Checking engine part depths in car repair
- Measuring grooves in wooden furniture making
- Inspecting step heights in metal fabrication
Advanced Tips For Precision
Using a caliper correctly ensures accurate measurements. Small details can affect precision.
These tips help you get the most exact results every time you measure.
Consistent Pressure Application
Apply steady pressure when closing the caliper jaws. Too much force can distort the object.
Too little pressure may cause gaps and wrong readings. Keep it firm but gentle.
- Hold the caliper with your thumb and fingers steadily
- Squeeze the jaws until they touch the object lightly
- Use the thumb wheel for fine adjustments
Temperature Effects
Temperature changes can expand or shrink metal parts. This affects caliper accuracy.
Measure in a room with stable temperature. Avoid measuring hot or cold objects right away.
- Let the caliper and object reach room temperature
- Avoid direct sunlight or heat sources
- Store calipers in a dry, cool place
Regular Maintenance
Keep your caliper clean and well-oiled. Dirt and rust reduce its precision.
Check calibration often. Adjust or replace parts if readings become inconsistent.
- Wipe jaws and scale with a soft cloth after use
- Use light machine oil to prevent rust
- Store caliper in a protective case
- Test calibration with gauge blocks or standards
Troubleshooting Common Issues
Using a caliper for precise measurements can sometimes lead to errors. Troubleshooting helps keep your readings accurate.
This guide covers common problems and how to fix them quickly and easily.
Inaccurate Readings
Inaccurate readings may happen due to dirt, poor technique, or worn parts. Clean the caliper jaws before use.
- Check if the caliper is fully closed before measuring.
- Apply gentle pressure while measuring to avoid bending the tool.
- Make sure the object being measured is stable and clean.
- Read the scale carefully and avoid parallax errors by looking straight at it.
Calibration Problems
Calibration keeps your caliper accurate over time. If readings seem off, recalibrate the tool.
| Problem | Cause | Solution |
| Zero error | Caliper does not read zero when closed | Reset zero or adjust dial |
| Scale misalignment | Wear or shock moved the scale | Realign scale or replace tool |
| Digital display error | Low battery or dirt in sensor | Replace battery and clean sensor |
Handling Wear And Tear
Wear and tear affect accuracy. Handle your caliper with care to extend its life.
- Store the caliper in its case after use.
- Avoid dropping or applying heavy force on it.
- Lubricate moving parts lightly to prevent rust.
- Inspect jaws for damage or bending regularly.
Credit: www.protoolreviews.com
Frequently Asked Questions
What Is The Best Way To Hold A Caliper Correctly?
Hold the caliper firmly with your dominant hand. Use your thumb to slide the jaws smoothly. Keep the tool steady to avoid errors. Proper grip ensures accurate and consistent measurements every time.
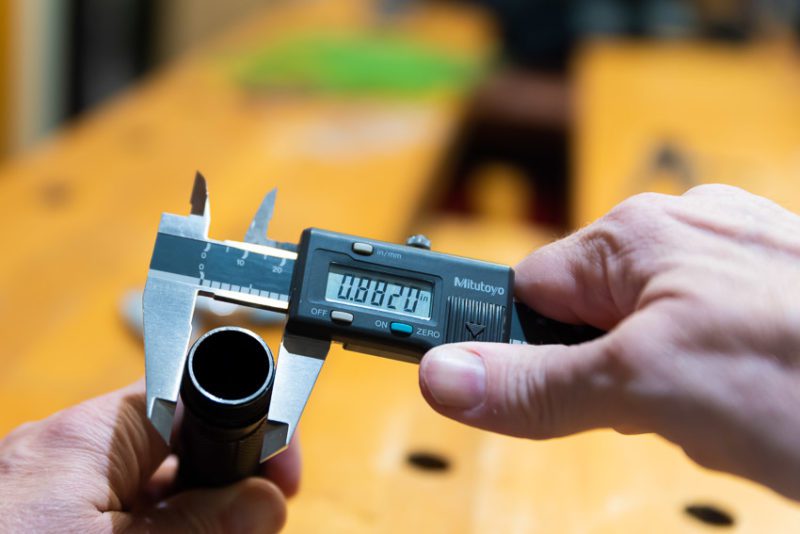
How Do You Read A Digital Caliper Measurement?
Turn on the digital caliper and zero it before use. Close the jaws gently around the object. Read the measurement displayed on the screen directly. Digital calipers provide quick and precise readings without manual interpretation.
Can Calipers Measure Inside And Outside Dimensions?
Yes, calipers measure both inside and outside dimensions. Use the larger jaws for outside measurements. Use the smaller jaws or tips for inside measurements. This versatility makes calipers essential for various precise measuring tasks.
How Often Should You Calibrate A Caliper?
Calibrate your caliper every 6 to 12 months. Regular calibration ensures measurement accuracy and tool reliability. Follow the manufacturer’s instructions or use a certified calibration service. Proper maintenance extends the caliper’s lifespan and precision.
Conclusion
Mastering caliper use ensures precise measurements every time. Practice regularly to improve your skills. Always check your tool for accuracy before using it. Handle it carefully to maintain its precision. Clean your caliper after each use. This prevents measurement errors.
Store it properly to avoid damage. Consistent care extends its life. Follow these steps for reliable results. You’ll achieve accuracy in your projects. Understanding calipers boosts confidence in measuring tasks. No more guesswork. Just precise, dependable measurements. Your projects deserve nothing less.
Keep practicing, and soon, you’ll measure like a pro.