If you want your projects to turn out perfect, knowing how to read a carpenter’s level correctly is a must. Imagine hanging a shelf that’s perfectly straight or building a deck that won’t wobble—all of this starts with mastering this simple tool.
You might think it’s easy, but many people miss small details that can lead to big mistakes. This guide will show you exactly what to look for and how to use your level like a pro. Keep reading, and you’ll never have to guess if something is truly level again.

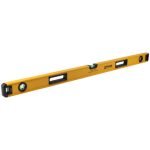
Credit: www.toolstop.co.uk
Choosing The Right Carpenter’s Level
Using a carpenter’s level correctly starts with choosing the right one. The right level helps you get accurate measurements for your projects. It is important to know the differences in types, materials, and sizes.
This guide will help you pick a level that fits your needs. Learning about these features makes your work easier and more precise.
Types Of Levels
There are several types of carpenter’s levels. Each type has a specific use. Knowing which type to pick will improve your work quality.
- Spirit Level: Uses liquid and an air bubble to show levelness.
- Laser Level: Projects a laser line for long or large projects.
- Box Level: Has a sturdy frame for heavy-duty work.
- Torpedo Level: Small and handy for tight spaces.
Materials And Durability
Levels come in different materials. The material affects how long the level lasts and how easy it is to use.
Look for levels made from strong materials that resist damage. This helps the level stay accurate over time.
- Aluminum: Lightweight and strong, good for most jobs.
- Wood: Traditional, but can warp or break easily.
- Plastic: Affordable but less durable.
- Stainless Steel: Very strong and rust-resistant.
Size And Accuracy
Size matters when choosing a carpenter’s level. Larger levels cover more surface but are less handy. Smaller levels fit in tight spaces but may be less stable.
Check the accuracy rating before buying. Higher accuracy means better results. Choose a size that fits your typical projects.
- 24 to 48 inches: Best for general woodworking and construction.
- 9 to 12 inches: Good for small or detailed tasks.
- Accuracy: Look for levels with accuracy of 0.5 mm/m or better.
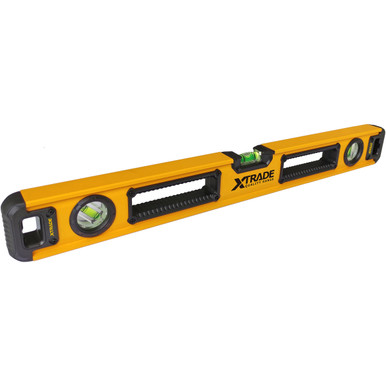
Components Of A Carpenter’s Level
A carpenter’s level helps check if surfaces are straight or even. Knowing its parts makes it easier to use correctly.
Each part has a role in measuring angles and balance. Let’s look at the main components of a carpenter’s level.
Vials And Bubbles
Vials are small tubes filled with liquid and a bubble inside. They show if a surface is level or plumb.
The bubble moves inside the vial. When it is centered between two lines, the surface is even or vertical.
- Horizontal vial checks flat surfaces
- Vertical vial checks upright surfaces
- Some levels have angled vials for specific angles
Frame And Edges
The frame holds all parts together. It is usually made of metal or plastic for strength and light weight.
Edges are straight and smooth. They help the level sit flat against surfaces for accurate readings.
- Frames resist bending and damage
- Edges are easy to clean and maintain
- Some frames have protective corners
Handles And Features
Handles make it easier to hold and place the level. They also help keep your hands away from the vials.
Some levels have extra features like magnets for metal surfaces or rubber grips for comfort.
- Handles improve control and stability
- Magnets hold the level on metal pipes or frames
- Rubber grips reduce slipping
Preparing For Accurate Readings
Using a carpenter’s level correctly starts with good preparation. This ensures your measurements are true and reliable.
Follow these steps to prepare your level for accurate readings before use.
Checking The Level’s Condition
Inspect your level carefully before each use. Look for cracks, dents, or dirt that may affect the bubble vial.
- Clean the vial and body with a soft cloth.
- Check if the bubble moves freely inside the vial.
- Ensure the frame is straight and not bent.
- Replace the level if the vial is damaged or leaking.
Calibrating Your Level
Calibration helps confirm your level gives correct readings. You can do this at home with a simple test.
- Place the level on a flat surface.
- Note the bubble position inside the vial.
- Rotate the level 180 degrees and place it again.
- Compare the bubble positions from both tests.
- If the bubbles do not line up, adjust or replace the level.
Setting Up The Surface
Choose a stable and flat surface for your measurements. Uneven surfaces cause wrong readings.
| Surface Type | Preparation Tips |
|---|---|
| Wood | Sand rough spots for smooth contact |
| Concrete | Remove debris and dust |
| Metal | Wipe clean and dry |
| Tile | Check for loose or uneven tiles |

Credit: www.wikihow.com
Techniques For Reading The Level
Using a carpenter’s level correctly ensures your projects are straight and even. This guide explains simple ways to read the level for accurate results.
Learn how to position the level, understand the bubble placement, and adjust the tool for different angles.
Positioning The Level Correctly
Place the level firmly on the surface you want to check. Make sure it lies flat and does not wobble. Hold the level steady for the most accurate reading.
- Set the level on the edge or flat side of the material.
- Keep the level still and avoid moving it during reading.
- Check that the level is clean and free of debris.
Interpreting Bubble Placement
The bubble inside the level’s vial shows if the surface is even. The bubble must be centered between the two lines for the surface to be level.
| Bubble Position | What It Means |
|---|---|
| Centered | Surface is level or plumb |
| Off to one side | Surface is tilted in that direction |
| Bubble moves quickly | Level is unstable or surface is uneven |
Adjusting For Different Angles
Carpenter’s levels can measure more than just flat surfaces. You can check angles like 45 or 90 degrees by using special vials or marks on the level.
Tips for angle adjustment:
- Use the vial marked for the angle you want to check.
- Place the level on the angled surface firmly.
- Adjust the material until the bubble centers in the angle vial.
Common Mistakes To Avoid
Using a carpenter’s level seems easy, but small errors can cause big problems. Avoiding common mistakes helps you get accurate readings every time.
Learn about errors like ignoring calibration, reading from the wrong angle, and using a damaged level. Fixing these will improve your work.
Ignoring Calibration
Calibration means checking if your level is accurate. Many people skip this step and get wrong results. A level can lose accuracy after drops or long use.
Always test your level on a known flat surface. If it is off, adjust or replace it. This saves time and avoids mistakes in your projects.
Reading From The Wrong Angle
Look at the bubble from directly above. Reading from the side makes the bubble appear off-center. This causes wrong measurements.
- Stand straight and eye level with the vial
- Do not tilt your head or the level
- Make sure lighting is good to see the bubble clearly
Using A Damaged Level
Cracks, dents, or worn vials affect how well a level works. A damaged level gives false readings and leads to uneven work.
Inspect your level before use. Replace it if you find damage. Using a good level keeps your work straight and professional.
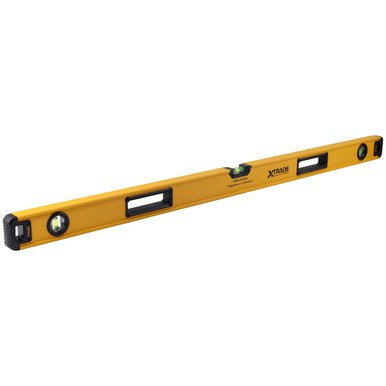
Credit: www.toolstop.co.uk
Advanced Tips For Precision
Reading a carpenter’s level correctly is key for precise work. Small errors can cause big problems in building.
This guide shares advanced tips to improve your accuracy and get the best results from your level.
Using Multiple Levels
Using more than one level helps confirm your measurements. It reduces mistakes caused by a single faulty tool.
Place levels on different parts of the surface to check if they all agree. If they do not, adjust until they match.
- Use a small level for tight spaces
- Use a longer level for bigger surfaces
- Compare readings from each level
- Adjust the workpiece based on combined results
Cross-checking With Laser Levels
Laser levels provide a precise reference line. They help verify the bubble level’s reading for better accuracy.
Set up the laser level and align your carpenter’s level with the laser line. This cross-check ensures your surface is truly level.
- Place the laser level on a stable surface
- Turn on the laser and aim it along the work area
- Align the carpenter’s level bubble to the laser line
- Make small adjustments if readings differ
Maintaining Your Level For Longevity
Keep your level clean and safe to maintain its accuracy. Dirt and damage can cause false readings.
Store the level in a dry place and check it regularly against a flat surface or another level.
- Wipe off dirt and dust after use
- Check for cracks or damages often
- Store in a protective case or tool box
- Test level accuracy every few months
Frequently Asked Questions
How Do I Read A Carpenter’s Level Bubble?
To read a carpenter’s level bubble, place the level on a surface and observe the bubble inside the vial. The bubble is centered when the surface is perfectly horizontal or vertical. Adjust the object until the bubble is between the marked lines for an accurate reading.
What Does It Mean When The Bubble Is Off-center?
An off-center bubble indicates the surface is not level. The bubble shifts toward the higher side, showing the tilt direction. To level the surface, adjust it until the bubble centers between the vial’s lines. This ensures accuracy in your carpentry work.
How Can I Ensure My Carpenter’s Level Is Accurate?
Check accuracy by placing the level on a flat surface, then flip it 180 degrees. If the bubble stays centered both ways, the level is accurate. Regular calibration and proper storage help maintain reliable readings over time.
Why Is Reading A Carpenter’s Level Important?
Reading a carpenter’s level correctly ensures your projects are straight and safe. Proper leveling prevents structural problems and improves aesthetics. Accurate use saves time and reduces costly mistakes during construction or woodworking tasks.
Conclusion
Reading a carpenter’s level correctly takes practice. Yet, it’s simple with patience. Start by ensuring the level is clean and undamaged. Always check the bubble position carefully. This ensures accuracy in your work. Align the bubble between the lines for a level surface.
Remember, practice makes perfect. With time, reading a level becomes second nature. Your projects will improve as you get better. Keep practicing and stay focused. Happy building and measuring!