If you want your joinery projects to be precise and professional-looking, mastering the combination square is a game-changer. This simple tool can help you measure, mark, and check angles with ease, saving you time and preventing costly mistakes.
Whether you’re a beginner or looking to sharpen your skills, this guide will show you exactly how to use a combination square to get perfect results every time. Ready to take your woodworking to the next level? Keep reading and discover tips that will make your work cleaner, faster, and more accurate.
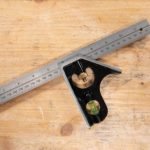
Choosing The Right Combination Square
A combination square is a handy tool for joinery work. Picking the right one makes your cuts and measurements more accurate. This guide helps you understand what to look for in a combination square.
Consider different types, materials, and sizes before buying. Each factor affects how well the tool works for your projects.
Types And Features
Combination squares come in various types. Some have extra features that help in specific tasks. Choose one that fits your usual woodworking needs.
- Standard combination square:Measures and marks 90 and 45 degrees.
- Center head square:Finds the center of round objects.
- Protractor head square:Measures and marks angles other than 45 and 90 degrees.
- Depth gauge feature:Measures depth or height of objects.
Material And Build Quality
| Material | Benefits | Notes |
| Steel | Durable and strong | May rust if not cared for |
| Stainless steel | Rust-resistant and long-lasting | Usually more expensive |
| Aluminum | Lightweight and easy to handle | Less durable than steel |
| Plastic | Affordable and lightweight | Not very durable or precise |
Look for tight-fitting parts that move smoothly. A good locking mechanism keeps the ruler steady during use.
Size Considerations
The size of the combination square affects its usefulness. Choose a size that matches the scale of your joinery projects.
- 6-inch squares:Compact and good for small projects.
- 12-inch squares:Most common size, versatile for many tasks.
- 16-inch or longer:Useful for larger workpieces and layout tasks.
Consider how easy it is to carry and store the tool. Larger sizes may offer more reach but can be less convenient.
Credit: www.rockler.com
Setting Up Your Combination Square
Using a combination square correctly helps you make precise joinery cuts. Setting it up right is important for accuracy.
This guide covers adjusting the blade, calibrating the tool, and maintaining it for long use.
Adjusting The Blade
Loosen the locking nut to slide the blade along the ruler. Move it to the needed measurement for your cut.
Make sure the blade is tight and does not move before you start marking or cutting.
Calibrating For Accuracy
Check the square’s accuracy by placing the blade against a known straight edge. The blade should be perfectly perpendicular.
- Place the blade firmly against the edge of a flat board.
- Draw a line along the ruler’s edge.
- Flip the square to the opposite side of the line.
- Draw a second line along the ruler.
- If the lines match, your tool is accurate.
- If not, loosen the nut and adjust the blade slightly.
- Tighten the nut once the lines align perfectly.
Maintenance Tips
| Task | How to Do It |
| Clean blade | Wipe with a dry cloth after each use to remove dust and debris. |
| Lubricate | Apply light oil to the moving parts to prevent rust and ensure smooth movement. |
| Tighten nuts | Check and tighten the locking nut regularly to keep the blade secure. |
| Store properly | Keep the tool in a dry place to avoid moisture damage. |
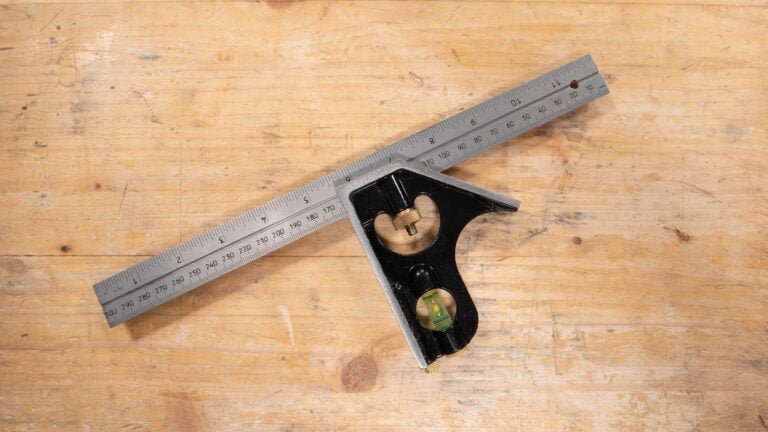
Measuring And Marking Techniques
A combination square is a useful tool for precise measuring and marking in joinery. It helps ensure your cuts and joints fit well together.
Using the right techniques will improve the accuracy of your work and reduce mistakes during assembly.
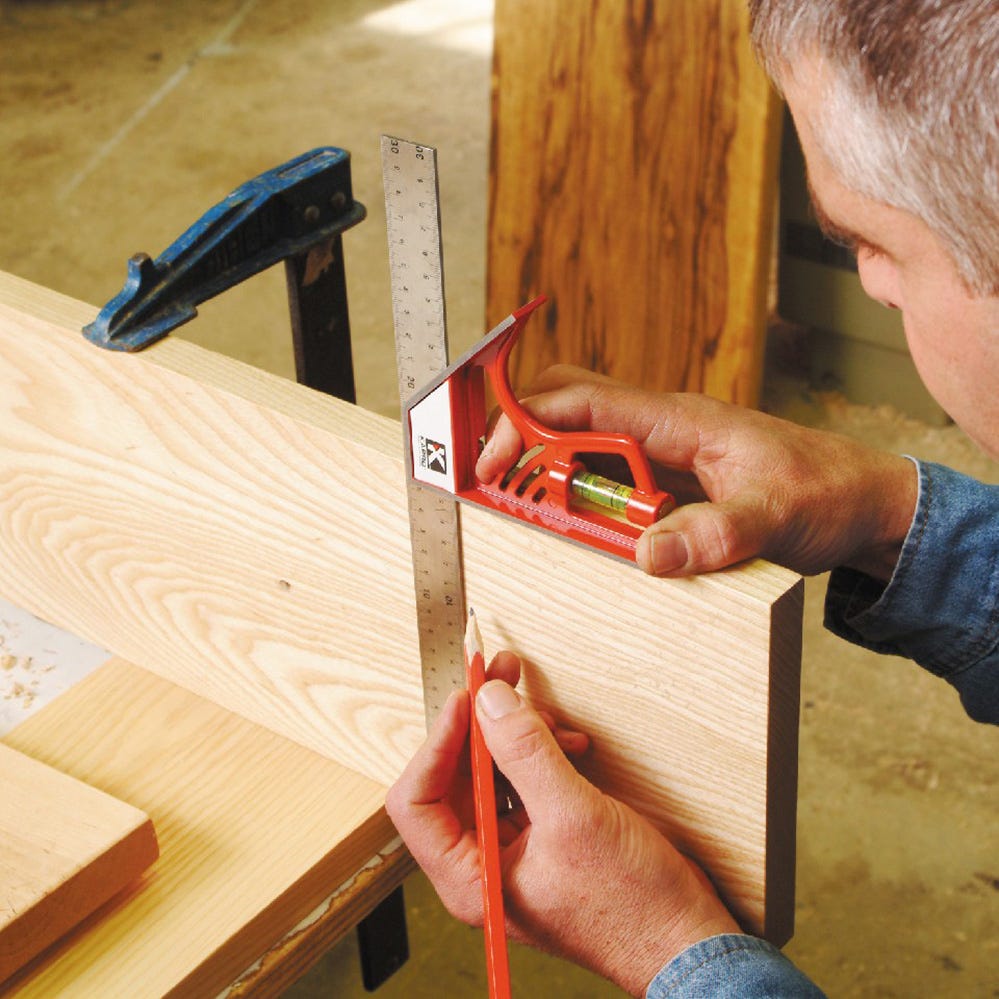
Marking Straight Lines
To mark a straight line with a combination square, set the ruler to the desired measurement. Hold the head firmly against the edge of the wood. Draw a line along the ruler’s edge for a straight and accurate mark.
- Place the stock flush against the wood edge
- Slide the ruler to the needed measurement
- Hold the head tight to prevent movement
- Use a sharp pencil or marking knife
- Draw the line along the ruler edge
Checking Angles
The combination square has a 90-degree and 45-degree angle built in. To check an angle, place the head against one surface and the ruler along the other. The tool will show if the angle is square or needs adjustment.
| Angle Type | How to Check |
| 90 Degrees | Place head and ruler at joint edges |
| 45 Degrees | Use the angled side of the head against the wood |
Transferring Measurements
To transfer measurements from one piece to another, lock the ruler at the correct length. Then, use the tool to mark the same distance on the second piece. This keeps your parts consistent.
- Unlock and slide the ruler to the needed length
- Lock the ruler in place
- Place the tool on the first piece to confirm measurement
- Move the tool to the second piece
- Mark the measurement clearly

Credit: www.reddit.com
Using The Square For Accurate Joinery
A combination square helps woodworkers make precise measurements and marks. It is key for creating strong, neat joinery. Using the square correctly improves fit and finish.
This guide shows how to use the square for common joinery tasks. Follow these tips to improve accuracy and consistency in your projects.
Laying Out Mortise And Tenon Joints
Use the combination square to mark exact lines for mortises and tenons. Adjust the ruler to the needed width and lock it in place. Then, place the square on the wood edge to draw straight, square lines.
- Set the ruler to the tenon thickness
- Mark shoulder lines on the wood face
- Use the square’s blade to mark mortise width
- Check angles to keep cuts square and even
- Recheck measurements before cutting
Aligning Dovetail Cuts
The combination square helps mark angled lines for dovetails. Adjust the head to the right angle for your pattern. Use the ruler to draw consistent tails and pins on both pieces.
| Tool Part | Use |
| Blade | Draw length and spacing lines |
| Adjustable Head | Set angle for tail cuts |
| Spirit Level | Check horizontal alignment |
| Scriber | Mark precise cut lines |
Ensuring Consistent Depths
Use the ruler as a depth gauge to keep cuts uniform. Slide the head to the desired depth and lock it. Then, guide your saw or chisel to that stop point.
Tips for consistent depth:
- Check the ruler setting before each cut
- Use the square’s head as a physical stop
- Measure depths on both mating pieces
- Keep the square steady while cutting
Troubleshooting Common Issues
Using a combination square correctly is key to good joinery work. Sometimes, the tool gives wrong results. This guide helps you fix common problems.
Check your tool often. Fix small issues early to keep your measurements accurate and your work clean.
Dealing With Inaccurate Readings
Inaccurate readings cause poor cuts and joints. Dirt, damage, or wear can change the tool’s precision.
- Clean the ruler and head to remove dust and debris.
- Check the ruler for dents or bends.
- Test the square on a known right angle surface.
- Replace the ruler if it shows permanent damage.
Fixing Loose Components
Loose parts affect stability and measurement. Tighten screws and check the sliding head for movement.
| Problem | Cause | Solution |
|---|---|---|
| Sliding head moves during use | Loose locking screw | Tighten the screw firmly without over-tightening |
| Blade wobbles in the head | Worn or damaged slot | Replace the combination square or consult a tool repair specialist |
| Lock nut spins without tightening | Stripped threads | Replace the nut or screw |
Avoiding Measurement Errors
Errors can happen if you do not use the tool properly. Follow these tips for better accuracy.
- Always hold the square firmly against the workpiece.
- Do not rush; take your time to line up the ruler and head.
- Double-check measurements before marking or cutting.
- Use the correct side of the ruler for the type of measurement.
- Keep the tool clean and dry to prevent slipping.

Credit: www.axminstertools.com
Advanced Tips For Precision
Using a combination square correctly can improve your joinery accuracy. Small changes in technique make a big difference.
This guide shares advanced tips to help you get precise measurements and cuts with your combination square.
Combining Tools For Better Results
Pair your combination square with other tools to increase accuracy. Using a marking knife with the square gives cleaner lines.
Use a bevel gauge alongside the square to check angles before cutting. This reduces errors in angled joinery.
- Mark with a sharp knife for thin, precise lines
- Check angles with a bevel gauge for accuracy
- Use a try square to verify 90-degree measurements
- Combine a ruler for longer measurements
Customizing Your Square
Adjust your combination square to fit your work style. Loosen the locking screw and slide the ruler for exact lengths.
Add a small piece of tape or a marker on the ruler to create a repeatable stop point. This speeds up marking consistent cuts.
- Loosen the lock to adjust ruler smoothly
- Use tape for repeat marks on the ruler
- Replace worn parts like the blade for better precision
- Keep the tool clean and rust-free for smooth movement
Practice Drills To Improve Skill
Practice measuring and marking regularly to improve your skill. Work on simple joints like butt and lap joints first.
Try measuring twice and marking once to avoid mistakes. Use scrap wood to test your marks and cuts before working on your project.
- Mark a series of lines at different lengths
- Cut along the marked lines and check accuracy
- Practice setting angles and marking bevels
- Repeat drills until your marks are consistent
Frequently Asked Questions
What Is A Combination Square Used For In Joinery?
A combination square measures and marks angles, depths, and lengths precisely. It helps ensure accurate cuts and joints in woodwork, improving overall project quality.
How Do You Read Measurements On A Combination Square?
Align the ruler’s edge with your workpiece. Read the measurement at the blade’s base where it meets the body for accuracy.
Can A Combination Square Check Both 90 And 45 Degrees?
Yes, it has a movable head to measure and mark both 90° and 45° angles easily, essential for joinery precision.
How To Maintain A Combination Square For Long-term Use?
Keep it clean and dry. Regularly check for damage and store it in a protective case to maintain its accuracy and durability.
Conclusion
Mastering the combination square enhances your joinery skills. It ensures precise measurements and angles. This tool is versatile and easy to use. Keep practicing to improve accuracy. Your projects will look more professional. Remember to maintain your tools. This prolongs their life and performance.
Share your knowledge with fellow woodworkers. They will appreciate the guidance. Stay patient and persistent in your craft. Enjoy the process of creating. Your efforts will bring rewarding results. Happy woodworking!