If you’ve ever struggled with messy wires or damaged cables, knowing how to use a cable stripper can save you time and frustration. Imagine being able to quickly remove the outer layer of a cable without nicking the wires inside.
This simple skill can make your DIY projects smoother and your repairs more professional. You’ll discover easy steps to master your cable stripper and avoid common mistakes. Ready to take control of your cables and work like a pro? Let’s dive in!

Credit: www.amazon.in
Choosing The Right Cable Stripper
Using a cable stripper makes removing insulation from wires easier and safer. Picking the right cable stripper depends on the type of cables you work with.
A good cable stripper saves time and prevents damage to wires. Learn about the types and what to consider before buying one.
Types Of Cable Strippers
Cable strippers come in different styles. Each type fits specific cable sizes and uses.
- Manual Strippers:Simple tools for small cables. You pull the blade around the wire to remove insulation.
- Automatic Strippers:These open and close by themselves. They work fast and reduce effort.
- Adjustable Strippers:You can change the blade size for different cables. Good for varied wire sizes.
- Rotary Strippers:These cut insulation by spinning around the cable. They offer precise control.
Factors To Consider
Choose a cable stripper based on cable size, ease of use, and durability. These factors affect your work quality.
- Cable Size Range:Pick a stripper that fits the cables you strip most often.
- Blade Quality:Sharp blades cut cleanly and last longer.
- Comfort:Handles should feel good in your hand to reduce fatigue.
- Adjustability:Adjustable tools work for many cable types.
- Safety Features:Look for strippers with blade guards or locking mechanisms.
Preparing Your Workspace
Setting up your workspace properly helps you work safely and efficiently. A clean and organized area reduces mistakes and accidents.
Before using a cable stripper, prepare your tools and environment. This preparation makes the task easier and safer.
Safety Precautions
Safety is very important when working with cable strippers. Protect yourself and others around you by following key safety rules.
- Wear safety glasses to protect your eyes from wire pieces.
- Keep your hands dry and clean to avoid slips.
- Work in a well-lit area to see clearly.
- Keep your workspace free of clutter to prevent accidents.
- Do not use damaged or dull tools as they can cause injury.
Gathering Necessary Tools
Having all the right tools ready saves time and avoids interruptions. Make sure your tools are in good condition before you start.
| Tool | Purpose | Tip |
| Cable stripper | Remove insulation from cables | Choose one that fits the cable size |
| Wire cutters | Cut cables cleanly | Keep blades sharp |
| Screwdriver | Open tool compartments or tighten screws | Use the correct size |
| Measuring tape | Measure cable length | Check twice before cutting |
| Work gloves | Protect hands from cuts | Choose gloves that fit well |
Step-by-step Wire Stripping
Using a cable stripper helps remove the outer layer of wire safely. This tool makes wire stripping faster and cleaner.
Follow these steps to strip wire correctly. This guide shows you how to measure, adjust, strip, and inspect the wire.
Measuring The Strip Length
First, decide how much insulation to remove from the wire. The strip length depends on your project needs.
Use a ruler or tape to measure the correct length. Mark the wire with a pencil or tape to guide the strip.
Adjusting The Stripper Settings
Set the cable stripper to fit your wire size. Most strippers have adjustable settings for different wire gauges.
Turn the adjustment knob or dial until the blades align with the wire’s insulation thickness. This prevents damage to the wire inside.
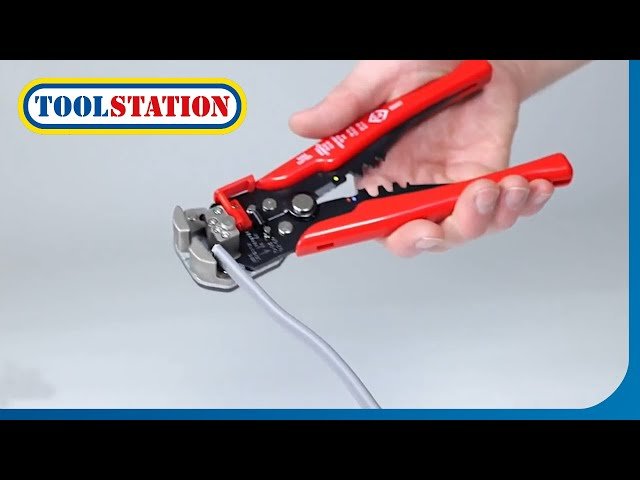
Stripping The Cable
Place the wire into the stripper at the marked strip length. Close the handles firmly to cut the insulation.
Pull the stripper away from the wire end to remove the insulation cleanly. Avoid twisting or bending the wire too much.
Inspecting The Wire
Check the stripped wire for any nicks or cuts on the metal. Damaged wires can cause poor connections or shorts.
If the wire looks clean and undamaged, it is ready for use. If not, trim and strip the wire again carefully.

Credit: zaavio.com
Common Mistakes To Avoid
Using a cable stripper may seem simple, but many people make mistakes. These errors can damage the cable or make your work harder. Knowing what to avoid helps you strip cables safely and cleanly.
Here are common mistakes to watch for when using a cable stripper. Avoiding these will save you time and keep your cables in good condition.
Cutting Too Deep
One common error is cutting too deep into the cable jacket. This can damage the wires inside. The jacket should be removed without harming the conductors.
- Set the blade depth correctly before cutting.
- Rotate the stripper gently around the cable.
- Stop cutting as soon as the jacket is loose.
- Test by pulling the jacket off carefully.
Damaging The Conductor
Damaging the conductor wires is a big problem. It can cause poor connections or failure. Avoid nicking or cutting the wires when stripping.
| Cause | Effect |
| Too much pressure on the stripper | Cut or nicked conductors |
| Using a dull blade | Uneven cuts, damaged wires |
| Not aligning cable properly | Partial cuts into conductors |
| Pulling cable too hard | Broken or bent wires |
Using The Wrong Tool
Using a tool not made for cable stripping can cause damage and make work harder. Different cables need different strippers. Using the wrong one can ruin the cable.
Common issues from wrong tools include:
- Cutting too deep or too shallow
- Uneven stripping
- Damaged insulation or conductors
- Increased effort and time spent
Always choose a cable stripper suited for your cable size and type.
Maintaining Your Cable Stripper
Keeping your cable stripper in good shape helps it last longer. Regular care makes your work easier and safer.
Follow simple steps to clean, store, and know when to replace your cable stripper.
Cleaning Tips
Remove dirt and debris after each use. This prevents damage and keeps the blades sharp.
- Use a soft cloth to wipe the tool clean
- Apply a small amount of lubricant on the blades
- Check for rust and remove it with fine sandpaper
- Dry the tool completely before storing
Storage Suggestions
Store your cable stripper in a dry place. Avoid moisture to prevent rust and damage.
Storage tips:
- Keep it in a toolbox or drawer
- Use a protective cover if available
- Separate from other sharp tools
- Keep away from direct sunlight
When To Replace
Replace your cable stripper if it shows signs of wear. Using a damaged tool can cause poor results or injury.
| Sign | Reason |
| Dull or chipped blades | Cannot strip cables cleanly |
| Loose or broken parts | Unsafe to use |
| Rust that can’t be removed | Tool is weakened |
| Handle damage | Grip is poor or unsafe |

Credit: www.amazon.in
Frequently Asked Questions
What Is The Purpose Of A Cable Stripper?
A cable stripper removes the outer insulation from cables safely and efficiently. It exposes the inner wires without damaging them. This tool simplifies wiring tasks and improves precision in electrical work.
How Do You Use A Cable Stripper Properly?
Place the cable in the stripper’s notch and close the handles. Rotate the tool around the cable to cut the insulation. Gently pull off the stripped insulation to reveal the inner wires.
Can A Cable Stripper Damage The Wires Inside?
If used correctly, a cable stripper won’t damage inner wires. Proper adjustment of blade depth ensures only insulation is cut. Incorrect use or excessive force may nick or cut the wires.
What Types Of Cables Can A Cable Stripper Handle?
Cable strippers work on various cables like coaxial, Ethernet, and electrical wires. Some models adjust to different cable sizes for versatility. Always check the tool specifications for compatibility before use.
Conclusion
Using a cable stripper is simple and effective. It ensures clean cuts and protects wires. Follow the steps carefully for best results. Always wear safety gear. Practice makes perfect, so keep trying. A well-stripped cable improves connections. It reduces electrical risks.
Remember to handle tools safely. Regular maintenance keeps tools in good shape. This guides your DIY projects smoothly. With these tips, you can handle cables confidently. Happy stripping!