
If you want smooth, professional-looking surfaces, an orbital sander can be your best friend. But using it the right way makes all the difference.
You might think sanding is simple, but a few smart tips can save you time, avoid mistakes, and give your projects a perfect finish. Keep reading to discover easy tricks that will help you master your orbital sander and get results that will impress everyone.
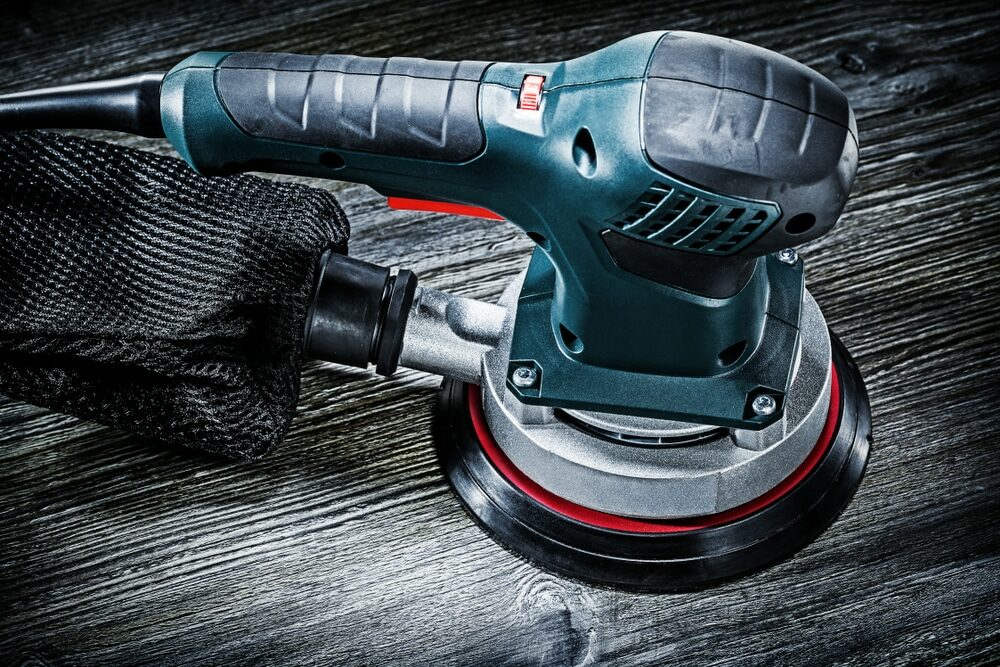
Credit: mrsander.co.uk
Choosing The Right Orbital Sander
Choosing the right orbital sander is important for your sanding projects. It helps you work faster and get smooth results.
There are different types of orbital sanders. Each type works best for certain tasks and materials.
Types Of Orbital Sanders
Orbital sanders come in several types. The main ones are finishing sanders, random orbital sanders, and palm sanders.
Finishing sanders are small and good for light sanding. Random orbital sanders are versatile and remove material quickly. Palm sanders are easy to hold for small jobs.
- Finishing Sanders:Best for smooth finishing work
- Random Orbital Sanders:Great for fast and even sanding
- Palm Sanders:Ideal for detail work and tight spaces
Selecting The Correct Grit
Sanding grit means how rough or fine the sandpaper is. Lower numbers are rougher. Higher numbers are finer.
Start with a rough grit to remove old paint or finish. Then use finer grits to smooth the surface.
- Coarse grit (40-60): Remove paint and shape wood
- Medium grit (80-120): Smooth rough surfaces
- Fine grit (150-220): Prepare for finishing
Power And Speed Considerations
Orbital sanders have different power levels and speed settings. Power helps the sander remove material faster.
Variable speed lets you control the sanding rate. Use lower speed for delicate work. Use higher speed for heavy sanding.
- Higher power means faster sanding
- Variable speed helps match the job
- Use lower speed on soft or thin materials
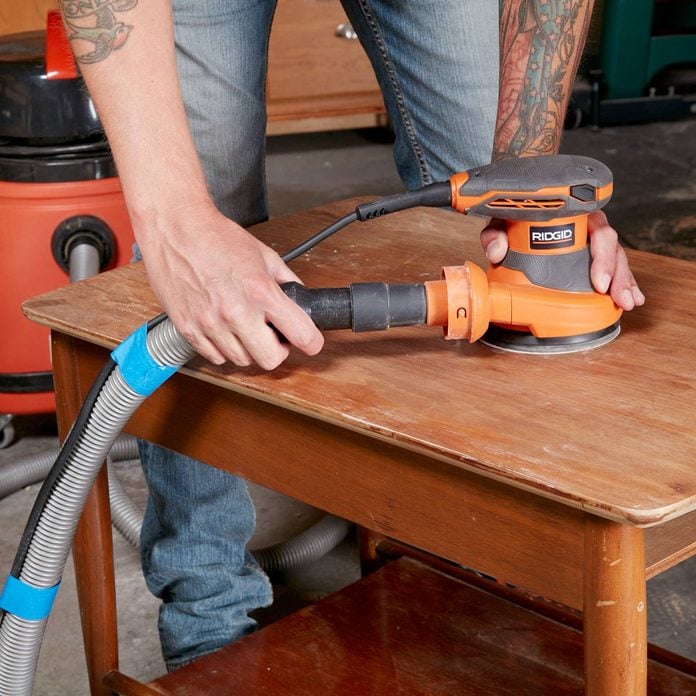
Credit: www.familyhandyman.com
Preparing Your Workspace
Getting your workspace ready is key for using an orbital sander safely and well. A clean and well-lit area helps you work better.
Organize tools and materials before you start. This saves time and keeps you focused on sanding.
Safety Precautions
Wear safety gear like goggles and a dust mask to protect your eyes and lungs. Keep loose clothing and hair away from the sander.
- Use hearing protection to reduce noise damage
- Check the sander for damage before use
- Keep your fingers clear of the moving parts
- Work in a well-ventilated area
Dust Collection Setup
Dust from sanding can harm your health and make a mess. A good dust collection system keeps your workspace clean.
| Dust Collection Method | Advantages | Tips |
| Vacuum attachment | Effective at capturing dust | Ensure tight seal on sander |
| Dust bag | Easy to empty and reuse | Empty often to maintain suction |
| Air filtration system | Improves air quality | Use alongside vacuum or dust bag |
Proper Lighting
Good lighting helps you see your work clearly. It reduces mistakes and improves sanding quality.
Tips for proper lighting setup:
- Use bright, white light to show true colors.
- Position lights to avoid shadows on the work surface.
- Consider adjustable lamps to focus light where needed.
Sanding Techniques For Smooth Surfaces
Using an orbital sander correctly helps create smooth, even surfaces. Good sanding techniques improve the finish and save time.
Focus on pressure, stroke patterns, and avoiding marks to get the best results with your sander.
Maintaining Even Pressure
Keep steady pressure on the sander. Too much pressure can damage the surface. Too little pressure slows the sanding.
- Hold the sander firmly but relaxed.
- Let the sander’s weight do most of the work.
- Move evenly to avoid gouges or uneven spots.
Using Overlapping Strokes
Overlap your sanding strokes to cover the entire surface. This technique helps remove scratches and creates a uniform finish.
- Start at one edge of the surface.
- Move the sander in straight lines or gentle curves.
- Overlap each pass by about half the sander’s pad width.
- Work across the surface in rows until complete.
Avoiding Swirl Marks
Swirl marks happen when the sander spins in one spot too long or moves unevenly. Avoid these with good technique.
| Cause | How to Avoid |
|---|---|
| Keeping sander still in one spot | Keep the sander moving at all times |
| Uneven pressure on edges | Hold sander flat and apply even pressure |
| Using too coarse sandpaper | Start with coarse grit, then switch to finer grit |
| Not cleaning dust from pad | Clean or replace sanding pad regularly |

Credit: m.youtube.com
Handling Different Materials
An orbital sander works well on many materials. Knowing how to use it on each material helps you get smooth results.
Different surfaces need different sanding methods. This keeps the material safe and improves the finish.
Wood Sanding Tips
Use an orbital sander with medium grit sandpaper for wood. Start with a rough grit, then move to finer grits.
Always sand along the grain of the wood. This avoids scratches and gives a smooth surface.
- Choose the right grit: 80-120 for rough sanding, 150-220 for finishing
- Keep the sander moving to avoid uneven spots
- Do not press too hard; let the sander do the work
- Wear a mask to avoid inhaling wood dust
Metal Surface Preparation
For metal, use a finer grit sandpaper like 120-180 grit. This removes rust and prepares the surface for painting.
Clean the metal before sanding. This removes dirt and grease for better results.
- Wear eye protection to guard against metal particles
- Use slow, steady movements to avoid overheating the metal
- Replace sandpaper often to keep it sharp
- Finish with a clean cloth to remove dust
Sanding Painted Surfaces
Use fine grit sandpaper, such as 220 grit, to sand painted surfaces. This smooths the paint without damaging it.
Sand lightly and evenly. This helps the new paint stick well.
- Remove loose or peeling paint before sanding
- Use a dust mask to avoid breathing paint dust
- Clean the surface after sanding to remove dust
- Test a small area first to check for damage
Maintaining Your Orbital Sander
Keeping your orbital sander in good shape helps it work better and last longer. Regular care prevents damage and costly repairs.
Follow simple steps to clean, store, and fix common problems with your sander.
Cleaning And Storage
After each use, remove dust and debris from your orbital sander. Dust can clog the motor and reduce performance.
Store the sander in a dry place to avoid rust and damage. Use a case or cover to protect it from dirt.
- Use a brush or compressed air to clean vents and surfaces
- Wipe the sander with a dry cloth
- Keep it in a cool, dry area
- Avoid damp or dusty environments
Replacing Sandpaper
Change the sandpaper when it becomes worn or clogged. Old sandpaper lowers sanding quality and can damage the work surface.
Make sure to use the right size and type of sandpaper for your sander. Attach it firmly to prevent slipping.
- Turn off and unplug the sander before replacing sandpaper
- Remove the old sandpaper carefully
- Align the new sandpaper with the pad
- Press or clamp it securely in place
Troubleshooting Common Issues
If your sander stops working well, check for these common problems. Fixing small issues keeps your tool running smoothly.
- Check if the power cord is damaged or loose
- Clean dust from the motor and vents
- Replace worn sandpaper to avoid motor strain
- Listen for unusual noises that may signal internal damage
- Make sure the sanding pad is tight and not worn out
Advanced Tips For Flawless Finishes
Using an orbital sander well can give your wood projects a smooth, even surface. These tips will help you get better results and perfect finishes.
Follow these advanced ideas to improve your sanding technique and make your work look professional.
Wet Sanding Techniques
Wet sanding lowers dust and keeps the surface cool. It helps you get very smooth finishes on wood and metal.
Use water or a special lubricant with fine grit sandpaper. Sand lightly to avoid removing too much material.
- Use waterproof sandpaper rated for wet sanding
- Keep the surface wet but not flooded
- Wipe away residue often to check progress
- Dry the surface fully before finishing
Using Multiple Grits Effectively
Start sanding with a coarse grit to remove rough spots. Then use finer grits to smooth the surface gradually.
Changing grits step by step helps avoid deep scratches. Always clean the surface before moving to the next grit.
- Begin with 80 or 100 grit for heavy sanding
- Move to 150 or 180 grit for smoothing
- Finish with 220 grit or higher for a fine finish
- Sand evenly and avoid staying too long in one spot
Final Touches And Polishing
After sanding, clean the surface from dust using a brush or cloth. This improves the look of your finish.
Use polishing pads or fine steel wool with a rubbing compound to add shine. Light pressure works best to avoid damage.
- Remove all sanding dust before polishing
- Use soft cloths or pads for final polishing
- Apply polish or wax to protect the surface
- Work in small areas for best results
Frequently Asked Questions
What Is The Best Grit For Orbital Sander Sanding?
Start with a coarse grit (60-80) for rough surfaces. Use medium grit (120-150) for smoothing. Finish with fine grit (220+) for a polished look.
How Do I Avoid Swirl Marks With An Orbital Sander?
Keep the sander moving steadily and evenly. Avoid pressing too hard. Use quality sandpaper and change it when worn.
Can Orbital Sanders Be Used On Metal Surfaces?
Yes, orbital sanders work well on metal. Use appropriate grit and avoid overheating the metal by sanding in short bursts.
How Often Should Sanding Pads Be Replaced?
Replace pads when they lose grip or show wear. Worn pads reduce sanding efficiency and can damage surfaces.
Conclusion
Mastering an orbital sander takes practice and patience. Safety comes first, always wear protective gear. Use the right grit for the task at hand. Keep movements smooth and steady for even results. Avoid applying too much pressure, let the sander work.
Regularly check and replace the sanding pads. Clean your work area to maintain a safe environment. By following these tips, your projects will improve. Enjoy the satisfaction of a job well done. Happy sanding!