If you’ve ever struggled with connecting copper wires, you know how frustrating it can be when the connection isn’t strong or reliable. Learning how to solder copper wires properly can save you time, money, and headaches.
Imagine creating solid, lasting joints that won’t fail when you need them most. You’ll discover simple, step-by-step instructions to master soldering copper wires—even if you’ve never tried it before. Ready to boost your skills and tackle your next project with confidence?
Keep reading, and you’ll be soldering like a pro in no time.
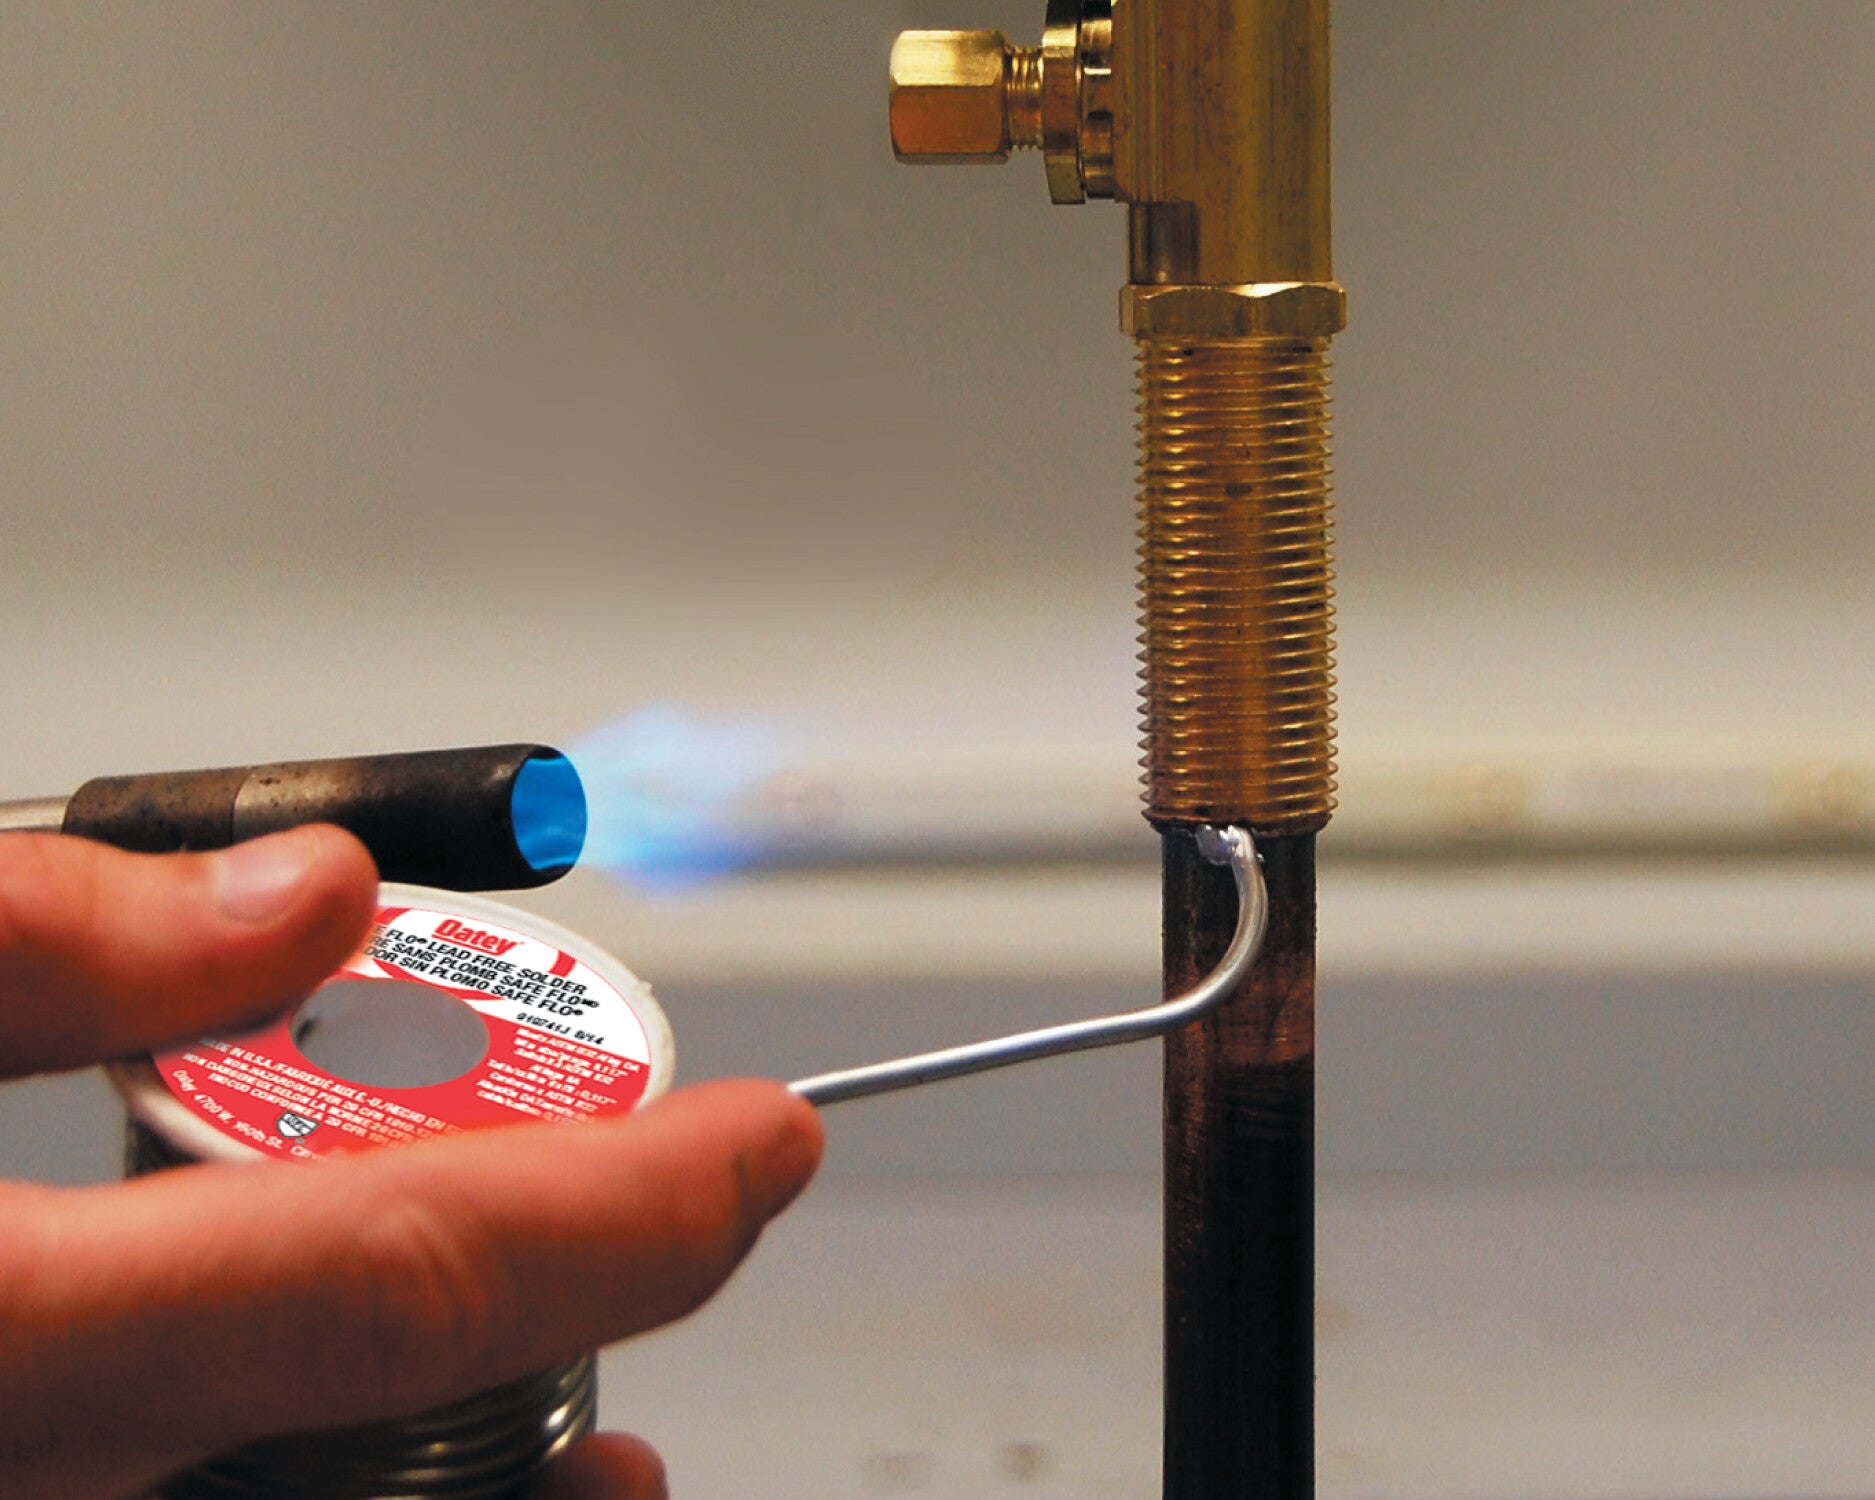
Credit: www.oatey.com
Tools And Materials Needed
Soldering copper wires needs the right tools and materials. Having these ready makes the job easier and safer.
This guide covers the essential items you need to start soldering copper wires properly.
Soldering Iron And Tips
A soldering iron melts solder to join copper wires. It should have a steady temperature control.
Tips come in different shapes and sizes. Choose a tip that fits the wire size and the work area.
- Use a soldering iron with 25-60 watts power
- Pick a fine or chisel tip for precision
- Keep the tip clean for better heat transfer
- Replace worn tips to maintain quality
Solder Types
Solder is a metal alloy used to join wires. It melts to create a strong electrical connection.
Lead-free solder is safer and more common today. It usually contains tin and copper or silver.
- Use rosin-core solder for electronics
- Choose solder diameter around 0.7mm to 1mm
- Lead-free solder is better for health
- Lead solder melts at lower temperatures but is toxic
Flux Essentials
Flux cleans metal surfaces before soldering. It helps solder stick better and prevents oxidation.
Use flux suitable for electrical work. It improves the flow of solder and the quality of the joint.
- Choose rosin-based flux for copper wires
- Apply flux sparingly to avoid residue
- Use flux pens or paste for easy application
- Clean joints after soldering to remove flux
Wire Preparation Tools
Preparing copper wires correctly is important. Clean and strip wires before soldering.
Use proper tools to strip insulation and clean the wire surface for a strong bond.
- Wire strippers to remove insulation without damage
- Sandpaper or abrasive pads to clean wire ends
- Cutter to trim wires to the needed length
- Helping hands or clamps to hold wires steady
Preparing Copper Wires
Before soldering copper wires, you must prepare them properly. Good preparation helps create strong, clean connections.
This guide explains how to strip insulation, clean the wire surface, and twist the wires for soldering.
Stripping The Insulation
Remove the plastic or rubber coating from the wire ends. This exposes the copper for soldering.
Use a wire stripper to avoid cutting the wire strands inside. Strip about half an inch of insulation.
Cleaning The Wire Surface
Clean the exposed copper wire to remove dirt, oil, and oxidation. Clean wires help solder stick better.
Use fine sandpaper or a small wire brush. Gently rub the copper until it looks shiny and free of debris.
Twisting And Aligning Wires
Twist the wire strands tightly to keep them together. This makes the wire stronger and easier to solder.
Align the wires you want to join. Hold them in place before applying solder to create a good connection.
Setting Up The Workspace
Preparing your workspace is important before soldering copper wires. A clean and organized area helps you work safely and efficiently.
Setting up the right environment reduces accidents and makes the soldering process easier to handle.
Safety Precautions
Soldering involves heat and chemicals. You need to protect yourself from burns and fumes. Wear safety glasses to shield your eyes.
Use heat-resistant gloves to protect your hands. Keep a fire extinguisher nearby in case of emergencies.
- Wear safety glasses
- Use heat-resistant gloves
- Keep a fire extinguisher close
- Avoid loose clothing and tie back long hair
Organizing Tools
Arrange all your tools within easy reach. This saves time and stops you from searching while working.
Keep your soldering iron, wires, solder, and cleaning sponge on a stable surface. Use a stand for the hot soldering iron.
- Place soldering iron in a stand
- Keep wires and solder close
- Use a heat-resistant mat
- Have a small container for scrap wires
Proper Ventilation
Fumes from soldering can be harmful. Work in a well-ventilated area to avoid breathing in smoke and chemicals.
Open windows or use a fan to move the air. A fume extractor is best if you solder often.
- Open windows for fresh air
- Use a fan to push fumes away
- Consider a fume extractor
- Never solder in a closed room

Credit: www.reddit.com
Soldering Process
Soldering copper wires joins them using a melted metal alloy. This creates a strong electrical connection. The process needs care and the right tools.
Four main steps help you make a good solder joint. These steps are heating the joint, applying flux, melting and applying solder, and cooling and inspecting the joint.
Heating The Joint
Start by heating the copper wires at the joint with a soldering iron. The wires must be clean for good heat transfer. Hold the iron tip to the wires until they are hot.
Do not touch the solder to the iron first. Heat the wires directly for even melting of solder later.
Applying Flux
Apply flux to the heated wires. Flux cleans the copper surface and stops oxidation. This helps the solder stick better.
You can use a brush or flux pen to spread a thin layer on the joint. Avoid using too much flux to keep the joint clean.
Melting And Applying Solder
Touch the solder wire to the heated joint, not the soldering iron. The heat from the wires melts the solder. Let the solder flow smoothly around the wires.
Cover the joint fully, but do not use too much solder. Remove the solder and then the iron carefully to avoid cold joints.
- Use rosin-core solder for electronics
- Feed solder wire slowly for control
- Keep the soldering iron steady
Cooling And Inspecting The Joint
Let the soldered joint cool naturally without moving the wires. This prevents cracks and weak connections.
Check the joint for a shiny and smooth surface. Dull or grainy joints may need reheating or resoldering.
Troubleshooting Common Issues
Soldering copper wires can sometimes cause problems. Fixing these issues helps make strong, safe connections.
Below are common soldering problems and how to spot and fix them for better results.
Cold Solder Joints
Cold solder joints happen when the solder does not melt properly. The joint looks dull and rough.
This causes weak electrical connections that can fail easily or create sparks.
- Heat the wire and solder until the solder melts smoothly
- Do not move the wire until the solder cools
- Use the right soldering iron temperature
Excessive Solder
Too much solder can create big blobs that block connections. It looks shiny and thick.
This causes short circuits or stops wires from fitting in tight spaces.
- Apply a small amount of solder at first
- Use just enough solder to cover the joint
- Remove extra solder with a solder wick or pump
Poor Electrical Contact
Poor electrical contact happens if wires are not clean or solder did not flow well.
This leads to high resistance and weak signals in the connection.
- Clean wires with sandpaper or a wire stripper before soldering
- Use flux to help solder flow and stick
- Make sure solder fully covers the wire and pad
Tips For Durable Joints
Soldering copper wires creates strong electrical connections. Good joints last longer and work better.
Follow simple tips to make your solder joints durable and safe for use.
Choosing The Right Solder
Use solder made for copper wires. Lead-free solder is safe and common. It melts at the right temperature for copper.
Choose solder with rosin core. Rosin cleans the wire while soldering. This helps the joint stick better.
- Use 60/40 tin-lead solder for easy melting
- Lead-free solder is safer but melts at higher heat
- Rosin core solder helps clean and bond copper
Maintaining Soldering Iron Temperature
Keep the soldering iron at the right temperature. Too hot can burn wires. Too cold makes weak joints.
Use a temperature between 350°C and 400°C (662°F and 752°F). This melts solder quickly and protects wires.
- Check iron temperature before starting
- Use a soldering iron with adjustable heat
- Clean the iron tip regularly for good heat transfer
Proper Joint Design
Make sure wires fit well before soldering. Twisting wires helps hold them together. This makes a stronger joint.
Heat both wires, then add solder. Let solder flow around the joint. Avoid too much solder to prevent weak spots.
- Twist wires tightly to prevent movement
- Heat wires evenly for good solder flow
- Use just enough solder to cover the joint
- Let the joint cool naturally without moving it

Credit: www.familyhandyman.com
Frequently Asked Questions
What Tools Do I Need To Solder Copper Wires?
You need a soldering iron, solder wire, flux, wire stripper, and a damp sponge. These tools ensure a clean and strong solder joint.
How Do I Prepare Copper Wires Before Soldering?
Strip about 1/2 inch of insulation from the wires. Clean the copper surface with sandpaper or a wire brush for better adhesion.
What Is The Best Solder To Use On Copper Wires?
Use rosin-core solder with a 60/40 tin-lead mix or lead-free solder. It melts easily and creates reliable electrical connections.
How Can I Avoid Cold Solder Joints On Copper Wires?
Heat the wire and solder simultaneously until the solder flows smoothly. Avoid moving the wires while the solder cools for a solid joint.
Conclusion
Soldering copper wires becomes easy with practice. Follow these steps for success. Always use the right tools for the job. Safety is important, so wear protective gear. Ensure wires are clean before soldering. Apply heat evenly for strong connections. Patience helps you achieve better results.
With time, your skills will improve. Mistakes are part of learning. Don’t rush the process. Check your work for secure connections. Enjoy the satisfaction of a job well done. Now, you can confidently tackle soldering projects.