If you’ve ever struggled to sand tiny, hard-to-reach spots, a rotary tool can be your best friend. But using it the right way matters.
When you learn how to use a rotary tool for sanding small surfaces, you’ll save time, avoid mistakes, and get smooth, professional results every time. This guide will show you simple steps and insider tips that anyone can follow. Ready to make your sanding projects easier and better?
Keep reading—you’re about to discover how to master this handy tool like a pro.
Credit: tendsupplies.com
Choosing The Right Rotary Tool
Using a rotary tool for sanding small surfaces makes the job easier and more precise. Picking the right rotary tool helps you work safely and efficiently.
This guide covers the types of rotary tools, speed settings, and attachments for sanding small surfaces.
Types Of Rotary Tools
Rotary tools come in different types. Each type fits certain tasks better than others. Choose the one that suits your sanding needs.
- corded rotary tools: Provide constant power. Good for long sanding jobs.
- cordless rotary tools: Offer freedom to move. Best for quick or outdoor work.
- variable speed rotary tools: Allow speed control. Ideal for delicate surfaces.
Selecting Appropriate Speed Settings
Speed affects how well you sand and the quality of the surface. Use lower speeds for soft materials and higher speeds for hard surfaces.
| Material | Recommended Speed (RPM) |
| Wood | 10,000 – 20,000 |
| Plastic | 5,000 – 15,000 |
| Metal | 15,000 – 25,000 |
| Painted Surfaces | 5,000 – 10,000 |
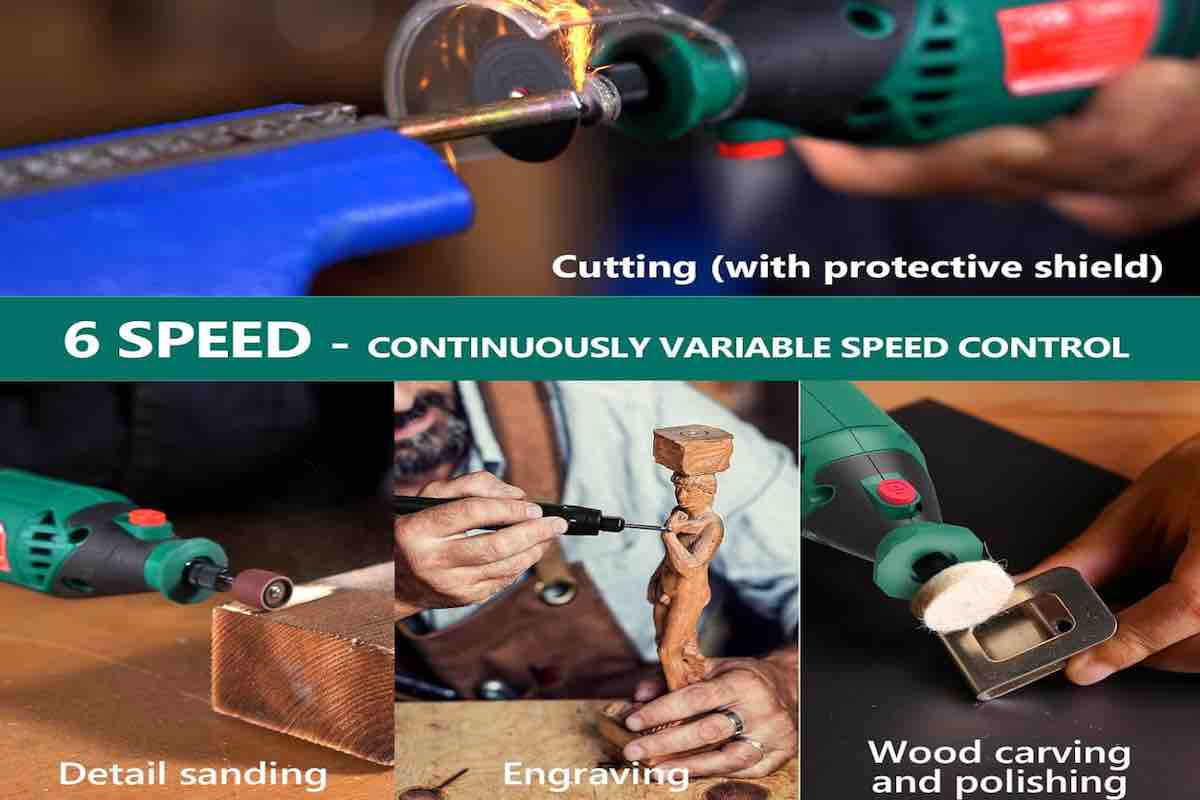
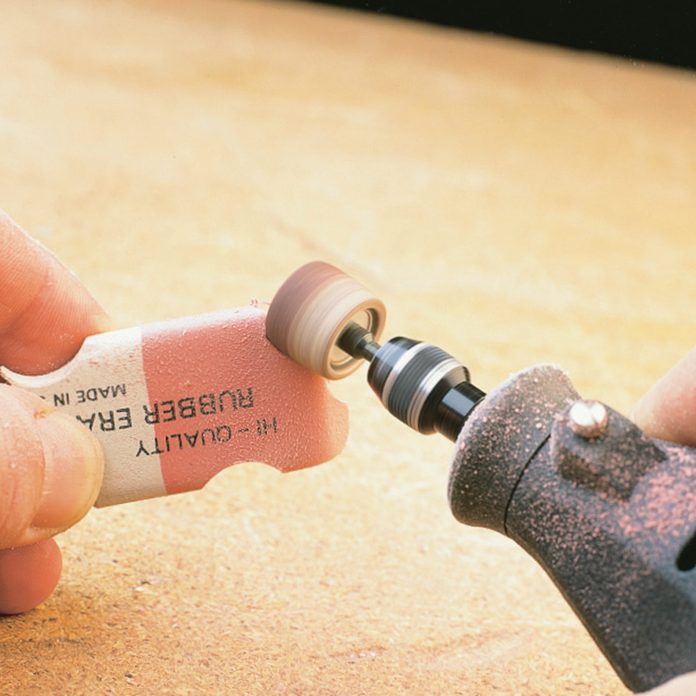
Essential Attachments For Sanding
Attachments help you get the best results when sanding small surfaces. Pick the right ones for your project.
- Sanding drums: Great for curved and rounded edges.
- Sanding discs: Work well on flat surfaces.
- Sanding bands: Easy to replace and good for detailed work.
- Polishing wheels: Use for final smoothing after sanding.
Credit: www.familyhandyman.com
Preparing Small Surfaces
Using a rotary tool for sanding small surfaces takes careful preparation. Proper steps help you get smooth results without damage.
Start by cleaning and marking the area. Then secure the workpiece well before sanding.
Cleaning And Marking Areas
Clean the surface to remove dust, dirt, and grease. A clean surface lets the sanding work better.
Use a pencil or marker to outline the sanding area. This helps keep your work precise and controlled.
- Wipe the surface with a dry cloth
- Use mild soap and water for sticky dirt
- Mark edges clearly with a pencil
- Double-check your markings before sanding
Securing The Workpiece
Hold the workpiece firmly to stop it from moving. This keeps your sanding even and safe.
Use clamps or a vise to fix small pieces. Make sure the tool has clear access to the sanding area.
- Choose a flat, stable surface for working
- Use clamps to hold tiny objects
- Place padding under the workpiece to avoid scratches
- Check that the piece does not shift when pressed
Sanding Techniques
Sanding small surfaces with a rotary tool needs care and skill. Good techniques help you finish the job cleanly and quickly.
Learn how to hold the tool, apply pressure, and move it correctly. These steps protect your work and get the best results.
Holding The Rotary Tool Properly
Hold the rotary tool like a pencil for full control. Keep your hand steady and close to the sanding bit.
- Use your thumb and index finger to grip the tool.
- Support the tool with your other fingers for balance.
- Keep your wrist relaxed to avoid shaking.
- Hold the tool at a slight angle to the surface.
Applying The Right Pressure
Pressing too hard can damage the surface or the sanding bit. Light, even pressure works best for smooth sanding.
| Pressure Level | Effect |
|---|---|
| Too Light | Sanding takes longer, uneven finish |
| Right Amount | Even sanding, smooth surface |
| Too Hard | Surface damage, tool wear |
Using Circular And Linear Motions
Use both circular and straight motions to cover surfaces well. Change motion based on the shape and material.
Try these tips:
- Use circular motions for rounded edges and curves.
- Use linear motions for flat surfaces.
- Keep the tool moving to avoid gouges.
- Overlap each pass slightly for even sanding.
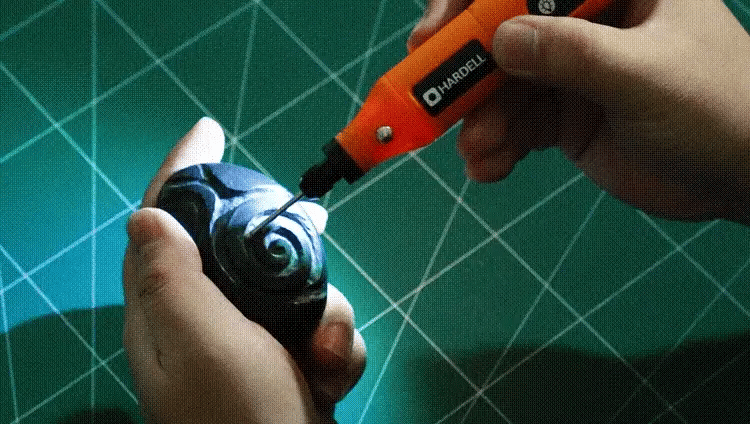
Credit: hardell.com
Safety Measures
Using a rotary tool for sanding small surfaces can be quick and effective. Safety is important to avoid injuries and damage.
Follow safety rules to protect yourself and work with confidence.
Protective Gear To Wear
Wear the right protective gear before sanding. It helps keep dust, debris, and sparks away from your body.
- Safety glasses protect your eyes from flying particles.
- Wear a dust mask to avoid breathing harmful dust.
- Use hearing protection if the tool is loud.
- Wear gloves to protect your hands from scratches.
- Wear long sleeves to protect your arms from sparks and dust.
Make sure your gear fits well and is in good condition before you start.
Avoiding Common Hazards
Know the dangers that can happen when sanding with a rotary tool. Avoid them to stay safe.
- Keep your work area clean and free of clutter.
- Check the tool and sanding attachments for damage before use.
- Hold the tool firmly to avoid slipping or loss of control.
- Do not wear loose clothing or jewelry that can get caught.
- Always work in a well-ventilated area to reduce dust buildup.
- Unplug the tool before changing sanding bits or cleaning.
Following these tips helps you avoid accidents and finish your sanding safely.
Finishing Touches
Using a rotary tool for sanding small surfaces requires care. The finishing touches ensure a smooth and clean result.
Paying attention to details like surface inspection, grit changes, and cleaning will improve your work.
Inspecting The Surface
Look closely at the surface after sanding. Check for scratches, bumps, or uneven spots.
- Use good lighting to see small imperfections.
- Run your fingers gently over the surface to feel rough areas.
- Mark any spots that need more sanding.
Switching Grits For Smoothness
Change sanding bits to finer grits for a smooth finish. Start with coarse grit for rough areas.
| Grit Type | Use For |
| Coarse (60-80) | Removing paint or rough sanding |
| Medium (100-150) | Smoothing surface after coarse grit |
| Fine (180-220) | Final smoothing and polishing |
Use slower speed on finer grits to avoid damage. Keep the tool moving to prevent heat buildup.
Cleaning After Sanding
Remove dust and debris from the surface after sanding. This prepares it for finishing or painting.
- Use a soft brush or cloth to wipe the area.
- Blow away dust with compressed air if available.
- Clean the rotary tool bits to keep them effective.
Maintenance Tips For Rotary Tools
Keeping your rotary tool in good shape helps it last longer. Regular care keeps it running smooth and safe.
Simple maintenance tasks prevent damage and improve performance during sanding small surfaces.
Cleaning And Storage
After use, remove dust and debris from your rotary tool. Use a soft brush or compressed air for cleaning.
- Unplug the tool before cleaning.
- Wipe the surface with a dry cloth.
- Store in a dry, cool place to avoid moisture damage.
- Keep attachments in a separate container to prevent loss.
Replacing Worn Attachments
Check sanding attachments regularly for wear. Replace them to keep sanding effective and safe.
| Sign of Wear | Action to Take |
| Worn sanding discs | Replace with new discs |
| Loose attachments | Tighten or replace attachment |
| Damaged mandrel | Swap for a new mandrel |
Frequently Asked Questions
What Rotary Tool Attachments Work Best For Sanding?
Sanding drums and sanding discs are ideal attachments for small surfaces. They provide precision and smooth finishes. Choose grit size based on your project’s detail and material type. Always secure the attachment properly for safety and effectiveness.
How Do I Prevent Damage When Sanding With A Rotary Tool?
Use light pressure and keep the tool moving to avoid gouges. Select the correct sanding grit for the surface. Start with coarse grit, then finish with fine grit for smoothness. Always wear protective gear to avoid dust and debris.
Can Rotary Tools Sand Curved Or Detailed Surfaces?
Yes, rotary tools are excellent for curved or detailed areas. Small sanding attachments fit tight spaces easily. Adjust speed settings for better control. This makes rotary tools perfect for intricate sanding tasks on small surfaces.
How Do I Maintain My Rotary Tool During Sanding?
Clean the tool and attachments after each use to prevent buildup. Check for worn sanding attachments and replace as needed. Lubricate moving parts occasionally. Proper maintenance ensures longer tool life and consistent sanding performance.
Conclusion
Mastering the rotary tool for sanding takes practice and patience. Remember to select the right attachment for each task. Always wear protective gear to stay safe. Keep movements steady and controlled for smooth finishes. Clean the tool after each use to maintain its efficiency.
Experiment with different surfaces to gain confidence. With these tips, sanding small surfaces becomes an easy task. Consistent practice leads to better results and satisfaction. Start your projects with the right tools and knowledge. Enjoy the process and the transformation of your workpieces.
Happy sanding!