
Are you wondering if your water pressure is just right or causing problems at home? Knowing how to measure water pressure with a gauge can save you from costly repairs and improve your daily comfort.
You’ll learn simple, step-by-step methods to check your water pressure quickly and accurately. By the end, you’ll have the confidence to spot issues early and keep your plumbing running smoothly. Let’s dive in and make sure your water pressure is exactly where it should be.

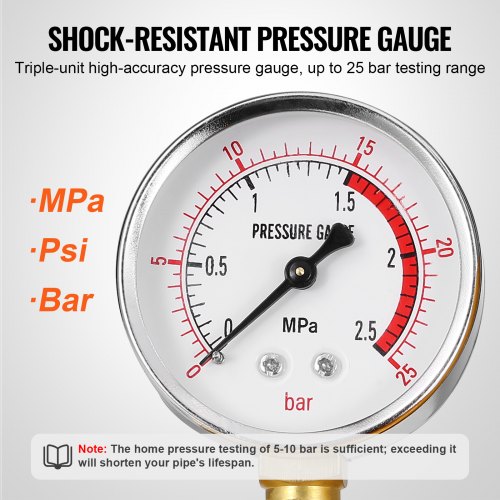
Credit: www.amazon.com
Tools Needed
Measuring water pressure requires specific tools. Having the right equipment makes the job easier and accurate.
This guide covers the main tools and supplies you need to measure water pressure with a gauge.
Choosing The Right Gauge
Select a pressure gauge designed for home water systems. Look for a gauge that reads between 0 and 160 psi.
- Dial size: 2 to 4 inches for easy reading
- Connection type: ½ inch NPT thread fits most faucets
- Accuracy: Choose a gauge with ±2 psi tolerance
- Material: Brass or stainless steel for durability
Additional Supplies
You need some extra items to connect the gauge and take correct readings. These supplies help ensure a secure fit and clear results.
| Supply | Purpose |
| Thread seal tape | Prevents leaks on gauge connections |
| Adjustable wrench | Tightens the gauge securely |
| Garden hose adapter | Connects the gauge to outdoor faucets |
| Bucket or container | Collects water during testing |

Credit: www.amazon.com
Preparing For Measurement
Measuring water pressure with a gauge needs some prep work. Getting ready helps you get accurate results and avoid mistakes.
Before you start, you must find the right spots and make sure water flow does not interfere with the reading.
Locate The Main Water Supply
The main water supply is where water enters your home. You need to find it to attach the pressure gauge correctly.
- Look near the water meter outside your house.
- Check basements or utility rooms for shutoff valves.
- Follow the main water pipe from the street to your home.
- Ask your water company if you cannot find it.
Turn Off Fixtures
Turn off all water fixtures before measuring pressure. This stops water flow and keeps the gauge reading stable.
| Fixture | Action |
| Faucets | Close tightly |
| Toilets | Turn off water supply |
| Washing machines | Switch off power and water valves |
| Sprinklers | Shut off system |
Attaching The Gauge
Measuring water pressure is simple with the right gauge. Attaching it correctly ensures accurate readings.
This guide explains how to attach the gauge by connecting it to the hose bib and making sure the seal is tight.
Connecting To The Hose Bib
Start by turning off the water supply to the hose bib. Then, remove any attached hose or nozzle.
Next, screw the water pressure gauge directly onto the hose bib’s threaded outlet. Turn it clockwise until snug.
- Turn off water supply at the main valve.
- Remove hose or attachments from hose bib.
- Align gauge threads with hose bib threads.
- Turn gauge clockwise until hand-tight.
Ensuring A Tight Seal
A tight seal prevents leaks and gives an accurate pressure reading. Use these tips to ensure the seal is secure.
| Tip | Details |
| Use plumber’s tape | Wrap tape clockwise around hose bib threads before attaching gauge |
| Hand-tighten firmly | Do not over-tighten; use hand pressure only |
| Check for leaks | Turn water on slowly and watch for drips around connection |
| Tighten slightly if needed | If leaks appear, turn gauge a bit more until sealed |
Taking The Reading
Measuring water pressure with a gauge helps you check your home’s water system. It shows if your water pressure is too high or low.
To get an accurate reading, you must follow certain steps. This guide explains how to take the reading correctly.
Turning On The Water
First, find the main water valve or a faucet near the pressure gauge. Open it fully to let water flow through the gauge.
Keep the water running steady while you check the gauge. Avoid turning the water on and off during the reading.
Reading The Pressure Gauge
Look at the needle or dial on the gauge. It shows the water pressure in pounds per square inch (PSI).
Normal water pressure usually ranges from 40 to 60 PSI. If the reading is outside this range, you may need to adjust your system.
- Note the number where the needle stops.
- Read the dial carefully from left to right.
- Write down the pressure value for future checks.
Interpreting Results
Measuring water pressure with a gauge gives useful information. You can check if your home’s water pressure is good or needs fixing.
Understanding the numbers on the gauge helps you keep your plumbing safe and working well.
Normal Pressure Range
The usual water pressure in homes is between 40 and 60 psi. This range keeps water flowing well without causing damage.
Pressure below 40 psi may lead to weak water flow. Pressure above 60 psi might harm pipes or appliances.
- 40 to 60 psi is safe and normal
- Below 40 psi means low pressure
- Above 60 psi means high pressure
Identifying Issues
Check the gauge for numbers outside the normal range. Low or high pressure can cause problems in your plumbing system.
Look for pressure that changes quickly or stays very high. These signs suggest you might need repairs or adjustments.
- Low pressure: weak water flow, possible leaks
- High pressure: risk of pipe damage, leaks
- Fluctuating pressure: faulty pressure regulator or pump
- Consistently high pressure: install a pressure reducer
Maintenance Tips
Keeping your water pressure gauge in good shape helps you get accurate readings. Regular care prevents damage and extends the gauge’s life.
Follow simple maintenance steps to make sure your gauge works well every time you check water pressure.
Regular Pressure Checks
Check your water pressure regularly to catch any issues early. This helps avoid damage to pipes and appliances.
- Test pressure at least once a month.
- Record readings to spot any changes.
- Check during different times of day for consistency.
- Look for sudden drops or spikes in pressure.
- Contact a plumber if readings are abnormal.
Gauge Care And Storage
Handle your gauge carefully and store it properly to keep it accurate and reliable.
| Care Tip | Why It Matters |
|---|---|
| Keep gauge dry after use | Prevents rust and damage |
| Store in a cool, clean place | Avoids heat and dirt buildup |
| Clean lens with soft cloth | Maintains clear readings |
| Avoid dropping or banging | Protects internal parts |
| Check calibration yearly | Ensures accurate measurements |
Credit: www.vevor.ca
Frequently Asked Questions
How Do I Use A Gauge To Measure Water Pressure?
Attach the gauge to an outdoor faucet or hose bib. Turn on the water fully. Read the pressure value on the gauge dial. It shows pressure in PSI (pounds per square inch).
What Is The Ideal Water Pressure Reading?
The ideal residential water pressure ranges between 40 and 60 PSI. Below 40 PSI causes weak flow. Above 60 PSI risks pipe damage and leaks.
Can I Measure Water Pressure Without A Gauge?
No, a pressure gauge is necessary for accurate measurement. Visual checks can’t determine exact pressure. Using a gauge ensures precise and reliable readings.
How Often Should Water Pressure Be Checked?
Check water pressure yearly or if you notice flow issues. Frequent checks prevent plumbing damage and help maintain optimal water system performance.
Conclusion
Measuring water pressure with a gauge is simple and effective. First, gather the right tools. Next, follow the steps carefully. This ensures accurate readings. Regular checks help prevent plumbing issues. Low or high pressure? Both can be problematic. Consistent readings mean healthier pipes.
Always address pressure problems quickly. This saves time and money. Understanding water pressure keeps your home safe. It’s a small task with big benefits. Now, you’re ready to ensure efficient plumbing. Happy measuring!
