Imagine walking into your garage or workshop and instantly finding the tool you need without sifting through clutter. Sounds like a dream, right?
Setting up a tool shelving unit could be the solution you’ve been seeking. With the right approach, you can transform your space into an organized haven where every tool has its place. This not only saves you time but also reduces stress and boosts productivity.
In this guide, you’ll discover simple steps to set up a tool shelving unit that caters to your specific needs. Stick around, and you’ll learn how to maximize your space and ensure your tools are always at your fingertips. Your journey to a more organized workspace starts here.
Choosing The Right Shelving Unit
Setting up a tool shelving unit begins with selecting the right type. A good choice keeps your tools organized and easy to reach. It also helps save space and protect your equipment.
Consider your workspace, the kind of tools you have, and how much weight the shelves need to hold. These factors guide your decision on which shelving unit fits best.
Types Of Shelving Units
Shelving units come in many forms. Each type suits different storage needs and spaces. Picking the right type helps you work efficiently.
- Wire Shelving:Open design, good for air flow and visibility.
- Wood Shelving:Strong and sturdy, fits heavy or sharp tools.
- Metal Shelving:Durable and easy to clean, ideal for garages.
- Plastic Shelving:Lightweight and resistant to moisture.
- Adjustable Shelving:Flexible height to store tools of different sizes.
Materials And Durability
The material affects the shelving unit’s strength and lifespan. Consider where you will place the shelves and the conditions they will face.
| Material | Durability | Best Use |
| Steel | High | Heavy tools, outdoor garages |
| Wood | Medium | Indoor, heavy but dry tools |
| Plastic | Low to Medium | Light tools, damp areas |
| Wire | Medium | Ventilated storage, lightweight tools |
Size And Weight Capacity
Measure your space before buying shelves. Also, know how much weight you plan to store. This helps avoid buying a unit that is too small or weak.
- Check shelf height to fit tall tools.
- Look at shelf depth for wider items.
- Confirm weight limits per shelf and total unit.
- Choose adjustable shelves for flexible storage.
Gathering Necessary Tools And Materials
Setting up a tool shelving unit needs the right tools and materials. Gathering everything before starting saves time and avoids problems.
This guide covers what you need for a smooth and safe setup process. Organize your workspace to keep things easy to find.
Essential Tools
These tools help you build and secure your shelving unit properly. Make sure each tool is in good condition.
- Power drill with drill bits
- Screwdriver set (flat and Phillips heads)
- Measuring tape
- Level tool
- Hammer
- Wrench or socket set
Additional Supplies
Besides tools, you need materials to assemble and support your shelving unit. Keep extras in case of mistakes.
| Supply | Purpose | Notes |
|---|---|---|
| Screws and bolts | Fastening shelves and frame | Choose sizes matching your shelving unit |
| Wall anchors | Securing unit to the wall | Use if mounting on drywall |
| Wood glue | Extra strength between parts | Optional, for wooden shelves |
| Sandpaper | Smoothing rough edges | Fine grit recommended |
| Drop cloth or tarp | Protecting floor during setup | Prevents scratches and dust |
Safety Gear
Wear safety gear to avoid injuries. Safety is important throughout the entire setup process.
- Safety goggles to protect your eyes
- Work gloves to protect your hands
- Dust mask to avoid inhaling dust
- Closed-toe shoes for foot protection
Preparing The Installation Area
Setting up a tool shelving unit starts with a well-prepared installation area. This ensures safety and stability during assembly.
Careful preparation helps avoid mistakes and makes the process faster and easier.
Selecting The Location
Choose a flat and sturdy surface for your shelving unit. Avoid places prone to moisture or direct sunlight. Make sure there is enough room to move around and access the shelves.
Clearing And Cleaning Space
Remove any objects or debris from the installation area. Clean the floor and walls to prevent dirt from affecting the shelf’s stability. A clear space reduces the risk of accidents during setup.
- Move furniture and tools away from the area
- Sweep or vacuum the floor
- Wipe down surfaces with a damp cloth
- Check for any nails or sharp objects on the floor
Measuring And Marking
Measure the area carefully to ensure the shelving unit fits perfectly. Mark the spots where the shelves and supports will go. Use a tape measure and a pencil for accuracy.
| Item | Recommended Measurement |
| Width of space | At least 2 inches wider than shelf |
| Height clearance | Minimum 6 feet for tall units |
| Distance from wall | Leave 1 inch for air circulation |
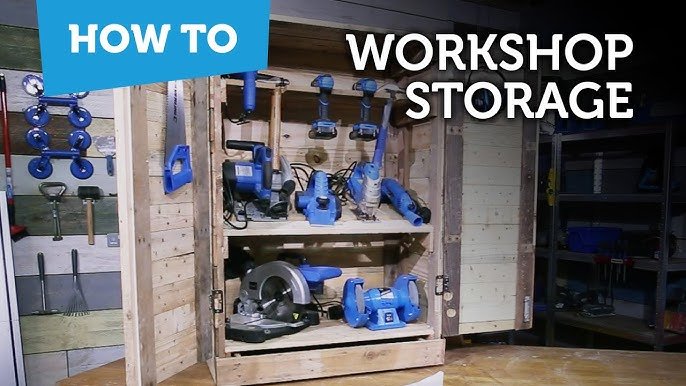
Credit: www.youtube.com
Assembling The Shelving Unit
Assembling your tool shelving unit is a simple process that anyone can do. This guide will help you put the parts together safely and correctly.
Make sure you have all the tools and parts ready before you start. Follow the instructions step-by-step for the best results.
Step-by-step Assembly
Begin by laying out all the pieces on a flat surface. Check the parts list to confirm nothing is missing.
- Attach the side panels to the base using the screws provided.
- Secure the back panel to the frame with bolts.
- Insert the shelves into their slots, starting from the bottom.
- Use a screwdriver to tighten all screws firmly but do not over-tighten.
- Check the unit is stable and stands upright without wobbling.
Common Assembly Tips
Keep these tips in mind to make assembly easier and safer.
- Work on a clean, flat surface to avoid losing small parts.
- Use the correct screwdriver size to prevent stripping screws.
- Ask a friend to help hold parts steady if needed.
- Follow the instructions carefully without skipping steps.
- Wear gloves to protect your hands from sharp edges.
Troubleshooting Assembly Issues
If you face problems during assembly, this table can help you find quick solutions.
| Problem | Possible Cause | Solution |
|---|---|---|
| Parts do not fit together | Wrong part or orientation | Check part numbers and flip pieces if needed |
| Screws won’t tighten | Stripped screw or wrong size | Use correct screwdriver or replace screw |
| Unit wobbles after assembly | Uneven floor or loose screws | Tighten all screws and place on level ground |
| Missing parts | Packaging error | Contact supplier for replacements |
Securing The Shelving Unit
Securing your tool shelving unit is important for safety. It prevents the shelf from tipping or moving.
This guide covers ways to anchor, stabilize, and support the shelving unit.
Anchoring To Walls Or Floors
Anchor the shelving unit to a wall or floor to stop it from falling. Use strong screws or bolts made for your wall type.
- Find studs behind drywall with a stud finder.
- Use masonry anchors for brick or concrete walls.
- Drill holes in the floor if needed for extra support.
- Secure the unit firmly with long screws or bolts.
Ensuring Stability
Keep the shelving unit steady by checking its balance and weight distribution. Avoid placing heavy tools on top shelves.
| Tip | Action |
| Level Surface | Place shelves on flat, even floors to avoid wobbling. |
| Weight Placement | Put heavy items on lower shelves for better stability. |
| Regular Checks | Check screws and anchors often to keep tightness. |
Using Brackets And Supports
Brackets and supports add strength to your shelving unit. They help hold shelves and prevent sagging.
Common bracket types:
- L-shaped brackets for corner support
- Heavy-duty steel brackets for thick shelves
- Adjustable supports for custom shelf height
Organizing Tools On Shelves
Organizing your tools on shelves keeps your workspace tidy. It helps you find tools fast and saves time.
A good setup protects your tools and makes your work easier. Use simple tips to organize well.
Grouping Similar Tools
Keep tools of the same type together. This makes it easy to grab what you need quickly.
Sort tools by use, size, or function. This prevents clutter and speeds up your work.
- Hand tools like hammers and screwdrivers in one spot
- Power tools grouped separately
- Fasteners and small parts stored together
Using Containers And Labels
Use containers to hold small tools and parts. This stops items from getting lost or mixed.
Label containers clearly. Labels help you find items without searching or opening every box.
- Clear plastic bins for visibility
- Drawer organizers for small tools
- Sticky or printed labels on each container
Maximizing Space Efficiency
Use all shelf space by adjusting shelf heights. This fits different tool sizes better.
Stack containers and use vertical space. This keeps your area neat and saves floor space.
- Adjust shelves for tall or short tools
- Stack bins safely to save room
- Hang tools on pegboards near shelves
Maintaining Your Shelving Unit
Keeping your tool shelving unit in good shape helps it last longer. Regular care also keeps your tools easy to find and safe to use.
Simple maintenance tasks can prevent damage and improve organization. Check your shelving often and make small fixes as needed.
Regular Cleaning
Dust and dirt can build up on shelves and tools. Clean your shelving unit at least once a month to keep it tidy.
Use a soft cloth or brush to remove dust. Wipe metal parts with a damp cloth to stop rust.
- Remove all tools before cleaning
- Use mild soap and water for tough dirt
- Dry shelves completely to avoid moisture
Checking For Wear And Damage
Look over your shelving unit regularly to spot any damage. Check for cracks, loose screws, or bent parts.
Fix small problems quickly to stop them from getting worse. Tighten screws and replace broken pieces as needed.
- Inspect shelves and supports for cracks
- Test stability by gently shaking the unit
- Replace any damaged parts immediately
Updating Organization System
As your tool collection grows, your system may need changes. Update labels and rearrange tools to keep things easy to find.
Check if your current setup works well. Move frequently used tools to easy-to-reach spots.
- Sort tools by type or size
- Use bins or containers for small items
- Label shelves clearly for quick access

Credit: www.reddit.com

Credit: hangthisup.com
Frequently Asked Questions
How Do I Choose The Right Tool Shelving Unit?
Select a shelving unit based on your tool types and storage space. Consider weight capacity and material for durability. Measure your area to ensure a proper fit. Choose adjustable shelves for flexibility and better organization.
What Tools Are Needed To Assemble Shelving Units?
Common tools include a screwdriver, hammer, level, and measuring tape. Some units may require a wrench or drill. Always check the assembly instructions for specific tool requirements. Having these tools ready speeds up the setup process.
How Can I Maximize Space On My Tool Shelves?
Use bins and labels to organize small items. Place frequently used tools at eye level for easy access. Adjust shelf heights to accommodate larger tools. Utilize vertical space by stacking items safely and securely.
Is It Necessary To Anchor Tool Shelving Units?
Yes, anchoring prevents tipping, especially for tall or heavy units. Secure the unit to a wall using brackets or anchors. This increases safety and stability, protecting both tools and people. Always follow manufacturer guidelines for anchoring.
Conclusion
Setting up a tool shelving unit saves space and keeps tools neat. Choose a sturdy shelf and place it in a dry spot. Organize your tools by size and use for quick access. Label shelves to find items without searching.
Regularly check the shelf for damage or clutter. A well-set shelving unit makes work easier and faster. Small steps create big changes in your workspace. Keep it simple, and enjoy a tidy, safe area.