Are you tired of struggling to mark perfect circles and arcs on your DIY projects or professional workpieces? Whether you’re a seasoned craftsman or a weekend hobbyist, achieving precision in your designs can elevate your work from ordinary to extraordinary.
You’ll discover simple yet effective tips that will help you master the art of marking circles and arcs on various materials. Imagine the satisfaction of creating flawless curves every time, effortlessly. Dive in and uncover techniques that can transform your projects and boost your confidence in your crafting skills.
Don’t let another imperfect line hold you back—read on and unlock the secrets to perfect precision!

Credit: www.familyhandyman.com
Choosing The Right Tools
Marking circles and arcs on materials needs the right tools. Using good tools makes your marks clear and accurate.
Pick tools that fit the material and the size of your circle or arc. This helps you work faster and better.
Types Of Marking Instruments
You can use many instruments to mark circles and arcs. Some tools work better on certain materials.
Common marking instruments include pencils, scribers, and markers. Each has a different use and mark type.
- Pencilsare good for wood and paper. They make soft lines that erase easily.
- Scribersscratch marks on metal or hard surfaces. They create fine, clear lines.
- Markerswork well on rough or dark materials. Their marks are bold and visible.
Selecting Compass And Dividers
Compasses and dividers help draw perfect circles and measure distances. Choose one with sturdy parts.
Look for a compass with a sharp point and a pencil holder that fits your pencil. Dividers should have sharp tips.
- Use a compass for drawing circles with pencils or pens.
- Use dividers to transfer measurements or mark arcs.
- Pick tools with adjustable arms for different sizes.
Using Templates And Stencils
Templates and stencils help you mark circles and arcs quickly. They work well for repeated shapes.
Choose a template made from plastic or metal for durability. Make sure the size matches your project.
- Use templates for small circles and arcs.
- Stencils help with complex or decorative shapes.
- Keep templates clean for clear markings.
Credit: www.familyhandyman.com
Preparing The Material Surface
Marking circles and arcs on materials needs a clean and smooth surface. Dirt and roughness can cause errors in your marks.
Good preparation helps you make clear and accurate marks for cutting or shaping your material.
Cleaning And Smoothing Techniques
Remove dirt, grease, and dust before marking. Use a soft cloth or brush to clean the surface.
Smooth rough areas with sandpaper or a file. This stops the marking tool from slipping or making uneven lines.
- Wipe with a damp cloth to remove dust
- Use fine-grit sandpaper for light smoothing
- Apply a gentle file on rough edges
- Dry the surface completely before marking
Applying Surface Treatments
Surface treatments can improve the marking process. Use them to make the surface easier to mark on.
Common treatments include primers, chalk coatings, or light paint layers. These create a better base for your marks.
- Apply primer for smooth, even surfaces
- Use chalk spray to highlight marks
- Light paint coats can increase contrast
- Let treatments dry fully before marking
Ensuring Visibility Of Marks
Clear marks help you follow your design. Use pencils, markers, or scribes that show well on your material.
Choose colors that stand out against the material’s surface. Test your marking tool on a small area first.
- Use dark pencils on light surfaces
- Try white or light markers on dark materials
- Engraving tools make permanent, visible lines
- Keep marks thin but clear for accuracy
Marking Perfect Circles
Marking circles on materials needs care and the right tools. A good mark helps cut or carve accurately.
Using a compass is the best way to mark circles. Let’s look at tips to get perfect shapes every time.
Setting The Compass Correctly
Adjust your compass to the right radius before marking. Measure twice to avoid errors.
- Loosen the screw or knob to move the pencil arm.
- Place the compass point on zero of a ruler.
- Extend the pencil arm to the desired circle size.
- Tighten the screw so the arms do not move.
- Check the pencil tip is sharp and aligned with the point.
Stabilizing The Tool During Marking
Hold the compass steady to draw a clean circle. Any slip will cause uneven lines.
| Tip | Reason |
|---|---|
| Place the compass point firmly | Prevents slipping |
| Keep pencil upright | Ensures even line thickness |
| Rotate compass using the top knob | Improves control |
| Use a flat surface | Keeps circle smooth |
Common Mistakes To Avoid
Watch out for errors that make circles look messy or wrong size.
- Not tightening the compass arms causes size changes.
- Using a blunt pencil leads to thick, unclear lines.
- Pressing too hard can dent soft materials.
- Moving the compass point during marking distorts the circle.
- Ignoring the surface flatness results in uneven shapes.

Credit: www.familyhandyman.com
Techniques For Accurate Arcs
Marking arcs on materials requires precision and the right tools. Accurate arcs ensure better fitting parts and cleaner designs.
Using simple techniques can help you draw perfect arcs every time. This guide covers key methods for accuracy.
Determining Arc Center And Radius
Find the arc’s center point before marking. This point is the pivot for drawing the curve. Measure the radius from this center to the edge of the arc.
- Use a ruler or tape measure to find the radius length.
- Mark the center clearly on the material.
- Double-check measurements to avoid mistakes.
- Use a compass or a fixed pivot to draw the arc smoothly.
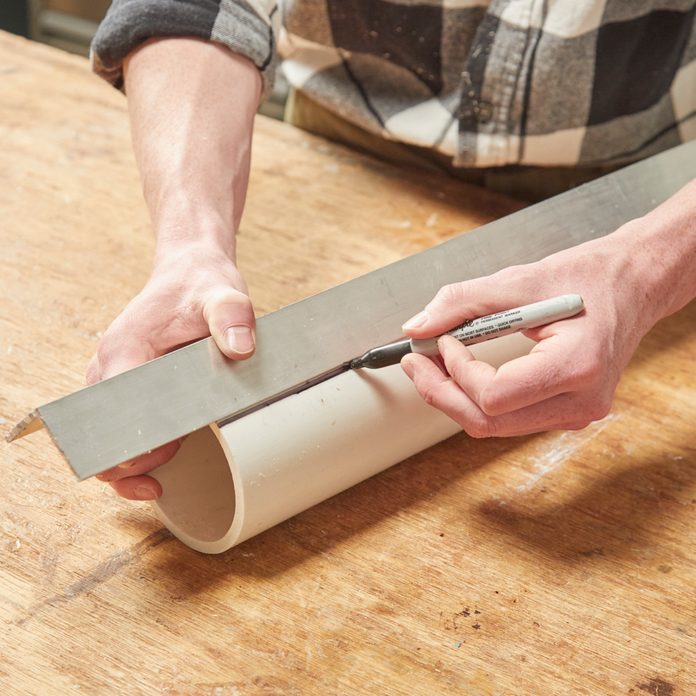
Using Flexible Curves
Flexible curves bend easily to match any arc shape. They are useful for irregular or large arcs that a compass cannot reach.
| Tool | Use | Best For |
|---|---|---|
| Flexible Curve | Bends to shape | Irregular arcs |
| Compass | Fixed radius | Perfect circles |
| String and Pin | Manual arc drawing | Large arcs |
After shaping the flexible curve, trace along its edge with a pencil to mark the arc.
Marking Partial Circles Precisely
Partial circles need careful measurement to ensure the arc matches the design. Use clear reference points to control the arc length.
- Mark the start and end points of the arc on the material.
- Use a ruler to measure the distance between these points.
- Set your compass or flexible curve to match this length.
- Draw the arc slowly, checking alignment with the marks.
Advanced Tips For Complex Shapes
Marking circles and arcs on materials can get tricky with complex shapes. You need precise methods to keep accuracy.
These tips help you handle difficult curves and combine different shapes with ease.
Combining Circles And Arcs
Use a compass or flexible curve rulers to draw circles and arcs that join smoothly. Mark points where arcs meet circles clearly.
Check the radius of each arc to make sure they fit together. Adjust arcs slightly to avoid gaps or overlaps.
- Draw intersecting points first to guide arcs
- Use French curves for smooth transitions
- Measure radii before drawing each arc
- Sketch lightly to correct before final marks
Transferring Marks Between Materials
Use tracing paper or carbon paper to copy marks from one material to another. This keeps shapes consistent across parts.
Another method is to create a template from thin plastic or cardboard. Use the template to trace circles and arcs exactly.
- Place tracing paper over the original marks
- Use a stylus to transfer marks onto tracing paper
- Lay tracing paper on new material and redraw marks
- Cut templates carefully for repeated use
Using Digital Tools And Software
Digital tools help design complex circles and arcs with exact measurements. Use CAD software to create shapes and print guides.
Laser cutters and plotters can mark materials precisely by following digital designs. This reduces human error in complex shapes.
- Design shapes with CAD or vector software
- Print templates on paper or adhesive vinyl
- Use laser cutters for precise marking
- Check digital measurements before cutting
Maintaining Tools For Consistent Results
Marking circles and arcs needs precise tools to get perfect shapes. Keeping these tools well-maintained helps you draw clean lines every time.
Regular care of your tools saves money and improves your work quality. Small steps can keep your compasses and dividers sharp and accurate.
Cleaning And Sharpening Tips
Remove dirt and rust from your tools after use. Use a soft cloth and mild cleaner to wipe metal parts. This stops buildup that can affect marks.
Sharpen pencil leads and scribing points regularly. A sharp point draws finer, more precise lines. Use a small file or sharpening stone for metal tips.
- Wipe tools clean after each use
- Sharpen points before detailed work
- Use rust remover if needed
- Check sharpness often to maintain precision
Storage Best Practices
Store your marking tools in a dry place to prevent rust. Keep them in a case or box to avoid damage. Avoid piling heavy objects on them.
Organize tools so you can find them quickly. Proper storage protects delicate points and keeps tools ready for use.
- Use tool cases or pouches
- Keep tools dry and away from moisture
- Separate sharp tools from softer items
- Label storage for easy access
When To Replace Equipment
Replace tools if they bend, break, or lose accuracy. Dull points or loose joints can cause mistakes in your markings.
New tools ensure clean, reliable lines. Check your tools before big projects to avoid delays or errors.
- Replace bent or damaged compasses
- Change worn-out pencil leads or tips
- Swap tools with loose or broken joints
- Update tools that no longer hold settings
Frequently Asked Questions
What Tools Are Best For Marking Circles On Materials?
Compasses and beam compasses are ideal for precise circle marking. They provide accuracy and adjustability for various circle sizes. Pencil or scribe tips enhance visibility on different materials like wood or metal. Choosing the right tool depends on your material and circle diameter.
How Do You Mark Arcs Accurately On Curved Surfaces?
Use flexible curve rulers or contour gauges to match the curve shape. Transfer the curve outline onto the material with a pencil or scribe. This method ensures the arc follows the surface’s contour precisely, avoiding measurement errors.
Can Templates Help In Marking Circles And Arcs?
Yes, templates simplify marking by offering ready-made shapes. They save time and improve accuracy for repetitive tasks. Plastic or metal templates suit different materials and sizes, making them essential for consistent circle and arc marking.
What Techniques Improve Circle Marking Precision?
Secure the material and tool firmly before marking. Use sharp pencils or scribes for clear, thin lines. Double-check measurements and mark lightly first, then darken lines once confirmed. These steps reduce errors and enhance precision in your markings.
Conclusion
Marking circles and arcs on materials becomes easier with practice. Use the right tools and steady hands for clear lines. Take your time to measure and mark carefully. Small steps lead to better results. Keep your workspace clean and well-lit.
These tips help you create precise shapes every time. Practice often to improve your skills. Soon, marking will feel natural and confident.