Are you looking to unlock a new level of creativity with your DIY projects? Operating a rotary tool for engraving might be just the skill you need.
Imagine the satisfaction of transforming everyday objects into personalized works of art. Whether you’re customizing gifts, adding flair to home decor, or simply exploring a new hobby, mastering this tool can elevate your crafting experience. But where do you start?
This guide will walk you through everything you need to know, ensuring you gain confidence and skill. Get ready to unleash your artistic potential and make your mark, quite literally, on the world around you. Keep reading to discover the secrets of successful engraving with a rotary tool.

Credit: www.youtube.com
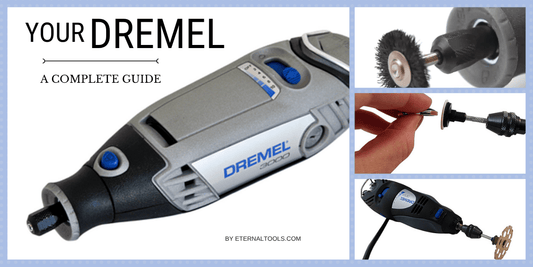
Choosing The Right Rotary Tool
A rotary tool is a small, handheld machine used for engraving, carving, and cutting. Picking the right one affects your work quality and ease. This guide helps you understand the main points to consider.
Choosing the right rotary tool depends on your project needs and the materials you work with. Focus on tool type, attachments, power, and speed for best results.
Types Of Rotary Tools
Rotary tools vary in power and design. Common types include corded, cordless, and pneumatic tools. Corded tools offer steady power but need an outlet. Cordless tools give freedom but run on battery life. Pneumatic tools use air pressure and are powerful but need an air compressor.
- Corded rotary tools:Consistent power, no battery worries.
- Cordless rotary tools:Portable, best for light work.
- Pneumatic rotary tools:High power, used in heavy-duty tasks.
Selecting Suitable Attachments
Attachments define what your rotary tool can do. For engraving, choose bits designed for fine detail. Common attachments include grinding stones, engraving cutters, sanding drums, and polishing wheels.
| Attachment | Use | Material Type |
| Engraving bits | Fine carving and detail work | Wood, metal, glass |
| Grinding stones | Smoothing rough edges | Metal, stone |
| Sanding drums | Surface sanding | Wood, plastic |
| Polishing wheels | Shine and finish | Metal, plastic |
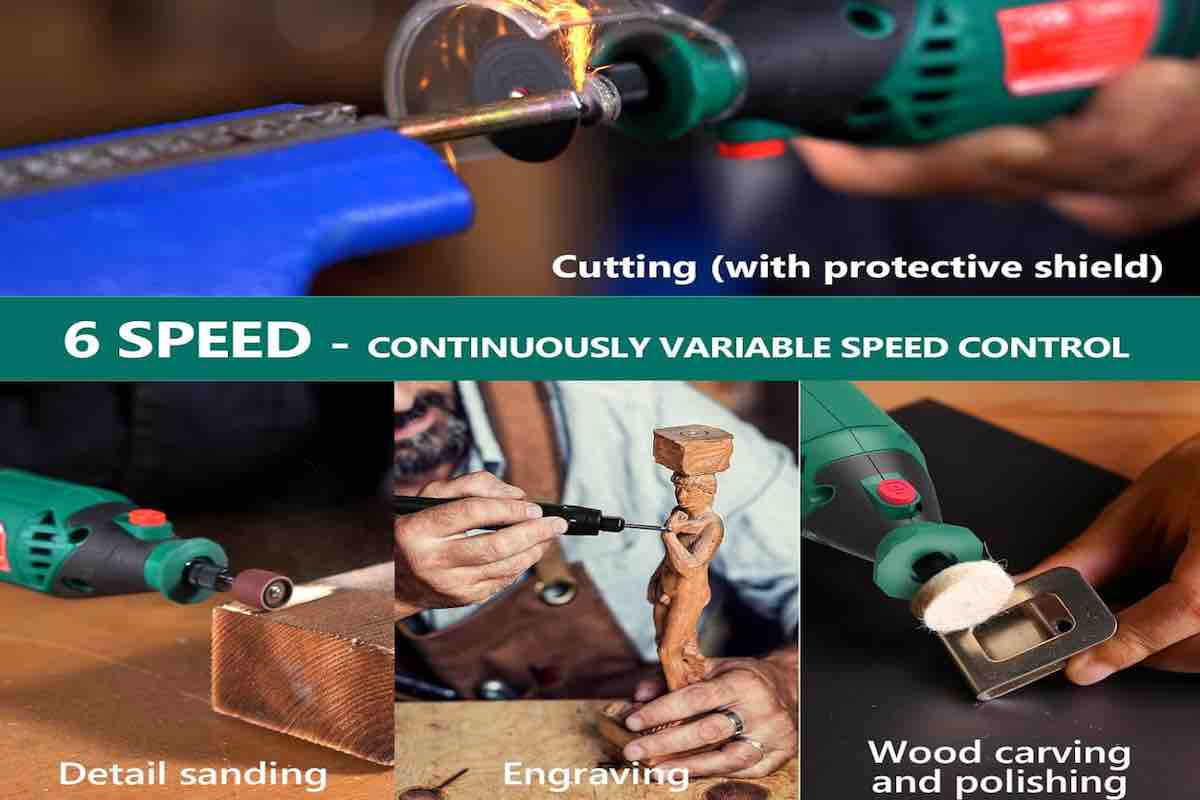
Power And Speed Considerations
Power and speed affect control and quality. Higher power handles tough materials better. Speed control lets you adjust for different tasks. Too fast can damage the workpiece. Too slow may cause poor results.
- Choose a tool with variable speed settings.
- Use lower speeds for delicate materials like glass.
- Use higher speeds for hard materials like metal.
- Check the tool’s power rating; more watts mean more power.
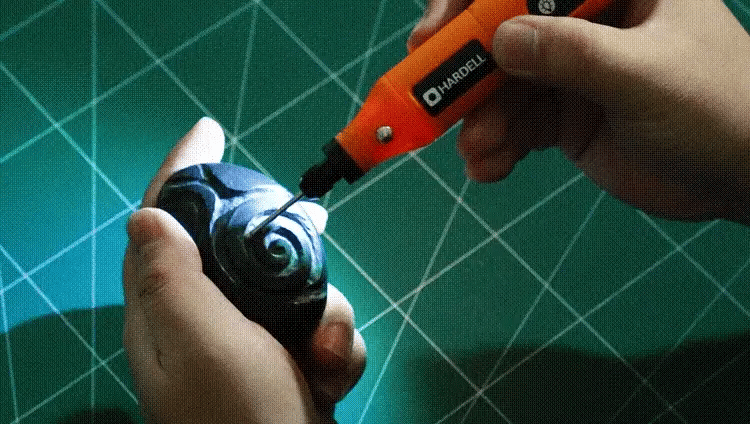
Credit: hardell.com
Preparing For Engraving
Using a rotary tool for engraving requires careful preparation. This ensures your work is safe and precise.
Before you start, set up your space, choose the right materials, and wear proper safety gear.
Safety Gear Essentials
Wear safety gear to protect your eyes, hands, and lungs from dust and debris. Safety helps prevent injuries.
- Safety goggles to protect your eyes
- Dust mask to avoid breathing dust
- Gloves for hand protection
- Long sleeves to cover your arms
Workspace Setup
Choose a clean, well-lit workspace with good ventilation. This helps you see details and stay comfortable.
Keep your work area organized. Place tools and materials within easy reach to work smoothly.
- Flat, stable table for your project
- Good lighting to see fine details
- Ventilation or fan to clear dust
- Tool organizer for bits and accessories
Material Selection
Pick materials that work well with rotary tools. Softer materials are easier to engrave for beginners.
Test your tool on a scrap piece before working on your final material to avoid mistakes.
- Wood: soft types like basswood or pine
- Plastic: acrylic sheets or similar
- Metal: aluminum or brass (requires skill)
- Glass: use special bits and slow speed
Engraving Techniques
Engraving with a rotary tool lets you add designs to many materials. You can create fine details or bold marks.
Using the right techniques helps you make clean and precise engravings. Practice helps improve your control and results.
Basic Handling And Grip
Hold the rotary tool like a pencil for good control. Keep your hand steady to avoid slips and mistakes.
Use a light grip to reduce hand fatigue. Hold the tool close to the tip for better accuracy.
- Grip the tool firmly but not too tight
- Keep your wrist relaxed
- Support your hand on a stable surface if possible
Controlling Speed And Pressure
Adjust the rotary tool speed based on the material you engrave. Softer materials need slower speeds.
Apply gentle pressure to avoid damaging the surface or breaking the tool bit. Let the tool do the work.
- Start with low speed and increase if needed
- Use light, steady pressure
- Test on scrap material to find the best speed and pressure
Creating Different Textures
Changing how you move the tool creates various textures. Slow, circular motions make smooth surfaces.
Quick, short strokes produce rough or dotted effects. Combine techniques to add depth and interest.
- Use smooth, steady strokes for clean lines
- Try cross-hatching for shading effects
- Vary pressure and speed for texture changes
Common Mistakes To Avoid
Using a rotary tool for engraving can be fun and rewarding. Avoiding common mistakes makes your work better and safer.
Here are some mistakes to watch out for when using a rotary tool for engraving.
Overheating The Tool
Running the rotary tool for too long can cause it to overheat. Overheating can damage the tool and affect your work.
Let the tool cool down often. Use it in short bursts instead of long continuous sessions.
- Take breaks to prevent heat build-up
- Do not press too hard on the tool
- Use the right speed for your material
Improper Attachment Use
Using the wrong attachment can harm your project or the tool. Each attachment is made for specific tasks.
Check the attachment type before starting. Make sure it fits properly and suits your engraving needs.
- Match attachments to the material you work on
- Secure attachments tightly before use
- Replace worn or damaged attachments immediately
Neglecting Safety Precautions
Ignoring safety rules can cause injuries. Always protect yourself when using a rotary tool.
Wear safety glasses and gloves. Work in a clean, well-lit area and keep your hands away from the spinning parts.
- Wear eye protection to prevent dust and debris
- Keep loose hair and clothing away from the tool
- Use a dust mask if engraving creates dust
Maintenance And Care
Keeping your rotary tool clean and well-maintained helps it last longer. Proper care also ensures safe and smooth engraving work.
Follow simple steps to clean, replace parts, and store your tool correctly. This guide covers key areas for maintenance.
Cleaning The Rotary Tool
Regular cleaning removes dust and debris that can damage the motor. Use a soft brush to clear vents and surfaces.
- Unplug the tool before cleaning
- Use compressed air to blow out dust
- Wipe the tool with a dry cloth
- Do not use water or harsh chemicals
- Check for loose parts and tighten if needed
Replacing Bits And Attachments
Bits wear out and need replacement for better engraving results. Use the correct tools to change bits safely.
| Step | Action |
| 1 | Unplug the rotary tool |
| 2 | Press the shaft lock button |
| 3 | Use the wrench to loosen the collet nut |
| 4 | Remove the old bit carefully |
| 5 | Insert the new bit firmly |
| 6 | Tighten the collet nut securely |
Storage Tips
Store your rotary tool in a dry, dust-free place. Proper storage protects it from damage and keeps it ready for use.
- Keep the tool in its case or a sealed container
- Store bits and attachments separately in labeled containers
- Avoid extreme temperatures and humidity
- Check the tool for damage before each use
Advanced Engraving Tips
Engraving with a rotary tool takes practice and care. Using advanced tips can improve your work. These tips help you create detailed and precise designs.
This guide covers layering and depth control, using templates, and mixing techniques. Follow these ideas to enhance your engraving projects.
Layering And Depth Control
Control the depth of your cuts to add texture and detail. Start with light passes and increase depth gradually. This method avoids mistakes and lets you fix errors easily.
- Use low speed for shallow layers
- Increase speed slightly for deeper cuts
- Pause often to check your progress
- Keep the tool steady to avoid slips
- Practice on scrap material before working on final piece
Using Templates And Guides
Templates help you keep designs consistent. You can make your own or buy pre-made guides. Use tape or adhesive spray to hold templates in place during engraving.
| Template Type | Use | Material |
|---|---|---|
| Paper Stencils | Simple shapes and patterns | Paper or cardstock |
| Plastic Guides | Reusable and durable designs | Thin plastic sheets |
| Laser-cut Masks | Fine details and complex patterns | Mylar or acetate |
Combining Techniques For Unique Designs
Mixing engraving methods adds depth and interest. Use freehand for organic lines and templates for precision. Try different bit sizes and speeds to vary texture.
- Start with a template for main shapes
- Add freehand details for a personal touch
- Use multiple bit sizes for varied lines
- Alternate speed settings for texture effects
- Finish with sanding or polishing for smooth edges
Credit: tendsupplies.com
Frequently Asked Questions
What Safety Measures Are Essential When Using A Rotary Tool?
Always wear protective eyewear and gloves while engraving. Work in a well-ventilated area to avoid dust inhalation. Keep your fingers away from the rotating bit. Secure your workpiece firmly to prevent slips. Follow the manufacturer’s instructions for safe operation.
How Do I Choose The Right Bit For Engraving?
Select bits based on material type and desired detail. Diamond and carbide bits work well on hard surfaces. High-speed steel bits suit softer materials like wood. Use fine-point bits for intricate designs. Change bits frequently to maintain precision and quality.
What Speed Settings Are Best For Engraving?
Use low to medium speeds for delicate materials to prevent damage. Hard materials may require higher speeds for efficient cutting. Start slow and gradually increase speed as needed. Always test on scrap material before engraving your final piece.
How Can I Prevent Overheating During Engraving?
Take breaks to let the rotary tool cool down. Use proper speed settings to avoid excessive friction. Keep bits sharp and clean for efficient cutting. Apply light pressure instead of forcing the tool. Overheating can damage both tool and material.
Conclusion
Operating a rotary tool for engraving takes practice and care. Choose the right bits and adjust the speed for your project. Hold the tool steady and move slowly to get clean lines. Always wear safety gear to protect your eyes and hands.
With patience, your engraving will improve over time. Keep your workspace tidy and tools in good shape. Enjoy the process and create unique designs with confidence.