Are you struggling to get the perfect finish on your small parts? Have you ever found yourself frustrated by uneven holes or misplaced drill bits?
If so, you’re in the right place. Using a drill press for small parts can transform your projects from mediocre to professional in no time. Imagine the satisfaction of creating precise, clean, and accurate work every single time. This guide is designed just for you, to help you master the art of using a drill press effectively.
With practical tips and easy-to-follow steps, you’ll soon be drilling like a pro, ensuring that every small part is crafted to perfection. Dive in to discover how you can elevate your work and impress everyone with your newfound skills.
Choosing The Right Drill Press
Using a drill press for small parts needs careful tool selection. The right drill press improves accuracy and safety.
Choosing the best drill press depends on your project size and material type. Let’s look at key factors.
Types Of Drill Presses
There are several drill press types. Each one suits different tasks and spaces.
- Bench-top drill presses are small and fit on workbenches.
- Floor-standing drill presses are larger and more powerful.
- Radial drill presses offer flexible arm movement for big workpieces.
For small parts, bench-top models are usually the best choice. They save space and handle light jobs well.
Key Features To Consider
Look for features that help you work safely and precisely. These make drilling small parts easier.
- Adjustable speed settings to match different materials
- Depth stop to control drill bit penetration
- Stable base or mounting options to prevent movement
- Clear worktable with tilting ability for angled holes
Good lighting and easy-to-read controls add convenience. These features save time and reduce errors.
Selecting The Ideal Chuck Size
The chuck size determines the drill bit sizes you can use. It affects the types of small parts you can work on.
- 1/4 inch chucks hold small drill bits for tiny holes
- 3/8 inch chucks fit medium bits for general use
- 1/2 inch chucks work with larger bits but may be too big for fine work
For small parts, a 1/4 or 3/8 inch chuck is best. It offers good control and fits common bit sizes.

Credit: ceeportmachine.com
Preparing Small Parts For Drilling
Drilling small parts needs care and attention. Proper preparation helps avoid mistakes and damage.
Using the right techniques keeps your parts steady and drills accurate holes every time.
Securing Workpieces Safely
Always hold small parts firmly before drilling. Loose parts can spin or shift, causing injury or poor holes.
Use a vise or clamp to keep parts in place. Avoid holding parts by hand near the drill bit.
- Check that the part does not move
- Use soft jaws on a vise to prevent damage
- Keep fingers away from the drill area
Marking Accurate Drill Points
Mark the exact spot where you want to drill. Clear marks guide the drill and prevent mistakes.
Use a center punch or sharp tool to make a small dent. This helps the drill bit stay on target.
- Draw marks with a pencil or marker
- Use a center punch for metal parts
- Double-check measurements before drilling
Using Clamps And Jigs
Clamps and jigs hold small parts steady during drilling. They improve safety and accuracy.
Choose the right clamp or jig for the part size and shape. This keeps parts from moving or twisting.
- Use C-clamps or bench clamps for flat parts
- Jigs guide the drill for repeated holes
- Soft padding on clamps protects delicate parts
Setting Up The Drill Press
Setting up a drill press correctly is important for working with small parts. It helps you drill holes accurately and safely.
Take your time to adjust the machine before starting. This reduces mistakes and protects your parts.
Adjusting Speed Settings
Different materials and drill bit sizes need different speeds. Slower speeds work better for hard materials.
Check the drill press manual for speed ranges. Set the speed by moving the belt or using the dial.
- Use low speed for metal and hard plastics
- Use medium speed for soft metals and wood
- Use high speed for soft plastics and small bits
Choosing The Correct Drill Bit
Select a drill bit that fits the hole size you need. Use bits made for the material you will drill.
Small parts need small drill bits to avoid damage. Keep drill bits sharp for clean holes.
- Use twist bits for wood and metal
- Use brad point bits for clean wood holes
- Use carbide bits for hard materials
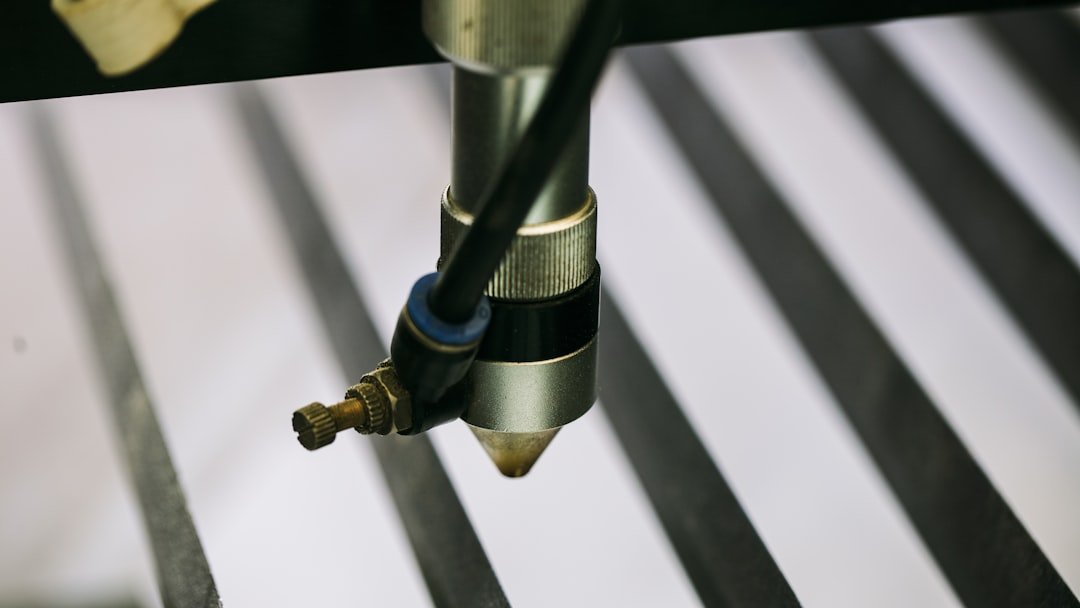
Aligning The Drill Bit Precisely
Place the small part securely on the drill press table. Use clamps or a vise to hold it steady.
Lower the drill bit slowly to check alignment. Adjust the part or table until the bit hits the exact spot.
- Use a center punch to mark drill spots
- Check alignment from top and side views
- Make small adjustments before drilling

Credit: www.amazon.ca
Techniques For Precision Drilling
Using a drill press for small parts needs careful control. Precision drilling ensures clean holes and less waste.
Following the right techniques helps you avoid mistakes and damage. This guide covers key tips for better results.
Controlling Feed Rate
Feed rate is how fast you push the drill into the material. A slow feed rate gives cleaner holes and reduces bit wear.
Too fast feed can cause rough holes or break the bit. Use steady pressure to keep control.
- Start slow and increase feed if needed
- Use steady, even pressure
- Stop if the drill binds or overheats
Avoiding Material Damage
Small parts can crack or chip easily. Use the right drill bit and speed to protect the material.
Clamp the part firmly to stop movement. Use backing material to support thin or fragile pieces.
- Choose sharp, correct bits for the material
- Clamp parts tightly to avoid slipping
- Use wood or plastic backing when possible
Drilling Through Thin Materials
Thin materials can tear or deform during drilling. Use low speed and light pressure for best results.
Place a scrap piece under the thin part. This prevents blowout and keeps the hole edges clean.
- Reduce drill speed to prevent heat damage
- Use a backing board to support the material
- Drill from both sides if needed to avoid splintering
Safety Measures To Follow
Using a drill press for small parts can be tricky. Safety is very important to avoid injuries.
Follow these safety measures to protect yourself and work better with the drill press.
Personal Protective Equipment
Always wear proper gear before starting the drill press. It helps protect your eyes and hands.
Use safety glasses to shield your eyes from flying debris. Gloves protect your hands but avoid loose-fitting ones.
- Wear safety glasses or goggles
- Use close-fitting gloves if needed
- Wear ear protection if noise is loud
- Avoid loose clothes and jewelry
Maintaining A Clean Workspace
Keep your work area clean and free of clutter. This reduces the chance of accidents.
Remove scraps and dust regularly. Make sure tools and parts are organized and easy to reach.
- Clear metal shavings and debris often
- Organize tools before starting work
- Keep the floor dry and free of spills
- Use proper lighting to see clearly
Handling Drill Press Emergencies
Know what to do if the drill press causes a problem. Quick action can prevent serious injury.
Turn off the machine immediately if something goes wrong. Keep a first aid kit nearby for minor injuries.
- Stop the drill press before fixing issues
- Keep a fire extinguisher close by
- Know where the emergency stop button is
- Have a first aid kit within reach

Credit: magswitch.com
Troubleshooting Common Issues
Using a drill press for small parts can be tricky. Some common problems may affect your work. Knowing how to fix these issues helps you get better results.
This guide covers three main problems: bit wander, uneven holes, and overheating. Each section gives tips to solve these problems.
Dealing With Bit Wander
Bit wander happens when the drill bit moves from the mark before drilling. It causes inaccurate holes and can damage the part.
- Use a center punch to make a small dent on the drilling spot.
- Check that the drill bit is sharp and not worn out.
- Secure the part firmly with clamps to prevent movement.
- Start drilling at a slow speed to keep control.
- Use a pilot hole for large drill bits to guide the bit.
Fixing Uneven Holes
Uneven holes can ruin your project. They happen if the bit is dull, the part moves, or the drill press is not set right.
| Cause | How to Fix |
|---|---|
| Dull Drill Bit | Replace or sharpen the bit before use. |
| Loose Workpiece | Clamp the part tightly to the table. |
| Wrong Drill Speed | Adjust the speed to match the material type. |
| Misaligned Drill Press | Check and adjust the head and table alignment. |
Preventing Overheating
Overheating can damage the drill bit and the part. It may also cause poor hole quality.
- Use cutting oil or lubricant to reduce heat.
- Drill at the correct speed for the material.
- Lift the bit regularly to clear chips and cool down.
- Do not force the drill bit; let it cut naturally.
- Use sharp drill bits to reduce friction.
Maintaining Your Drill Press
Keeping your drill press in good shape helps it work better and last longer. Regular care stops problems before they start.
Learn simple ways to clean, oil, and check your drill press parts. This guide will help you maintain small parts drilling safely.
Regular Cleaning Tips
Clean your drill press often to remove dust and metal shavings. Dirt can block moving parts and cause damage.
Use a brush or cloth to wipe all surfaces. Keep the table, base, and spindle free from debris.
- Unplug the drill press before cleaning
- Brush off metal chips and dust
- Wipe with a dry cloth
- Remove rust with fine sandpaper if needed
- Clean the chuck and drill bits carefully
Lubrication Points
Oil helps the drill press run smoothly. Apply lubricant to parts that move or spin.
Use light machine oil on the spindle, quill, and feed handles. Avoid over-oiling to stop dust build-up.
- Oil the spindle and quill regularly
- Lubricate the feed handles and pulleys
- Check the owner’s manual for specific points
- Use the right type of oil recommended for your model
- Wipe off excess oil to prevent dirt sticking
Checking For Wear And Tear
Look for worn or damaged parts to keep your drill press safe. Replace parts before they break during use.
Check belts, pulleys, and the chuck for cracks or looseness. Tighten or change parts if they look bad.
- Inspect belts for cracks or fraying
- Check pulleys for wobbling or damage
- Test the chuck for secure grip and smooth rotation
- Listen for unusual noises when running
- Replace worn parts promptly to avoid accidents
Frequently Asked Questions
How Do I Secure Small Parts On A Drill Press?
Use a vise or clamps to firmly hold small parts. This prevents movement and ensures precise drilling. Avoid holding parts by hand to improve safety and accuracy.
What Drill Bit Size Is Best For Small Parts?
Choose a drill bit size based on your project’s hole requirement. For small parts, use bits ranging from 1/16″ to 1/4″ for better control and precision.
How To Adjust Speed Settings On A Drill Press?
Set lower speeds for small parts to prevent damage. Adjust speed based on material hardness and drill bit size for optimal results.
Can I Use A Drill Press For Delicate Materials?
Yes, use slow speeds and gentle pressure. Secure the material well to avoid cracking or breaking during drilling.
Conclusion
Using a drill press for small parts makes your work steady and safe. Always measure twice to avoid mistakes. Keep your parts clamped tightly to stop slipping. Choose the right drill bit for each job. Take your time and work carefully.
Practice helps you get better and faster. This tool can make small tasks easier and more precise. Stay patient and use the drill press often. You will see good results every time.
