Unlock your potential and creativity with the ultimate guide to using a rotary tool for detailed carving. Imagine transforming ordinary pieces of wood, metal, or even glass into intricate works of art, all from the comfort of your home.
If you’ve ever marveled at the delicate patterns and exquisite designs in sculptures and wondered how they’re made, this is your chance to delve into that world. You don’t need to be a seasoned artisan to create stunning carvings. Whether you’re a hobbyist or a beginner eager to explore a new skill, a rotary tool can be your perfect companion.
This guide will walk you through everything you need to know, from selecting the right tool and attachments to mastering techniques that will elevate your work. Stick with us, and you’ll discover how easy it is to achieve precision and finesse in your carvings, making your projects truly stand out. Get ready to captivate your friends and family with your newfound skills and bring your creative visions to life.
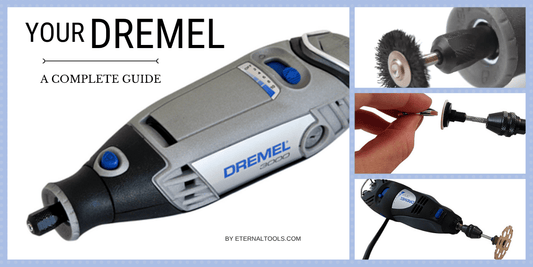
Credit: tendsupplies.com
Choosing The Right Rotary Tool
Using a rotary tool for detailed carving needs the right device. It helps you work with precision and ease.
Choosing the right rotary tool depends on what features you need and what brands offer the best quality.
Key Features To Look For
Look for a rotary tool with adjustable speed. This lets you control how fast the tool spins.
Check the power source. Corded tools give constant power, while cordless tools offer more movement.
- Lightweight design for less hand fatigue
- Comfortable grip for steady control
- Wide range of attachments and accessories
- Durable build for long use
- Easy to change bits
Popular Brands And Models
Many brands make rotary tools suited for carving. Some offer kits with many accessories.
| Brand | Model | Power Source | Speed Range (RPM) |
| Dremel | 3000 | Corded | 5,000 – 35,000 |
| Proxxon | 28500 | Corded | 5,000 – 20,000 |
| WEN | 2305 | Corded | 8,000 – 30,000 |
| Black+Decker | RTX-B | Cordless | Up to 30,000 |
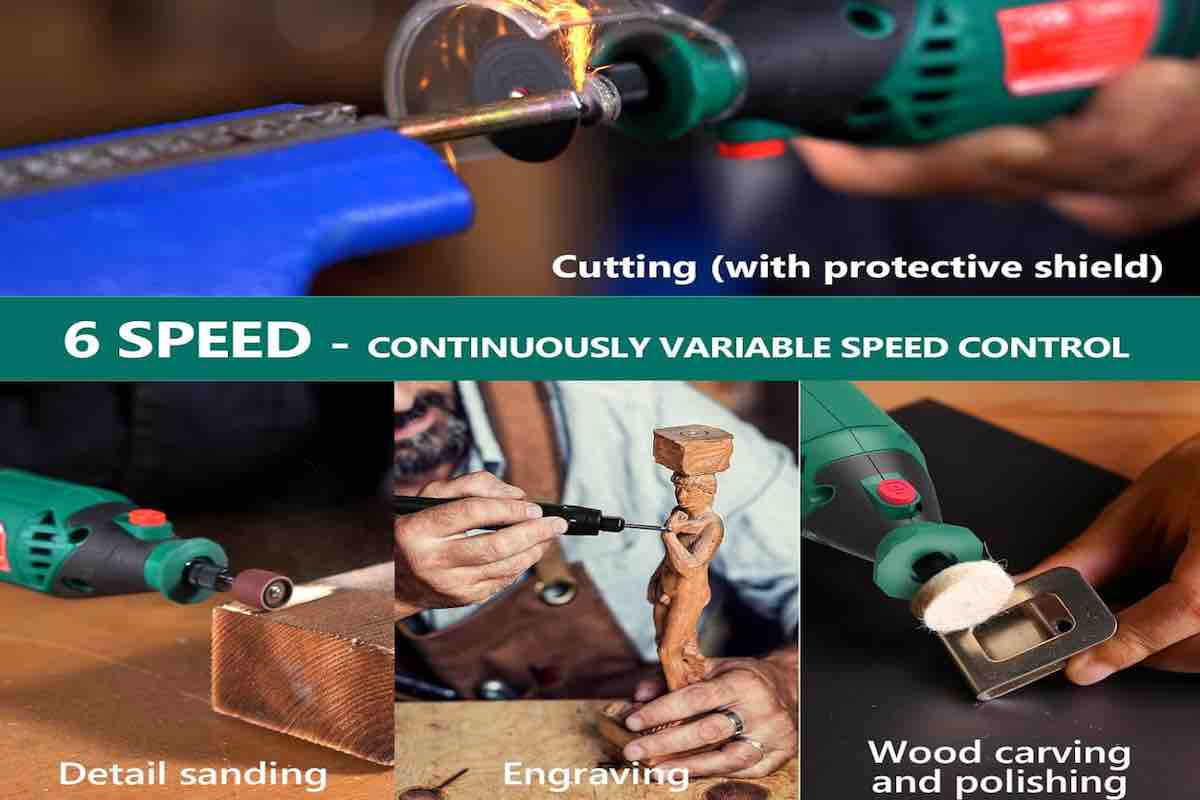
Credit: hardell.com
Essential Accessories For Carving
A rotary tool helps you create fine details in your carving projects. Using the right accessories improves your work and safety. This guide covers key carving bits and safety gear to use.
Knowing what bits to choose and which safety tools to wear makes carving easier and protects you from harm. Let’s look at these important accessories.
Types Of Carving Bits
| Bit Type | Description | Best Use |
| Diamond Bits | Very hard and durable | Detailed engraving on hard materials |
| Carbide Bits | Sharp and strong | Cutting through wood and metal |
| High-Speed Steel Bits | Good for general carving | Shaping and smoothing wood |
| Sanding Drums | Wraps sandpaper around a drum | Sanding and smoothing surfaces |
| Grinding Stones | Coarse and rough | Removing large amounts of material |
Choose bits based on the material you work with and the detail you want. Using the right bit saves time and gives better results.
Safety Gear Recommendations
- Wear safety goggles to protect your eyes from dust and chips.
- Use a dust mask to avoid breathing fine particles.
- Gloves help protect your hands but must fit well to keep control.
- Hearing protection reduces noise from the rotary tool.
- Wear long sleeves to protect your arms from flying debris.
Always work in a well-lit area. Keep your workspace clean to avoid accidents. Safety gear keeps you safe and lets you focus on carving.
Preparing Your Workspace
Setting up your workspace is important for detailed carving. A clean and organized area helps you focus on your work.
Good preparation keeps you safe and makes carving easier. This guide covers lighting, ergonomics, surface protection, and organization.
Lighting And Ergonomics
Bright, even lighting helps you see fine details clearly. Use a desk lamp with an adjustable arm to focus light where you need it.
Ergonomics reduce strain during long carving sessions. Sit in a comfortable chair with good back support. Keep your work at a height that lets you work without bending too much.
- Place your light source to avoid shadows on your work
- Use daylight bulbs to see true colors
- Adjust chair and table height for comfort
- Take short breaks to rest your hands and eyes
Surface Protection And Organization
Protect your work surface with a cutting mat or scrap wood. This prevents damage from the rotary tool.
Keep your tools and materials organized. Use containers or trays to hold bits, carving tips, and safety gear. This saves time and avoids losing small parts.
- Cover your table with a non-slip mat
- Sort rotary bits by size and type
- Store safety glasses and dust masks nearby
- Keep a small brush or blower to clear dust
Techniques For Detailed Carving
Using a rotary tool for detailed carving needs careful control and focus. Small changes in speed and pressure can change your work a lot.
Knowing different techniques helps you create fine details and layers. This guide covers key methods for better carving results.
Controlling Speed And Pressure
Adjusting the speed of your rotary tool changes how it cuts the material. Slower speeds are best for delicate work. Faster speeds remove material quickly but can be rough.
Pressure also affects the cut depth and detail. Light pressure keeps lines thin and clean. Too much pressure may cause mistakes or damage.
- Use low speed for fine details
- Apply gentle pressure for smooth cuts
- Increase speed slightly for soft materials
- Test on scrap material first
Creating Fine Lines And Textures
Fine lines add detail and character to your carving. Use small bits and steady hands to draw thin lines. Textures give your piece a natural look.
Try moving the tool slowly and steadily for thin lines. For textures, use different bit shapes and light pressure to create patterns.
- Choose fine-point bits for thin lines
- Keep tool steady and move slowly
- Use rounded bits for soft textures
- Practice patterns on spare material
Layering And Depth Management
Layering means carving in steps to build depth. Start with shallow cuts and go deeper carefully. This prevents mistakes and keeps the work neat.
Managing depth helps create shadows and highlights. Use different carving angles and bit sizes to shape the layers well.
- Begin with light, shallow cuts
- Gradually increase depth in layers
- Change bits for wider or narrower cuts
- Check your progress often
Maintaining Your Rotary Tool
Keeping your rotary tool in good shape helps it work better and last longer. Regular care stops problems and keeps your carving smooth.
This guide shows how to clean, lubricate, replace bits, and store your tool properly.
Cleaning And Lubrication
Clean your rotary tool after each use. Dust and debris can block air vents and wear out parts. Use a soft brush or compressed air to remove dirt.
Lubricate moving parts to reduce friction and heat. Use oil made for rotary tools. Avoid over-oiling because it can attract dust.
- Unplug the tool before cleaning
- Remove dust from vents and motor area
- Apply a few drops of oil to the spindle and bearings
- Wipe off excess oil with a clean cloth
- Check the manual for specific lubrication points
Bit Replacement And Storage
Change bits as soon as they become dull or damaged. Sharp bits make cleaner cuts and reduce stress on the tool.
Store bits and the rotary tool in a dry, safe place. Organize bits by type and size to find them quickly.
| Bit Type | Use | Storage Tip |
| Diamond | Fine detail carving | Keep in a sealed container |
| Carbide | Hard materials like metal | Store in a padded case |
| Sandpaper | Smoothing surfaces | Keep dry and flat |
| Drill | Making holes | Organize by size in a box |
Troubleshooting Common Issues
Using a rotary tool for detailed carving can sometimes cause problems. Knowing how to fix these issues helps you work better.
This guide covers common problems and simple ways to solve them.
Overheating And Burn Marks
Rotary tools can get hot if used too long without breaks. This heat can leave burn marks on your workpiece.
Burn marks happen when the tool spins too fast or presses too hard on the material.
- Take short breaks to let the tool cool down.
- Use a slower speed for delicate materials.
- Keep the tool moving to avoid staying in one spot.
- Lighten your pressure to reduce heat build-up.
Bit Slippage And Tool Vibration
Bit slippage happens when the carving bit moves or loosens during use. This causes uneven cuts and can harm your project.
Vibration occurs when the bit is not tight or the tool is unbalanced. It makes controlling the tool harder.
- Check that the bit is firmly tightened before starting.
- Use the right size collet for your bit.
- Replace worn or bent bits to reduce vibration.
- Hold the tool steadily and use both hands if needed.
Project Ideas For Practice
Using a rotary tool for carving lets you create detailed art. Practice helps improve your control and skills.
Start with simple designs to build confidence. Try advanced patterns as you gain experience and precision.
Simple Patterns For Beginners
Choose easy shapes like stars, hearts, or leaves. These patterns have clear lines and basic curves.
Practice carving these shapes on soft materials like basswood or plastic. This helps you control the tool safely.
- Basic geometric shapes (circles, squares, triangles)
- Simple animal outlines (fish, birds)
- Floral patterns with few petals
- Initials or letters in block style
- Simple mandala or spiral designs
Advanced Carving Designs
Try detailed patterns like intricate florals or animals with fine features. These require steady hands and patience.
Work on harder materials such as hardwood or thick acrylic sheets. Use smaller rotary bits for fine details.
- Detailed animal portraits (owls, wolves)
- Complex mandalas with many layers
- 3D relief carvings on wood blocks
- Ornate patterns with curves and sharp edges
- Miniature architectural designs or landscapes

Credit: www.youtube.com
Frequently Asked Questions
What Materials Can I Carve With A Rotary Tool?
Rotary tools work well on wood, plastic, soft metals, and foam. Choose the right bit for each material for best results.
How Do I Choose The Best Rotary Tool Bits?
Select bits based on your project: sanding, engraving, cutting, or polishing. Use high-quality bits for detailed carving.
What Safety Precautions Should I Follow Using Rotary Tools?
Always wear safety goggles and a dust mask. Secure your workpiece and work in a well-ventilated area to avoid injury.
Can Beginners Use Rotary Tools For Detailed Carving?
Yes, beginners can start with basic bits and practice on soft materials. Patience and steady hands improve carving skills quickly.
Conclusion
Using a rotary tool for detailed carving opens many creative doors. Start slow and practice often to improve your skills. Always wear safety gear to protect yourself. Choose the right bits for each carving task. Keep your work area clean and well-lit.
Enjoy the process and watch your designs come alive. With patience, your carving will get better every day. Try new techniques and have fun creating unique pieces. This guide gives you the basics to begin your carving journey. Keep exploring and making art with confidence.