Have you ever tried to measure the depth of an object and found yourself a little confused? If you have, you’re not alone.
Many people find measuring depth a daunting task. But here’s the good news: with a depth gauge, you can easily and accurately measure depth without any hassle. You’ll discover exactly how to use a depth gauge, simplifying your measuring tasks and boosting your confidence.
Imagine the satisfaction of obtaining precise measurements every time, avoiding costly mistakes and enhancing your project outcomes. Ready to become a pro at measuring depth? Let’s dive in and explore the simple steps to mastering the depth gauge!
Choosing The Right Depth Gauge
Using a depth gauge helps you measure depth accurately. It is important to pick the right one for your tasks.
Different depth gauges suit different jobs. Knowing their types and key factors helps you choose well.
Types Of Depth Gauges
Depth gauges come in various forms. Each type offers specific features for measurement.
- Vernier Depth Gauge:Offers precise readings with a sliding scale.
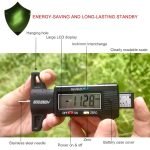
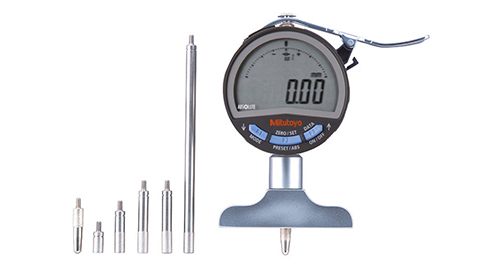
- Digital Depth Gauge:Shows measurements on a digital screen for easy reading.
- Dial Depth Gauge:Uses a dial for clear analog measurement.
- Tapered Depth Gauge:Measures slots and grooves with a tapered tip.
Factors To Consider
Choosing the right gauge depends on your needs. Consider accuracy, ease of use, and durability.
| Factor | Details |
| Accuracy | Choose a gauge that matches your measurement precision needs. |
| Type of Measurement | Pick a gauge suitable for the surface and depth you measure. |
| Material | Look for durable materials like stainless steel for long use. |
| Ease of Reading | Digital gauges are easier to read than analog ones. |
| Price | Select a gauge that fits your budget without sacrificing quality. |

Credit: www.youtube.com
Setting Up Your Depth Gauge
A depth gauge helps you measure how deep a hole or groove is. It is important to set it up correctly for accurate results.
This guide shows you how to prepare your depth gauge before use. Follow these simple steps for best measurements.
Calibrating The Tool
Calibrating your depth gauge ensures it shows the right measurement. Start by zeroing the tool before measuring.
Check the gauge on a flat surface to confirm it reads zero. Adjust the dial or digital display if needed.
- Place the base on a flat, clean surface
- Move the measuring rod until it touches the surface
- Set the dial or digital readout to zero
- Repeat calibration if readings seem off
Preparing The Workpiece
Make sure the workpiece is clean and stable. Dirt or movement can affect the depth reading.
Place the workpiece on a flat surface and hold it firmly. This prevents errors during measurement.
- Clean the area where you will measure
- Secure the workpiece on a flat surface
- Remove any debris that could block the gauge
- Keep the workpiece steady while measuring
Measuring Depth Accurately
Using a depth gauge helps you measure how deep holes or gaps are. Accurate readings prevent mistakes in projects.
Follow simple steps to get precise depth measurements every time you use the gauge.
Positioning The Gauge Correctly
Place the depth gauge so its base rests flat on the surface. The measuring rod should go straight down into the hole.
Keep the gauge steady and vertical to avoid wrong readings. Make sure it touches the bottom without tilting.
- Set the base firmly on the surface
- Insert the rod straight down
- Hold the gauge steady and vertical
- Ensure the rod touches the bottom fully
Reading The Scale
Look at the scale on the gauge to find the depth measurement. The number next to the rod shows how deep it is.
Check the measurement at eye level to avoid errors. Read the smallest lines for precise results.
- Read the number next to the rod
- View the scale straight on
- Use smaller marks for exact depth
Common Measurement Techniques
Use a few techniques to improve depth measurement. Repeat measurements help confirm accuracy.
Clean the hole before measuring to avoid false readings. Use a ruler or caliper for cross-checking depth.
- Take multiple measurements for accuracy
- Clear debris from the hole first
- Cross-check with other tools if needed
- Record measurements carefully
Tips For Precision And Consistency
Using a depth gauge helps measure exact depths in various projects. Accurate readings ensure quality and safety.
Follow some simple tips to keep your measurements precise and consistent every time you use the gauge.
Avoiding Common Errors
One common error is not placing the gauge perpendicular to the surface. This causes incorrect depth readings.
Another mistake is rushing the measurement without stabilizing the gauge. This leads to inconsistent results.
- Always hold the gauge straight and steady.
- Check the zero mark before measuring.
- Take multiple readings for accuracy.
- Clean the surface before measuring.
Maintaining The Gauge
Keeping your depth gauge clean extends its lifespan and maintains accuracy. Dirt and rust affect performance.
Regular calibration ensures the gauge gives correct readings. Use a calibration block or follow manufacturer instructions.
- Clean the gauge after each use with a soft cloth.
- Store it in a dry place to prevent rust.
- Check for damage before measuring.
- Calibrate regularly for best results.
Applications Of Depth Gauges
Depth gauges measure the depth of holes, slots, and recesses. They are useful in many fields for precise measurements.
Using a depth gauge helps ensure parts fit well and work correctly. Different industries use them in various ways.
In Woodworking
Woodworkers use depth gauges to check the depth of drilled holes. This helps in making joints and fitting hardware.
Depth gauges ensure that grooves and slots are cut to the right depth. This keeps the wood pieces strong and neat.
- Measure hole depth for dowels and screws
- Check groove depth for joints
- Ensure consistent cuts across pieces
In Metalworking
Metalworkers use depth gauges to measure holes and slots in metal parts. This helps keep parts within tight tolerances.
Depth gauges help inspect machined parts to avoid errors. This improves the quality and safety of metal products.
- Measure drilled hole depths
- Check slot and groove dimensions
- Ensure parts meet design specs
In Engineering
Engineers use depth gauges for precise measurements in prototypes and finished products. This aids in design and quality control.
Depth gauges help verify dimensions in complex parts. This reduces errors and improves product reliability.
- Measure component depths in prototypes
- Check assembly part fit
- Verify product dimensions during inspection
Credit: en-40020.site-translation.com
Troubleshooting Measurement Issues
Using a depth gauge correctly is important for accurate results. Sometimes, you may get wrong measurements. This guide helps you find and fix common problems.
Checking the gauge and its settings can solve many errors. Follow these tips to keep your depth gauge working well.
Identifying Inaccurate Readings
Inaccurate readings happen for many reasons. Dirt or debris on the gauge can block proper contact. Also, using the gauge on uneven surfaces causes wrong numbers.
Check the gauge for any damage or wear. Look at the measuring rod and display to see if they move freely and clearly show numbers.
- Clean the gauge before use
- Measure on flat, stable surfaces
- Check for bent or stuck parts
- Ensure the display is clear and readable
Correcting Calibration Problems
Calibration keeps your depth gauge accurate. If the gauge shows wrong numbers at zero or known depths, it needs adjustment. Use a calibration block or a known standard for this.
Follow the gauge’s instructions to reset or adjust zero points. Regular calibration helps avoid measurement errors over time.
- Use a flat, known depth surface for calibration
- Adjust zero reading if it does not start at zero
- Repeat calibration regularly for best results
- Store the gauge in a safe place to keep calibration

Credit: www.reddit.com
Frequently Asked Questions
What Is The Main Purpose Of A Depth Gauge?
A depth gauge measures the depth of holes, slots, or recesses precisely. It ensures accurate depth readings during machining or woodworking tasks. Using a depth gauge helps maintain product quality and consistency by providing reliable measurements.
How Do You Read A Depth Gauge Correctly?
To read a depth gauge, place its base flat on the surface. Lower the measuring rod into the hole until it touches the bottom. Read the measurement on the scale or digital display carefully for accuracy.
Can A Depth Gauge Measure Internal And External Depths?
Yes, a depth gauge can measure both internal and external depths. It is designed to access holes, grooves, or recesses inside objects and measure their depth accurately. This versatility makes it useful in various applications.
What Types Of Depth Gauges Are Commonly Used?
Common types include vernier, dial, and digital depth gauges. Vernier and dial gauges offer analog readings, while digital gauges provide easy-to-read digital measurements. Choose based on required precision and ease of use.
Conclusion
Using a depth gauge helps measure depth accurately and easily. It ensures your work stays precise and safe. Keep the gauge clean and check it before each use. Practice often to feel confident handling it. Simple steps lead to better results every time.
Trust your measurements and take your time. This tool supports many tasks, from woodworking to diving. With care and attention, it becomes a useful part of your toolkit.