Are you planning to upgrade your plumbing system with something more efficient and reliable? PEX plumbing connections might just be the solution you’re looking for.
This modern plumbing option offers flexibility, durability, and ease of installation. But how do you go about installing it yourself without any hassle? You’re in the right place! In this guide, we’ll walk you through the step-by-step process of installing PEX plumbing connections.
Whether you’re a DIY enthusiast or a homeowner looking to save some money on plumbing costs, you’ll find this information invaluable. Get ready to transform your plumbing system and enjoy the benefits of PEX. Let’s dive in and make your home improvement project a success!

Credit: www.angi.com
Tools And Materials Needed
Installing PEX plumbing connections requires the right tools and materials. Using proper items makes the job easier and safer.
Below are the common types of PEX tubing, fittings, connectors, and essential tools needed for installation.
Types Of Pex Tubing
PEX tubing comes in several types to fit different plumbing needs. The main types include PEX-A, PEX-B, and PEX-C. Each type has unique flexibility and strength.
- PEX-A:Most flexible and easy to bend. Good for tight spaces.
- PEX-B:Stiffer but more resistant to chlorine and chemicals.
- PEX-C:Least flexible, often used for radiant heating.
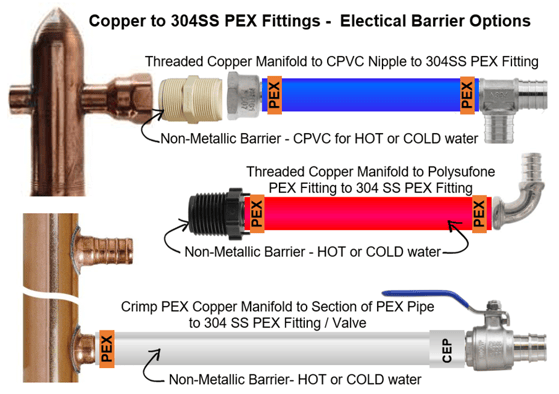
Fittings And Connectors
Fittings and connectors join PEX tubing to pipes or fixtures. Choosing the right type ensures a leak-free system.
| Fitting Type | Description | Use |
|---|---|---|
| Crimp | Uses copper rings to secure tubing | Common for residential plumbing |
| Clamp (Cinch) | Uses stainless steel clamps and a special tool | Easy to install and remove |
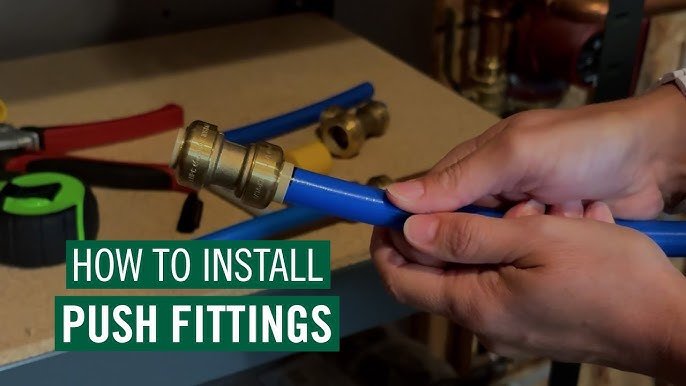
| Push-to-Connect | Quick connection without tools | Good for repairs and tight spaces |
| Expansion | Expands tubing before inserting fitting | Works well with PEX-A tubing |
Essential Tools
Using the right tools helps make clean cuts and secure connections in PEX plumbing.
- PEX tubing cutter for smooth, straight cuts
- Crimp tool or clamp tool to secure fittings
- Go/no-go gauge to check crimp rings
- Expansion tool for PEX-A tubing
- Measuring tape to measure pipe lengths accurately
- Marker to mark cutting points
Preparing The Work Area
Before installing PEX plumbing connections, make sure the workspace is safe and clear. Preparing the area helps prevent accidents and makes the job easier.
Organize your tools and materials nearby. A clean space allows better focus and faster work.
Shutting Off Water Supply
Turn off the main water supply to stop water flow. This prevents leaks and water damage during installation.
- Locate the main water shut-off valve.
- Turn the valve clockwise until it stops.
- Open nearby faucets to drain remaining water.
- Check that water is fully off before starting work.
Clearing The Installation Space
Clear the area around pipes and fittings. Remove any objects that block access or could get damaged.
| Item to Clear | Reason |
| Furniture | Allows space to move freely and use tools |
| Rugs or Carpets | Protects from water spills and dirt |
| Loose Items | Prevents tripping and damage during work |
| Electrical Appliances | Reduces risk of electric shock near water |
Cutting And Measuring Pex Tubing
Installing Pex plumbing requires careful cutting and measuring of the tubing. Accurate lengths ensure a proper fit and avoid leaks.
This guide covers two key tasks: measuring accurate lengths and using a Pex tubing cutter.
Measuring Accurate Lengths
Measure the Pex tubing carefully before cutting. Use a tape measure and mark the exact spot to cut. Always allow some extra length for fittings and connections.
- Place the tubing along the planned route.
- Use a tape measure to find the distance between connection points.
- Add about 1 inch to the length for fittings.
- Mark the cutting spot with a pencil or marker.
- Double-check the measurement before cutting.
Using Pex Tubing Cutter
A Pex tubing cutter helps make clean, straight cuts. Avoid twisting or crushing the tubing while cutting.
| Tool | Purpose | Tip |
|---|---|---|
| Pex Tubing Cutter | Cut tubing cleanly | Hold tubing firmly, cut straight |
| Tape Measure | Measure tubing length | Measure twice, cut once |
| Marker | Mark cut spot | Use fine tip for accuracy |
To cut, open the cutter blades and place the tubing inside. Squeeze the handles firmly and rotate slightly if needed. The cut should be smooth without jagged edges.
Credit: mickeysplumbing.com
Attaching Pex Fittings
Attaching Pex fittings is a key step in Pex plumbing installation. Proper connection ensures a leak-free system.
There are three common ways to attach Pex fittings. Each uses different tools and techniques for secure joints.
Crimping Method
The crimping method uses a metal ring and a special tool. It squeezes the ring tightly around the Pex pipe and fitting.
This creates a strong, watertight seal. It is fast and works well for many plumbing jobs.
- Slide the crimp ring over the pipe
- Push the pipe onto the fitting
- Use the crimp tool to compress the ring
- Check the ring with a gauge for a proper fit
Clamp Ring Method
The clamp ring method uses a stainless steel ring and a clamp tool. The ring tightens around the pipe and fitting.
This method is simple and does not require a special gauge. It offers a durable connection with good resistance.
- Place the clamp ring over the pipe
- Insert the pipe onto the fitting
- Use the clamp tool to tighten the ring
- Ensure the ring is fully compressed
Expansion Method
The expansion method uses a tool to stretch the Pex pipe end. It fits the pipe over a fitting as it shrinks back.
This method creates a strong, leak-proof joint without metal rings. It requires special expansion tools.
- Use the expansion tool to widen pipe end
- Quickly slide pipe onto the fitting
- Hold pipe steady as it contracts
- Check the connection for tightness
Connecting Pipes To Fixtures
Connecting PEX pipes to fixtures requires careful attention. You must ensure tight seals to avoid leaks.
Use the right valves and adapters for a secure and durable connection.
Installing Valves And Adapters
Begin by selecting valves and adapters that match your fixture and pipe size. Clean the pipe ends before installation.
- Slide a crimp ring over the pipe.
- Push the valve or adapter onto the pipe fully.
- Position the crimp ring 1/8 inch from the pipe end.
- Use a crimping tool to secure the ring tightly.
- Check the fit by pulling lightly on the connection.
Securing Connections
After installing valves and adapters, securing the entire assembly prevents stress and damage. Use supports and clamps to hold pipes in place.
| Support Type | Recommended Spacing | Notes |
| Wall Clamp | 32 inches (81 cm) | Use plastic or metal clamps |
| Pipe Strap | 6 feet (1.8 m) | Secure horizontal runs |
| Floor Support | Every 10 feet (3 m) | For vertical pipes |
Testing The System
After installing Pex plumbing connections, testing the system is important. This ensures the water flows properly and no leaks exist.
Check each connection carefully before you finish the installation. Testing helps avoid costly repairs later.
Turning On Water Supply
Slowly open the main water supply valve to let water into the Pex pipes. Open it gently to avoid sudden pressure.
- Locate the main water valve.
- Turn the valve handle slowly to open.
- Listen for water flow sounds in the pipes.
- Check pressure gauges if available.
- Close any faucets slightly to release trapped air.
Checking For Leaks
Inspect all Pex connections for drips or moisture. Leaks can cause water damage and reduce system efficiency.
| Location | Signs of Leak |
| Fittings | Water droplets, wetness around joints |
| Crimp Rings | Rust marks, loose fittings |
| Pipe Sections | Wet spots, discoloration |
| Valves | Dripping, corrosion |
Fix any leaks by tightening or replacing fittings. Retest the system after repairs to confirm no leaks remain.
Common Mistakes To Avoid
Installing PEX plumbing connections is simple but needs care. Avoiding mistakes saves time and money.
Here are common errors to watch out for during your PEX plumbing installation.
Using The Wrong Fittings
Choosing the wrong fittings can cause leaks or damage. Make sure fittings match your PEX tubing size.
Use fittings designed for PEX systems only. Other fittings may not seal properly.
Not Cutting Tubing Straight
Cutting tubing at an angle causes poor connections. Always cut PEX tubing straight across.
Use a sharp PEX tubing cutter for clean, even cuts. Avoid using scissors or knives.
Failing To Deburr Or Clean Tubing Ends
Leaving burrs or dirt on tubing ends stops fittings from sealing well. Clean and smooth the ends before installing.
- Remove any rough edges with a deburring tool
- Wipe tubing ends clean of dirt or oil
- Check tubing ends before inserting fittings
Not Using The Proper Crimp Or Clamp Tools
Using the wrong tool can break fittings or cause leaks. Use the tool made for your connection type.
Check tool jaws fit your clamp or crimp ring size exactly before starting.
Not Checking Connections Thoroughly
Skipping the leak test wastes time fixing problems later. Always check each connection after installation.
- Turn on water slowly and watch for drips
- Tighten or redo connections that leak
- Use soapy water to spot small leaks
Ignoring Expansion And Contraction
PEX tubing expands and contracts with temperature changes. Not allowing space can stress fittings.
Leave room for tubing movement by using proper supports and avoiding tight bends.
Credit: support.boshart.com
Frequently Asked Questions
What Tools Are Needed For Pex Plumbing Installation?
You need a Pex cutter, crimping tool, and a deburring tool. These ensure clean cuts and secure fittings. A measuring tape and marker also help in accurate pipe placement.
How Do I Connect Pex Pipes Securely?
Use Pex fittings with crimp rings or clamps. Slide the ring, insert the pipe into the fitting, and crimp securely. Check for leaks before finalizing the connection.
Can Pex Plumbing Be Used For Hot Water Lines?
Yes, Pex pipes are suitable for hot and cold water. They resist heat and pressure well, making them ideal for hot water distribution systems.
How Long Does Pex Plumbing Installation Take?
Installation time varies by project size but typically takes a few hours to a day. Pex’s flexibility speeds up the process compared to traditional pipes.
Conclusion
Installing PEX plumbing connections can save time and effort. Follow each step carefully for a secure fit. Use the right tools to avoid leaks or damage. Check connections twice before turning on the water. With practice, the process becomes faster and easier.
This method suits many home plumbing needs. Keep your workspace clean and organized. PEX plumbing offers flexibility and durability for your pipes. Trust the process and enjoy reliable water flow. Simple steps lead to a successful installation every time.