Imagine transforming your backyard into a thriving vegetable garden, bursting with fresh produce ready for your table. If you’ve ever felt overwhelmed by the prospect of planting vegetables, you’re not alone.
But here’s the secret: a simple tool called a dibber can make all the difference. By the end of this guide, you’ll discover how this underrated garden tool can streamline your planting process, save you time, and even boost your vegetable yields.
You’re about to unlock the potential of your garden with ease and efficiency. Ready to dig in and learn how a dibber can revolutionize your gardening experience? Keep reading, and let’s get started!
Benefits Of Using A Dibber
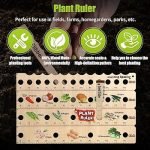
A dibber is a simple gardening tool used to make holes in the soil. It helps plant seeds or seedlings easily. Using a dibber can improve your vegetable planting process.
This guide explains the main benefits of using a dibber for planting vegetables. You will learn how it helps with precision, saves time, and supports better seedling growth.
Precision In Planting
A dibber creates uniform holes at the right depth and spacing. This precise planting helps seeds get the best start. It also reduces seed waste and crowding.
- Holes are made quickly and evenly
- Seeds or seedlings are placed at correct depth
- Plants have enough space to grow
- Soil is disturbed less, keeping it healthy
Time-saving Techniques
Using a dibber speeds up the planting process. It lets you make many planting holes in a short time. This is helpful for large vegetable beds.
- Press dibber into soil to make a hole
- Place seed or seedling in the hole
- Cover with soil and gently press
- Repeat for all plants
Improved Seedling Growth
Planting with a dibber helps seedlings grow stronger. It makes sure roots have enough room and soil contact. This leads to better water and nutrient uptake.
| Benefit | Effect on Seedling |
| Proper hole depth | Roots develop well |
| Even spacing | Plants avoid crowding |
| Less soil disturbance | Soil stays healthy |
| Quick planting | Less stress on seedlings |
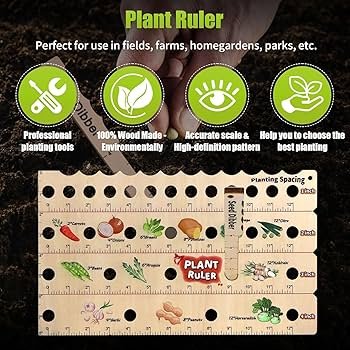
Choosing The Right Dibber
A dibber is a simple tool to help plant vegetables easily. Picking the right dibber makes planting faster and more accurate.
Different dibbers suit different tasks. Knowing what to look for helps you choose one that fits your garden needs.
Types Of Dibbers
Dibbers come in many forms. Some are pointed sticks, while others have handles or special shapes.
- Pointed dibbers: Simple sticks with a sharp tip for making holes.
- Handled dibbers: Have a grip for easier pushing into the soil.
- Adjustable dibbers: Can change depth or size for different seeds.
- Multi-hole dibbers: Make many holes at once for quick planting.
Material Considerations
Dibbers are made from wood, metal, or plastic. Each material has pros and cons to think about.
| Material | Advantages | Disadvantages |
|---|---|---|
| Wood | Lightweight, natural feel | Can crack or rot over time |
| Metal | Durable, strong tip | Heavier, may rust without care |
| Plastic | Affordable, rust-free | Less durable, can break |
Size And Shape Options
Size and shape affect how deep and wide the holes go. Choose dibbers based on seed size and soil type.
- Small dibbers: Good for tiny seeds like carrots and lettuce.
- Medium dibbers: Fit most vegetable seeds like beans and peas.
- Large dibbers: Make holes for big seeds or seedlings.
- Pointed tips: For firm or compact soil.
- Wide tips: For loose soil or big seed holes.
Preparing The Soil
Good soil is important for healthy vegetable plants. Preparing the soil helps seeds grow strong roots.
Use a dibber to make planting easier. Before planting, prepare the soil well for best results.
Soil Testing And Amendment
Test soil to know its nutrients and pH level. This helps decide what to add to the soil.
Add compost or fertilizer to improve soil quality. Amend soil based on test results for healthy plants.
- Collect soil samples from different spots
- Send samples to a testing lab or use a home kit
- Add lime if soil is too acidic
- Add sulfur if soil is too alkaline
- Mix in organic matter like compost or manure
Loosening And Leveling
Loosen soil to let roots grow easily. Hard soil stops roots from spreading well.
Level the soil surface for even planting with a dibber. This helps water reach all seeds equally.
- Use a garden fork or tiller to break up hard soil
- Remove stones, roots, and debris
- Rake soil to create a flat surface
- Check for smooth, even soil to plant seeds
Moisture Management
Keep soil moist but not wet before planting. Good moisture helps seeds sprout well.
Use a dibber to plant seeds at the right depth. This protects seeds and keeps moisture around them.
- Water soil lightly a day before planting
- Check soil moisture by touching it
- Avoid waterlogged or dry soil
- Water gently after planting to keep soil moist
Credit: thelizlogelinfoundation.org
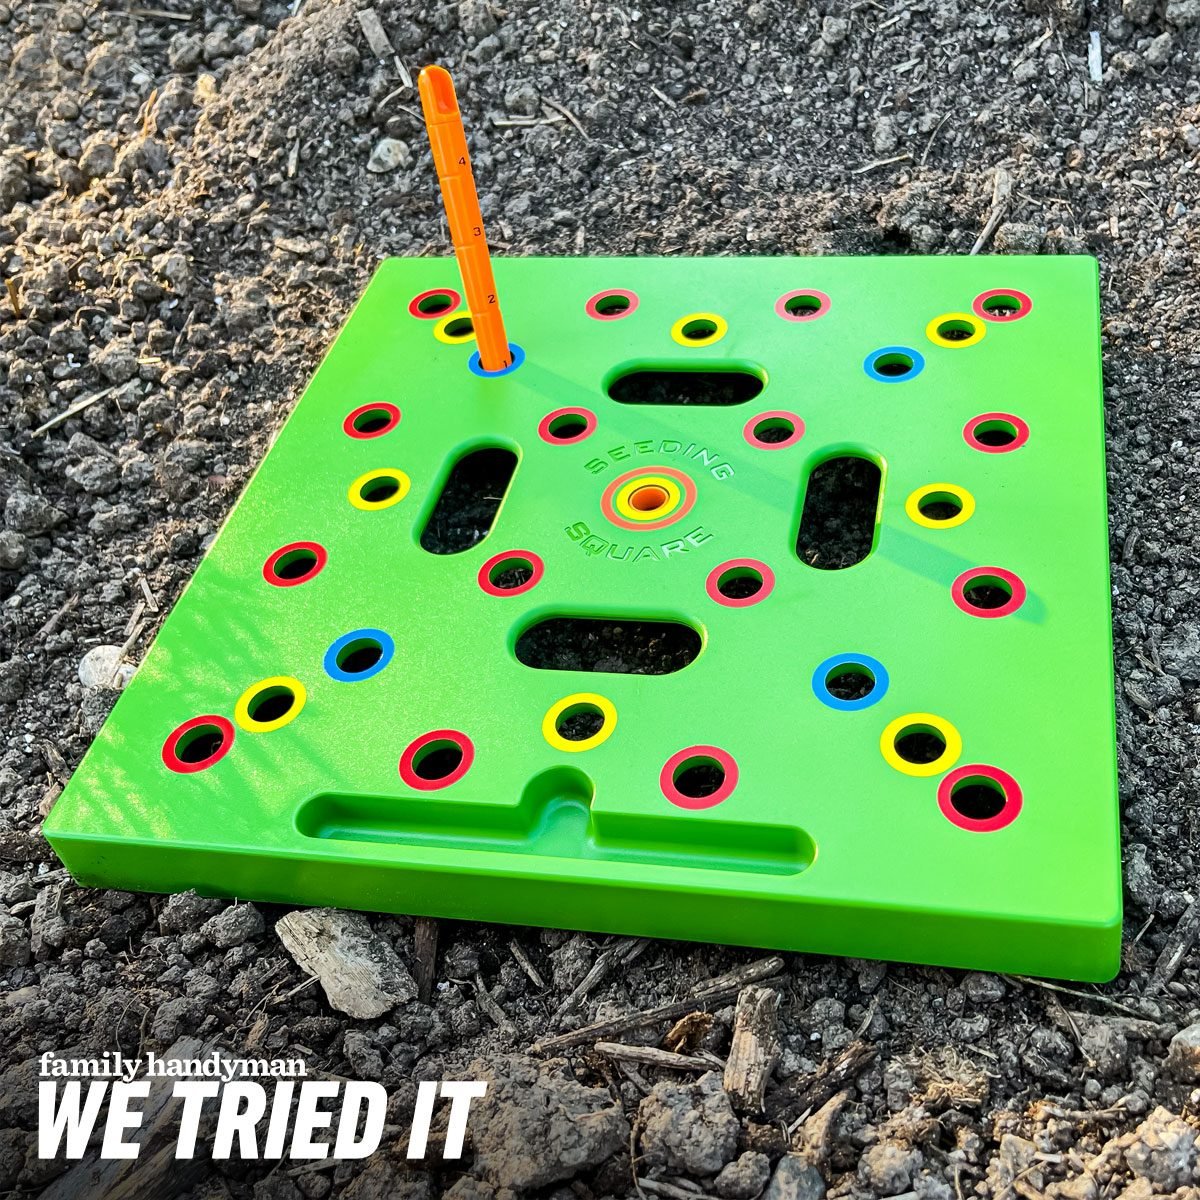
Marking Planting Spots
Using a dibber helps you plant vegetables evenly. It marks spots where seeds or seedlings go. This makes your garden neat and organized.
Marking spots correctly helps plants grow well. It saves space and avoids crowding. Learning how to use a dibber is easy and useful.
Spacing Guidelines
Different vegetables need different space to grow. Giving enough room helps roots and leaves develop. Follow spacing rules for healthy plants.
- Leafy greens like lettuce need 6 to 12 inches apart
- Root vegetables like carrots need 2 to 4 inches apart
- Tomatoes and peppers need 18 to 24 inches apart
- Beans and peas need about 3 to 4 inches apart
Using The Dibber For Marking
Hold the dibber straight and push it into the soil. Make holes where you want to plant. Use the right depth for each vegetable.
Mark all planting spots before adding seeds or seedlings. This saves time and keeps rows straight. You can check the spacing again easily.
- Choose a dibber size that fits seed or seedling size
- Press gently to avoid compacting soil too much
- Make holes the right depth for each plant
- Mark spots in rows or patterns you planned
Avoiding Common Mistakes
Do not make holes too close or too deep. This can harm plants or stop growth. Take care to measure spacing before marking.
Do not rush when using the dibber. Mark each spot carefully. Avoid uneven holes that confuse planting or watering.
- Check soil moisture before marking to avoid hard soil
- Use a ruler or tape to keep consistent spacing
- Clean the dibber after use to prevent soil buildup
- Recheck planting spots before planting seeds or seedlings
Planting Seeds And Seedlings
Using a dibber helps plant seeds and seedlings with care and precision. It creates perfect holes for your garden plants.
This guide covers how to make holes, set the right depth, and place seeds or seedlings correctly.
Creating Holes With The Dibber
Hold the dibber firmly and push it straight into the soil. Twist it gently to form a clean hole. Remove the dibber carefully to keep the hole intact. This method works well for both seeds and seedlings.
Proper Depth For Different Vegetables
| Vegetable | Seed Depth (inches) | Seedling Depth |
|---|---|---|
| Carrot | 0.25 | Plant at soil surface |
| Tomato | 0.5 | Plant deeper, bury stem slightly |
| Peas | 1 | Plant at soil surface |
| Lettuce | 0.25 | Plant at soil surface |
Use the dibber to control the hole depth. Adjust the pressure and length of the dibber in soil for different seeds and seedlings.
Placing And Covering Seeds
- Drop seeds gently into the hole made by the dibber.
- Do not overcrowd seeds in one hole.
- Cover seeds with loose soil using your hand or dibber.
- Press soil lightly to remove air pockets.
- Water the area gently to keep soil moist.
For seedlings, place roots carefully into the hole. Fill soil around roots and press gently to support the plant.

Credit: www.amazon.com
Aftercare Tips
Planting vegetables with a dibber is just the start. Proper care helps plants grow strong and healthy.
After planting, you need to water, mulch, and protect your young plants. These steps support growth.
Watering Techniques
Water your vegetables gently to avoid washing away soil. Keep the soil moist but not soggy.
Water early in the morning or late in the afternoon to reduce evaporation and water loss.
- Use a watering can with a fine rose or drip irrigation
- Check soil moisture regularly by touching the soil
- Avoid watering the leaves to prevent diseases
Mulching Benefits
Mulch helps keep soil moist and stops weeds from growing around your vegetables.
It also protects roots from extreme heat and cold, helping plants stay healthy all season.
- Use organic mulch like straw, leaves, or grass clippings
- Spread mulch around plants but keep it away from stems
- Replace mulch if it breaks down or blows away
Protecting Young Plants
Young plants are fragile and need care against pests, wind, and harsh sun.
Use simple barriers or covers to shield plants while they grow strong.
- Place small fences or nets to keep animals away
- Use row covers to protect from insects and frost
- Provide shade during very hot days to avoid leaf burn
Troubleshooting Common Issues
Planting vegetables with a dibber can be easy and fun. Still, some problems might happen in your garden.
Knowing how to fix common issues helps your plants grow healthy and strong.
Uneven Growth
Uneven growth happens when some plants grow faster or taller than others. This can be caused by poor planting depth or uneven watering.
- Make sure you plant each seed at the same depth with your dibber.
- Water your plants evenly to avoid dry or soaked spots.
- Check if sunlight reaches all parts of your garden.
- Add fertilizer if the soil lacks nutrients.
Pests And Diseases
Pests and diseases can harm your vegetables. They may cause spots, holes, or wilting leaves.
| Problem | Signs | Action |
| Aphids | Small insects on leaves | Spray water to remove them |
| Fungal Disease | White powder on leaves | Use fungicide and remove affected leaves |
| Cutworms | Seedlings cut at base | Place collars around young plants |
Soil Compaction Problems
Soil compaction makes it hard for roots to grow. It lowers air and water flow in the soil.
To fix soil compaction:
- Loosen soil with a garden fork before planting.
- Avoid walking on planting beds.
- Add organic matter like compost to improve soil texture.
- Use your dibber gently to avoid packing soil too hard.

Credit: www.amazon.com.au
Maintaining Your Dibber
Taking care of your dibber helps it last longer. A well-maintained dibber makes planting easier and more precise.
Regular cleaning, sharpening, and knowing when to replace your dibber keep it working well for every gardening task.
Cleaning And Storage
After using your dibber, remove dirt and debris. This prevents rust and damage.
Store your dibber in a dry place to avoid moisture buildup. Moisture can cause wood to rot and metal to rust.
- Wipe off soil with a damp cloth
- Dry the dibber completely before storing
- Keep it in a shed or tool rack
Sharpening Tips
A sharp dibber makes planting holes easier. Check the point for dullness often.
Use a metal file or sharpening stone to keep the tip pointed. Always file in one direction for best results.
- Hold the dibber firmly
- File the tip at a 20-30 degree angle
- Remove small amounts of metal at a time
- Wear gloves to protect your hands
When To Replace
Replace your dibber if it cracks, splinters, or bends badly. Damaged tools can hurt plants or the user.
If the dibber loses shape and sharpening no longer helps, it is time for a new one. Using a strong dibber makes planting easier.
Frequently Asked Questions
What Is A Dibber And How Is It Used?
A dibber is a simple gardening tool used to make holes in soil. It helps plant seeds or seedlings precisely. You press the dibber into the soil to create perfect planting spots. This ensures even spacing and proper depth for healthy vegetable growth.
Why Use A Dibber For Planting Vegetables?
Using a dibber saves time and improves planting accuracy. It creates uniform holes, which helps seeds grow evenly. A dibber also reduces soil disturbance and root damage. This tool is ideal for gardeners who want neat rows and better crop yields.
Which Vegetables Are Best Planted With A Dibber?
Small seeds and seedlings like carrots, beans, and lettuces benefit most. Dibbers work well for root vegetables and herbs too. They provide consistent depth and spacing essential for these plants. Using a dibber ensures stronger growth and easier garden management.
How Deep Should I Plant Seeds With A Dibber?
Seed depth depends on the vegetable type and seed size. Generally, plant seeds at two to three times their diameter deep. A dibber allows you to control depth accurately. This helps seeds germinate properly without drying out or rotting.
Conclusion
Planting vegetables with a dibber makes gardening easier and more precise. This tool helps create perfect holes for seeds and seedlings. It saves time and reduces effort in your garden work. Using a dibber ensures plants grow well and strong.
Try this simple tool to improve your vegetable planting. Your garden will thank you with better crops and less hassle. Give it a try and enjoy a more organized garden space. Small steps like this lead to great gardening results.