Are you tired of ending up with unsightly kinks every time you try to bend copper tubing? You’re not alone.
Many DIY enthusiasts and professionals alike face this common challenge. Whether you’re working on a plumbing project, crafting a unique piece of art, or tackling an automotive repair, knowing how to bend copper tubing without causing damage can save you time, money, and frustration.
Imagine the satisfaction of creating smooth, flawless curves effortlessly. In this guide, we’ll unveil simple techniques that ensure your copper tubing bends perfectly every time. Stick around to discover the secrets that will transform your copper bending skills and leave your projects looking professional and pristine.

Credit: www.reddit.com
Choosing The Right Copper Tubing
Bending copper tubing without kinks needs the right material. Choosing the correct type and size helps you work easier. The right tubing keeps your project safe and strong.
This guide covers types of copper tubing and important size details. Knowing these helps you pick tubing that bends well and lasts long.
Types Of Copper Tubing
Copper tubing comes in three main types. Each type suits different uses and bending needs. Knowing these types helps avoid kinks during bending.
- Type K:Thickest walls, used for underground or heavy-duty work.
- Type L:Medium thickness, common for plumbing and HVAC systems.
- Type M:Thinner walls, best for light-duty and indoor use.
Type L tubing is usually best for bending without kinks. It balances strength and flexibility well.
Tube Diameter And Wall Thickness
The diameter and wall thickness affect how easy it is to bend copper tubing. Smaller diameters bend easier but may kink if too thin. Thick walls resist kinks but need more force to bend.
| Diameter (inches) | Wall Thickness (inches) | Best Use |
| 1/4″ | 0.025″ | Light plumbing, easy bending |
| 1/2″ | 0.035″ | Standard plumbing, good durability |
| 3/4″ | 0.045″ | Heavy plumbing, less flexible |
| 1″ | 0.050″ | Commercial use, strong and rigid |
Credit: www.eliterooter.com
Tools For Bending Copper Tubing
Bending copper tubing without causing kinks is important for plumbing and HVAC work. Using the right tools helps you bend copper smoothly and safely.
There are different types of benders available. Each type works best for certain jobs. Understanding these tools makes your work easier and cleaner.
Manual Benders
Manual benders are simple tools used by hand to bend copper tubing. They have shaped forms that guide the tube to bend evenly.
These benders work well for small jobs and thin tubing. You hold the tube and bend it around the form slowly to avoid kinks.
- Easy to use and affordable
- Best for tight bends and small pipes
- Requires physical effort
Spring Benders
Spring benders fit inside the copper tubing to support it while bending. The spring keeps the tube from collapsing or kinking.
You insert the spring into the tube, bend the tube carefully, then remove the spring. This method is good for gentle curves.
- Prevents tube from collapsing
- Good for flexible, smooth bends
- Works best on smaller diameter tubing
Hydraulic Benders
Hydraulic benders use fluid pressure to bend copper tubing with little effort. They provide precise bends for larger pipes.
These benders are often used in professional settings. They reduce the chance of kinks by applying even pressure during bending.
- Suitable for thick and large tubing
- Produces clean, accurate bends
- Requires a hydraulic system or pump
Preparing The Tubing For Bending
Before bending copper tubing, you must prepare it properly. Good preparation prevents kinks and damage.
Two main tasks are cutting and deburring, followed by cleaning the tube. Each step ensures smooth and safe bends.
Cutting And Deburring
Cut the copper tubing straight to avoid uneven bends. Use a pipe cutter for clean cuts.
- Mark the tube where you want to cut.
- Place the pipe cutter on the mark and tighten it slightly.
- Rotate the cutter around the tube, tightening it after each full turn.
- Stop when the tube is cut through.
- Use a deburring tool to remove sharp edges inside and outside the cut.
Cleaning The Tube
Clean the copper tube to remove dirt, oil, and oxidation. This helps the tubing bend smoothly.
| Cleaning Method | Purpose | Recommended Tools |
| Wipe with a clean cloth | Remove surface dust and grease | Lint-free cloth |
| Use mild detergent and water | Clean stubborn dirt and residues | Soap, water, soft brush |
| Rinse and dry thoroughly | Prevent corrosion and ensure dry surface | Clean water, dry cloth |
| Use fine steel wool or emery cloth | Remove oxidation for better bending | Steel wool or emery cloth |
Techniques To Prevent Kinks
Bending copper tubing without causing kinks is important for plumbing and HVAC work. Kinks reduce flow and weaken the tube. Using proper methods helps keep the tubing smooth and strong.
This guide explains three key techniques to bend copper tubing safely. Each method helps stop kinks and keeps your project professional.
Using A Bending Spring
A bending spring fits inside the copper tube to support it during bending. It stops the tube from collapsing and kinking. You can use springs for small to medium diameter tubing.
- Insert the bending spring fully into the tube.
- Bend the tube slowly around a form or pipe.
- Remove the spring once the bend is complete.
- Check the tube for smooth curves without dents.
Filling With Sand
Filling the tube with sand makes the inside firm. This keeps the tube shape steady while you bend it. Fine, dry sand works best for this method.
| Step | Description |
| 1 | Plug one end of the copper tubing. |
| 2 | Fill the tube completely with dry sand. |
| 3 | Seal the other end tightly. |
| 4 | Bend the tube slowly to the desired angle. |
| 5 | Remove plugs and empty the sand after bending. |
Applying Proper Heat
Heating copper tubing makes it more flexible and easier to bend. Use a torch carefully to warm the tube evenly. Avoid overheating to prevent damage.
Follow these heat safety tips:
- Wear heat-resistant gloves and eye protection.
- Heat the tubing evenly along the bend area.
- Keep the flame moving to avoid burning one spot.
- Do not overheat; stop when the copper glows dull red.
- Cool the tube slowly to keep the shape intact.
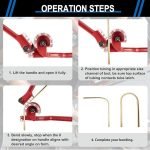
Step-by-step Bending Process
Bending copper tubing is a useful skill for plumbing and craft projects. Doing it right prevents kinks that can block water flow.
This guide shows how to bend copper tubing safely and smoothly in three clear steps.
Marking The Bend Location
Start by choosing the exact spot where you want to bend the tubing. Mark it clearly with a permanent marker or tape.
Make sure your mark is easy to see and lines up with your project measurements.
Slow And Steady Bending
Bend the tubing slowly to avoid sharp angles and kinks. Use your hands or a proper bending tool for better control.
- Hold the tubing firmly near the mark.
- Apply steady pressure to begin the bend.
- Move slowly and keep checking the shape.
- Stop when you reach the desired angle.
Checking The Bend Radius
Check the bend radius to ensure the tubing is not too tight. A small radius can cause damage or flow issues.
| Tube Diameter | Minimum Bend Radius |
| 1/4 inch | 1 inch |
| 3/8 inch | 1.5 inches |
| 1/2 inch | 2 inches |
| 3/4 inch | 3 inches |
Common Mistakes To Avoid
Bending copper tubing is a skill that needs care. Many people make errors that cause kinks or damage. Avoiding these mistakes keeps your tubing smooth and strong.
Learn about common errors to save time and materials. Fixing problems later can be costly and frustrating. Follow simple rules to get good bends every time.
Bending Too Sharply
Bending copper too sharply causes kinks and weak spots. Copper tubing needs smooth curves to keep its shape. Sharp bends reduce flow and can cause leaks.
- Use a proper bend radius that matches tubing size.
- Slowly bend the tube without forcing it.
- Check the tubing as you bend to avoid tight corners.
Skipping Tube Preparation
Not preparing the tube leads to poor bends and damage. Cleaning and marking the tube helps guide your work. Tube preparation prevents cracks and kinks.
| Preparation Step | Why It Matters |
|---|---|
| Clean the tubing | Removes dirt and oils that cause slipping |
| Mark the bend point | Ensures accurate and consistent bends |
| Check tubing for defects | Prevents weak spots from bending |
Using Incorrect Tools
Wrong tools damage copper tubing and make bending hard. Use tools made for copper tubing. This reduces the risk of kinks and dents.
- Bending springs protect the tube inside.
- Bending pliers help create smooth curves.
- Tube benders offer control and precision.
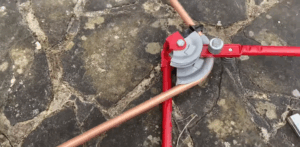
Post-bending Inspection And Finishing
After bending copper tubing, it is important to inspect and finish the work carefully. This ensures the tubing works properly and lasts longer.
Check the tubing for damage, smooth the bends, and test for leaks. These steps help maintain the quality of the tubing.
Checking For Cracks And Kinks
Look closely at the bent areas to find cracks or kinks. Cracks can cause leaks, and kinks reduce water flow.
- Hold the tubing up to the light to spot thin spots or cracks.
- Run your fingers along the bend to feel for sharp edges or dents.
- Check if the tubing is flattened or collapsed at the bend.
Smoothing The Bend
Use a soft cloth or fine sandpaper to smooth any rough spots on the tubing. This helps prevent damage to fittings and seals.
| Tool | Purpose |
|---|---|
| Soft cloth | Remove dirt and minor roughness |
| Fine sandpaper | Smooth out small dents or rough patches |
| Plastic or rubber mandrel | Support tubing to keep shape while smoothing |
Testing For Leaks
Once the tubing is smooth, test it for leaks. This ensures the bend did not cause any holes or weak spots.
- Plug one end of the tubing securely.
- Fill the tubing with water or air.
- Apply gentle pressure and watch for drops or hissing sounds.
- Inspect all bends closely during the test.
- Repair or replace tubing if leaks appear.

Credit: www.eliterooter.com
Tips For Complex Bends
Bending copper tubing without kinks can be tricky, especially with complex shapes. Careful handling and the right techniques help keep the tubing smooth.
This guide focuses on bending copper tubing when you need multiple bends or precise shapes. Follow these tips to avoid damage and get the shape you want.
Multiple Bends In One Tube
Bending several angles on one tube needs careful planning. Each bend affects the next, so measure and mark before you start.
Use a bending spring or sand inside the tube to keep it from kinking. Bend slowly and check your progress often.
- Mark each bend location clearly on the tube
- Use a bending spring to support the tube
- Bend slowly to avoid sharp kinks
- Check the tube after each bend
- Adjust angles carefully to match your plan
Using Templates And Jigs
Templates and jigs help make complex bends easier and more accurate. They hold the tubing in place and guide your bending.
Create or buy a template that matches your needed shape. Secure the tube in the jig and bend along the guide to keep consistent curves.
- Use templates to visualize the bend shape
- Jigs keep tubing steady during bending
- They help repeat the same bends on multiple tubes
- Templates reduce mistakes and save time
- Choose materials for jigs that won’t damage copper
Frequently Asked Questions
How Do You Prevent Kinks In Copper Tubing Bends?
To prevent kinks, use a proper tubing bender or a bending spring. Bend slowly and evenly, avoiding sharp angles. Maintain a consistent radius to keep the tubing smooth and intact.
What Tools Are Best For Bending Copper Tubing?
The best tools include tubing benders, bending springs, and heat guns for thick tubing. These tools help maintain shape and prevent damage during bends.
Can Copper Tubing Be Bent Without Special Tools?
Yes, small diameter copper tubing can be bent by hand carefully. Use a bending spring inside the tube to avoid kinks and maintain a smooth curve.
What Is The Ideal Bending Radius For Copper Tubing?
The ideal bending radius is typically three times the tube’s diameter. This radius prevents kinks and preserves tubing integrity during bends.
Conclusion
Bending copper tubing takes patience and the right tools. Use a bending spring or tubing bender to keep shapes smooth. Work slowly to avoid sharp angles or cracks. Practice on scrap pieces before bending your final tubing. Clean cuts and gentle pressure make a big difference.
These simple steps help you create strong, kink-free bends every time. Keep these tips in mind for your next project. Success is closer than you think.