Imagine you’re in the middle of a home improvement project, whether it’s hanging a picture frame, installing shelves, or constructing a new piece of furniture. You reach for your trusty spirit level, but are you sure you’re using it correctly?
A slight tilt can mean the difference between a polished, professional finish and a skewed, frustrating result. Using a spirit level properly isn’t just about balance; it’s about precision and confidence in every project you tackle. You’ll discover essential tips to ensure your spirit level becomes your most reliable tool.
Don’t let uneven surfaces disrupt your hard work. Dive in to learn how you can achieve perfect alignment every single time.
Choosing The Right Spirit Level
Using a spirit level correctly starts with choosing the right one. The right level makes your work easier and more accurate.
Different jobs need different types of spirit levels. It is important to pick a level that fits your task and work style.
Types Of Spirit Levels
Spirit levels come in various types. Each type suits specific tasks, from simple home projects to professional construction.
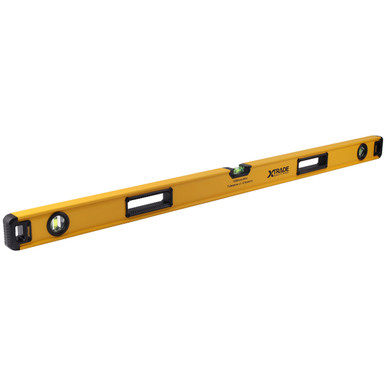
- Carpenter’s Level:Long and sturdy, best for framing and large surfaces.
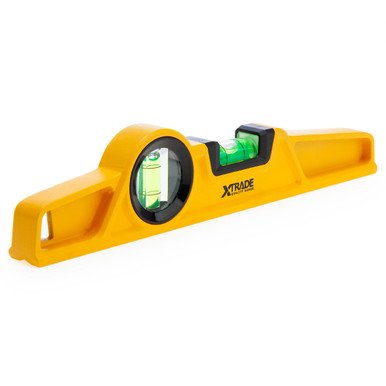
- Torpedo Level:Small and portable, good for tight spaces.
- Box Beam Level:Heavy-duty and precise, ideal for heavy construction.
- Laser Level:Projects a laser line for very accurate leveling over distance.
Material And Build Quality
Material affects durability and weight. Choose a spirit level made from strong materials for long use.
| Material | Benefits | Drawbacks |
|---|---|---|
| Aluminum | Lightweight, rust-resistant | Can dent easily |
| Wood | Traditional look, stable | Can warp if wet |
| Plastic | Cheap, light | Less durable |
| Steel | Very strong | Heavy, may rust |
Size Considerations
Size matters for accuracy and ease of use. Match the size to your project and space.
- Small levels are easy to carry and good for small jobs.
- Medium levels work well for most household tasks.
- Large levels give more accuracy on big surfaces.

Credit: www.engineersupply.com
Preparing The Surface
Using a spirit level correctly starts with preparing the surface. A clean and stable surface helps get accurate readings. Take time to check and clear the area before measuring.
These tips will help you prepare the surface well. Follow each step to avoid errors in your leveling work.
Cleaning The Surface
Remove dirt, dust, and grease from the surface before placing the spirit level. Even small debris can cause wrong readings.
- Use a dry cloth or brush to clear loose dirt.
- For sticky spots, apply a damp cloth and wipe clean.
- Make sure the surface is dry before placing the level.
Checking For Obstructions
Look for nails, screws, or bumps on the surface. These can lift the spirit level and give false results.
| Common Obstruction | Effect on Level |
|---|---|
| Nails or Screws | Causes uneven contact |
| Paint Bumps | Raises one side slightly |
| Dust Particles | Blocks full surface contact |
| Wood Splinters | Creates gaps under the level |
Ensuring Stability
Make sure the surface is firm and does not move. A shaky surface will cause the bubble to shift and give wrong readings.
- Place the spirit level on a solid part of the surface.
- Avoid soft or flexible materials that bend easily.
- Hold the level steady if the surface is slightly unstable.
Proper Positioning Techniques
Using a spirit level correctly helps ensure surfaces are perfectly horizontal or vertical. Proper positioning is key to getting an accurate reading every time.
This guide covers how to place the level correctly, use multiple points, and read the bubble accurately for the best results.
Placing The Level Correctly
Place the spirit level on a clean, flat surface. Make sure the tool sits firmly without wobbling. Avoid placing it on rough or uneven areas.
- Clean the surface and the level before use
- Hold the level steady without tilting
- Align the level along the edge or surface you want to check
- Check both ends to ensure the level is fully supported
Using Multiple Points
Check several points along the surface to get a full picture of its levelness. One spot might look right, but others can reveal tilts or dips.
| Point | Why Check | How to Do It |
| Center | Main reference for level | Place level at mid-point and read bubble |
| Edges | Detect slope or warping | Move level to left and right edges |
| Intermediate spots | Find uneven areas | Test points between center and edges |
Reading The Bubble Accurately
The bubble shows if the surface is level. It must be centered between the two lines to be accurate.
Follow these tips to read the bubble correctly:
- Look at the level from directly above to avoid angle errors.
- Hold your head steady and aligned with the bubble vial.
- Wait a moment for the bubble to settle before reading.
- If the bubble is not centered, adjust the surface and check again.
Credit: www.toolstop.co.uk
Calibrating Your Spirit Level
Using a spirit level correctly depends on accurate calibration. Calibration helps ensure that the level shows true horizontal or vertical lines.
Regular checks and adjustments keep your spirit level reliable. This guide explains how to calibrate it simply and when to do so.
Simple Calibration Methods
Place the spirit level on a flat surface and note the bubble position. Then turn the level 180 degrees and check the bubble again.
If the bubble does not stay in the same spot, adjust the vial or mark the difference for future use.
- Place level on a flat, stable surface
- Mark the bubble position
- Flip the level end to end
- Check if the bubble matches the first position
- Adjust if the bubble is off-center
When To Recalibrate
Recalibrate your spirit level after any hard impact or if you drop it. Damage can shift the vial and cause errors.
Also check calibration before important projects. Regular use over time can cause the level to lose accuracy.
- After dropping or hitting the level
- Before starting a critical job
- Every few months with frequent use
- If measurements seem off or inconsistent
Using Calibration Tools
Use a precision flat surface or a known level reference to check your spirit level. Calibration tools improve accuracy.
You can also use a laser level or a digital level to compare readings and adjust your manual spirit level accordingly.
- Flat granite surface plate
- Known accurate spirit level
- Laser level for comparison
- Digital level for precise readings
Common Mistakes To Avoid
Using a spirit level is simple but can lead to errors if not done carefully. Avoid common mistakes to get accurate results.
These tips help you use your spirit level correctly and prevent wrong readings.
Ignoring Surface Irregularities
Placing the spirit level on uneven surfaces causes false readings. Small bumps or dirt under the tool affect its balance.
Always check the surface before measuring. Clean and smooth the area to get the best result.
- Remove dust, dirt, or debris
- Use a flat surface or board if needed
- Check for cracks or bumps
Misreading The Bubble
Misreading the bubble is a common mistake. The bubble must be centered between the two lines for an accurate level.
Look straight at the bubble to avoid parallax errors. Tilting your head can make the bubble appear off-center.
- Keep your eyes level with the vial
- Check the bubble position carefully
- Do not guess or estimate the bubble’s position
Overlooking Calibration
Spirit levels can lose accuracy over time. Not checking calibration leads to wrong measurements.
Test your level by placing it on a flat surface, then flip it 180 degrees. The bubble should stay in the same position.
- If bubble moves, your level needs recalibration
- Adjust or replace the tool if needed
- Check calibration regularly for best results
Advanced Tips And Tricks
Using a spirit level correctly helps you get precise results. Some advanced tips make your work easier and more accurate.
This guide covers useful ways to use your spirit level with laser tools, on angled surfaces, and how to keep it in good shape.
Using A Spirit Level With Laser Tools
Combine a spirit level with laser tools to check both horizontal and vertical planes fast. Use the spirit level to confirm the laser’s accuracy.
Place the spirit level on the laser beam’s target surface. Adjust until both tools show level. This helps avoid errors from laser misalignment.
- Set the laser on a stable base.
- Use the spirit level to double-check laser lines.
- Check multiple points along the laser beam.
- Adjust the laser if the spirit level shows a difference.
Working On Angled Surfaces
Spirit levels usually work best on flat surfaces. Use special methods on angled surfaces to get correct readings.
Hold the spirit level firmly against the angled surface. Use a protractor or angle finder to know the exact angle you work on.
- Mark the angle on your spirit level if needed.
- Use adjustable or digital levels for tough angles.
- Check the bubble position carefully; slight moves matter.
- Recheck after moving the level to avoid errors.
Maintaining Your Spirit Level
Keep your spirit level clean and safe to stay accurate. Dirt and damage cause wrong readings.
Store it in a dry place and avoid dropping it. Check the bubble tubes for cracks or leaks regularly.
- Clean the level with a soft cloth after use.
- Do not use harsh chemicals on the bubble tubes.
- Test the level on a known flat surface to check accuracy.
- Replace or repair if the bubble moves slowly or sticks.

Credit: www.toolstop.co.uk
Frequently Asked Questions
How Do I Calibrate A Spirit Level Before Use?
Calibrate by placing the level on a flat surface. Note the bubble position, then rotate 180 degrees. If the bubble shifts, adjust until it stays centered. This ensures accurate measurements during your project.
What Surfaces Work Best For Spirit Level Accuracy?
Use clean, flat, and stable surfaces for best results. Avoid rough, uneven, or dusty areas. Proper surface contact ensures the bubble moves correctly, giving precise leveling readings every time.
How Do I Read The Bubble On A Spirit Level?
Center the bubble between the marked lines inside the vial. When the bubble is perfectly centered, the surface is level. If it’s off-center, adjust the surface until the bubble aligns correctly.
Can A Spirit Level Be Used Vertically And Horizontally?
Yes, spirit levels work both vertically and horizontally. Use the horizontal vial for flat surfaces and the vertical vial for upright objects. This flexibility helps achieve accurate alignment in various tasks.
Conclusion
Using a spirit level correctly makes your work neat and accurate. Always check the bubble’s position carefully. Place the level on a clean, flat surface for best results. Take your time to avoid mistakes. Keep your spirit level in good condition for reliable use.
Practice these tips to gain confidence quickly. Small efforts lead to better projects and happy results. Simple steps make a big difference. Try these ideas on your next task and see the improvement.
