Are you tired of searching for your tools every time you start a project? Imagine having a neat, organized DIY workbench where everything has its place, and you can easily find what you need.
Whether you’re an experienced craftsman or a weekend hobbyist, organizing your workbench can transform your DIY projects from chaotic to efficient. You’ll save time, reduce stress, and find a new level of satisfaction in your work. In this guide, we’ll reveal simple yet effective strategies to keep your workspace tidy and functional.
Stick around, and discover how a well-organized workbench can elevate your crafting experience to new heights!
Planning Your Workbench Layout
Organizing a DIY workbench starts with a clear plan. A good layout helps you work better and faster.
Think about your space, tools, and comfort before building your workbench.
Choosing The Right Location
Pick a spot with enough room to move around your workbench. Good lighting is important too.
Make sure the location has easy access to power outlets and storage areas.
- Space for tool storage nearby
- Good natural or artificial light
- Close to electrical outlets
- Flat and stable floor surface
Determining Workbench Size
Choose a workbench size that fits your room and projects. It should be wide enough for your tools.
Leave space around the bench for easy movement and safety.
- Consider your available floor space
- Plan for a work surface at least 4 feet wide
- Allow 3 feet clearance around the bench
- Adjust size for larger or smaller projects
Selecting Workbench Height
Set your workbench height so you can work without bending or stretching. Comfort prevents fatigue.
The right height depends on your body size and the tasks you do most often.
- Standard height is about 36 inches
- Taller people may prefer 38 to 40 inches
- Shorter people may choose 30 to 34 inches
- Use adjustable legs for flexibility
Credit: medium.com
Essential Tools And Materials
Setting up a DIY workbench needs the right tools and materials. This helps you build a strong and useful workspace.
Below, we cover the basics you need for construction, durable materials, and smart storage choices.
Basic Tools For Construction
Start with essential tools that make building easier and faster. These tools help you measure, cut, and join parts of your workbench.
- Measuring tape for accuracy
- Hand saw or circular saw for cutting wood
- Hammer and nails for joining parts
- Screwdriver and screws for tight fits
- Level to keep surfaces flat
- Clamps to hold pieces in place
Materials For Durability
Choose materials that last long and handle heavy use. Wood and metal are popular choices for a strong workbench.
| Material | Use | Benefit |
| Hardwood | Workbench top | Strong and smooth surface |
| Plywood | Workbench frame | Affordable and sturdy |
| Steel | Legs and supports | Very durable and stable |
| Wood sealant | Surface finish | Protects from moisture and stains |
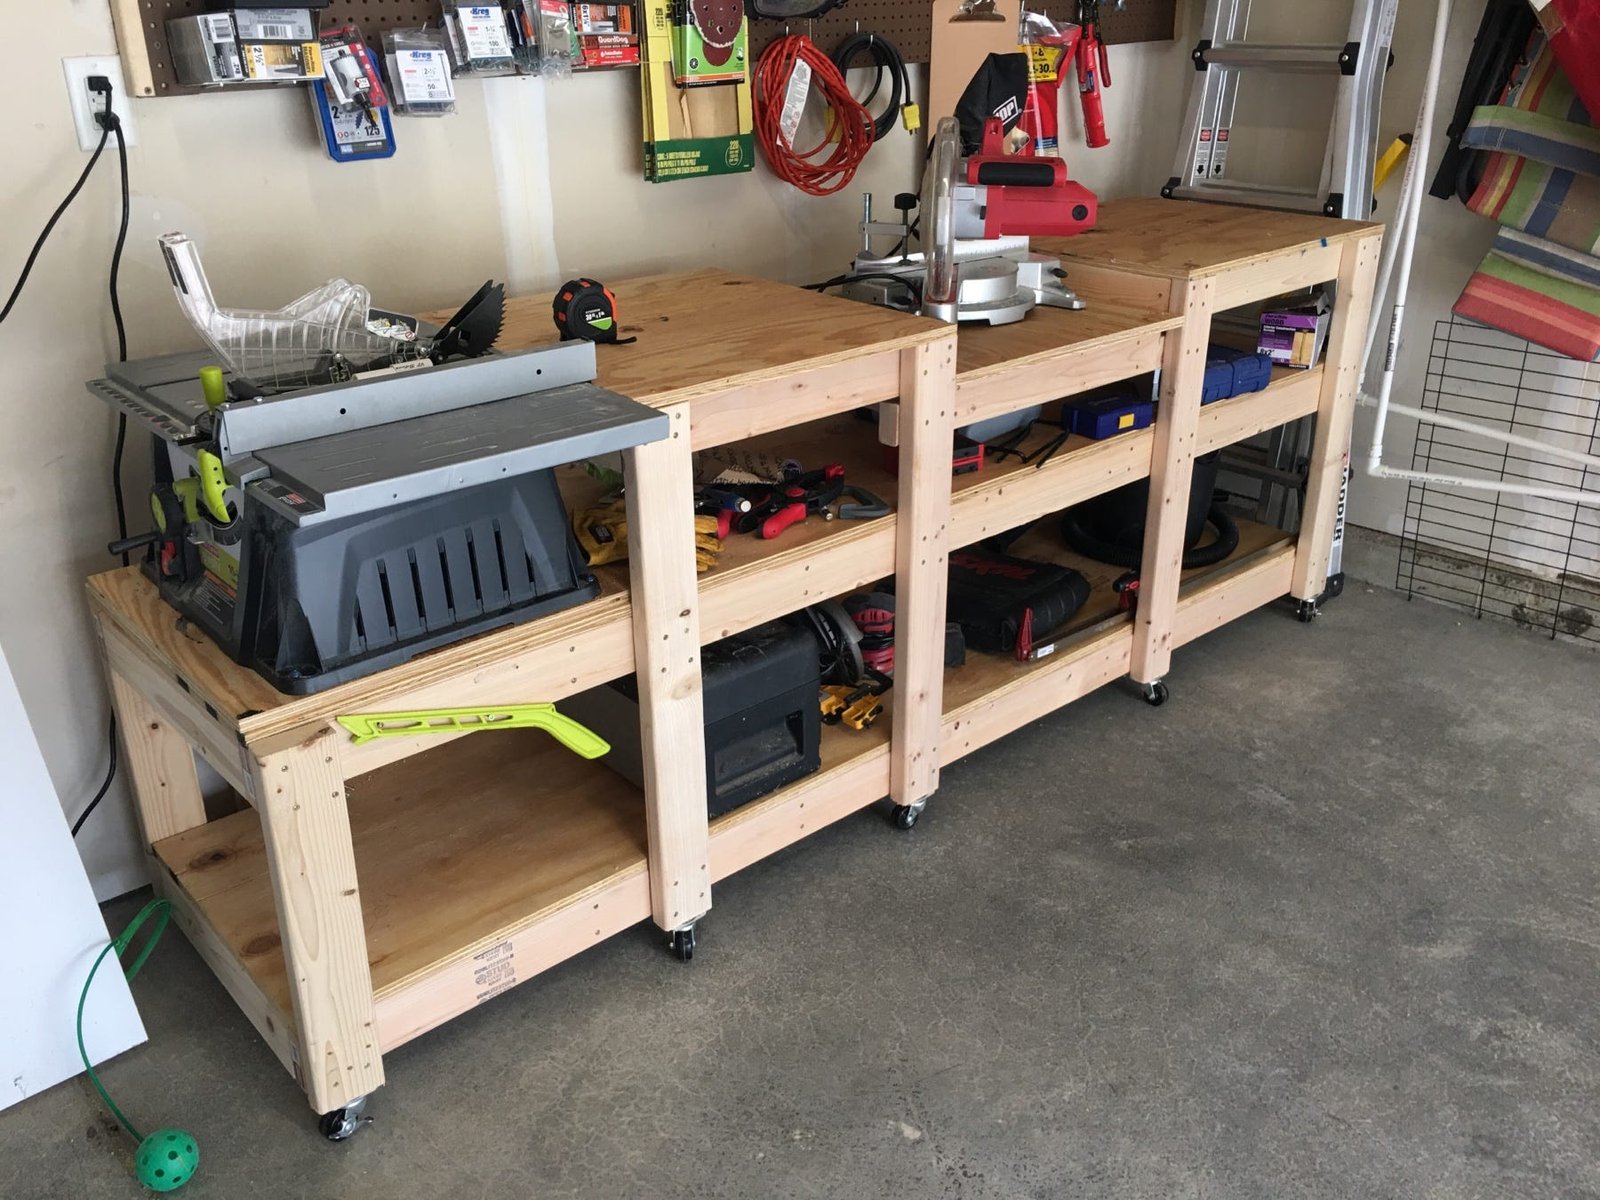
Storage Solutions To Consider
Good storage keeps your tools organized and easy to find. Plan shelves, drawers, or hooks depending on your needs.
- Wall-mounted pegboards for hanging tools
- Drawers under the workbench for small items
- Shelves for larger equipment
- Magnetic strips for metal tools
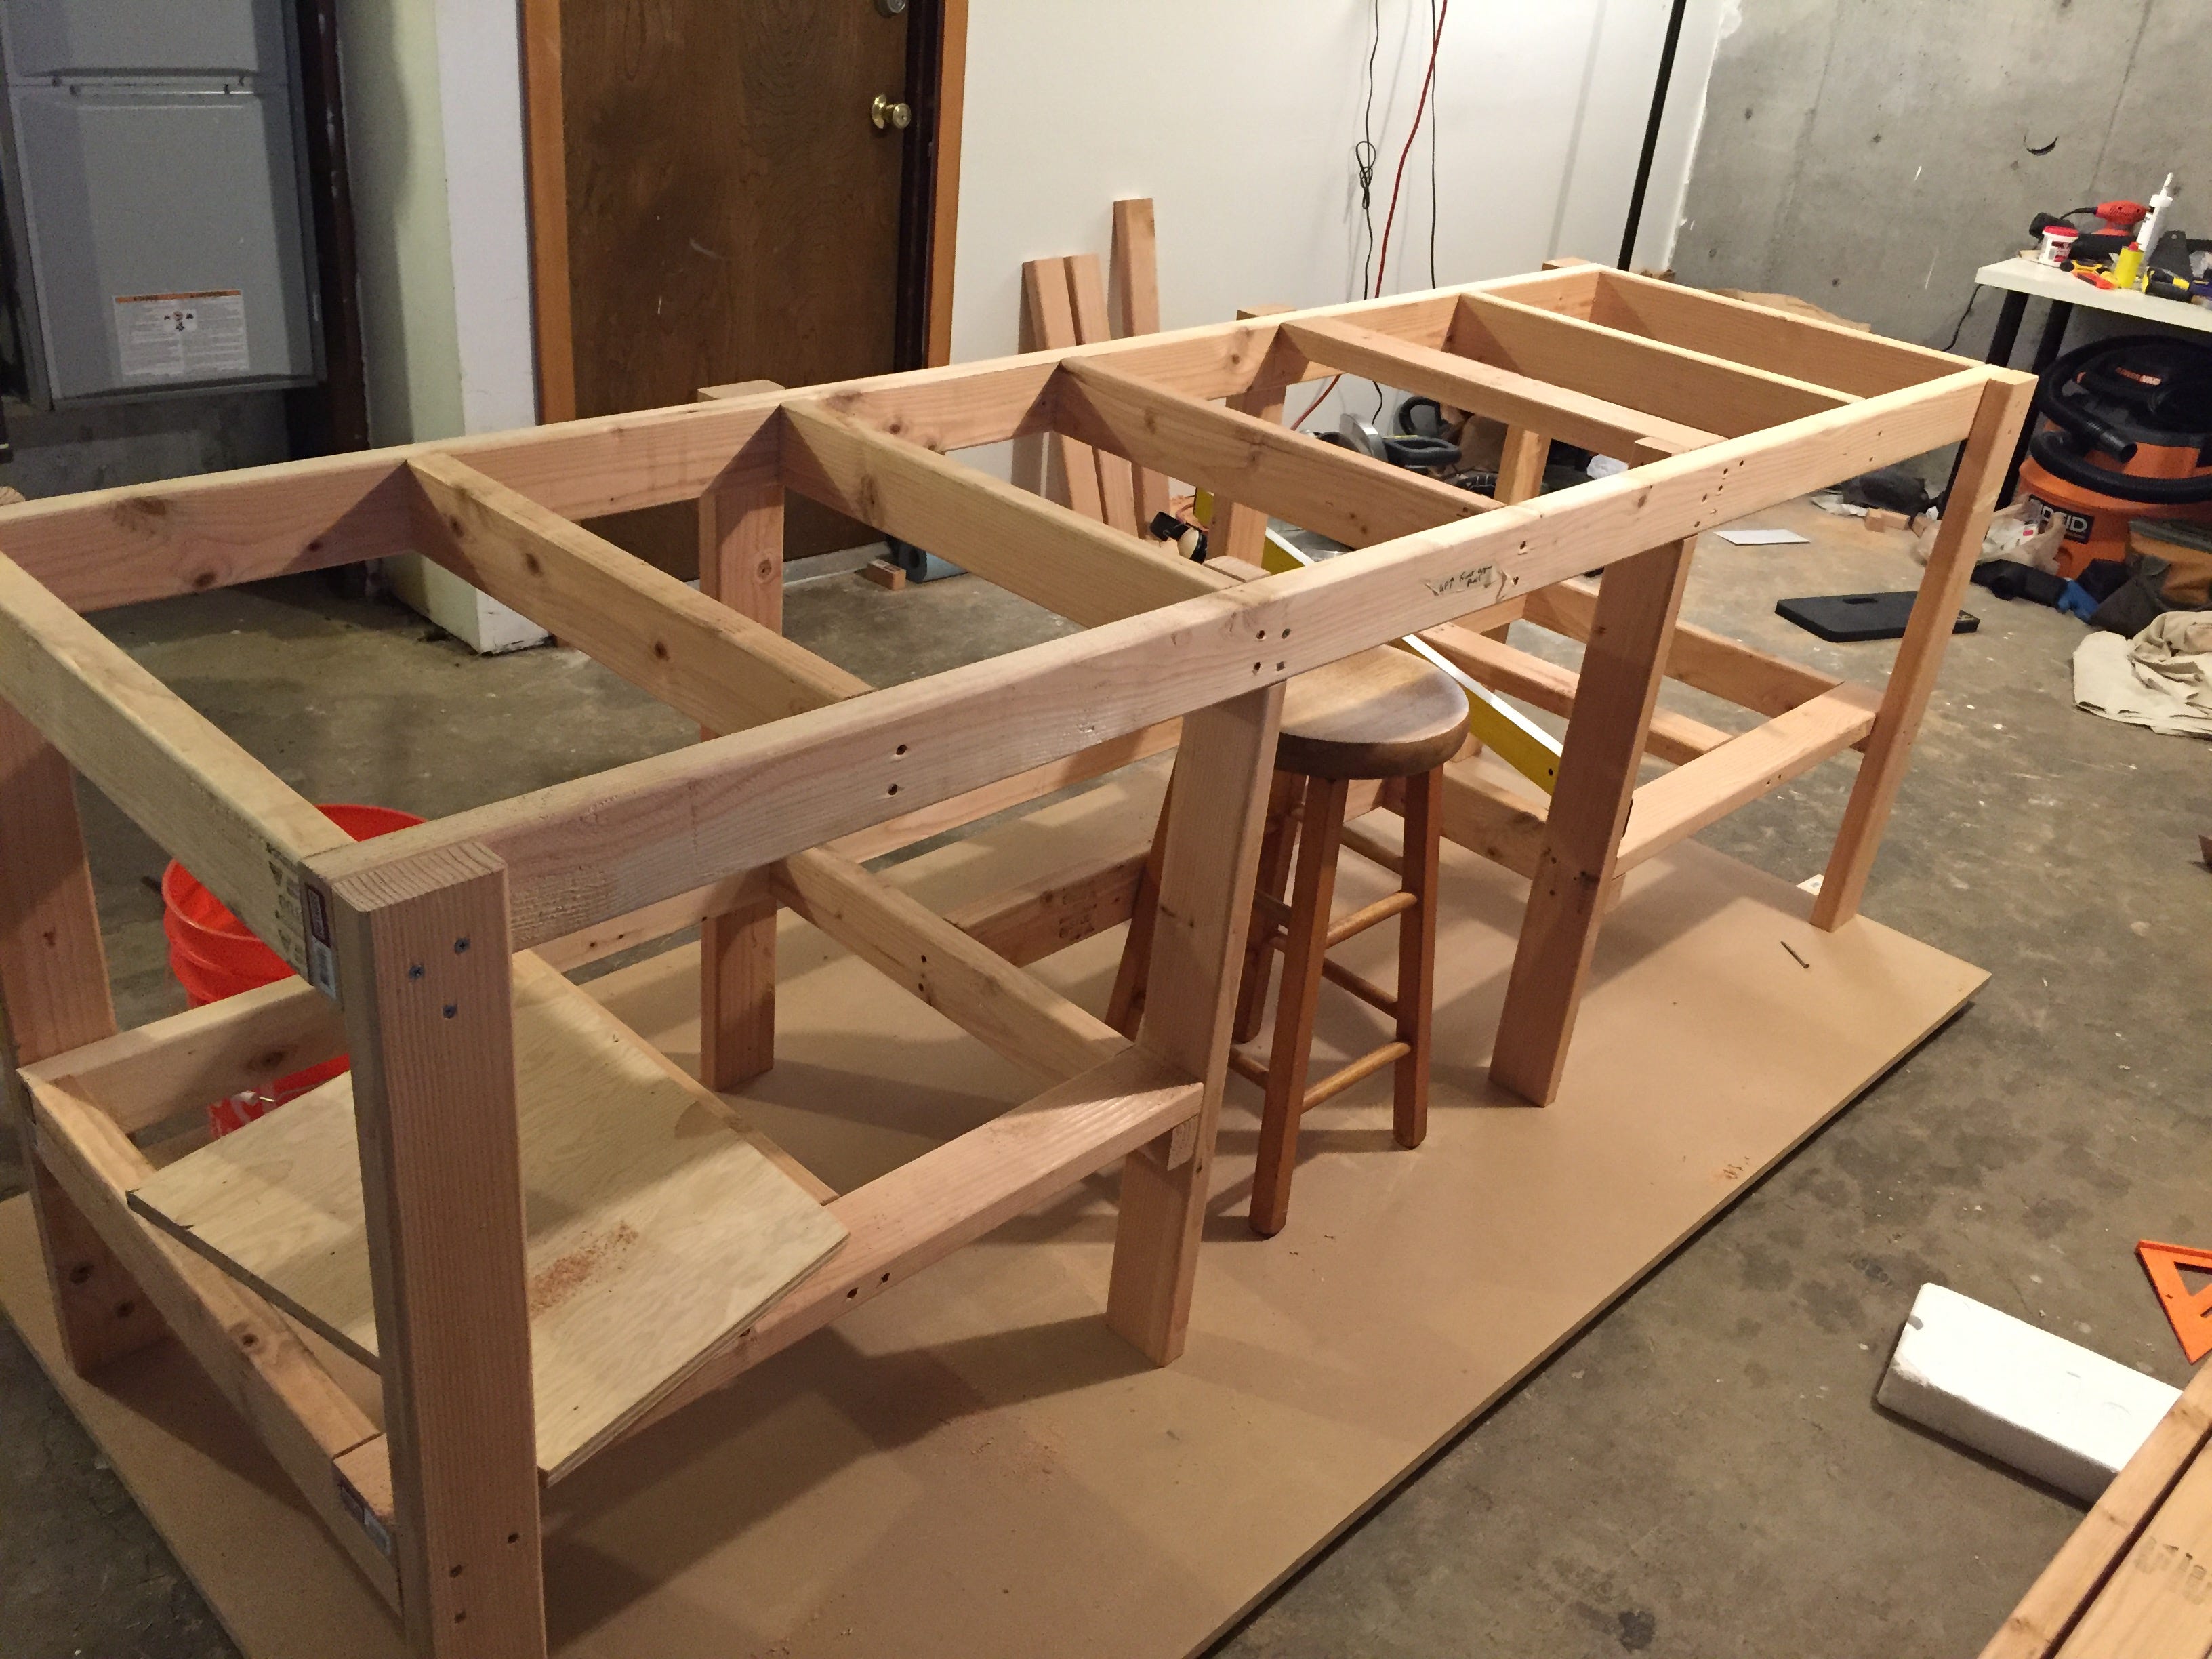
Building The Workbench Frame
Creating a solid frame is key to a strong DIY workbench. This frame holds everything together and supports your projects.
Focus on making the base sturdy, adding support, and using adjustable parts for flexibility.
Constructing A Sturdy Base
Start with thick, quality wood for the base. This will hold the whole workbench steady and prevent wobbling.
- Cut four legs to the desired height using 2×4 lumber.
- Connect the legs with 2×4 stretchers on all sides.
- Use wood screws and wood glue for strong joints.
- Check the base for level and square before tightening.
Adding Support And Stability
Extra support prevents the frame from shifting or bending. Use braces and cross beams to add strength.
| Support Type | Purpose | Material |
| Corner Braces | Prevent side movement | Metal or wood |
| Cross Beams | Distribute weight evenly | 2×4 lumber |
| Bottom Shelf Frame | Adds rigidity and storage space | Same as base wood |
Incorporating Adjustable Features
Adjustable parts make your workbench more useful for different tasks and tools.
Consider these adjustable features:
- Height-adjustable legs with bolt holes and pins
- Sliding or removable shelves
- Swappable tool mounts or clamps
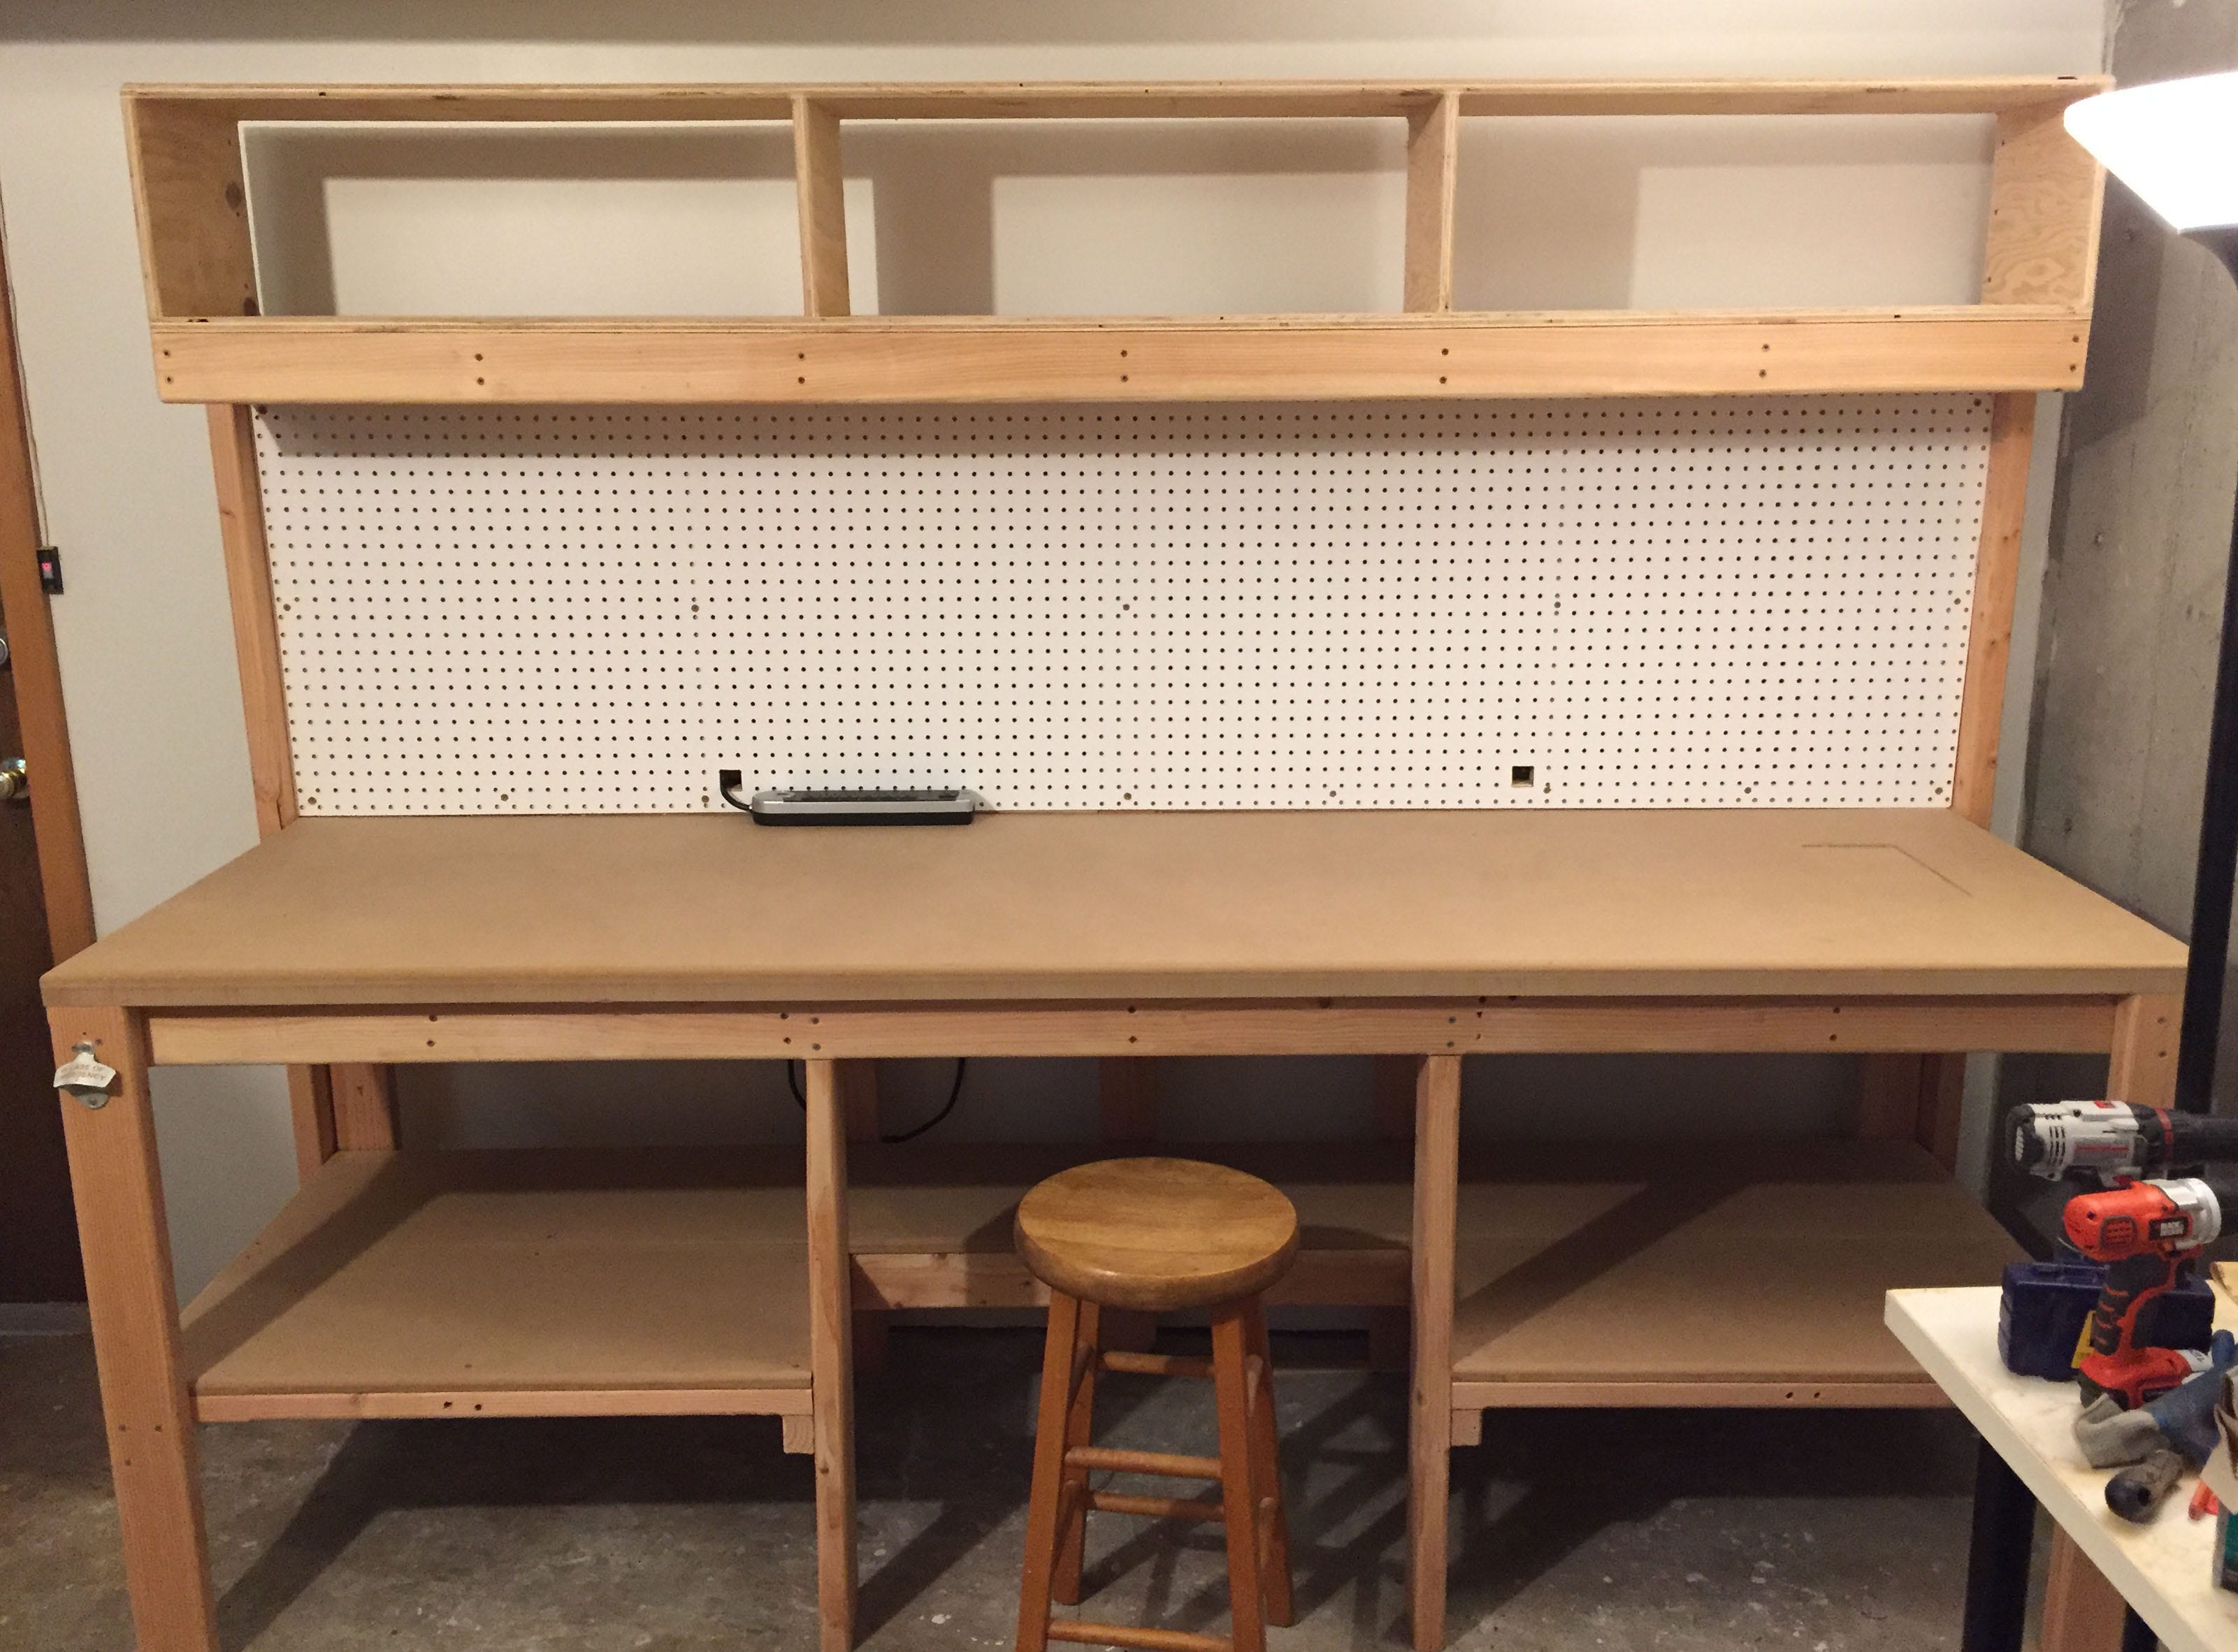
Creating An Efficient Work Surface
Building a DIY workbench needs a good work surface. It helps you work faster and keeps tools safe. Choosing the right materials and finishes makes your bench last longer.
This guide shows how to pick worktop material, finish the surface, and add protection. Each part helps make your workbench better for your projects.
Choosing The Worktop Material
Pick a worktop that fits your tasks and budget. Common materials include wood, metal, and plastic. Wood is easy to work with and looks nice. Metal is very strong but can be heavy. Plastic tops resist stains and moisture.
- Wood: smooth surface, easy to fix scratches
- Metal: durable, good for heavy tools
- Plastic: lightweight, water-resistant
- Plywood: affordable, good for light projects
Surface Finishing Techniques
Finish the surface to make it smooth and safe. Sanding removes rough spots. You can paint or varnish the top to protect it from damage. Choose a finish that fits your work style.
| Finish Type | Benefits | Best For |
| Sanding | Removes roughness | All materials |
| Paint | Protects and colors | Wood and metal |
| Varnish | Waterproof and hard | Wood surfaces |
| Sealant | Protects from chemicals | Wood and plastic |
Adding Protective Layers
Protective layers extend your workbench life. Use mats or covers to avoid scratches and stains. Rubber mats reduce tool slipping. Clear plastic sheets keep the surface clean.
- Use rubber mats for grip and cushion
- Apply clear plastic for easy cleaning
- Replace worn covers regularly
- Keep protective layers flat to avoid bumps
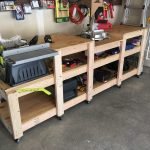
Maximizing Storage And Organization
Creating an organized DIY workbench helps keep tools easy to find and use. A well-planned space improves work speed and safety.
Maximizing storage means using every inch wisely. This guide shows simple ways to add drawers, shelves, and hooks to your workbench.
Installing Drawers And Shelves
Drawers and shelves keep your tools and supplies neat and reachable. Use strong materials to hold heavy items safely.
- Measure your workbench space before buying or building drawers.
- Choose sliding drawers for easy access to small tools.
- Add adjustable shelves to store different sized items.
- Use dividers inside drawers to separate tools by type.
- Label shelves and drawers for quick identification.
Using Pegboards And Hooks
Pegboards and hooks make wall space useful. Hang tools where you can see and reach them fast.
Here is a simple table to help plan pegboard layouts:
| Tool Type | Recommended Hook Size | Placement Tips |
|---|---|---|
| Hammers | Large hooks | Place near work surface |
| Screwdrivers | Small hooks | Group by size and type |
| Wrenches | Medium hooks | Hang in size order |
| Measuring tapes | Medium hooks | Keep close to cutting area |
Labeling And Sorting Tools
Labels help find tools quickly. Sort tools by function or size for better order.
- Use clear labels on drawers, shelves, and bins.
- Group similar tools together.
- Keep frequently used tools in easy spots.
- Color-code labels for faster recognition.
- Update labels as you add or remove tools.
Optimizing Workbench Lighting
Good lighting helps you see your work clearly. It makes your DIY projects safer and easier.
Choosing the right light can improve your focus and reduce mistakes at your workbench.
Natural Vs Artificial Lighting
Natural light comes from windows or skylights. It is bright and easy on the eyes during the day.
Artificial light works anytime, day or night. You can control its brightness and direction.
- Use natural light to save energy and see true colors.
- Use artificial light to work after dark or on cloudy days.
- Combine both types for the best results.
Task Lighting Options
Task lighting focuses light on your work area. It helps you see small details clearly.
LED lamps are popular for workbenches. They use less power and last a long time.
- Clamp lights that attach to the bench are easy to move.
- Adjustable desk lamps help you direct light where you need it.
- Under-shelf lights brighten the bench without taking space.
Reducing Shadows And Glare
Shadows can hide parts of your project. Glare can hurt your eyes and cause mistakes.
Use multiple light sources to reduce shadows. Position lights at different angles.
- Place lights above and to the side of your work area.
- Use diffusers or lampshades to soften harsh light.
- Avoid shiny surfaces that reflect light directly into your eyes.
Maintaining And Upgrading Your Workbench
A good workbench lasts longer with regular care. Keeping it clean and checking for damage helps it stay strong. You can also add new features to make it more useful.
In this guide, learn how to keep your DIY workbench in top shape. We will cover cleaning, inspecting, and upgrading it over time.
Regular Cleaning Routines
Cleaning your workbench often stops dirt and dust from building up. A clean surface helps your tools last longer and keeps your workspace safe.
- Wipe down the surface with a damp cloth after each use.
- Remove sawdust and scraps daily.
- Use mild soap for sticky stains.
- Keep tool holders and drawers tidy.
- Check for rust and clean metal parts.
Inspecting For Wear And Damage
Look closely at your workbench to find any damage early. Fixing small issues can stop bigger problems later. Check joints, screws, and the surface.
| Part | What to Check | How Often |
| Workbench surface | Cracks, dents, stains | Weekly |
| Joints and screws | Loose, missing, rusted | Monthly |
| Legs and supports | Stability and damage | Monthly |
| Tool holders | Secure and clean | Weekly |
Adding Custom Features Over Time
Adding features makes your workbench fit your needs. Start small and build up. You can add storage, lighting, or special holders.
- Install pegboards for hanging tools.
- Add drawers or shelves for parts storage.
- Attach clamps or vices for holding work.
- Mount LED lights for better visibility.
- Build a fold-out extension for extra space.
Credit: medium.com

Credit: m.youtube.com
Frequently Asked Questions
What Tools Are Essential For A Diy Workbench?
Basic tools include a saw, drill, hammer, measuring tape, and screwdriver. These tools help build and customize your workbench effectively.
How Do I Maximize Storage In A Diy Workbench?
Use shelves, drawers, and pegboards to organize tools. Vertical storage saves space and keeps your work area tidy.
What Materials Are Best For Building A Sturdy Workbench?
Solid wood like maple or oak is durable. Plywood can be used for shelves and backing, balancing cost and strength.
How Can I Customize My Diy Workbench For Specific Projects?
Add features like clamps, tool holders, or adjustable height. Tailor your workbench to fit your workflow and project needs.
Conclusion
Organizing your DIY workbench makes projects easier and more fun. Keep tools within reach and sort materials by type. A tidy workspace saves time and reduces stress. Small steps like labeling drawers help a lot. Regularly clean and adjust your setup for best results.
Enjoy working in a neat, efficient space every day.