Are you tired of crooked tiles and uneven lines ruining your home improvement projects? Imagine achieving flawless alignment every time with minimal effort.
The secret weapon? A laser level. Whether you’re a DIY enthusiast or a seasoned pro, mastering this tool can transform your tiling and alignment tasks. In this guide, you’ll discover simple yet powerful tips to harness the full potential of a laser level.
Get ready to boost your precision and efficiency, turning your vision into reality with perfect accuracy. Keep reading to uncover how you can elevate your projects from ordinary to extraordinary.
Credit: www.bosch-pt.co.nz
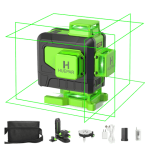
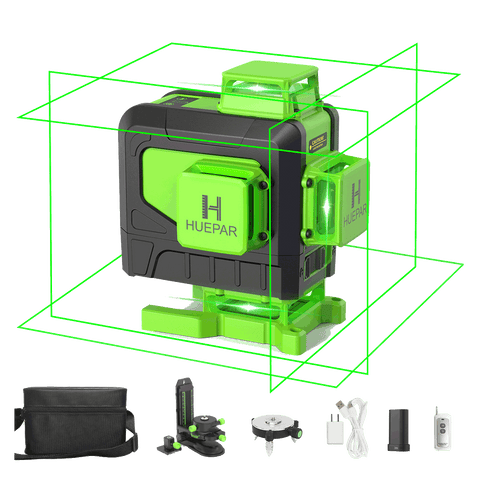
Choosing The Right Laser Level
Using a laser level helps keep your tiles straight and aligned. Picking the right laser level is important for good results.
Different laser levels have features that suit various tiling jobs. Learn about types and what to look for before buying.
Types Of Laser Levels
Laser levels come in different types. Each type works best for certain tasks in tiling and alignment.
- Dot Laser Levels:Project points for simple alignment tasks.
- Line Laser Levels:Show straight lines on walls or floors for easy leveling.
- Cross Line Laser Levels:Combine horizontal and vertical lines for better layout accuracy.
- Rotary Laser Levels:Rotate to project 360-degree level lines, ideal for large areas.
Features To Consider
Some features make laser levels easier and more precise to use. Check these before you buy.
- Accuracy:Look for models with ±1/8 inch accuracy or better.
- Range:Choose a range that fits the size of your project area.
- Self-Leveling:This feature saves time and improves precision.
- Visibility:Bright lasers show better in different light conditions.
- Mounting Options:Tripods or magnetic mounts help position the laser easily.
- Battery Life:Longer battery life means less interruption during work.
Budget And Quality Balance
Find a laser level that fits your budget and still offers good quality. Cheap models may lack key features.
Invest in a reliable tool if you plan to tile often. For occasional use, a basic model can work well.
- Set a budget before shopping to avoid overspending.
- Read reviews to check how well the tool performs.
- Consider warranty and customer support for peace of mind.
- Balance cost with features you actually need for your projects.
Credit: medium.com
Preparing The Work Area
Setting up your work area is important before using a laser level. A clean and organized space helps you get accurate results.
Take time to prepare the surface and mark reference points clearly. Good lighting makes it easier to see the laser lines.
Clearing And Cleaning Surface
Remove all objects from the work surface. Dirt and dust can affect the laser beam and tile placement.
Clean the surface with a damp cloth. Make sure it is dry before starting the alignment process.
Marking Reference Points
Mark key points on walls or floors where tiles will start. These points guide the laser level placement.
Use a pencil or chalk to make light marks. Avoid heavy marks that are hard to erase later.
- Mark corners and edges
- Check for level and straight lines
- Confirm points before turning on the laser
Ensuring Proper Lighting
Good lighting helps you see the laser beam and marks clearly. Avoid shadows on the work area.
Use natural light or bright lamps. Adjust lights to reduce glare or reflections on tiles.
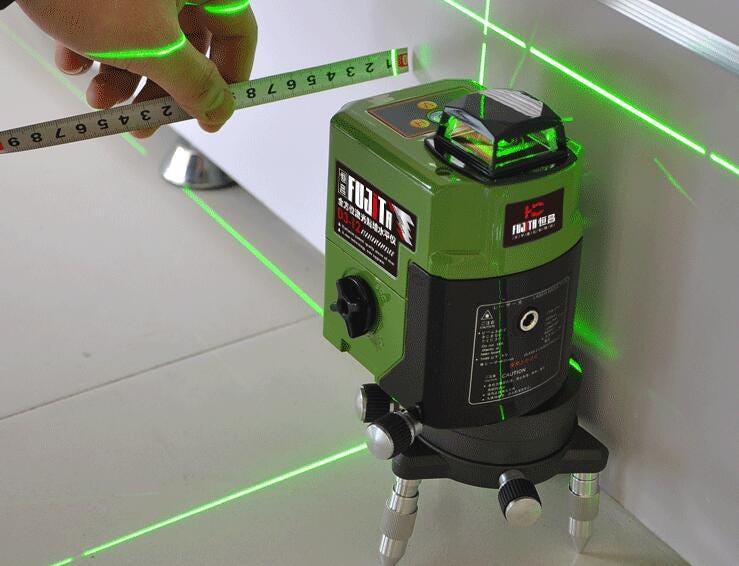
Setting Up The Laser Level
Using a laser level helps make tiling and alignment tasks easier. Proper setup is key for accurate results. This guide covers mounting, calibration, and accuracy checks.
Follow these steps to ensure your laser level works well before you start tiling or aligning surfaces.
Mounting Options
Choose the right mounting method to keep the laser level steady. This keeps the laser line stable and precise during work.
- Tripod mounts offer height adjustment and stability on uneven floors.
- Magnetic mounts attach easily to metal surfaces for hands-free use.
- Wall mounts fix the laser at a constant height and angle for long projects.
- Clamp mounts secure the laser to pipes or beams in tricky spots.
Calibration Steps
Calibration ensures the laser level projects true lines. Follow these steps to check and adjust it.
- Place the laser level on a flat surface or mount it securely.
- Turn on the laser and project a line on a wall or floor.
- Mark the line’s start and end points clearly.
- Rotate the laser 180 degrees and project the line again.
- Check if the new line matches the previous marks.
- If lines differ, adjust the laser’s calibration screws as per the manual.
- Repeat the test until the lines align correctly.
Checking Accuracy
Regular accuracy checks help avoid errors in your tiling and alignment. Use simple tools to verify the laser’s precision.
| Tool | How to Use | What to Check |
| Spirit Level | Place near the laser line | Level surface and straight line |
| Measuring Tape | Measure distance from line to known points | Consistent measurements on both ends |
| Plumb Bob | Hang from laser line point | Vertical alignment check |
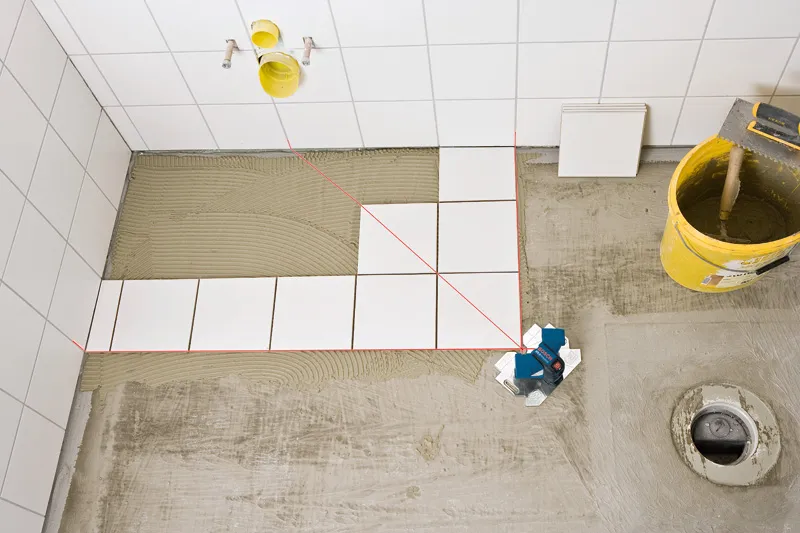
Aligning Tiles With Laser Level
Using a laser level helps keep tiles straight and even. It saves time and reduces mistakes while tiling.
This tool projects a clear line to follow. It works well on floors, walls, and corners for perfect alignment.
Establishing Baselines
Start by setting a strong baseline with the laser level. This line acts as the main guide for placing tiles.
- Place the laser level on a flat surface or mount it on a tripod.
- Turn on the laser and adjust it to the height where tiles will begin.
- Mark the laser line on the wall or floor using a pencil or chalk.
- Double-check the line is level and straight before starting to tile.
Maintaining Consistent Spacing
Even spacing between tiles is key for a neat look. Use the laser line to keep gaps uniform.
| Tool | Purpose |
| Laser Level | Shows a straight line to align tiles |
| Tile Spacers | Keeps equal space between tiles |
| Measuring Tape | Checks distance and spacing |
Adjusting For Walls And Corners
Walls and corners often are uneven. Use the laser level to adapt tile placement for a smooth finish.
- Project the laser line along the corner to find the true angle.
- Cut tiles to fit uneven edges, using the laser line as a guide.
- Check alignment at multiple points to keep tiles straight around corners.
- Use the laser to maintain level rows even on irregular surfaces.
Common Challenges And Solutions
Using a laser level helps keep tiles straight and aligned. It makes the work easier and more precise. Still, some issues can happen during the process.
This guide shows common problems and how to solve them. It covers uneven surfaces, laser visibility, and misalignment.
Dealing With Uneven Surfaces
Uneven floors or walls cause the laser line to tilt or skip spots. This makes it hard to place tiles correctly.
- Check the surface with a straight edge before starting.
- Use a leveling compound to fill low spots.
- Adjust the laser tripod or mount to keep it steady.
- Work in small sections to control errors.
Handling Laser Visibility Issues
Bright light can make the laser line hard to see. This slows down the tiling work and causes mistakes.
| Cause | Solution |
| Strong sunlight | Use laser glasses or shades |
| Long distance | Choose a laser with higher brightness |
| Dust or dirt on lens | Clean the laser lens regularly |
| Reflective surfaces | Adjust angle to reduce glare |
Correcting Misalignment
Tiles may not line up if the laser or surface shifts. Fixing this quickly saves time and materials.
Try these tips to fix misalignment:
- Re-check the laser level position before tiling.
- Mark reference points on the wall or floor.
- Use spacers to keep tile gaps even.
- Adjust tiles gently if they move out of line.
- Pause often to confirm alignment with the laser.

Credit: www.youtube.com
Safety Tips And Maintenance
Using a laser level helps make tiling and alignment easier. It is important to keep safety in mind while working. Proper care keeps the device working well for a long time.
This guide covers how to protect your eyes and maintain your laser level properly. Follow these tips to work safely and keep your tool in good condition.
Protecting Eyes From Laser
Laser beams can harm your eyes. Never look directly into the laser beam or point it at others. Use safety glasses if needed.
Keep the laser level away from children. Always turn off the device when not in use to avoid accidental exposure.
- Do not stare into the laser beam
- Wear safety glasses if recommended
- Keep the laser away from children
- Turn off the device when not in use
Storing The Device Properly
Store the laser level in a dry and safe place. Avoid places with high heat or humidity. Use a case to protect it from dust and damage.
Keep the device away from heavy objects that can cause damage. Proper storage helps the laser level last longer and work accurately.
- Use a protective case or cover
- Keep in a dry place with low humidity
- Avoid high temperatures
- Do not place heavy items on it
Regular Calibration And Cleaning
Check the calibration of your laser level often. A wrong calibration can cause errors in your work. Follow the manufacturer’s instructions for calibration.
Clean the laser lens with a soft cloth to remove dust and dirt. Avoid using harsh chemicals. Keep the device clean to maintain clear laser lines.
- Calibrate regularly according to instructions
- Use a soft cloth for cleaning
- Avoid harsh cleaning chemicals
- Keep the lens free of dust and dirt
Frequently Asked Questions
How Does A Laser Level Improve Tile Alignment?
A laser level projects a straight, visible line on surfaces. This helps ensure tiles are perfectly aligned. It reduces errors and speeds up the tiling process. Using it guarantees a professional, clean finish with minimal adjustments.
What Are The Best Laser Level Types For Tiling?
Rotary and line laser levels are ideal for tiling. Rotary lasers cover large areas with a 360-degree beam. Line lasers provide clear horizontal and vertical lines. Both types help maintain precise tile placement and alignment.
How To Set Up A Laser Level For Tiling?
Place the laser level on a stable surface or tripod. Adjust its height to match your tile layout. Turn it on and ensure the beam is visible on your working surface. Double-check the level’s calibration before starting your project.
Can Laser Levels Be Used On Uneven Walls?
Yes, laser levels work on uneven walls. Use a self-leveling laser to automatically adjust the beam. This feature ensures straight lines despite surface irregularities. It helps maintain accurate tile placement on challenging walls.
Conclusion
Using a laser level helps keep tiles straight and even. It saves time and reduces mistakes. Always check the level before starting your work. Small adjustments make a big difference in alignment. Practice using the laser level on a small area first.
This tool makes tiling easier and more precise. Trust the laser level to guide your work. Good alignment leads to a professional look. Keep your workspace clean and organized for best results. With patience and care, your tiling will look great every time.