Have you ever wondered how to wield a claw hammer like a pro when framing? This trusty tool is more than just a nail remover; it’s your partner in creating strong, stable structures.
Whether you’re a DIY enthusiast or a budding builder, mastering the use of a claw hammer in framing can save you time and effort. Imagine confidently swinging the hammer, every strike precise and effective, knowing you’re building something that will last.
In this guide, you’ll discover simple yet powerful techniques to elevate your skills. Ready to transform your framing projects from ordinary to extraordinary? Let’s dive in and unlock the secrets of using a claw hammer with finesse!

Credit: www.thisoldhouse.com
Choosing The Right Claw Hammer
Using the right claw hammer makes framing easier and safer. The hammer you pick should fit the job and your comfort.
There are many types of claw hammers. Weight, handle material, and grip affect how well you work.
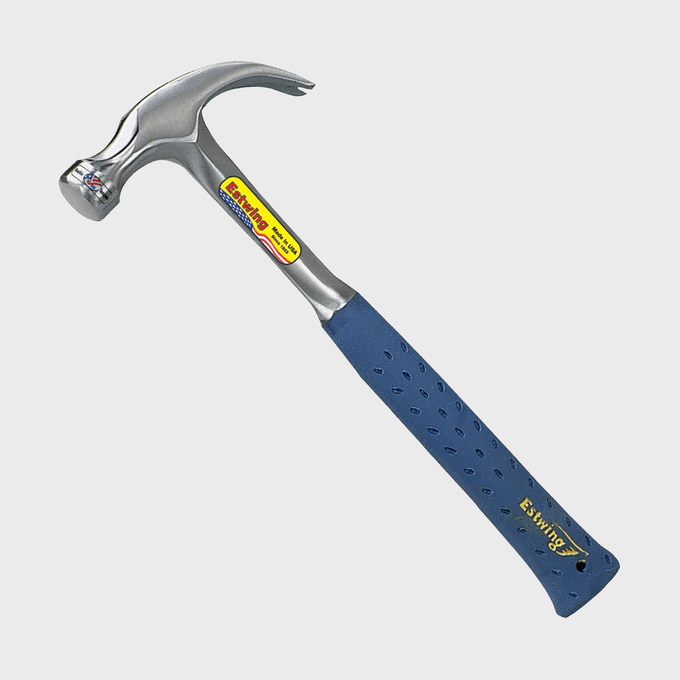
Types Of Claw Hammers
Claw hammers come in different shapes and sizes. Some have straight claws, others curved claws. Each type suits different tasks in framing.
- Curved Claw: Good for pulling nails and general framing.
- Straight Claw: Better for prying and demolition work.
- Milled Face: Has a textured face to grip nails better.
- Smooth Face: Leaves fewer marks on wood surfaces.
Hammer Weight And Handle Material
| Weight (ounces) | Best Use | Handle Material |
| 16 | General framing and finishing | Wood – absorbs shock well |
| 20 | Heavy framing and larger nails | Fiberglass – durable and lighter |
| 22+ | Heavy demolition and large nails | Steel – very strong but heavier |
Choose a hammer weight that matches your strength and job needs. Handle materials change how the hammer feels and lasts.
Grip And Comfort Considerations
A good grip helps prevent slips and reduces hand strain. Look for handles with cushioned grips or ergonomic shapes.
Comfort features to look for:
- Non-slip rubber grip
- Shock-absorbing handle
- Balanced weight distribution
- Proper handle length for your hand size
Credit: www.familyhandyman.com
Preparing For Framing Work
Using a claw hammer correctly makes framing easier and safer. Before starting, prepare your work area and tools well. This helps you work faster and avoid accidents.
Good preparation includes wearing safety gear, setting up your workspace, and choosing the right nails. Each step is important for a smooth framing process.
Safety Gear Essentials
Protecting yourself is the first priority. Wear the right gear to avoid injuries while using a claw hammer in framing.
- Safety glasses to protect your eyes from flying nails and wood chips
- Work gloves to prevent blisters and improve grip on the hammer
- Steel-toed boots to protect your feet from falling objects
- Hearing protection if you work in a noisy environment
- Long sleeves and pants to protect your skin from scratches
Worksite Setup
Arrange your workspace so you can move freely and keep tools within reach. A clean and organized site helps you work safely and efficiently.
| Setup Item | Purpose | Tip |
| Clear floor space | Reduce tripping hazards | Remove debris and wood scraps |
| Good lighting | See clearly while nailing | Use portable work lights if needed |
| Tool storage | Keep hammer and nails handy | Use a tool belt or nearby table |
| Material stacking | Organize lumber and nails | Stack wood flat and stable |
Selecting Nails For Framing
Choose nails that fit your framing project. Different nails work better for specific wood types and thicknesses.
- Use 16d nails (3.5 inches) for most framing tasks
- Choose galvanized nails to prevent rust outdoors
- Select ring-shank nails for extra holding power
- Match nail length to wood thickness for strong joints
- Avoid nails that are too short or too thin
Basic Hammering Techniques
Using a claw hammer in framing requires proper technique. Good hammering helps build strong structures and saves time.
Learn simple methods to grip, position nails, and drive them well. These basics make your work safer and neater.
Proper Grip And Stance
Hold the hammer near the end of the handle for better control and power. Keep your wrist relaxed to avoid strain.
Stand with feet shoulder-width apart. Face the workpiece squarely and keep your body balanced for steady swings.
Starting Nails With Accuracy
Place the nail tip on the wood where you want it. Hold the nail steady with your fingers close to the head.
- Tap the nail lightly to set it in place.
- Keep the hammer angle straight to avoid bending the nail.
- Use small, controlled hits until the nail stands on its own.
Driving Nails Efficiently
Swing the hammer with a smooth, controlled motion. Use your elbow and shoulder for power, not just your wrist.
| Tip | Reason |
| Keep hammer face flat on nail head | Prevents bending and drives nail straight |
| Use full arm swing | Delivers more force with less effort |
| Stop before hammer hits wood | Reduces damage to wood surface |
Using The Claw For Nail Removal
The claw hammer is not just for driving nails. It is also useful for removing nails safely. Using the claw correctly helps you take out nails without hurting the wood or yourself.
Nail removal can be tricky, especially with bent or stuck nails. This guide shows how to use the claw hammer to remove nails with care and ease.
Leveraging The Claw Correctly
Place the claw under the nail head carefully. Use the hammer handle as a lever. Pull back slowly to lift the nail out.
Make sure the claw grips the nail tightly. Keep your hand steady and use smooth, even force. This avoids slipping or breaking the nail.
Removing Bent Or Stubborn Nails
Bent or stuck nails need extra care. Wiggle the nail gently with the claw to loosen it. If the nail is very bent, use pliers to straighten it first.
Pull the nail out slowly in stages. If it resists, release and try again. For very stubborn nails, tapping the wood around the nail can help loosen it.
Minimizing Damage To Wood
Protect the wood by placing a small block under the hammer handle. This spreads the pressure and prevents dents.
- Use a thin piece of wood or scrap as a buffer
- Lift nails slowly to avoid splitting the wood
- Keep the claw close to the wood surface
Advanced Tips For Framing
Using a claw hammer in framing takes skill and care. It helps to work faster and make stronger frames. These tips will improve your speed and precision.
We will cover how to avoid common mistakes and keep your hammer in good shape. This way, your framing work will be better and easier.
Speed And Precision Improvement
Hold the hammer near the end of the handle for more power. Use your wrist for small taps and your arm for full swings. Aim nails carefully before hitting.
- Start nails with light taps to set them straight.
- Use the hammer’s face squarely on the nail head to avoid bending.
- Practice a smooth, controlled swing for better accuracy.
- Keep your eyes on the nail to improve aim.
- Use framing nails for strong joints and quick work.
Avoiding Common Mistakes
Many beginners bend nails or miss their mark. This wastes time and weakens frames. Avoid these simple errors to work better.
- Do not hit nails at an angle; always strike straight.
- Never use a dull hammer face; it slips easily.
- Do not hold nails too close to the head; use pliers if needed.
- Avoid overdriving nails that can split wood.
- Check wood alignment before nailing to prevent mistakes.
Maintaining Your Hammer
Keep your hammer clean and sharp for best results. A well-maintained hammer lasts longer and works safer.
| Maintenance Task | How to Do It |
| Clean Hammer Head | Wipe with a cloth after use to remove dirt. |
| Check Handle | Inspect for cracks or splinters; replace if damaged. |
| Sharpen Claw | Use a file to keep the claw edges sharp for nail removal. |
| Oil Moving Parts | Apply light oil if hammer has a joint or moving parts. |
| Store Properly | Keep in a dry place to prevent rust and wood damage. |

Credit: www.bangingtoolbox.com
Frequently Asked Questions
What Is The Best Claw Hammer For Framing?
A framing hammer should be heavy, typically 16 to 20 ounces. It must have a straight claw for prying and a comfortable handle for grip.
How Do You Hold A Claw Hammer Correctly?
Grip the hammer near the end of the handle. This provides maximum leverage and control when driving nails into wood.
How Do You Drive Nails Efficiently In Framing?
Position the nail tip where needed. Start with light taps, then increase force for full insertion without bending the nail.
Can A Claw Hammer Remove Nails Easily?
Yes, use the claw end to grip the nail head. Apply leverage by rocking the handle backward to pull the nail out.
Conclusion
Using a claw hammer in framing takes practice and care. Always hold the hammer firmly and strike nails straight. Use the claw to remove nails gently without damaging wood. Keep your workspace safe and clean to avoid accidents. With patience, your framing skills will improve steadily.
Remember, simple steps lead to strong, lasting frames. Keep practicing and stay safe on every project.