Have you ever made a woodworking cut that didn’t quite fit the way you planned? Maybe the depth was off, and that perfect piece you envisioned ended up not quite right.
It’s a common frustration, and it all boils down to one crucial step: measuring depth accurately. Whether you’re crafting a custom shelf or creating a detailed piece of furniture, getting the depth right is essential for a flawless finish. Imagine the satisfaction of perfectly aligned joints and snugly fitting parts.
You can achieve this with the right techniques and tools. In this guide, we’ll dive straight into the methods that will help you measure depth with precision, ensuring your woodworking projects always hit the mark. Ready to elevate your craftsmanship and avoid those pesky mistakes? Let’s get started!
:max_bytes(150000):strip_icc()/WD312908-2000-77708514b5524b17b4fb5e3654f1e93c.jpg)
Credit: www.woodmagazine.com
Choosing The Right Tools
Measuring depth accurately is key to good woodworking. Using the right tools helps you make precise cuts and avoid mistakes. Different tools suit different tasks and preferences.
This guide covers three common measuring tools. Learn how each works and when to use them for the best results.
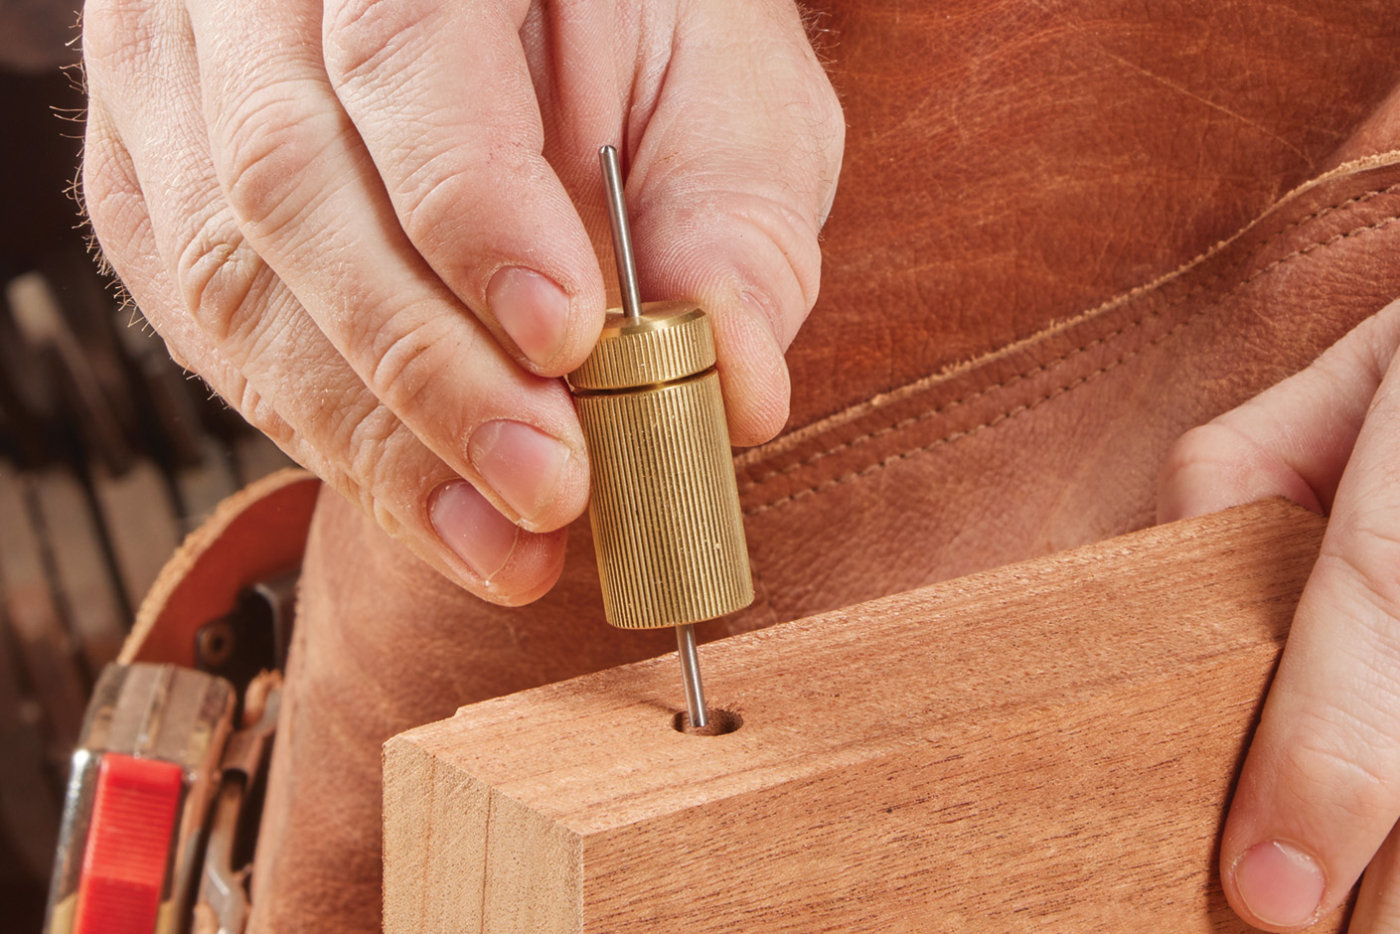
Calipers And Depth Gauges
Calipers and depth gauges are precise tools for measuring small depths. They slide into cuts or holes to give exact readings. These tools are great for detailed work like joinery or grooves.
- Calipers have two jaws that open and close to measure width or depth.
- Depth gauges have a flat base and a sliding rod to measure depth.
- Both tools can be manual or digital for easier reading.
- They offer measurements in millimeters or inches.
Rulers And Tape Measures
Rulers and tape measures are common and easy to use for depth measuring. They work well for rough cuts or larger pieces where high precision is less critical.
| Tool | Best Use | Limitations |
| Steel Ruler | Short depths and flat surfaces | Hard to measure deep holes |
| Tape Measure | Longer depths and large cuts | Less precise for small details |
| Wood Ruler | Quick checks and rough measuring | May wear down and lose accuracy |
Digital Measuring Devices
Digital devices combine technology with measuring tools. They give quick, clear readings and reduce errors. These tools are useful for both beginners and experts.
- Easy to read LCD display
- Can switch between metric and imperial units
- Store multiple measurements
- Some models have Bluetooth for data transfer
Credit: www.popularwoodworking.com
Preparing The Workpiece
Accurate depth measurement starts with a well-prepared workpiece. Proper preparation helps avoid mistakes and ensures clean cuts.
Focus on securing the wood firmly and marking clear reference points before cutting. These steps set the foundation for precise woodworking.
Securing The Wood
Keep the wood steady to prevent slipping or shifting during cutting. Use clamps or a vise to hold the workpiece firmly in place.
- Choose clamps suitable for the size and shape of the wood
- Tighten clamps enough to hold the wood without damaging it
- Check that the wood does not move when you apply pressure
- Place clamps so they do not block the path of your cutting tool
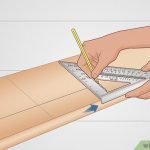
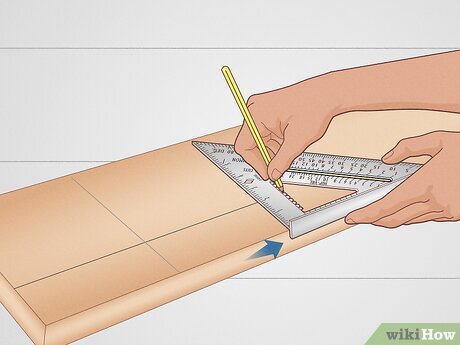
Marking Reference Points
Mark clear points on the wood to guide your depth measurement and cutting. Use a pencil or marking knife for accuracy.
| Mark Type | Use | Tools |
| Cut Line | Shows where to cut | Pencil, marking knife |
| Depth Line | Indicates cut depth | Ruler, marking gauge |
| Reference Points | Help align tools | Straight edge, square |
Measuring Techniques
Accurate depth measurement is key to clean woodworking cuts. It helps avoid mistakes and saves time.
Use the right tools and methods to get precise results every time you cut wood.
Using Depth Stops
Depth stops limit how deep your blade or bit can cut. They ensure you don’t cut too far into the wood.
- Attach the depth stop to your tool securely.
- Adjust it to the desired depth before cutting.
- Test the stop on scrap wood to confirm depth.
- Recheck the stop setting if you change blades or bits.
Setting Router And Saw Depths
Set the depth carefully on routers and saws to match your project needs. Small errors can ruin the cut.
| Tool | How to Set Depth | Tip |
| Router | Loosen the depth adjustment, lower or raise the bit, then tighten. | Use a depth gauge or ruler for accuracy. |
| Table Saw | Raise or lower the blade using the height adjustment wheel. | Measure from the table surface to blade tip. |
| Circular Saw | Adjust the base plate lever to set blade depth. | Check blade exposure before cutting. |
Double-checking Measurements
Always double-check your measurements before cutting wood. This prevents errors and waste.
- Measure the depth on your tool with a ruler or caliper.
- Compare the measurement to your project plan.
- Test the cut on scrap wood to confirm depth.
- Adjust if the test cut is too shallow or too deep.
- Recheck after any tool change or adjustment.
Common Measurement Mistakes
Measuring depth correctly is key for good woodworking cuts. Mistakes can cause poor fits and wasted materials.
This guide covers common errors to avoid. Fix these issues for better accuracy in your projects.
Parallax Errors
Parallax error happens when you look at the measuring scale from an angle. This makes the reading wrong.
Always look straight at the scale line to avoid this. Use a ruler with a clear mark or a digital tool.
Ignoring Tool Calibration
Tools that are not calibrated give wrong measurements. Check your tools often for accuracy.
| Tool | Calibration Check | Frequency |
| Caliper | Measure a known block | Before each use |
| Depth gauge | Check zero point | Weekly |
| Ruler | Compare with metal scale | Monthly |
Misreading Scales
Scales can be confusing. Woodworkers often mistake millimeters for inches or skip small marks.
- Know the unit your scale uses
- Use magnifiers for small marks
- Double-check measurements before cutting
- Mark the correct depth clearly on your wood
Tips For Precision
Measuring depth accurately is key to good woodworking cuts. Small mistakes can ruin your project.
Use careful techniques to get precise measurements every time. This guide shows helpful tips.
Consistent Measuring Habits
Always measure the same way to avoid errors. Use a clear method and stick to it.
Check your measurements twice before cutting wood. This saves time and materials.
- Use the same tool for all measurements
- Hold the measuring tape firmly and straight
- Write down measurements if needed
- Measure from a fixed edge or reference point
Using Jigs And Guides
Jigs and guides help keep cuts straight and deep to the right size. They reduce guesswork.
Make or buy jigs that fit your tools and projects. Use them to control depth and angle.
- Clamp jigs firmly to your workpiece
- Set guides to the exact depth needed
- Test cuts on scrap wood first
- Use depth stops on saws or routers
Regular Tool Maintenance
Keep your measuring and cutting tools clean and sharp. Worn tools cause mistakes.
Check your tools often for damage. Fix or replace parts that affect accuracy.
- Clean rulers and tape measures regularly
- Sharpen blades on saws and chisels
- Lubricate moving parts for smooth action
- Calibrate digital tools as instructed
Advanced Techniques
Measuring depth accurately is important for quality woodworking cuts. Using advanced tools helps get exact results.
These techniques reduce mistakes and save time. They work well for both beginners and experts.
Laser Measurement Tools
Laser tools use light to measure depth quickly and precisely. They give instant readings without contact.
These tools are easy to use on flat or angled surfaces. They help check cut depth before and after cutting.
- Hold the laser tool steady for best results
- Check the measurement in good lighting
- Use laser tools for both shallow and deep cuts
Digital Readouts
Digital readouts attach to machines and show exact depth on a screen. They update as you move the blade or bit.
This method reduces guesswork and lets you set the depth before cutting. It works well with routers and table saws.
- Calibrate the readout before use
- Double-check the zero setting
- Use the digital display to track small changes
Custom Depth Templates
Custom depth templates guide your cuts to exact depths. They are made from scrap wood or plastic pieces.
Templates fit around the tool or clamp to the workpiece. They help keep consistent depth across many cuts.
- Measure the needed depth carefully
- Cut the template to match the depth
- Secure the template to avoid slipping
- Check the cut depth with a ruler or gauge

Credit: www.wikihow.com
Frequently Asked Questions
How Do I Measure Depth Accurately For Woodworking Cuts?
Use a depth gauge or ruler to measure the cut depth precisely. Mark the measurement on your tool for consistent cuts. Always double-check before cutting to avoid mistakes.
What Tools Are Best For Measuring Cut Depth?
Depth gauges, calipers, and combination squares are ideal for accurate depth measurement. These tools provide precise readings and help maintain consistent cut depths.
How Can I Ensure Consistent Depth In Multiple Cuts?
Set a stop block on your saw or use a depth stop on your router. This ensures each cut maintains the same depth without re-measuring.
Why Is Measuring Depth Important In Woodworking?
Accurate depth measurement ensures joints fit perfectly and cuts are clean. It prevents material waste and improves the overall quality of your project.
Conclusion
Measuring depth accurately makes woodworking cuts safer and neater. Use the right tools and double-check your measurements every time. Small mistakes can cause big problems in your project. Take your time and work carefully to get the best results. With practice, measuring depth will become easier and more natural.
Keep these tips in mind for every cut you make. Your woodworking projects will look cleaner and fit better. Trust the process and enjoy building with confidence.