Are you looking to add precision and flair to your craft projects? A utility knife might be the secret tool you’ve been missing.
With its sharp edge and versatility, a utility knife can transform your crafting experience, making it easier to achieve clean cuts and intricate designs. Whether you’re working with paper, fabric, or other materials, mastering this tool can elevate your projects from amateur to professional.
Imagine the satisfaction of creating with confidence, knowing each cut will be perfect. Intrigued? Let’s dive in and discover how you can harness the power of a utility knife to take your crafts to the next level.
Choosing The Right Utility Knife
Using a utility knife for craft projects requires the right tool. Choosing the correct knife helps you cut safely and easily.
Many types of utility knives exist. Knowing the differences helps you pick the best one for your work.
Types Of Utility Knives
Utility knives come in several styles. Each style fits different cutting needs and comfort levels.
- Retractable knives: blades slide in and out for safety.
- Fixed blade knives: strong and steady for heavy cutting.
- Snap-off knives: blades break off in segments to keep sharp edges.
- Folding knives: compact and easy to carry.
Blade Selection Tips
Choosing the right blade depends on your material and project type. Sharp blades cut cleanly, reducing mistakes.
| Blade Type | Best For | Material |
|---|---|---|
| Standard sharp blade | Paper, cardboard | Steel |
| Hook blade | Cutting linoleum, roofing materials | Steel |
| Carpet blade | Thick fabrics, carpet | Curved steel |
| Fine-point blade | Detail cutting | Steel |
Safety Features To Look For
Safety features reduce risk of injury while cutting. Look for knives with these helpful parts.
- Blade lock: keeps the blade in place during use.
- Retractable blade: hides blade when not in use.
- Non-slip handle: improves grip and control.
- Blade cover or sheath: protects blade and fingers.

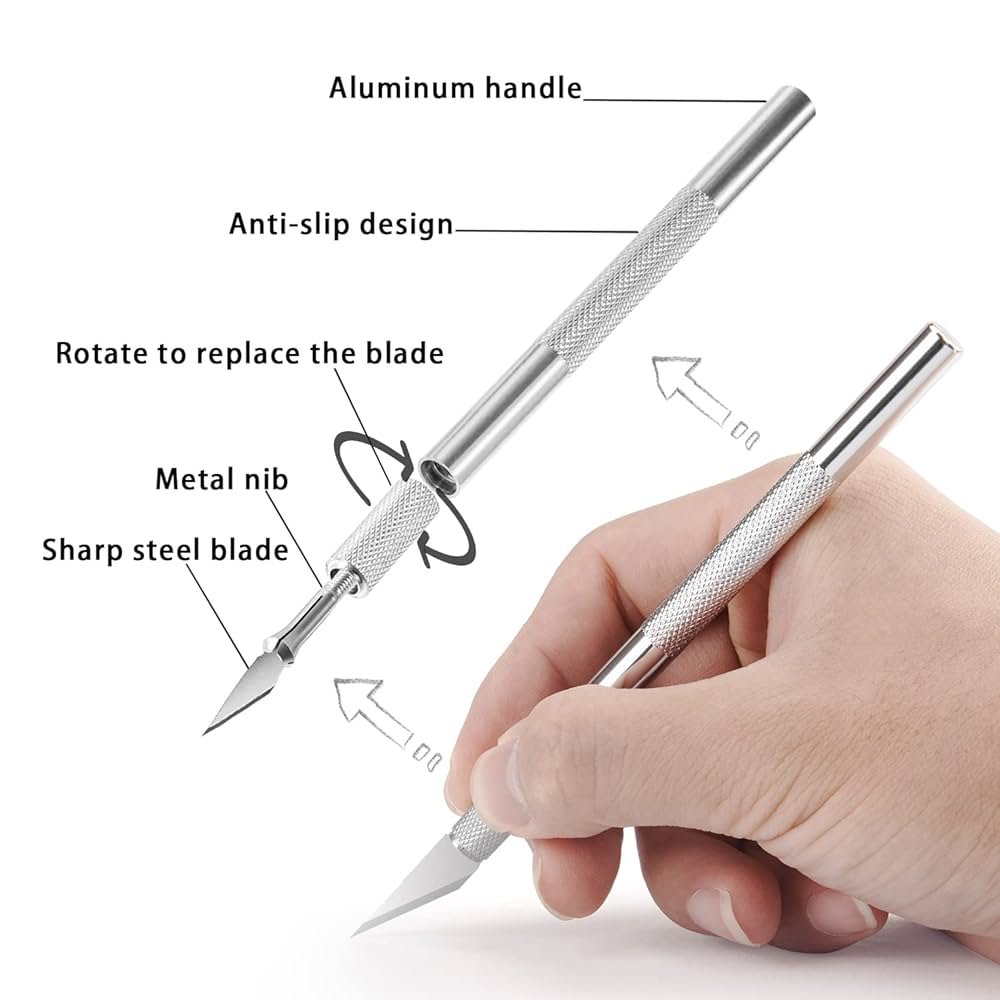
Credit: www.amazon.co.uk
Preparing For Your Craft Project
Using a utility knife can make many craft projects easier. You need to prepare well before you start cutting. This helps you work safely and get good results.
Getting ready means setting up your space, gathering tools, and checking your knife blade. These steps keep you safe and make your project smooth.
Setting Up A Safe Workspace
Choose a clean, flat surface to work on. Make sure the area has good light so you can see clearly. Keep your workspace free of clutter to avoid accidents.
Use a cutting mat or a piece of scrap wood under your project. This protects your table and keeps the knife blade sharp longer.
- Work on a stable table
- Ensure good lighting
- Clear away unnecessary items
- Use a cutting mat or protective surface
Essential Tools And Materials
Gather all the tools you need before starting. Besides the utility knife, you may need a ruler, pencil, and tape. Having materials ready helps you work faster and neater.
Choose a sharp utility knife blade for clean cuts. Use a metal ruler for straight lines. Keep scrap paper nearby to test cuts safely.
- Utility knife with sharp blade
- Metal ruler for guidance
- Pencil for marking
- Tape to hold materials
- Cutting mat or board
- Scrap paper for testing cuts
Blade Maintenance And Replacement
Check your blade before each project. A dull blade can slip and cause mistakes or injuries. Replace the blade if it feels blunt or does not cut smoothly.
Many utility knives have snap-off blades. Break off the dull section to reveal a new sharp edge. Dispose of old blade parts safely in a container.
- Inspect blade sharpness before use
- Replace or snap off dull blade parts
- Use blade covers when not in use
- Store blades safely in a container
Cutting Techniques For Precision
Using a utility knife correctly helps you make clean, exact cuts in craft projects. Precision is key to achieving the best results.
Learning the right techniques improves safety and control. This guide covers grip, scoring, and using guides for accuracy.
Proper Grip And Hand Positioning
Hold the utility knife firmly but not too tight. Place your index finger along the top of the handle to guide the blade smoothly.
- Keep your wrist straight to avoid slipping
- Use your other hand to steady the material
- Point the blade away from your body
- Apply gentle, steady pressure
Scoring Vs. Cutting Through
Scoring means making a shallow cut to mark the surface. Cutting through means slicing completely through the material.
| Technique | Purpose | Blade Action |
| Scoring | Mark fold lines or guides | Light, shallow passes |
| Cutting Through | Separate pieces | Firm, deep cuts |
Using A Straightedge For Accuracy
A straightedge helps guide the blade for clean, straight cuts. It also protects your fingers from the blade.
Tips for using a straightedge:
- Choose a metal or sturdy plastic edge
- Hold it firmly against the material
- Align the blade with the edge
- Make several light passes instead of one deep cut

Credit: www.amazon.com
Safety Practices While Cutting
Using a utility knife for craft projects needs care. Following safety rules helps prevent injuries.
Learn how to protect yourself and handle the knife properly. This keeps your work safe and smooth.
Protective Gear Recommendations
Wear the right gear before you start cutting. Gloves protect your hands from slips and cuts.
Safety glasses keep your eyes safe from flying debris. Use a cutting mat to protect surfaces.
- Cut-resistant gloves
- Safety glasses or goggles
- Cutting mat or board
Safe Cutting Angles
Hold the knife at a low angle to the cutting surface. This gives better control and cleaner cuts.
Cut away from your body to avoid accidents. Use slow and steady pressure when slicing.
- Keep blade at about 30 to 45 degrees
- Cut away from your hands and body
- Do not force the blade through material
Handling And Storing Blades
Change blades carefully to avoid cuts. Use the knife’s blade lock to keep it secure during use.
Store blades in a safe container. Keep knives out of reach of children when not in use.
- Always retract blade when not cutting
- Use blade covers or cases
- Dispose of old blades in a sharps container
Common Mistakes To Avoid
Using a utility knife for craft projects can be safe and effective. Many people make simple errors that cause accidents or poor results.
Knowing what to avoid helps you work better and stay safe. Read on for common mistakes to watch out for.
Overextending The Blade
One common error is pulling the blade out too far. This makes the blade weak and easy to break. It also increases the risk of cutting yourself.
- Keep the blade length as short as possible for your cut
- Only expose the blade enough to cut through the material
- Retract the blade fully when not in use
- Use the knife handle for better control
Ignoring Blade Sharpness
Dull blades cause more accidents than sharp ones. You have to press hard with a dull blade. This can make the blade slip or damage your work.
| Blade Condition | Effect on Cutting | Safety Risk |
| Sharp | Easy, clean cuts | Low |
| Dull | Requires force, rough cuts | High |
Unsafe Cutting Habits
Many accidents happen because of poor cutting habits. These include cutting towards your body or holding the material incorrectly.
Follow these safety tips:
- Always cut away from your body
- Use a stable surface to work on
- Hold the material firmly but keep fingers clear of the blade path
- Wear protective gloves if needed
- Take your time; do not rush cuts
Creative Project Ideas Using A Utility Knife
A utility knife is a handy tool for many craft projects. It cuts cleanly and precisely. You can use it on different materials for creative results.
This guide shows you how to use a utility knife for paper crafting, model making, and cutting leather or fabric. Try these ideas to improve your skills.
Paper Crafting
Use a utility knife to cut shapes and designs from paper. It works well for cards, decorations, and scrapbooking. A sharp blade helps make smooth edges.
- Create pop-up cards by cutting precise lines and folds.
- Make stencils for painting or drawing.
- Cut out intricate patterns for layered paper art.
- Trim photos or paper pieces with clean, straight edges.
Model Making
Model making needs detailed cuts and shaping. A utility knife helps you trim foam, plastic sheets, and balsa wood. It gives you control over small parts.
| Material | Use Tips |
| Foam | Cut slowly for smooth edges |
| Balsa Wood | Score first, then snap or cut fully |
| Plastic Sheets | Use a ruler to guide straight cuts |
Leather And Fabric Cutting
Cutting leather and fabric with a utility knife needs care. The knife can slice through thick or layered materials. Use a cutting mat to protect surfaces.
Tips for cutting leather and fabric:
- Keep the blade sharp for clean cuts.
- Cut in one smooth motion to avoid jagged edges.
- Use weights to hold the material steady.
- Mark your cutting lines with chalk or fabric pencil.
- Practice on scraps before working on the main piece.
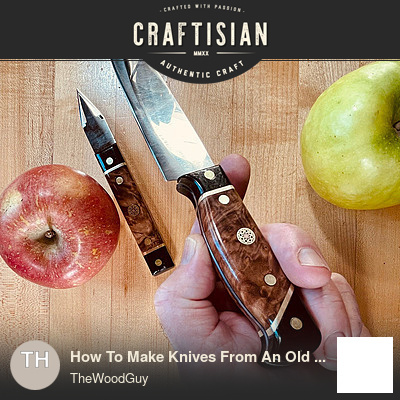
Credit: craftisian.com
Frequently Asked Questions
What Safety Tips Should I Follow Using A Utility Knife?
Always cut away from your body and keep fingers clear. Use a sharp blade to avoid slipping. Wear protective gloves and work on a stable surface for better control and safety.
How Do I Choose The Right Utility Knife Blade?
Select a blade type based on your project needs. For detailed cuts, use a fine-point blade. For heavy-duty cutting, choose a thicker, hooked, or serrated blade.
Can A Utility Knife Cut Different Craft Materials?
Yes, utility knives can cut paper, cardboard, foam, vinyl, and thin wood. Choose the right blade and apply steady pressure for clean cuts.
How Do I Maintain A Utility Knife Blade?
Replace dull blades promptly to ensure clean cuts and safety. Clean the blade after use to prevent rust and debris buildup.
Conclusion
Using a utility knife can make craft projects easier and neater. Always cut slowly and carefully to stay safe. Keep your blade sharp for the best results. Remember to use a cutting mat or board to protect surfaces. Practice different cutting techniques to improve your skills.
With patience and care, your crafts will look professional. Enjoy the process and create something special today.
