Ever tried hanging a picture frame, installing shelves, or laying tiles, only to step back and realize everything’s slightly off-kilter? You’re not alone.
Getting things perfectly aligned can be a headache. But what if there was a tool that could take the guesswork out of alignment tasks, saving you time and frustration? Enter the laser level. This precision tool is a game-changer, making alignment tasks a breeze.
Imagine effortlessly achieving the professional look you desire, every time. Intrigued? Let’s dive into how you can harness the power of a laser level to transform your DIY projects and home improvements into perfection.
Credit: medium.com
Choosing The Right Laser Level
Using a laser level makes alignment tasks easier and more accurate. Choosing the right one depends on your needs and the type of work.
This guide explains different types of laser levels, important features, and budget tips to help you pick the best tool.
Types Of Laser Levels
Laser levels come in various types. Each type suits different tasks and environments.
- Line Laser Levels:Project horizontal or vertical lines. Good for hanging pictures or shelves.
- Dot Laser Levels:Show a single point or multiple points. Useful for marking spots on walls.
- Rotary Laser Levels:Spin a laser beam 360 degrees. Ideal for large areas and outdoor projects.
- Laser Distance Measurers:Combine leveling with distance measuring. Helpful for quick measurements.
Features To Consider
| Feature | Benefit |
| Self-Leveling | Automatically adjusts for accuracy on uneven surfaces |
| Range | Distance the laser can project clearly |
| Visibility | Laser color and brightness affect how well you see the line |
| Mounting Options | Tripod or magnetic mounts improve stability and ease of use |
| Battery Life | Long battery life means less interruption during work |
Budget And Brand Options
Laser levels vary in price. It is important to balance cost with features you need.
- Set a budget before shopping to avoid overspending.
- Look for reliable brands known for quality and support.
- Read reviews to learn about durability and accuracy.
- Consider warranty and customer service options.
Setting Up Your Laser Level
Using a laser level correctly helps you make precise alignments. Setting it up right is the first step to accurate results.
This guide covers preparing your work area, mounting the laser level, and calibration tips.
Preparing The Work Area
Clear the area where you will use the laser level. Remove any objects that block the laser beam.
- Clean the surfaces you will work on
- Ensure good lighting to see the laser clearly
- Check for any obstacles in the laser path
- Mark reference points on walls or floors if needed
Mounting And Positioning
Place the laser level on a stable surface or tripod. Position it so the laser beam covers your work area.
| Mount Type | Use Case |
| Tripod | Uneven surfaces and height adjustment |
| Wall Mount | Fixed positions on walls |
| Flat Surface | Simple, level surfaces |
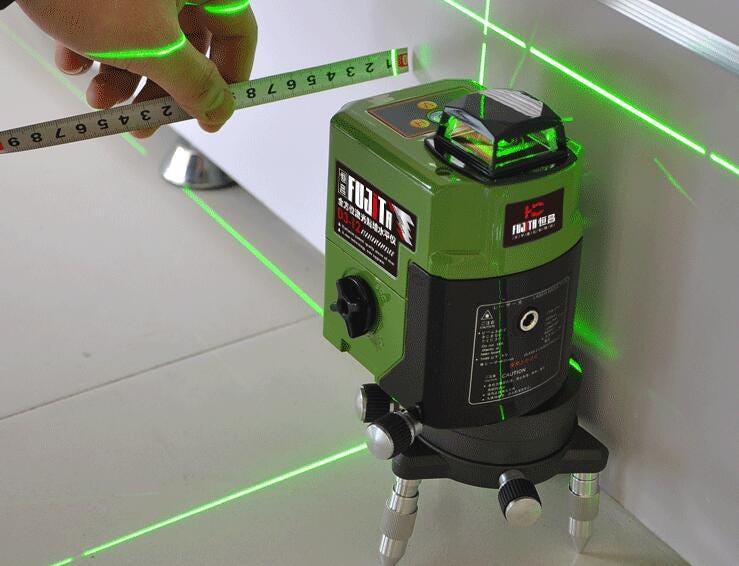
Calibration Tips
Check the laser level’s accuracy before starting. Calibrate if needed to avoid errors.
- Turn on the laser and let it stabilize
- Place a measuring tape along the laser line
- Measure distances at multiple points
- Adjust the laser level until measurements match your marks
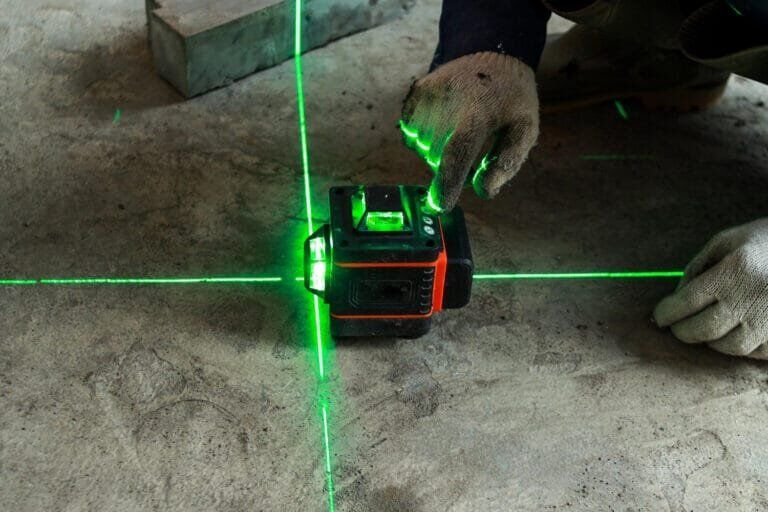
Basic Alignment Techniques
Using a laser level helps make alignment tasks easier and more accurate. It projects a clear laser line that guides your work.
This guide explains basic ways to use a laser level for common alignment needs.
Horizontal Alignment
Horizontal alignment means making sure items are level from side to side. The laser level creates a straight line across the surface.
Place the laser level on a stable surface or tripod. Turn it on and adjust it until the laser line is perfectly horizontal.
- Mark points along the laser line on your work surface
- Check that objects match these marks for level placement
- Use the laser line as a guide for shelves, tiles, or pictures
Vertical Alignment
Vertical alignment ensures objects are straight up and down. The laser level projects a vertical beam to help you.
Set up the laser level so it shines a line on the wall or surface you want to align. Adjust it until the beam is straight vertical.
- Use the vertical laser line to place door frames or window trim
- Check that posts or columns are perfectly straight
- Align tiles or panels along the vertical laser beam
Plumb Line Usage
A plumb line is a vertical reference from a fixed point. A laser level can create a plumb line quickly and accurately.
Position the laser level at the top of the area you want to check. The laser beam will mark the exact vertical line down to the floor.
- Use the plumb line to check walls for straightness
- Transfer points from floor to ceiling accurately
- Align studs, pipes, or wiring along the plumb line

Credit: huepar.com
Advanced Alignment Applications
Laser levels are useful for many alignment tasks beyond simple leveling. They help with complex layouts and accurate measurements.
Using advanced techniques, you can improve your work quality and speed. These methods apply in construction, landscaping, and other trades.
Multi-point Layouts
Multi-point layouts use a laser level to mark several points across a space. This helps create precise references for walls, tiles, or fixtures.
Set the laser to project a line or dot at each point. Mark the spots on your surface to guide your installation or construction work.
- Set the laser level at a central location
- Rotate the laser to project points on all walls or surfaces
- Mark the points clearly with a pencil or marker
- Use the marks to align materials or structures accurately
Slope And Grade Adjustments
Laser levels can measure slopes and grades for drainage or ramps. Adjust the laser angle to match the desired slope.
Use the laser’s slope function or manually tilt it. Check the laser line against your target grade to ensure correct alignment.
- Set the laser level on a stable surface
- Adjust the slope angle according to project needs
- Verify the laser line with a grade rod or measuring tool
- Mark the slope points for excavation or construction
Using Laser Levels Outdoors
Outdoor use may require a laser detector to see the beam in bright sunlight. Position the level on firm, even ground.
Check the battery and protect the laser from dust and weather. Use tripods or mounts for steady placement and better accuracy.
- Use a laser detector for bright light conditions
- Place the laser level on stable, flat ground
- Protect the device from rain and dust
- Secure the laser with a tripod or mount
Troubleshooting Common Issues
Using a laser level helps you align objects with accuracy. Sometimes, the tool may not work properly. This guide covers common problems and how to fix them.
Check each issue carefully to keep your projects on track. Fixing problems quickly saves time and effort.
Laser Not Leveling Correctly
If the laser line is not straight or tilts, the level might be off. Make sure the device is on a stable surface. Also, check for dirt or damage on the leveling mechanism.
- Place the laser level on a flat surface.
- Clean the laser and sensor areas.
- Check if the self-leveling feature is working.
- Reset the device according to the manual.
- Replace or repair if the problem continues.
Visibility Problems
Laser lines can be hard to see in bright light or on certain surfaces. Using the right laser color and accessories helps improve visibility.
| Problem | Solution |
| Bright sunlight | Use laser glasses or shade the area |
| Reflective surfaces | Adjust angle or cover surface |
| Dark or matte surfaces | Use a laser with higher brightness |
| Long distances | Use a laser detector or receiver |
Battery And Power Concerns
Low or dead batteries cause the laser to fail or flicker. Always check the power source before starting work.
Follow these tips to handle battery issues:
- Use fresh batteries or fully charge rechargeable ones.
- Carry spare batteries on site.
- Turn off the laser when not in use to save power.
- Clean battery contacts to ensure good connection.
- Replace batteries if the laser still malfunctions.

Credit: huepar.com
Safety Tips And Best Practices
Using a laser level helps with many alignment tasks. It is important to stay safe and use the tool correctly.
This guide covers key safety tips and best practices for using a laser level.
Protecting Your Eyes
Laser beams can harm your eyes if you look directly at them. Always be careful when handling a laser level.
Wear safety glasses if recommended. Avoid pointing the laser at people or reflective surfaces.
- Never stare directly into the laser beam
- Keep the laser away from your face and eyes
- Use protective eyewear if available
- Warn others nearby about the laser use
Securing The Device
Place the laser level on a stable surface or tripod. This helps prevent it from falling or moving during use.
Check that the device is tightly fixed before starting your alignment. This keeps your measurements accurate.
- Use a tripod or flat surface for the laser level
- Lock the device in place before use
- Keep the area clear to avoid bumps or knocks
- Store the laser level safely after use
Maintaining Accuracy Over Time
Regularly check the laser level to ensure it stays accurate. Dirt or damage can cause errors in alignment.
Clean the lens and store the device properly. Calibrate the laser level as needed following the manufacturer’s instructions.
- Clean the laser lens with a soft cloth
- Store the device in a protective case
- Calibrate the laser level regularly
- Inspect the device for damage before use
Frequently Asked Questions
What Is A Laser Level Used For In Alignment?
A laser level projects a straight line for precise alignment. It helps ensure accuracy in construction, carpentry, and DIY projects. Using it reduces errors and speeds up tasks like hanging pictures, installing tiles, or framing walls.
How Do You Set Up A Laser Level Correctly?
Place the laser level on a stable surface or tripod. Turn it on and adjust its position until the laser line is visible. Use the built-in bubble or self-leveling feature for accurate horizontal or vertical alignment.
Can A Laser Level Improve Diy Project Accuracy?
Yes, a laser level significantly enhances precision. It provides a clear reference line, preventing misalignment. This tool helps avoid costly mistakes and ensures professional-quality results in various home improvement tasks.
Are Laser Levels Suitable For Outdoor Alignment Tasks?
Many laser levels work outdoors, especially those with high brightness or pulse modes. Using a laser detector can improve visibility in bright sunlight. Always check the product specifications for outdoor use suitability.
Conclusion
Using a laser level makes alignment tasks easier and more accurate. It saves time and reduces mistakes on any project. Always follow the steps carefully for the best results. Practice helps you get comfortable with the tool. With patience and attention, your work will look neat and professional.
Keep your laser level clean and store it safely after use. Small efforts lead to better results every time. Try it yourself and see the difference in your projects.