When tackling home projects, precision is key, and nothing provides that better than a tape measure. Whether you’re hanging shelves or planning a garden layout, a tape measure is your trusty companion.
But are you using it to its full potential? Imagine the satisfaction of perfectly aligned pictures or a flawlessly measured space. With the right tips, your home projects can go from good to great. In this guide, you’ll discover simple yet effective ways to make the most out of your tape measure.
Ready to transform your DIY tasks with precision and ease? Keep reading to uncover techniques that will make your next project a success.
Credit: www.familyhandyman.com
Choosing The Right Tape Measure
Using a tape measure is important for many home projects. Picking the right tape measure makes your work easier and more accurate.
There are different tape measures. Each one fits different jobs. Knowing what to choose helps you get better results.
Types Of Tape Measures
Tape measures come in many styles. Some are for small projects, others for large jobs. Choose one that fits your needs.
- Standard tape measures with a metal blade for general use
- Cloth or fiberglass tapes for measuring curves or fabric
- Digital tape measures that show numbers on a screen
- Long tapes for big spaces like yards or walls
Length And Width Considerations
Length matters for your project size. Short tapes are good for small tasks. Long tapes work better for big areas.
Width affects how easy the tape is to read. Wider tapes are easier to see and harder to bend. Narrow tapes fit in tight spaces.
- Choose tape length based on the largest measurement you expect
- Pick a tape width that makes reading numbers simple
- Wide tapes last longer and stay straight
Material And Durability
Tape measure materials affect how long they last. Strong materials resist damage and wear. Pick one that fits your work style.
Look for tapes with sturdy cases and blades. Some have coatings to stop rust and scratches. This keeps measurements clear and easy.
- Metal blades are strong but may rust without coating
- Fiberglass tapes resist water and bending
- Plastic cases protect the tape and are light to carry
- Rubberized grips prevent slipping during use
Preparing For Accurate Measurements
Taking accurate measurements is key to successful home projects. Small mistakes can cause big problems later. Proper preparation helps you get the right results every time.
Before you start measuring, set up your workspace and tools carefully. This makes the process smoother and more precise.
Clearing The Measuring Area
Make sure the area where you measure is clean and free from clutter. Objects in the way can block your tape or give false readings.
- Remove loose items from the surface
- Check for dust or dirt that may affect tape grip
- Ensure the surface is flat and stable
- Clear enough space to fully extend the tape measure
Marking Starting Points
Start measuring from a clear, visible point. Marking this spot helps you avoid errors and makes it easy to check your work.
Use these tips to mark your starting points:
- Use a pencil or masking tape to mark edges
- Double-check that the mark is exactly where the tape starts
- Avoid soft or uneven surfaces for marking
- Keep the tape hook firmly against the starting edge
Avoiding Common Measurement Errors
Some mistakes happen often but are easy to prevent. Watch for these to keep your measurements accurate.
| Error | How to Avoid |
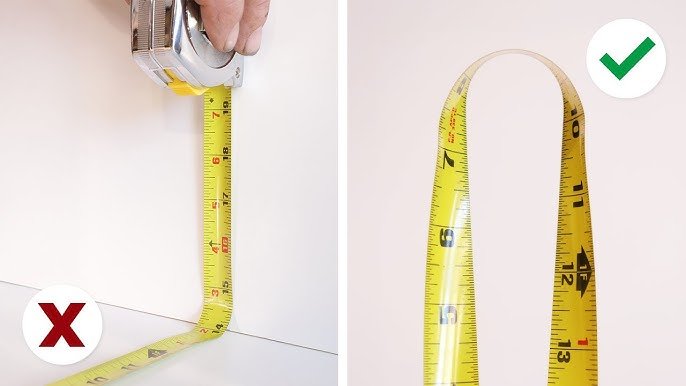
| Tape not straight | Pull tape tight and keep it level |
| Incorrect tape hook placement | Hook onto the edge, not past it |
| Reading from wrong side | Use the correct side of the tape |
| Parallax error | Look straight at the measurement mark |
| Not locking tape | Use tape lock to hold position |
Techniques For Precise Measuring
Using a tape measure correctly helps get exact results in home projects. Precise measuring saves time and materials. It also makes your work look professional.
Here are key techniques to improve your measuring skills. Learn how to use the tape hook, measure inside and outside dimensions, and read tape markings well.
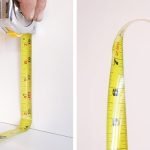
Using The Hook Correctly
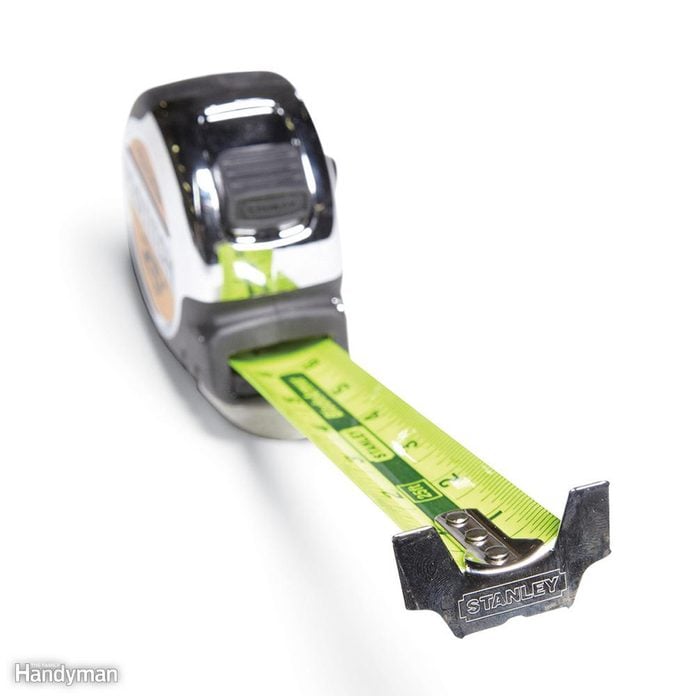
The metal hook at the tape’s end moves slightly. This helps measure both inside and outside edges. For outside measurements, hook it over the edge. For inside measurements, push the hook tight against the surface.
- Check if the hook moves freely.
- Use the hook’s thickness for exact measurements.
- Hold the tape steady to avoid slipping.
Measuring Inside And Outside Dimensions
Outside dimensions measure the length or width of an object’s surface. Inside dimensions measure spaces like the width of a window frame. Both require different tape use methods.
| Dimension Type | How to Measure | Hook Position |
| Outside | Hook over the edge, pull tape straight | Hook catches edge |
| Inside | Press hook against inside edge, stretch tape | Hook pressed flat |
Reading The Tape Markings
Tape measures have marks for inches, feet, and sometimes centimeters. The smallest marks show fractions of an inch. Understanding these helps you get exact numbers.
- Identify whole inch marks, usually longer lines.
- Count smaller marks for fractions like 1/8 or 1/16 inch.
- Use the markings to note both feet and inches.
- Double-check measurements by reading the tape twice.

Credit: tikweld.com
Tips For Measuring Different Materials
Using a tape measure correctly helps you get accurate results for home projects. Different materials need different measuring techniques.
Knowing how to measure each material type makes your work easier and more precise.
Measuring Wood And Drywall
Wood and drywall are flat and firm, so tape measures work well on them. Hold the tape tight to avoid bends or sagging.
Measure from the edge or corner for best accuracy. Mark your measurement clearly with a pencil.
- Place tape flat against the surface
- Keep tape straight and tight
- Use a square for right angles
- Double-check your marks before cutting
Measuring Metal And Pipes
Metal and pipes can be round or thin, making measuring tricky. Use the tape carefully to get the right length or diameter.
For round pipes, measure around the pipe to find the circumference or measure straight across for diameter.
- Hold the tape firmly on the edge
- Wrap tape all the way around for circumference
- For diameter, stretch tape straight across
- Use a cloth tape measure for curved surfaces
Handling Flexible Or Curved Surfaces
Flexible or curved surfaces need a gentle touch. Use a cloth or flexible tape to follow the shape closely.
Avoid stretching the tape too much. Keep it snug and follow the curve for accurate measuring.
- Use a flexible tape measure
- Keep tape snug but not stretched
- Measure along the curve smoothly
- Mark points clearly to avoid mistakes
Maintaining Your Tape Measure
A tape measure is a useful tool for many home projects. Taking care of it keeps it working well.
Proper maintenance helps your tape measure last longer and stay accurate.
Cleaning And Storage
Clean your tape measure after each use to remove dirt and dust. Use a soft cloth to wipe the blade.
Store your tape measure in a dry place. Avoid leaving it in damp or dirty areas.
- Wipe the tape blade with a dry cloth
- Remove any sticky residue gently
- Keep the tape retracted when not in use
- Store in a toolbox or drawer to protect it
Avoiding Tape Damage
Do not let the tape snap back quickly. It can damage the blade or the case.
Avoid bending or twisting the tape too much. This can cause it to lose its shape.
- Pull the tape out slowly and smoothly
- Do not use the tape to pry or lift heavy items
- Keep the tape away from sharp edges
- Check the lock mechanism regularly for proper function
When To Replace Your Tape
Replace your tape measure if the blade is bent or cracked. This can cause wrong measurements.
If the numbers are faded or hard to read, it is time for a new tape. Also, replace it if the lock stops working.
- Bent or cracked tape blade
- Faded or missing measurement markings
- Broken or loose case
- Lock mechanism failure

Credit: georgefurniture.com
Advanced Tricks For Home Projects
Using a tape measure goes beyond just taking simple lengths. You can apply advanced tricks to improve your home projects.
These methods help you work faster and get more accurate results with your measurements.
Using The Tape For Leveling
You can use a tape measure to check if surfaces are level without extra tools. Pull the tape tight across the area and look for gaps under the tape.
- Stretch the tape between two points on the surface.
- Check if the tape touches the surface evenly along its length.
- If there are gaps, the surface is not level.
- Adjust the surface until the tape lies flat.
Combining Tape Measure With Other Tools
Pair your tape measure with tools like a square or laser level for better accuracy. This helps you mark exact angles and straight lines.
| Tool | Purpose with Tape Measure |
| Carpenter’s Square | Mark perfect right angles on wood or walls |
| Laser Level | Check horizontal and vertical alignment over long distances |
| Chalk Line | Create straight guide lines between two points |
Estimating Dimensions Quickly
You can estimate room sizes or furniture fit by using quick tape measure tricks. This saves time before detailed measuring.
Try these tips to estimate dimensions fast:
- Use your arm span or hand width as a rough guide.
- Measure one side and double it for square rooms.
- Mark common furniture sizes on the tape for quick reference.
- Use the tape’s markings to divide spaces evenly.
Frequently Asked Questions
How Do I Read A Tape Measure Accurately?
To read a tape measure accurately, align the tape’s zero mark with your starting point. Read the measurement at the point you want to measure. Use the smallest markings for precision, typically 1/16th of an inch. Always keep the tape straight and taut for best results.
What Are Common Tape Measure Markings Explained?
Tape measures typically show inches, feet, and centimeters. Inch markings are divided into halves, quarters, eighths, and sixteenths. Feet are usually marked with a different color or number. Understanding these helps in precise measurements for any home project.
How Can I Avoid Tape Measure Errors?
To avoid errors, ensure the tape is flat and not twisted. Measure twice to confirm accuracy. Use the tape’s hook end properly; it compensates for its thickness. Avoid stretching the tape as it can distort measurements.
When Should I Use A Tape Measure Vs A Ruler?
Use a tape measure for longer or curved surfaces. A ruler is best for short, straight lines under 12 inches. Tape measures are flexible and ideal for most home projects involving larger dimensions.
Conclusion
Using a tape measure well saves time and avoids mistakes. Always hold it straight and read the numbers carefully. Double-check your measurements to be sure. Practice often to feel more confident. Simple tools bring great results when used right. Keep these tips in mind for your next home project.
Measuring with care makes your work look better and fit perfectly. Small steps lead to big improvements. Grab your tape measure and start measuring with ease.