Is your drill press gathering dust and grime, making it less efficient and more prone to errors? If so, you’re not alone.
Many people overlook the importance of keeping their drill presses clean, yet this simple task can drastically extend the life of your machine and improve its performance. Imagine your drill press operating smoothly, with precision cuts and no unexpected hiccups.
Sounds ideal, right? By learning how to clean your drill press properly, you can achieve this level of efficiency. Dive into our guide, and discover the simple yet effective steps to keep your drill press in top-notch condition, ensuring your projects are completed with ease and accuracy.

Credit: www.familyhandyman.com
Preparation Before Cleaning
Cleaning a drill press keeps it working well and safe. Preparing before cleaning helps avoid problems.
Proper preparation saves time and makes the cleaning process easier. It also protects you and the machine.
Gathering Necessary Tools
Collect all tools before starting to clean the drill press. This keeps the work smooth and quick.
- Soft cloths or rags for wiping dirt
- Brushes for hard-to-reach areas
- Vacuum cleaner or compressed air to remove dust
- Lubricants to oil moving parts
- Cleaning solution safe for metal surfaces
- Protective gloves to keep hands clean
Ensuring Safety Measures
Safety is important when cleaning a drill press. Wear safety gear to protect yourself from harm.
Keep the work area clean and clear. Avoid loose clothing or jewelry that may get caught in the machine.
- Wear safety goggles to protect eyes
- Use gloves to protect hands
- Keep hair tied back
- Remove jewelry and loose clothing
- Make sure the area is well-lit
Disconnecting Power Supply
Always disconnect the drill press from power before cleaning. This stops accidental starts and injuries.
Unplug the machine or switch off the main power. Verify the machine is completely off before you begin.
- Unplug the drill press from the wall socket
- Switch off the main power supply if needed
- Check that the machine does not turn on
- Inform others nearby about the cleaning

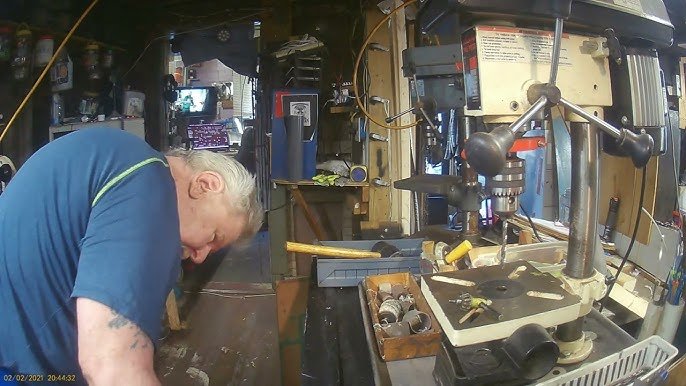
Credit: www.reddit.com
Removing Dust And Debris
Keeping your drill press clean is important for safety and accuracy. Dust and debris can build up on parts and cause problems. Regular cleaning helps your machine work well for a long time.
This guide explains easy ways to remove dust and debris from your drill press. Use the right tools and methods to clean every part thoroughly.
Using Compressed Air
Compressed air is a fast way to blow dust out of tight spaces. Use an air compressor or canned air to remove dirt from the drill press.
Hold the nozzle a few inches away to avoid damaging parts. Blow air along the spindle, table, and motor vents. This clears loose dust and debris quickly.
Brushing Hard-to-reach Areas
Some areas collect dust that compressed air cannot remove. Use brushes with soft or medium bristles to clean these spots gently.
- Use a small paintbrush for crevices around the chuck and spindle.
- A toothbrush works well on the feed handles and adjustment knobs.
- Brush the table grooves to remove stuck-on debris.
- Clean the base and motor housing to prevent dust buildup.
Brushing helps prevent dirt from causing wear or blocking moving parts.
Vacuuming Loose Particles
A vacuum cleaner can remove dust without spreading it into the air. Use a vacuum with a narrow nozzle for the best results.
| Area | Vacuum Tip |
| Table surface | Wide nozzle to cover area quickly |
| Spindle and chuck | Narrow nozzle for precise cleaning |
| Base and motor vents | Brush attachment to loosen dust |
| Feed handles | Small nozzle to reach small gaps |
Vacuuming keeps dust contained and helps maintain a clean work area around your drill press.
Cleaning The Table And Base
Cleaning the table and base of a drill press keeps it working well. Dirt and rust can cause problems.
Regular cleaning helps the drill press last longer and stay safe to use.
Wiping With Mild Detergent
Start by wiping the table and base with a cloth dipped in mild detergent and water. This removes dust and grease.
Use a soft cloth to avoid scratching metal surfaces. Dry the parts well after wiping to stop rust.
Removing Rust Spots
Use fine steel wool or sandpaper to gently scrub rust spots on the table and base. Do not use too much force.
After removing rust, clean the area again to clear all particles and dust.
- Wear gloves to protect your hands
- Work in a well-ventilated area
- Check all surfaces for hidden rust spots
Applying Protective Coating
Apply a thin layer of machine oil or protective spray to the cleaned table and base. This stops rust from returning.
Use a clean cloth to spread the coating evenly. Avoid excess oil that can attract dust and dirt.

Credit: www.reddit.com
Maintaining The Spindle And Chuck
Keeping your drill press spindle and chuck clean helps the machine work well. Dirt and rust can cause problems during drilling. Regular care extends the tool’s life.
This guide shows simple ways to clean and maintain the spindle and chuck. Follow these tips to keep your drill press running smoothly and safely.
Cleaning The Chuck Jaws
Remove the chuck from the spindle before cleaning. Use a brush to clear dust and metal chips from the jaws. Wipe with a cloth dampened with light oil to remove grime.
- Open the jaws fully to reach all areas.
- Use compressed air to blow out small particles.
- Apply a small amount of oil to prevent rust.
- Check that the jaws move smoothly after cleaning.
Lubricating Moving Parts
Lubricate the spindle and chuck regularly. This reduces friction and wear. Use machine oil or grease made for power tools.
| Part | Type of Lubricant | Frequency |
| Spindle | Light machine oil | Monthly |
| Chuck jaws | Thin oil | After cleaning |
| Chuck body | Grease | Every 3 months |
Checking For Wear And Tear
Inspect the spindle and chuck for damage. Look for cracks, rust, or loose parts. Replace worn components to keep safety and accuracy.
- Check spindle runout with a dial indicator.
- Test chuck grip by holding a drill bit and trying to pull it out.
- Look for any rust spots or corrosion.
- Tighten loose screws or bolts.
- Replace damaged jaws or spindle parts immediately.
Cleaning The Motor And Belts
Keeping your drill press motor and belts clean helps the machine run smoothly. Dirt and dust can cause damage over time. Regular cleaning saves you money and extends tool life.
This guide covers how to remove dust from the motor housing, clean the belts, and adjust belt tension properly.
Removing Dust From Motor Housing
Turn off and unplug the drill press before cleaning. Use a soft brush or compressed air to remove dust from the motor housing. Avoid letting dust enter the motor vents.
If needed, wipe the outside with a dry cloth. Do not use water or liquid cleaners as they can damage the motor.
Inspecting And Cleaning Belts
Check the belts for cracks, frays, or signs of wear. Dirty belts can slip and reduce performance. Clean them gently with a dry cloth or mild soap and water if very dirty.
- Look for any damage or thinning on the belt surface.
- Remove dirt and grease with a clean cloth.
- Do not soak belts in water; dry them completely before use.
- Replace belts if you see cracks or excessive wear.
Adjusting Belt Tension
Correct belt tension keeps the drill press running well. Too loose belts slip; too tight belts wear out faster. Use this table to help set the right tension.
| Tension Level | How It Feels | Effect on Drill Press |
| Loose | Press belt down 1 inch easily | Slips and loses power |
| Correct | Press belt down about 1/2 inch firmly | Runs smoothly and efficiently |
| Tight | Hard to press belt down | Wears belts and bearings fast |
Final Checks And Testing
Cleaning a drill press is important for its safety and performance. After cleaning, check all parts and test the machine.
These final steps make sure the drill press works well and lasts longer.
Reassembling Parts
Put all parts back carefully after cleaning. Make sure each part fits correctly in its place.
Check screws and bolts to see if they are tight. Loose parts can cause accidents or damage.
- Replace worn or broken parts before assembling
- Follow the manual for correct order
- Use proper tools to tighten screws
Testing Machine Functionality
Turn on the drill press to check if it runs smoothly. Listen for strange noises or vibrations.
Test the speed controls and the depth adjustment. Make sure the drill bit moves freely without sticking.
- Run the drill at different speeds
- Check the spindle for any wobble
- Ensure safety guards work properly
Scheduling Regular Maintenance
Set a regular schedule to clean and inspect your drill press. This keeps it in good condition and prevents problems.
Write down maintenance dates and what tasks you did. This helps you track the machine’s health over time.
- Clean and lubricate monthly or after heavy use
- Check belts and replace if worn
- Inspect electrical parts for safety
Frequently Asked Questions
How Often Should I Clean My Drill Press?
You should clean your drill press after every use. Regular cleaning prevents dust and debris buildup. This maintains machine efficiency and prolongs its lifespan.
What Tools Are Needed To Clean A Drill Press?
Use a brush, cloth, compressed air, and lubricant. These tools remove dust and keep parts moving smoothly. Avoid harsh chemicals that can damage components.
Can I Use Wd-40 To Clean Drill Presses?
WD-40 can remove rust and lubricate parts. However, use it sparingly and wipe off excess. It’s best for occasional cleaning, not regular maintenance.
How Do I Clean The Drill Press Table?
Wipe the table with a damp cloth to remove debris. Use a mild detergent for stubborn stains. Dry thoroughly to prevent rust formation.
Conclusion
Regular cleaning keeps your drill press working well. Dirt and dust can cause problems fast. Wipe down surfaces and remove debris after use. Check moving parts and oil them often. A clean drill press lasts longer and works better. Taking a few minutes to clean saves time and money later.
Keep your workspace safe and tidy too. Small steps make a big difference in machine care. Clean drills mean smooth, precise work every time. Simple habits protect your tools and improve results.