Have you ever marveled at the intricate designs etched into glass, wood, or metal and thought, “I wish I could do that”? With a rotary tool in your hands, you absolutely can.
Engraving with a rotary tool opens up a world of creativity, letting you transform ordinary items into personalized masterpieces. Whether you’re new to the craft or looking to refine your skills, understanding how to effectively use a rotary tool can make all the difference in your results.
Imagine the satisfaction of holding a piece you’ve engraved, knowing it’s a one-of-a-kind creation. Ready to unleash your artistic potential and create stunning designs? Dive into these tips and watch your creativity flourish.
Choosing The Right Rotary Tool
Using a rotary tool for engraving needs the right choice of tool. The correct rotary tool helps you work with precision and ease.
Picking the proper rotary tool depends on the material and design you want to create. This guide will help you choose well.
Types Of Rotary Tools
Rotary tools come in many shapes and sizes. Some are small and light, while others are bigger and more powerful.
You can find handheld rotary tools, cordless models, and ones with variable speed settings. Pick one that fits your work style.
- Handheld rotary tools offer good control for detailed work
- Cordless tools give more freedom of movement
- Tools with variable speeds adjust to different materials
Selecting Suitable Attachments
Attachments change how your rotary tool works. Choose bits and accessories that match your design needs.
For engraving, fine and pointed bits work best. You may also use sanding or polishing attachments to finish your work.
- Diamond bits are great for hard materials like glass and metal
- Carbide bits work well on wood and plastic
- Sanding drums smooth rough edges
- Polishing wheels add shine to your design
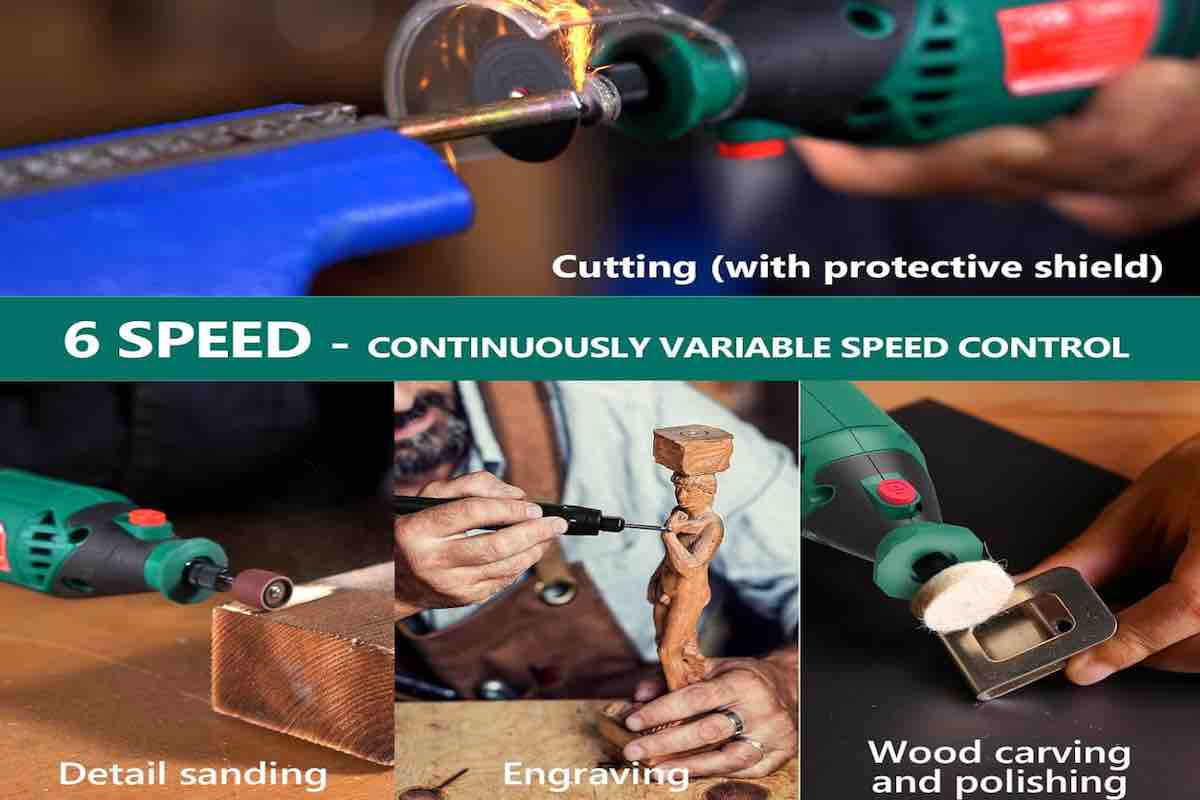
Power And Speed Considerations
Power and speed affect how well you can engrave. Too much speed can damage the material or tool.
Choose a rotary tool with adjustable speed settings. Lower speeds work better on soft materials, higher speeds on hard materials.
- Low speed (5,000-10,000 RPM) for soft materials like wood and plastic
- Medium speed (10,000-20,000 RPM) for general engraving tasks
- High speed (20,000+ RPM) for hard materials like metal and glass
- Check power rating for consistent performance

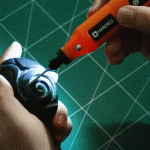
Credit: hardell.com
Preparing Your Workspace
Setting up your workspace before using a rotary tool helps you work safely and efficiently. A clean and organized area improves your focus and results.
Keep everything you need close by to avoid distractions. Proper preparation lowers risks and makes engraving easier.
Lighting And Ventilation
Good lighting helps you see details clearly while engraving. Use bright, focused lights to reduce shadows on your workpiece.
Ventilation keeps the air fresh and removes dust or fumes. Open a window or use a fan to improve airflow in your workspace.
Securing The Workpiece
Holding your workpiece steady is important for accurate engraving. Use clamps or a vise to keep it from moving.
- Choose the right clamp size for your material
- Make sure the piece is tight but not damaged
- Check stability before starting the tool
- Use a soft pad to avoid scratching delicate surfaces
Safety Precautions
| Safety Item | Purpose |
|---|---|
| Safety Glasses | Protect eyes from dust and debris |
| Dust Mask | Prevent inhaling fine particles |
| Ear Protection | Reduce noise from the rotary tool |
| Gloves | Guard hands from sharp edges and heat |
Always wear the right safety gear. Follow the tool’s instructions to avoid accidents and injuries.
Design Planning And Transfer
Engraving with a rotary tool needs careful design planning. Transferring the design clearly to your work surface is key. Good preparation helps you avoid mistakes and achieve clean results.
This guide covers sketching your design, using stencils and templates, and marking the surface before engraving. Follow these tips for better accuracy and ease.
Sketching Your Design
Start by drawing your design on paper. Use simple shapes and clear lines. Keep the size close to what you want on your project. This helps you see how the design will look.
- Use a pencil for easy changes
- Keep lines light and neat
- Check proportions before moving on
- Try different layouts if needed
Using Stencils And Templates
Stencils and templates give you a reusable design outline. They save time and keep your work consistent. You can buy them or make your own from paper or plastic sheets.
| Stencil Type | Material | Best For |
| Paper Stencil | Cardstock or tracing paper | Simple designs, one-time use |
| Plastic Template | Thin plastic sheets | Repeated use, detailed shapes |
| Adhesive Stencil | Vinyl or sticker material | Curved surfaces, precise edges |
Marking The Surface
Mark your design carefully on the surface before engraving. Use a pencil or erasable marker. Check that the marks are visible but light enough to remove after work.
- Place stencil or template firmly
- Trace edges slowly and clearly
- Double-check design placement
- Use tape to hold stencil if needed
- Erase any extra pencil lines after tracing
Engraving Techniques
Using a rotary tool for engraving lets you create detailed designs on many materials. Understanding basic techniques helps you get better results.
Practice and patience improve your control over the tool. Learn how to use speed, pressure, and depth to shape your design.
Controlling Speed And Pressure
Adjust the rotary tool’s speed based on the material you are engraving. Hard materials need slower speed to avoid damage.
Use light pressure to start. Pressing too hard can make mistakes or break the tool bit. Let the tool do the work.
- Slow speed for hard materials like metal or glass
- Higher speed for soft materials like wood or plastic
- Light pressure to avoid gouges and tool damage
- Steady hand movement for smooth lines
Creating Depth And Texture
Vary the depth of your engraving to add interest. Shallow cuts create fine details, while deeper cuts add boldness.
Use different bits to create textures. Rounded bits make smooth curves. Pointed bits give sharp lines and dots.
- Light passes for shallow, fine details
- Multiple passes to deepen cuts gradually
- Use various bits for different surface effects
- Try cross-hatching for textured patterns
Avoiding Common Mistakes
Do not rush your work. Moving too fast leads to uneven lines and poor control. Take your time for clean results.
Keep your workspace clean. Dust and debris can affect the tool’s performance and your design accuracy.
- Test your tool on scrap material first
- Wear safety glasses to protect your eyes
- Keep bits sharp and replace when worn
- Work in a well-lit area to see details clearly
Tool Maintenance And Care
Keeping your rotary tool clean and well-maintained helps it last longer. Proper care improves engraving results. Regular checks prevent damage and costly repairs.
Follow simple steps for cleaning, replacing parts, and storing your tool safely. This guide covers key tips to care for your rotary tool effectively.
Cleaning The Rotary Tool
Remove dust and debris after each use. Use a small brush to clean air vents. Wipe the tool with a dry cloth to keep it free from dirt. Avoid water or liquid cleaners to prevent damage.
Replacing Bits And Attachments
Change bits when they become dull or worn out. Use the correct size wrench to loosen and tighten bits. Store spare bits in a safe place to avoid losing them.
- Turn off and unplug the rotary tool.
- Press the shaft lock button to hold the bit.
- Use a wrench to loosen the collet nut.
- Remove the old bit carefully.
- Insert the new bit firmly and tighten the collet nut.
Storage Tips
| Storage Tip | Reason |
|---|---|
| Keep the tool in a dry case | Protects from moisture and dust |
| Store bits separately | Prevents loss and damage |
| Avoid extreme temperatures | Prevents motor and plastic damage |
| Unplug before storing | Ensures safety and saves power |
Credit: tendsupplies.com
Advanced Tips For Precision
Using a rotary tool for engraving requires steady hands and sharp focus. Precision can improve your designs greatly.
These tips help you control the tool better and create detailed, clean engravings on various surfaces.
Using Guides And Jigs
Guides and jigs keep your rotary tool steady and help maintain straight or curved lines. They reduce mistakes and speed up your work.
- Use a ruler or metal guide for straight lines.
- Clamp a jig to hold the workpiece firmly.
- Try circle or curve jigs for smooth round shapes.
- Use tape to mark the path on the surface before engraving.
Working With Different Materials
Each material reacts differently to a rotary tool. Adjust speed and pressure to avoid damage and get fine details.
| Material | Recommended Speed | Tip |
| Wood | Medium | Use light pressure to avoid splintering |
| Glass | Low | Use diamond bits for better grip |
| Metal | High | Keep tool moving to avoid heat build-up |
| Plastic | Low to medium | Test on scrap to prevent melting |
Enhancing Details
Small details make your engraving stand out. Use the right bits and take your time to get sharp lines and textures.
- Switch to fine or needle bits for tiny lines.
- Work slowly and in short bursts to avoid mistakes.
- Use magnifying glasses for better control.
- Clean the surface frequently to remove dust and debris.

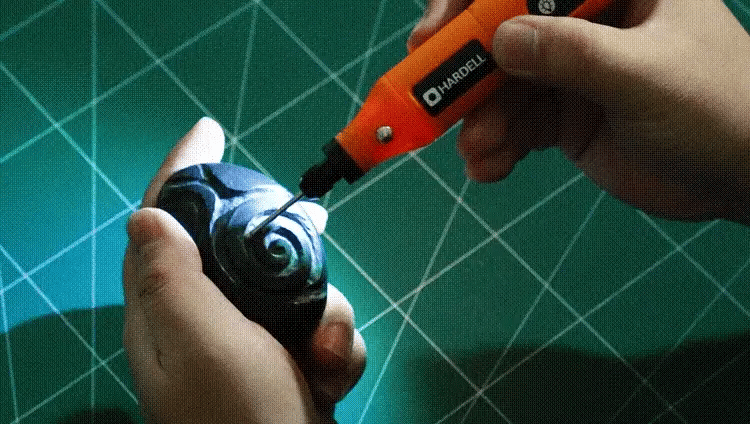
Credit: hardell.com
Frequently Asked Questions
What Materials Work Best With Rotary Tool Engraving?
Rotary tools can engrave wood, metal, glass, plastic, and stone. Softer materials are easier for beginners. Hard metals need specific bits and slower speeds for precision and control.
How Do I Choose The Right Rotary Tool Bits?
Select bits based on material and design detail. Diamond bits suit hard materials. Carbide bits work well on wood and soft metals. Use fine-tipped bits for detailed engraving.
What Safety Precautions Should I Follow When Engraving?
Always wear safety goggles and a dust mask. Work in a well-ventilated area. Secure your workpiece to avoid slipping. Keep fingers away from the spinning bit.
How Can I Improve Precision With A Rotary Tool?
Use a steady hand and slow speed settings. Practice on scrap material first. Employ clamps to stabilize the workpiece. Light, consistent pressure ensures clean, detailed lines.
Conclusion
Using a rotary tool for engraving takes patience and practice. Start with simple designs to build your confidence. Always wear safety gear to protect yourself. Keep your hand steady and move slowly for better results. Clean your tool regularly to keep it working well.
Try different bits to see what works best for your project. With time, your skills will improve, and your designs will look great. Enjoy the process and have fun creating unique engraved pieces.