
Are you ready to transform your woodworking skills and achieve flawless trim cuts with a table saw? Imagine the satisfaction of crafting precise, clean edges that make your projects look professional.
Whether you’re a seasoned woodworker or a DIY enthusiast, mastering the art of using a table saw for trim cutting can elevate your craftsmanship to new heights. This guide is designed with you in mind, offering simple, actionable insights to help you tackle your next project with confidence.
Dive in to discover tips and tricks that will not only enhance your skills but also save you time and effort. Don’t miss out on the chance to unlock the full potential of your table saw and create stunning trim pieces every time.
Credit: homenias.com
Choosing The Right Blade
Using the right blade on your table saw makes trim cutting easier and cleaner. The blade type and size affect how smooth the cut is. Keeping the blade sharp helps with safety and quality.
This guide covers blade types, sizes, tooth count, and blade maintenance for trim cutting tasks.
Blade Types For Trim Cutting
Different blades work best for different materials. For trim cutting, blades with many teeth give a fine finish. Carbide-tipped blades last longer and cut cleaner than steel blades.
- Crosscut blades: Designed to cut across the grain with many teeth.
- Combination blades: Can cut both wood and plywood with moderate teeth count.
- Plywood blades: Thin kerf blades made for smooth cuts on thin material.
Blade Size And Tooth Count
Blade size affects how deep you can cut. Most trim cutting uses 10 or 12-inch blades. Tooth count controls the smoothness of the cut. More teeth mean smoother cuts but slower feed rate.
| Blade Size | Common Tooth Counts | Use |
| 10 inches | 60 to 80 teeth | General trim cutting |
| 12 inches | 80 to 100 teeth | Finer trim and finish cuts |
| 8 inches | 40 to 60 teeth | Small trim and detailed work |
Maintaining Sharpness
A sharp blade cuts cleaner and is safer to use. Dull blades cause tear-out and need more force. Clean the blade and check it often to keep it sharp.
- Remove resin and pitch buildup after use.
- Use a blade sharpener or send it to a professional.
- Store blades in a dry place to prevent rust.

Credit: www.findbuytool.com
Setting Up The Table Saw
Setting up your table saw correctly is key to making clean trim cuts. It ensures your cuts are accurate and safe.
This guide covers how to adjust the blade, use the fence and miter gauge, and check safety features before cutting.
Adjusting Blade Height And Angle
Set the blade height so it is just above the thickness of the trim piece. This prevents tear-out and reduces kickback.
Check the blade angle if you need beveled cuts. Most table saws have an angle gauge to help you set the blade precisely.
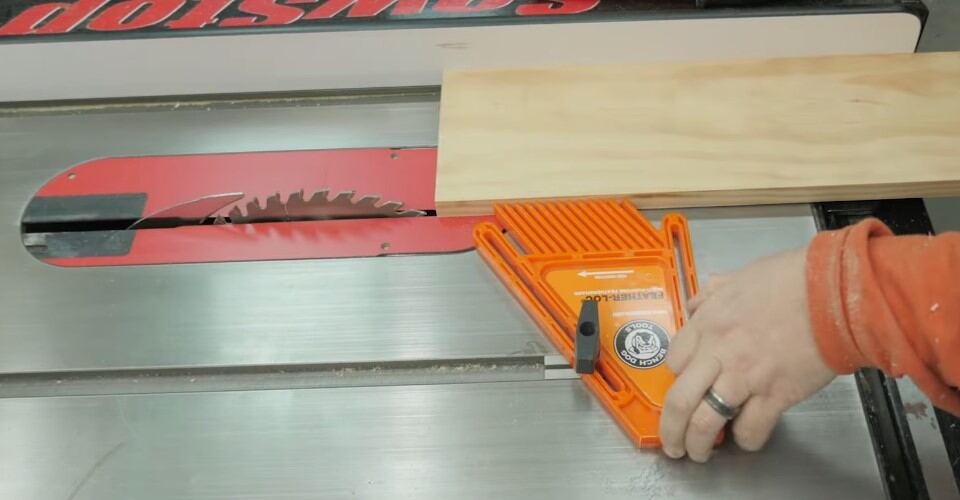
Using The Fence And Miter Gauge
The fence helps you make straight rip cuts. The miter gauge guides the wood for angled crosscuts.
- Lock the fence firmly in place before cutting.
- Use the miter gauge for crosscuts or angled trim pieces.
- Check that both tools move smoothly and hold the wood securely.
Ensuring Safety Features Are Active
Always confirm safety features are working before starting the saw. This protects you during use.
| Safety Feature | Purpose |
| Blade Guard | Prevents contact with the blade |
| Riving Knife | Stops the wood from pinching the blade |
| Anti-Kickback Pawls | Reduces the chance of wood kicking back |
| Emergency Stop | Allows quick power shutdown |
Techniques For Accurate Trim Cuts
Trim cutting with a table saw needs focus and care. Small mistakes can ruin the finish of your work. Using the right techniques helps you get clean and precise cuts every time.
This guide covers key steps to improve your trim cutting skills. You will learn how to measure and mark materials, position your workpiece, and feed the material smoothly.
Measuring And Marking Materials
Accurate measurements are the start of good trim cuts. Use a sharp pencil or marking knife for clear lines. Double-check your measurements before cutting.
- Use a reliable tape measure or ruler
- Mark the cut line on the face side of the material
- Check the mark with a square for straight lines
- Measure twice to avoid errors
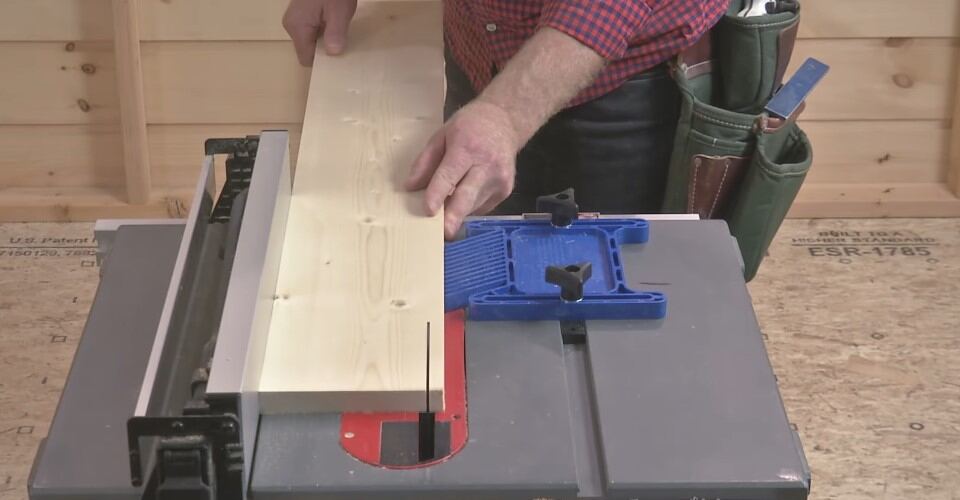
Proper Workpiece Positioning
Place the workpiece firmly against the fence. This keeps the cut straight and consistent. Make sure the material is flat on the table to avoid kickback or uneven cuts.
| Positioning Tip | Benefit |
|---|---|
| Hold workpiece tight to fence | Prevents shifting during cut |
| Keep workpiece flat on table | Ensures smooth blade contact |
| Use push sticks for small pieces | Keeps hands safe and steady |
Feeding The Material Smoothly
Feed the material at a steady pace. Do not rush or force the cut. Smooth feeding lets the blade cut cleanly and reduces tear-out on trim edges.
- Keep your hands steady and guide the workpiece gently
- Match the feed speed with the saw blade’s cutting speed
- Stop feeding if the saw struggles or binds
- Clear sawdust regularly for better visibility and performance
Credit: homenias.com
Safety Tips For Trim Cutting
Using a table saw for trim cutting can be risky without proper safety. You must follow rules to keep yourself safe. This guide shares key safety tips to help you work carefully.
Always prepare before cutting. Wear the right gear and use tools that protect your hands. Stay alert to avoid common dangers.
Wearing Protective Gear
Protective gear helps prevent injuries. Wear safety glasses to shield your eyes from flying wood chips. Use hearing protection to guard against loud noise. Gloves can protect your hands but should fit well and not catch on the blade.
- Safety glasses or goggles
- Hearing protection like earplugs or earmuffs
- Close-fitting gloves made for woodworking
- Dust mask to avoid breathing sawdust
Using Push Sticks And Featherboards
Push sticks and featherboards keep your hands away from the blade. They help you hold and guide small trim pieces safely. Use a push stick to move wood through the blade. A featherboard applies steady pressure, preventing kickbacks.
| Tool | Purpose | Benefit |
|---|---|---|
| Push Stick | Pushes wood through blade | Keeps hands at safe distance |
| Featherboard | Holds wood steady against fence | Prevents kickback and improves accuracy |
Avoiding Common Hazards
Many accidents happen from simple mistakes. Watch out for these common hazards. Always check your blade guard is in place. Never wear loose clothing that can catch on the saw. Keep your work area clean to avoid tripping or slipping.
- Use blade guards and anti-kickback devices
- Do not reach over the blade
- Stand to the side, not directly behind the blade
- Keep fingers at least 4 inches from the blade
- Turn off and unplug the saw before adjustments
Troubleshooting Common Issues
Using a table saw for trim cutting can sometimes cause problems. These issues affect the quality of your work.
Knowing how to fix common problems saves time and improves safety. Here are some common issues and solutions.
Dealing With Tear-out
Tear-out happens when wood splinters along the cut edge. This makes the trim look rough and uneven.
To reduce tear-out, use a sharp blade with many teeth. Cutting slowly and supporting the wood helps too.
- Use a fine-tooth blade designed for trim work
- Place painter’s tape along the cut line
- Cut with the good side facing down
- Make a shallow scoring cut before the full cut
- Support the wood firmly to avoid vibration
Fixing Uneven Cuts
Uneven cuts happen when the wood moves or the fence is not straight. This causes trim pieces to not fit well.
Check that the fence is locked tight and parallel to the blade. Use clamps or push sticks to keep wood steady.
- Confirm fence alignment with a square
- Lock the fence before cutting
- Use push sticks for better control
- Feed wood at a steady, even speed
- Avoid forcing the wood through the blade
Addressing Blade Drift
Blade drift occurs when the cut line shifts during the cut. The blade moves away from the fence or mark.
Blade drift happens from blade dullness or incorrect fence setup. Adjust the fence and check blade sharpness.
- Inspect and sharpen or replace the blade
- Ensure the fence is parallel to the blade
- Use a zero-clearance insert to reduce drift
- Keep the wood tight against the fence
- Make test cuts to check drift before final cuts
Maintenance For Optimal Performance
Keeping your table saw in good shape helps it work safely and well. Regular care can stop problems before they start.
Simple maintenance tasks keep your saw cutting smoothly and last longer. This guide covers key steps to maintain your table saw.
Cleaning The Table Saw
Dust and debris can build up on your table saw. Cleaning removes this build-up and prevents damage.
Use a brush or vacuum to clean the surface and inside parts. Wipe down with a dry cloth to keep it clear.
- Unplug the saw before cleaning
- Remove dust from the table surface
- Clear debris from the blade area
- Clean the motor vents carefully
Lubricating Moving Parts
Lubrication helps parts move smoothly and reduces wear. This keeps the saw running with less effort.
Use light machine oil on gears and bearings. Avoid over-lubricating, which can attract dust and dirt.
- Apply lubricant to the blade arbor
- Oil the height and angle adjustment mechanisms
- Keep the fence rails smooth by lubricating
Regular Blade Inspection
Check your blade often for damage or dullness. A sharp blade cuts cleaner and is safer to use.
Look for chipped teeth, rust, or bent parts. Replace or sharpen the blade if needed to keep good cutting performance.
- Inspect blade teeth for chips or breaks
- Check for rust or corrosion
- Make sure the blade is straight and true
- Replace dull or damaged blades promptly
Frequently Asked Questions
What Safety Precautions Are Essential When Using A Table Saw?
Always wear safety goggles and hearing protection. Keep hands clear of the blade. Use a push stick for small pieces. Ensure the blade guard is in place. Maintain a clean work area to prevent accidents.
How To Set The Table Saw Blade For Trim Cutting?
Adjust the blade height so it’s slightly higher than the trim thickness. Set the blade angle to 90 degrees for straight cuts. Use a square to verify blade alignment for accurate cuts.
What Type Of Blade Is Best For Trim Cutting?
A fine-tooth blade with 80 to 100 teeth is ideal. It produces clean, smooth cuts on delicate trim pieces. Avoid blades with fewer teeth to reduce splintering and tear-out.
Can I Use A Table Saw For Miter Trim Cuts?
Yes, by tilting the blade to the desired angle. Use the miter gauge to guide the trim. Always make test cuts on scrap wood before the final cut.
Conclusion
Using a table saw for trim cutting can be safe and easy. Always follow safety steps and use the right blade. Take your time to measure and cut carefully. Clean cuts make your work look neat and professional. Practice helps you gain confidence and better results.
Keep your saw in good shape for best performance. Enjoy creating trim pieces that fit perfectly every time. Small steps lead to great woodworking success.