
Imagine having a versatile tool in your toolbox that can handle a variety of tasks with precision and ease. That’s what a rotary tool offers, especially when it comes to sanding.
Whether you’re a seasoned DIY enthusiast or just starting, understanding how to effectively use a rotary tool for sanding can elevate your projects to a professional level. You might be wondering how such a small tool can make such a big difference.
Well, this guide is here to uncover the secrets and techniques that will transform your sanding experience. Get ready to discover how you can achieve smoother surfaces, save time, and unleash your creativity with just a few simple steps. Stay with us, and you’ll soon see why a rotary tool could become your new favorite tool for sanding.
Credit: www.familyhandyman.com
Choosing The Right Rotary Tool
Using a rotary tool for sanding can make your work easier and faster. Picking the right tool is important for good results.
This guide helps you choose the best rotary tool by explaining types, features, and accessories.
Types Of Rotary Tools
Rotary tools come in different types. Each type works better for certain tasks.
Some tools have variable speed while others have fixed speed. Corded and cordless models are also available.
- Corded Rotary Tools:Provide constant power and run longer without stopping.
- Cordless Rotary Tools:Offer flexibility and easy movement but need battery charging.
- Variable Speed Tools:Let you adjust the speed to fit different sanding jobs.
- Fixed Speed Tools:Have one speed setting and are simpler to use.
Key Features To Look For
Look for features that help you work safely and comfortably. These features affect how well the tool performs.
Good features include easy speed control, comfortable grip, and strong motor power.
- Speed Control:Allows you to change speed for different sanding needs.
- Ergonomic Design:Makes the tool comfortable to hold for long times.
- Power:Strong motors handle tough sanding tasks better.
- Durability:A sturdy build lasts longer and withstands heavy use.
- Safety Features:Includes things like spindle locks to change accessories safely.
Selecting Compatible Accessories
Accessories like sanding drums and discs must fit your rotary tool. Check compatibility before buying.
Using the right accessories improves sanding quality and prevents damage to the tool.
- Check the size and type of the accessory to match your tool’s collet size.
- Use accessories made for sanding to avoid poor results.
- Choose the right grit level for your sanding project.
- Replace worn accessories to keep sanding smooth and effective.

Credit: www.youtube.com
Essential Sanding Attachments
Rotary tools use different attachments for sanding. Each type fits a specific sanding task. Choosing the right attachment makes your work easier and cleaner.
This guide covers three main sanding attachments. Learn about sanding drums and bands, sanding discs, and detail sanding tips.
Sanding Drums And Bands
Sanding drums are drum-shaped attachments that hold sanding bands. They are good for sanding curves and rounded edges. The bands come in many grits for rough or fine sanding.
- Attach the drum securely to avoid slipping.
- Use coarse bands for heavy material removal.
- Switch to fine bands for smooth finishing.
- Replace worn bands to keep sanding effective.
Sanding Discs
Sanding discs fit on flat or rounded surfaces of a rotary tool. They work well for sanding large flat areas quickly. Discs come in different grit sizes and materials.
| Disc Type | Best Use | Grit Range |
| Aluminum Oxide | Wood and metal | 60 to 240 |
| Silicon Carbide | Plastic and glass | 80 to 320 |
| Ceramic | Hard metals | 60 to 120 |
Detail Sanding Tips
Detail sanding tips have small shapes for sanding tight spaces and fine details. They allow precise control for delicate work.
- Choose tips shaped like cones, points, or cylinders.
- Use fine grit tips for gentle smoothing.
- Apply light pressure to avoid damage.
- Keep the tip moving to prevent burns.
Preparing For Sanding
Using a rotary tool for sanding needs careful preparation. Good setup keeps you safe and gets better results.
Before you start, check your gear, workspace, and the material you want to sand.
Safety Gear And Precautions
Wear safety gear to protect yourself from dust and flying debris. Rotary tools spin fast and can cause injury.
- Use safety glasses to protect your eyes.
- Wear a dust mask to avoid breathing dust.
- Put on gloves to protect your hands.
- Work in a well-ventilated area.
- Keep hair and loose clothing away from the tool.
Workspace Setup
Set up your workspace before sanding. A clean, organized area helps you work better and safer.
- Clear the workspace of clutter.
- Use a sturdy table or workbench.
- Have good lighting to see your work clearly.
- Keep a container nearby for dust and debris.
- Make sure your power source is safe and accessible.
Material Inspection
Check the material you want to sand. Look for nails, screws, or hard spots that can damage the tool or cause injury.
Test the material’s hardness to pick the right sanding attachment. Softer materials need finer sanding bits.
- Remove any metal parts or staples.
- Look for cracks or weak spots.
- Choose sanding bits that fit the material type.
- Practice on a small area first.
Sanding Techniques
Using a rotary tool for sanding helps smooth surfaces quickly. It works well on wood, metal, and plastic.
To get good results, you need to use the right sanding motions and avoid common errors. This guide covers key techniques.
Basic Sanding Motions
Move the rotary tool in steady, even motions. Use light pressure to avoid damage. Keep the tool moving to prevent grooves.
- Use circular or back-and-forth strokes
- Keep a consistent speed on the tool
- Sand along the grain on wood surfaces
- Start with coarse grit and finish with fine grit
Contouring And Detail Work
For curves and small areas, use smaller sanding bits. Work slowly to keep the shape clean and smooth.
| Tool Bit | Best Use |
| Small sanding drum | Curves and edges |
| Fine sanding disc | Flat detailed areas |
| Pointed sanding tip | Intricate details |
Avoiding Common Mistakes
Many users press too hard or keep the tool in one spot. This causes uneven surfaces and tool wear.
- Do not press firmly; let the tool do the work
- Keep the sanding bit clean and replace if worn
- Wear safety glasses and a mask to protect yourself
- Test on scrap material before sanding your project
Speed And Pressure Tips
Using a rotary tool for sanding requires control over speed and pressure. These factors affect the finish and tool lifespan.
Adjusting speed and pressure correctly helps avoid damage and achieve smooth results.
Adjusting Tool Speed
Set the rotary tool speed based on the material you sand. Soft materials need slower speeds. Hard materials can handle faster speeds.
- Low speed for delicate surfaces
- Medium speed for general sanding
- High speed for tough or thick materials
Applying Proper Pressure
Use light pressure when sanding with a rotary tool. Heavy pressure can cause scratches and wear the tool faster.
| Pressure Level | Effect |
|---|---|
| Light | Even sanding, longer bit life |
| Medium | Faster material removal, risk of uneven surface |
| Heavy | Scratches, overheating, tool damage |
Managing Heat Build-up
Heat can build up if speed and pressure are too high. Stop sanding often to let the tool cool.
- Use lower speeds on heat-sensitive materials
- Apply light pressure to reduce friction
- Take breaks to avoid overheating
Maintaining Your Rotary Tool
Keeping your rotary tool in good shape helps it last longer. Regular care also ensures it works well every time.
Simple maintenance tasks after each use can prevent damage and save money on repairs.
Cleaning After Use
Clean your rotary tool after every job. Remove dust and debris to avoid buildup inside the tool.
- Unplug the tool before cleaning.
- Use a soft brush to clear dust from vents and attachments.
- Wipe the body with a dry cloth.
- Do not use water or liquid cleaners.
- Store the tool in a dry place.
Replacing Worn Attachments
Attachments wear out with use. Replace them to keep your tool safe and effective.
| Attachment Type | Signs to Replace |
| Sanding Drum | Worn or torn sanding surface |
| Cutting Wheel | Cracks or uneven edges |
| Grinding Stone | Rounded or chipped stone |
| Polishing Bit | Frayed or missing polishing material |
Troubleshooting Performance Issues
If your rotary tool is not working well, check these common problems and fixes.
- Tool won’t start:Check the power source and switch.
- Low speed or power:Clean vents and check for worn brushes.
- Unusual noise or vibration:Inspect attachments for damage and replace if needed.
- Overheating:Let the tool cool down and clean dust from the motor area.
Project Ideas With Rotary Tool Sanding
Rotary tools are great for sanding small areas and detailed spots. They help you finish projects with precision.
You can use rotary tool sanding for wood, metal, and old items. It saves time and makes surfaces smooth.
Woodworking Finishes
Rotary tools help smooth wood before finishing. They reach corners and edges easily.
Use different sanding bits to remove rough spots and prepare wood for paint or stain.
- Smooth edges of shelves and frames
- Remove old paint or varnish from furniture
- Refine small wooden carvings
- Prepare surfaces for clear coats
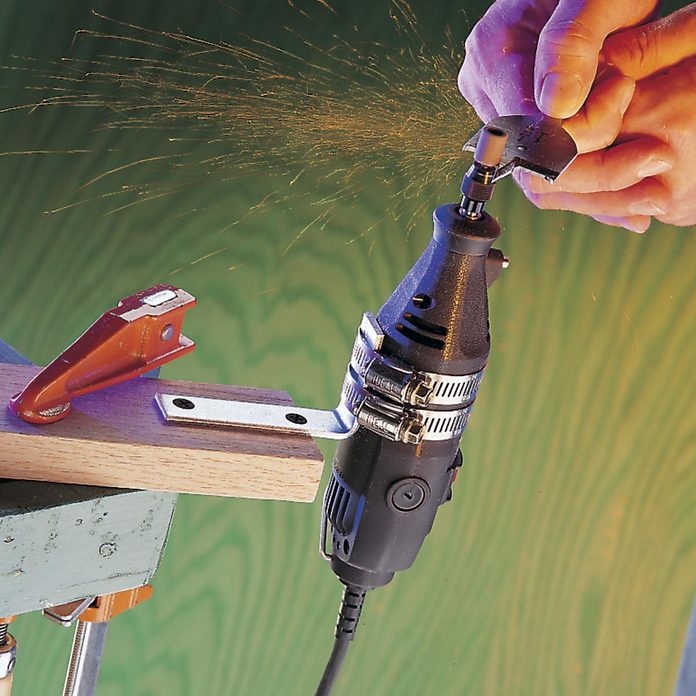
Metal Surface Prep
Rotary tool sanding removes rust and old paint from metal. It helps prepare metal for painting.
Use wire brush or sanding attachments to clean small metal parts or tight spaces.
- Clean rust from tools and hardware
- Smooth weld seams on metal projects
- Prepare metal surfaces for primer or paint
- Polish small metal components
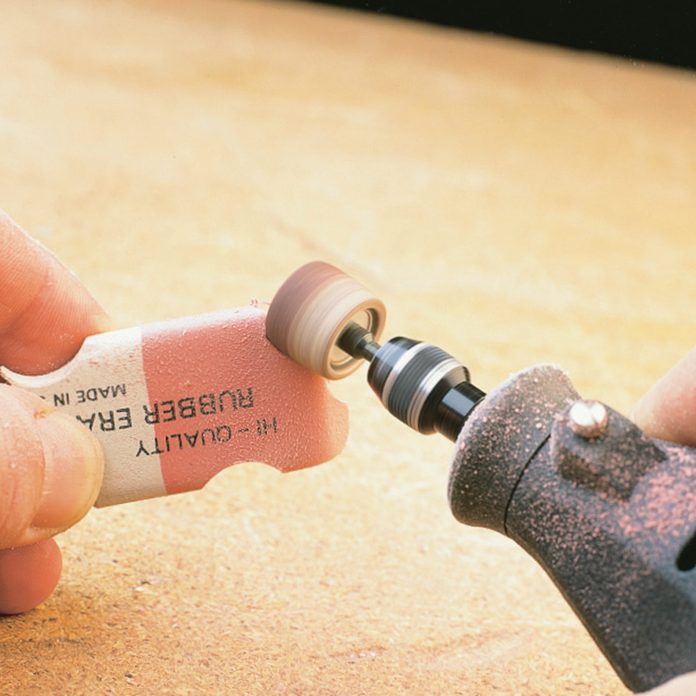
Restoring Old Items
Rotary tool sanding helps bring old items back to life. It removes dirt, paint, and corrosion.
Use fine sanding attachments to carefully clean antiques or vintage pieces without damage.
- Remove chipped paint from old furniture
- Clean metal parts on vintage tools
- Restore wooden frames and decorations
- Smooth damaged surfaces before refinishing
Credit: www.familyhandyman.com
Frequently Asked Questions
What Types Of Sanding Attachments Fit A Rotary Tool?
Rotary tools use sanding drums, discs, and flap wheels as sanding attachments. Choose based on project needs and surface type.
How Do I Control Speed For Sanding With A Rotary Tool?
Adjust speed settings according to material hardness. Lower speeds suit soft materials, higher speeds work for hard surfaces.
Can I Use A Rotary Tool For Fine Detail Sanding?
Yes, rotary tools excel at fine detail sanding with small attachments and precise control for delicate areas.
What Safety Gear Is Needed When Sanding With A Rotary Tool?
Wear safety goggles, a dust mask, and gloves to protect eyes, lungs, and hands from debris and dust.
Conclusion
Using a rotary tool for sanding can save time and effort. Choose the right attachment for your project. Keep a steady hand and apply light pressure. Always wear safety gear to protect your eyes and hands. Practice on scrap material to improve your skill.
Clean the tool after each use to keep it working well. With patience, you can achieve smooth and even surfaces. Enjoy the satisfaction of a job done right. Keep these tips in mind for your next sanding task.
