Are you tired of struggling to get your projects perfectly aligned? Whether you’re hanging shelves, installing tiles, or building a deck, even the smallest misalignment can cause big headaches.
Using a laser level can change everything for you. It’s a simple tool that brings precision and ease to your work, saving you time and frustration. You’ll discover how to use a laser level step-by-step, so your projects come out flawless every time.
Keep reading to unlock the secret to perfect alignment and take your DIY skills to the next level.
Choosing The Right Laser Level
Using a laser level can make your projects more accurate. Picking the right laser level helps you align things well.
There are many types and features to consider before buying one. This guide helps you choose the best laser level for your needs.
Types Of Laser Levels
Laser levels come in different types. Each type works best for certain jobs.
- Line Laser Levels:Show horizontal or vertical lines. Good for hanging pictures or shelves.
- Cross Line Laser Levels:Project both horizontal and vertical lines. Help with square layouts.
- Rotary Laser Levels:Spin 360 degrees to level large areas. Used in construction and landscaping.
- Dot Laser Levels:Show points instead of lines. Useful for transferring points from floor to ceiling.
Features To Consider
Look for features that fit your work style. The right features improve accuracy and ease of use.
- Accuracy:Check the level’s accuracy rating. Better accuracy means better results.
- Range:Consider how far the laser can reach. Longer range suits bigger projects.
- Self-Leveling:This feature saves time by automatically leveling the laser.
- Visibility:Bright lasers are easier to see in daylight or bright rooms.
- Mounting Options:Some have tripods or magnetic mounts for easier placement.
- Battery Life:Longer battery life means less downtime during work.
Budget Vs. Quality
Choose a laser level that fits your budget. Cheaper models may lack some features.
High-quality laser levels cost more but last longer and work better. Consider how often you will use it.
- Cheap models are okay for small home projects.
- Mid-range levels offer better accuracy and features.
- Professional models suit heavy use and large jobs.
- Think about repair and warranty options.

Credit: www.youtube.com
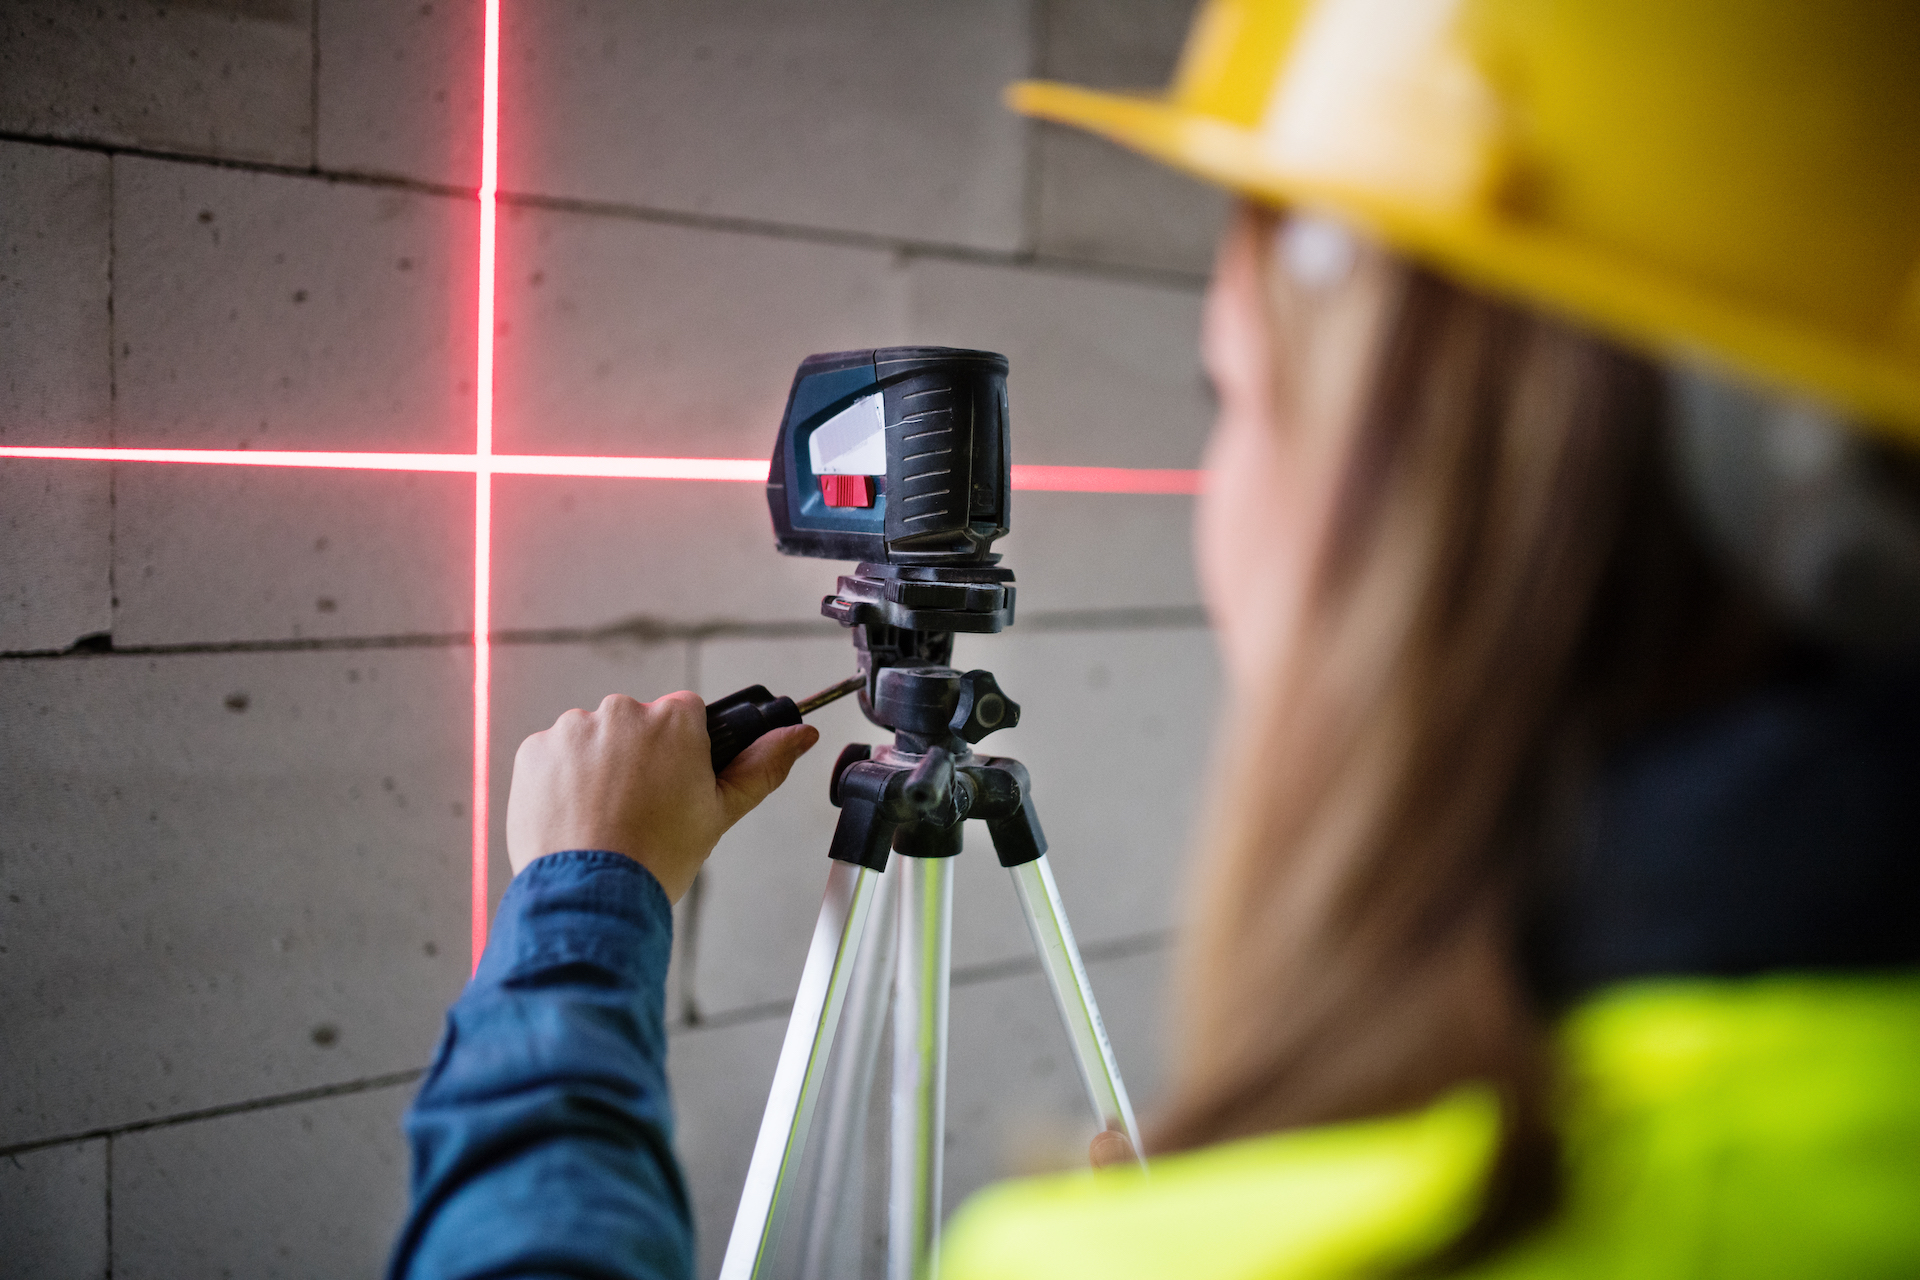
Setting Up Your Laser Level
Using a laser level helps you align objects straight and even. Setting it up right makes your project easier and more accurate.
This guide covers how to prepare your workspace, mount the device, and calibrate it properly.
Preparing The Workspace
Clear the area where you will work. Remove obstacles that may block the laser beam.
- Turn off bright lights that cause glare
- Close curtains to reduce sunlight
- Keep the floor clean and dry
- Mark reference points on walls or surfaces
Mounting And Positioning
Place the laser level on a stable surface or tripod. Make sure it does not move during use.
| Mount Type | Best Use | Tips |
| Tripod | Uneven floors | Adjust legs for balance |
| Wall Mount | Fixed points | Check screws are tight |
| Flat Surface | Quick setups | Use a non-slip pad |
Calibrating The Device
Check the laser level for accuracy before you start. Calibration ensures the beam is true and straight.
- Place the laser level on a flat surface
- Turn on the device and project the laser line
- Measure the height of the laser at two points, several feet apart
- Adjust the device until both measurements match
- Repeat the check after moving the device
Techniques For Accurate Alignment
Using a laser level helps make your projects more precise. It shows clear lines that guide your work.
Knowing how to use it well ensures your measurements and alignments are correct. This saves time and materials.
Using Horizontal And Vertical Lines
Set the laser level on a flat surface or mount it on a tripod. Turn it on to project horizontal or vertical lines.
Use the horizontal line to check if surfaces are level. Use the vertical line to align walls or posts straight up and down.
- Place the laser level at the desired height.
- Adjust the device until the line is steady.
- Mark points along the laser line for reference.
- Double-check with a spirit level if needed.
Aligning Multiple Points
To align many points, turn on the laser level and move it between locations. Mark each point where the laser hits.
| Tip | Reason |
|---|---|
| Use a tripod for stable positioning | Prevents shifting and keeps lines accurate |
| Mark points clearly with a pencil | Helps you find exact spots later |
| Check points from different angles | Ensures all points line up perfectly |
Working With Angled Surfaces
Adjust the laser level to match the angle of the surface. Some models let you tilt or rotate the laser beam.
Follow these steps for angled surfaces:
- Set the laser level near the surface.
- Use the tilt function to align the beam with the angle.
- Check that the laser line stays steady on the surface.
- Mark the line to guide your work.
Common Applications In Projects
Using a laser level helps keep projects straight and even. It saves time and improves accuracy.
This tool is useful in many tasks like installing cabinets, framing walls, and laying tiles. Below are common uses in these projects.
Installing Cabinets And Shelves
A laser level ensures that cabinets and shelves are perfectly aligned. It prevents slanting and uneven spacing.
- Mark cabinet heights accurately on walls
- Align multiple cabinets in a straight line
- Check shelf levels before fixing brackets
- Ensure doors and drawers close evenly
Framing And Drywall
Laser levels help frame walls straight and level. They also guide drywall installation for smooth surfaces.
| Task | Use of Laser Level |
| Wall Framing | Check studs are vertical and aligned |
| Drywall Hanging | Mark level lines for sheet placement |
| Ceiling Installation | Set height for ceiling joists |
Tiling And Flooring
Laser levels guide tile and floor layout for a neat finish. They help keep tiles straight and even.
- Create straight reference lines for tile rows
- Check floor slope to avoid water pooling
- Align tiles evenly across large areas
- Set height for raised flooring systems
Troubleshooting And Maintenance
Using a laser level helps keep your project aligned. Sometimes, the laser can show wrong lines. Proper care keeps the tool working well.
Check your laser level often. Fix small problems before they get bigger. Clean and store it properly to make it last longer.
Fixing Misalignment Issues
If the laser line is off, first check the tool’s setup. Make sure it is on a flat, stable surface. Even slight tilting can cause errors.
Look for loose parts or screws. Tighten any that are loose. Reset the laser level and test it again.
- Place laser level on flat ground
- Tighten loose screws and mounts
- Reset tool to factory settings if possible
- Test laser on a known straight edge
Cleaning And Storage Tips
Keep the laser lens clean for bright, clear lines. Use a soft cloth to wipe the lens gently. Avoid harsh chemicals.
Store the laser level in its case when not in use. Keep it in a dry place away from dust and moisture. This protects the tool from damage.
- Wipe lens with soft, dry cloth
- Use lens cleaner if needed, avoid sprays
- Store in protective case
- Keep away from direct sunlight and moisture
When To Replace Batteries Or Parts
Check the battery level before starting your project. Weak batteries cause dim or flickering laser lines. Replace batteries if the light fades.
Parts like mounts or buttons may wear out over time. Replace broken or worn parts to keep the tool working well and safe.
- Replace batteries if laser dims or flickers
- Use recommended battery type for your model
- Replace damaged mounts or clips
- Fix or replace broken buttons and switches
Credit: myconstructiontechnology.com
Safety Tips And Best Practices
Using a laser level helps you align things quickly and accurately. Safety is important when using this tool. Follow these tips to stay safe and get the best results.
Keep your work area organized and be careful with the laser beam. This guide covers how to protect your eyes, avoid trip hazards, and set up your laser level safely.
Protecting Your Eyes
Laser beams can hurt your eyes if you look directly into them. Always avoid staring into the laser beam or pointing it at others. Use laser safety glasses if available.
Turn off the laser when you do not need it. This keeps the beam from shining in unwanted places and reduces eye risks.
- Never look directly into the laser beam
- Wear laser safety glasses if possible
- Keep the laser turned off when not in use
- Do not point the laser at people or animals
Avoiding Trip Hazards
Laser levels often need power cords or tripods. Keep cords and tools tidy to prevent falls. Watch your surroundings and keep your workspace clear.
Mark cords or use tape to keep them flat on the ground. This helps others see and avoid them. Good lighting also helps to spot hazards.
- Keep power cords organized and out of walkways
- Use tape to secure cords to the floor
- Clear the area of clutter and tools
- Ensure good lighting in the workspace
Ensuring Stable Setup
Set your laser level on a stable surface or tripod. Check that the tripod legs are locked and the tool does not wobble. A steady setup gives accurate lines.
Place the laser away from places where it might get bumped. Make sure the surface is flat and strong enough to hold the device safely.
- Use a sturdy tripod or flat surface
- Lock tripod legs securely
- Check that the laser level is steady before use
- Place the laser away from traffic or work paths

Credit: huepar.com
Frequently Asked Questions
What Is A Laser Level Used For?
A laser level projects a straight line onto a surface. It helps ensure precise alignment in construction and DIY projects. Common uses include setting tiles, aligning cabinets, and installing picture frames. Its accuracy reduces human error and enhances productivity in various tasks.
How Do You Set Up A Laser Level?
To set up a laser level, first ensure a stable surface. Mount it on a tripod or flat surface. Turn it on and adjust until the laser beam is level. Use the bubble level or auto-leveling feature to ensure accuracy.
Always double-check alignment before proceeding.
Can A Laser Level Work Outside?
Yes, a laser level can work outside. Choose a laser level with a high visibility beam for outdoor use. Consider models with a green beam, as they’re more visible in daylight. Use a laser detector for increased accuracy over long distances.
Ensure the device is weather-resistant.
How Do You Maintain A Laser Level?
Maintaining a laser level involves regular cleaning and calibration. Wipe the lens with a soft cloth to prevent dust buildup. Store it in its case to avoid damage. Periodically check for calibration accuracy. Follow the manufacturer’s guidelines for specific maintenance instructions to ensure longevity.
Conclusion
Using a laser level makes alignment tasks easier and more precise. It saves time and reduces mistakes on any project. Always set the laser level on a stable surface for best results. Check the bubble or digital display to confirm accuracy.
Small steps lead to better outcomes. Practice often to feel confident with the tool. Clear lines guide your work and keep everything straight. This tool helps both beginners and experienced users achieve neat finishes. Keep your laser level clean and store it carefully after use.
Simple tools, smart use.