Are you ready to tackle your next DIY project with confidence? Using a claw hammer might seem simple, but doing it the right way can save you time, effort, and even prevent injuries.
Imagine driving nails smoothly, pulling them out without damage, and finishing your work with a professional touch. You’ll discover easy-to-follow tips that make using a claw hammer safer and more effective. Keep reading to master your tool and get the job done like a pro!
Choosing The Right Claw Hammer
Choosing the right claw hammer helps you work safer and faster. A proper hammer fits your hand and matches your tasks.
Learn about different types, weights, and handle materials. These details guide you to the best hammer choice.
Types Of Claw Hammers
There are many claw hammer types. Each suits different jobs like framing, finishing, or general use.
- Curved Claw:Good for pulling nails and light carpentry.
- Straight Claw:Best for demolition and prying.
- Rip Claw:Designed for heavy-duty tasks and removing wood.
Selecting The Appropriate Weight
Hammer weight affects control and power. Light hammers are easier to swing. Heavy ones drive nails faster.
| Weight | Best Use |
| 8 to 12 ounces | Small nails, finishing work |
| 16 ounces | General household tasks |
| 20+ ounces | Framing and heavy carpentry |
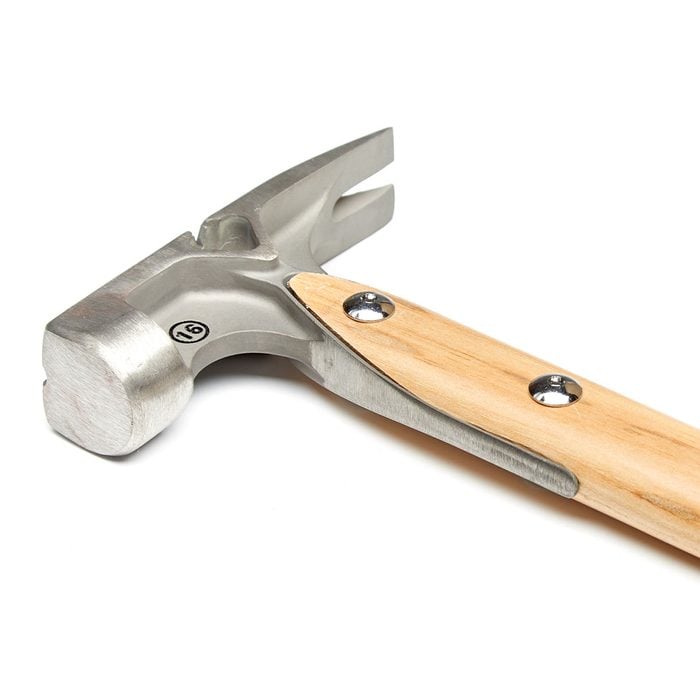
Handle Materials And Grip
Handle material affects comfort and shock absorption. Choose what feels best in your hand.
- Wood:Classic look, good shock absorption, may break under heavy use.
- Fiberglass:Durable and absorbs shock well, resists weather.
- Steel:Very strong but can transfer more shock to your hand.
- Grip Types:Rubber grips reduce slipping and improve comfort.
Credit: www.familyhandyman.com
Proper Hammer Grip And Stance
Using a claw hammer correctly helps you work safely and efficiently. Good grip and stance reduce the risk of injury.
This guide covers how to hold the hammer, position your body, and keep balance.
Holding The Hammer Correctly
Hold the hammer near the end of the handle for better power. Your grip should be firm but not too tight.
- Wrap your fingers around the handle with your thumb on top.
- Keep your wrist straight to avoid strain.
- Use your forearm to swing, not just your wrist.
- Adjust your grip for small or precise tasks.
Positioning Your Body For Control
Stand facing your work with feet shoulder-width apart. Keep your shoulders relaxed and elbows close to your body.
Body Position Tips:
- Keep your eyes on the nail or target area.
- Lean slightly forward to maintain control.
- Use a smooth, controlled swing for accuracy.
Maintaining Balance And Stability
Good balance helps you hit nails straight and avoid slips. Distribute your weight evenly on both feet.
| Balance Tip | How to Do It |
| Foot Placement | Keep feet flat and shoulder-width apart |
| Knees | Slightly bent to absorb shock |
| Core | Engage core muscles for stability |
| Breathing | Inhale before swing, exhale during impact |
Effective Hammering Techniques
Using a claw hammer properly makes your work easier and safer. Good techniques help you drive nails without bending or missing.
Learn how to start nails lightly, control your swings, and avoid common mistakes. These tips improve your hammering skills quickly.
Starting Nails With Light Taps
Begin by holding the nail steady with your fingers. Tap the nail head lightly to set it in place. This keeps the nail from bending or slipping.
Use soft, gentle hits at first. Once the nail stands firm, you can stop holding it and prepare to drive it deeper.
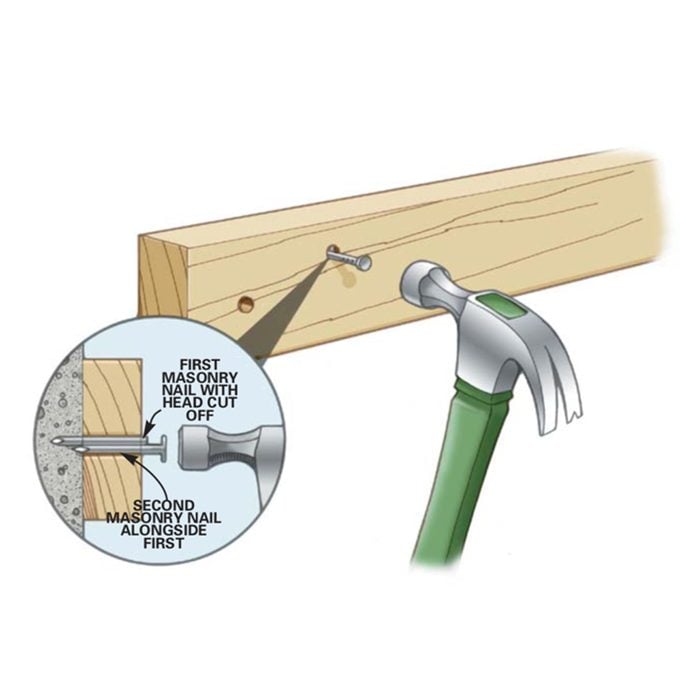
Driving Nails With Controlled Swings
Use smooth, controlled swings to drive nails. Avoid wild or fast hits that can cause the nail to bend or miss.
- Hold the hammer near the end of the handle for better leverage.
- Swing the hammer from your elbow, not just your wrist.
- Keep your eye on the nail head while swinging.
- Strike the nail squarely to drive it straight.
- Stop swinging as the nail gets close to the surface.
Avoiding Common Hammering Mistakes
| Mistake | Why It Happens | How to Fix |
| Bent Nails | Hitting nail at an angle or with too much force | Hit the nail head squarely and use light taps at start |
| Missing the Nail | Poor aim or rushing the swing | Look carefully at the nail and swing slowly |
| Hammer Slipping | Holding hammer too close to the head or wet hands | Grip handle near the end and keep hands dry |
| Damaging Wood | Using hammer face edge or excessive force | Use flat hammer face and controlled hits |
Credit: www.familyhandyman.com
Nail Removal Tips
Removing nails with a claw hammer can be easy and safe. Using the right techniques prevents damage to wood and tools.
This guide gives tips on how to use the claw hammer correctly for nail removal. Follow these steps to work efficiently.
Using The Claw Safely
Hold the hammer firmly by the handle. Keep your fingers away from the claw to avoid pinches.
Wear safety glasses to protect your eyes from flying debris. Stand in a stable position to keep balance.
- Grip the hammer handle near the end for better control
- Pull nails slowly to avoid sudden slips
- Check the claw for damage before use
Leveraging Techniques To Reduce Damage
Place a small block of wood under the hammer’s head. This protects the surface from dents and scratches.
Use the hammer’s curved claw as a lever. Apply steady pressure to ease nails out without breaking the wood.
- Insert the claw fully under the nail head
- Rest the hammer’s head on the wood or block
- Pull back the handle slowly and steadily
Handling Stubborn Nails
Try rocking the hammer side to side to loosen tight nails. Use pliers to pull nails that are hard to remove.
If nails break below the surface, dig around them gently before pulling. Avoid forcing the hammer to prevent damage.
- Rock the hammer claw carefully to loosen nails
- Use pliers for bent or stuck nails
- Clear wood around the nail for better grip
Essential Safety Practices
Using a claw hammer safely helps prevent injuries. Follow simple safety steps every time.
These tips focus on wearing gear, checking your hammer, and working safely.
Wearing Protective Gear
Always wear protective gear before using a claw hammer. Safety glasses protect your eyes from flying debris.
Gloves protect your hands from splinters and accidental hits. Wear closed-toe shoes to protect your feet.
- Safety glasses or goggles
- Work gloves
- Closed-toe shoes
Inspecting Your Hammer Before Use
Check your hammer before every use. Look for cracks or damage on the handle and head.
Make sure the hammer head is tightly attached to the handle. A loose head can cause accidents.
- Look for cracks or splits on the handle
- Check if the hammer head is secure
- Do not use if the hammer is damaged
Working In A Safe Environment
Clear your work area before using the hammer. Remove any clutter or obstacles that may cause trips.
Make sure your workspace has good lighting. Use a stable surface to hammer on for better control.
- Keep the area clean and free of clutter
- Ensure good lighting
- Use a stable work surface
Maintaining Your Claw Hammer
Keeping your claw hammer in good shape helps it last longer. Regular care also makes it safer to use.
Simple maintenance tasks can prevent damage and improve your hammer’s performance.
Cleaning And Storage
After using your hammer, wipe off dirt and dust. Use a cloth to clean the handle and metal head.
Store your hammer in a dry place. Avoid damp areas to stop rust and wood damage.
- Remove dirt with a dry cloth
- Use light oil on metal parts to prevent rust
- Keep hammer in a toolbox or hang it on a rack
- Store away from moisture and direct sunlight
Checking For Damage
Check your hammer often for cracks, chips, or loose parts. These can cause accidents or reduce tool strength.
Look at the handle and head carefully. Make sure the head is tight and the handle is smooth.
- Inspect handle for cracks or splinters
- Check if hammerhead is loose or moves
- Look for rust or dents on the metal
- Ensure claw is not bent or damaged
When To Replace Your Hammer
Replace your hammer if it shows serious damage. Using a broken hammer can cause injury.
Signs to replace include deep cracks, a loose head, or a broken handle that cannot be fixed.
- Handle is cracked or split beyond repair
- Hammerhead is loose and cannot be tightened
- Metal parts are heavily rusted or chipped
- Claw is bent or unusable

Credit: buildwithme.nz
Frequently Asked Questions
How Do I Hold A Claw Hammer Properly?
To hold a claw hammer correctly, grip the handle near the end. This provides better control and leverage. Ensure your thumb is on top and the other fingers wrap around the handle. A firm yet relaxed grip helps prevent fatigue and enhances precision in your hammering tasks.
What Is The Purpose Of The Claw On A Hammer?
The claw is designed for pulling nails out of wood. It provides leverage when wedged under a nail head. The curved design allows efficient nail removal with minimal effort. It can also be used for prying apart materials, making it a versatile tool for various tasks.
How Can I Avoid Hammer Mishaps?
To avoid mishaps, always wear safety goggles to protect your eyes. Ensure your work area is stable and clear of obstructions. Use the correct size and type of hammer for your task. Practice controlled, steady swings, and keep your non-dominant hand away from the striking zone.
Why Is Hammer Weight Important?
Hammer weight affects control and power. Lighter hammers offer precision for small tasks, while heavier ones provide force for tougher jobs. Choose a weight that feels comfortable for extended use. A balanced hammer minimizes fatigue and enhances accuracy, improving efficiency and safety in your work.
Conclusion
Using a claw hammer safely and correctly makes any job easier. Hold the hammer firmly and strike nails with steady, controlled hits. Use the claw carefully to remove nails without damaging surfaces. Always check your work area for safety before starting.
Practice these tips to build confidence and avoid accidents. Small steps lead to better results and safer projects. Keep your hammer in good condition for longer use. Simple habits help you work smarter, not harder.