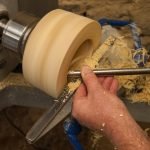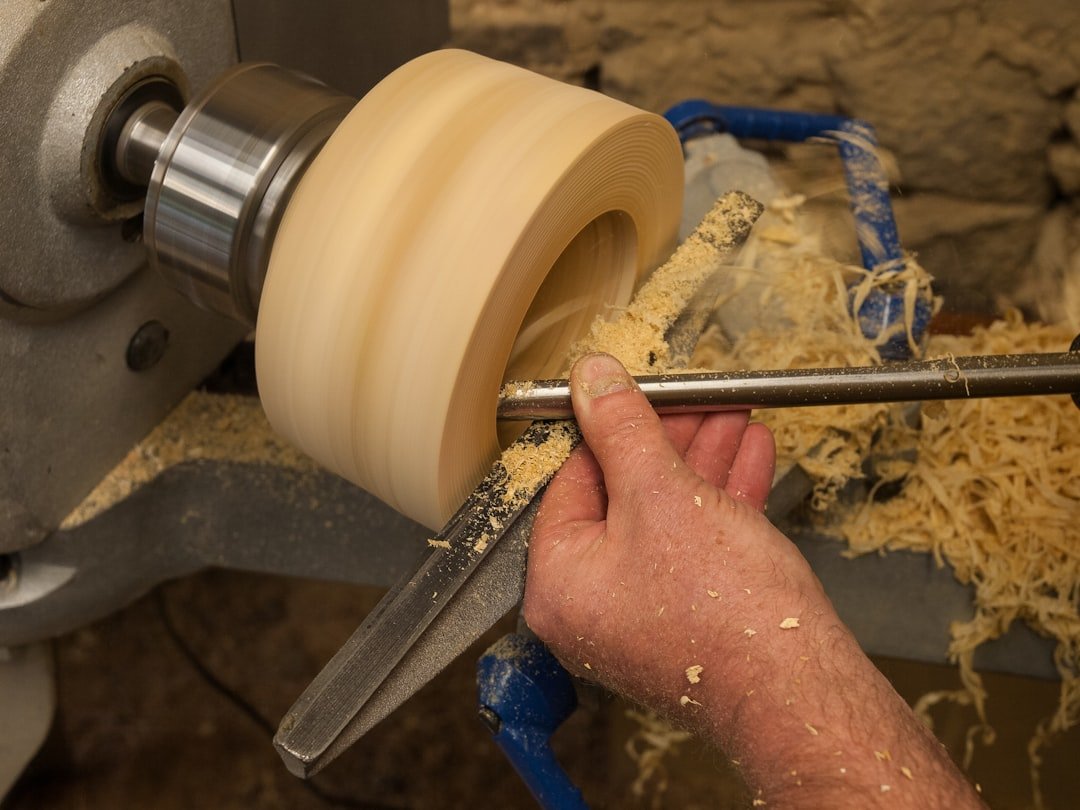
If you’ve ever faced the challenge of sanding a large surface, you know how tiring and time-consuming it can be. But what if there was a tool that could make this job faster and smoother?
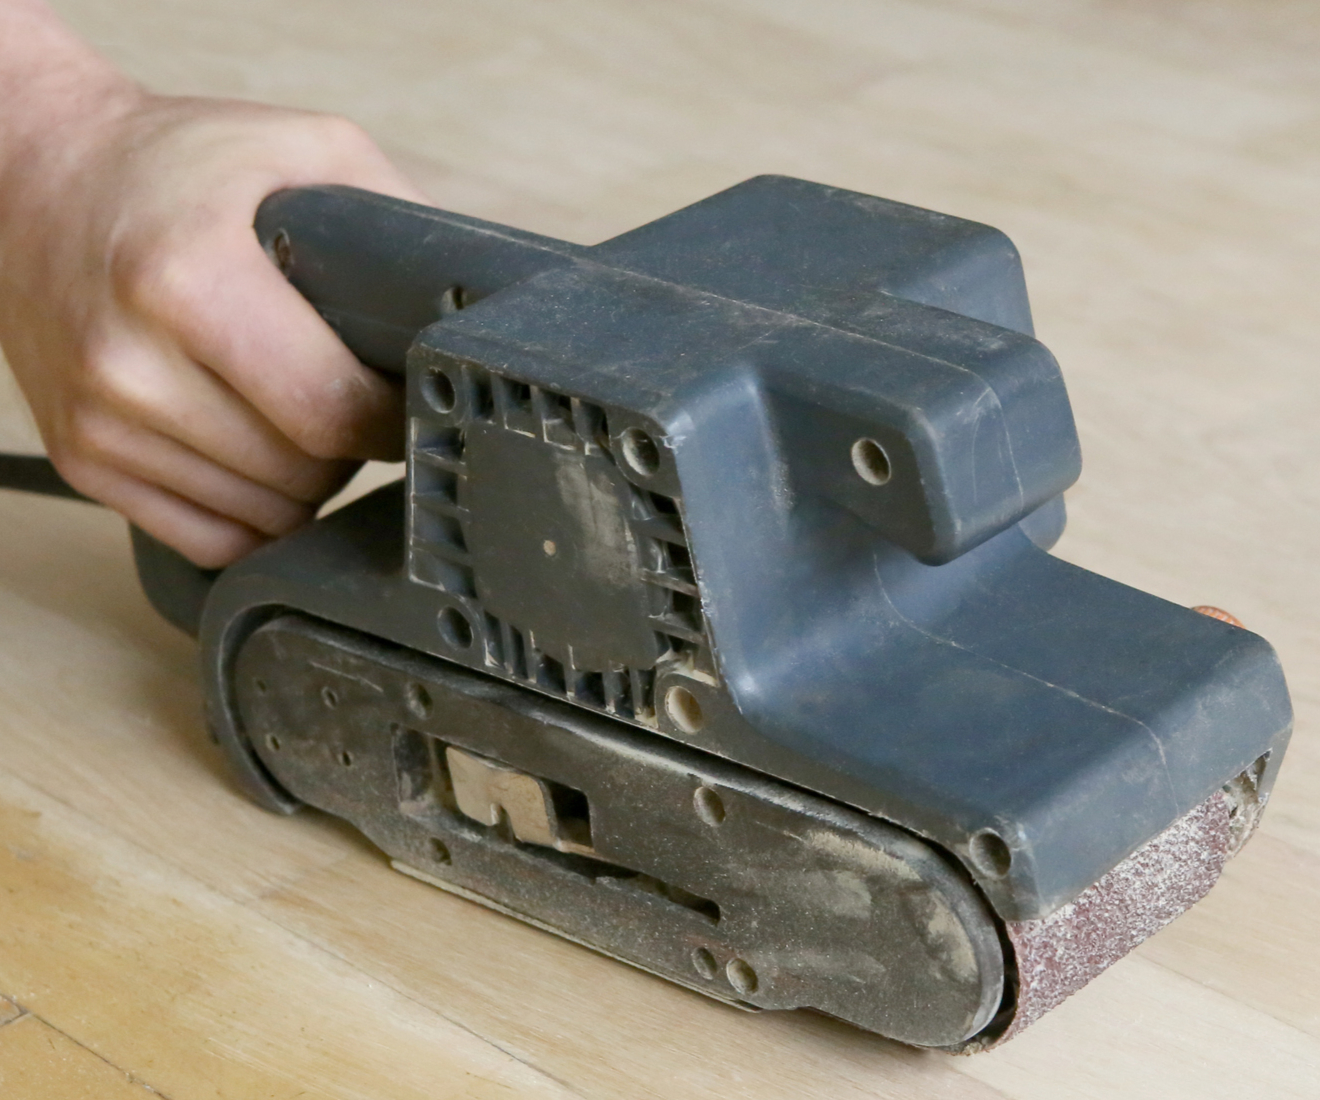
A belt sander is exactly that tool. You’ll learn how to use a belt sander effectively, even if you’ve never handled one before. By the end, you’ll feel confident tackling big sanding projects with ease, saving you time and effort.
Ready to transform your sanding experience? Let’s dive in.
Credit: www.homebuilding.co.uk
Choosing The Right Belt Sander
Using a belt sander properly helps finish large surfaces fast. Picking the right tool is key for good results and safety.
This guide covers the types of belt sanders, the grit you need, and power and size tips for sanding.
Types Of Belt Sanders
Belt sanders come in different styles for specific tasks. Knowing which type fits your project saves time and effort.
- Handheld Belt Sanders: Easy to control, good for medium to large flat surfaces.
- Stationary Belt Sanders: Fixed on a workbench, used for precise sanding and shaping.
- Detail Belt Sanders: Small and narrow belts, perfect for tight spots and edges.
Selecting The Appropriate Grit
The grit size affects how smooth or rough the surface will be. Choose grit based on the sanding stage.
| Grit Size | Use |
| 40-60 | Remove rough material and old finishes |
| 80-120 | General sanding and smoothing |
| 150-220 | Final sanding before finishing |
Power And Size Considerations
Choose a sander with enough power and the right belt size for your surface area. This helps you work faster and cleaner.
- Higher power models handle tough sanding jobs better.
- Large belt sanders cover more area quickly but need more control.
- Smaller sanders are lighter and easier to use on detailed spots.

Credit: www.familyhandyman.com
Preparing The Work Area
Using a belt sander on large surfaces needs a clean and safe space. Preparing your work area helps you work smoothly and avoid accidents.
Before you start, take time to organize and secure everything. This guide covers the main steps to get your space ready.
Safety Precautions
Safety is key when using power tools like belt sanders. Wear protective gear to guard your eyes and lungs from dust and debris.
- Wear safety goggles to protect your eyes.
- Use a dust mask to avoid breathing dust.
- Put on ear protection to reduce noise exposure.
- Wear gloves to protect your hands from rough surfaces.
- Check the sander and cords for damage before use.
Securing The Surface
Keep the workpiece steady to get even sanding and avoid slips. Use clamps or a sturdy workbench to hold the surface firmly.
| Tool | Purpose |
| Clamps | Hold the workpiece tightly in place |
| Workbench | Provides a stable platform for sanding |
| Non-slip mat | Prevents the workpiece from moving |
Clearing The Workspace
Remove all items that are not needed for sanding. This makes the area safer and gives you more room to work.
- Clear tools and materials from the work surface.
- Vacuum or sweep dust and debris from the floor.
- Ensure power cords are out of the way to prevent tripping.
- Keep a trash bin nearby for waste disposal.
Setting Up The Belt Sander
Setting up a belt sander properly makes sanding large surfaces easier and safer. This guide covers installing the sanding belt, adjusting tension, and checking tracking.
Each step ensures the belt sander works smoothly and prevents damage to the machine or the workpiece.
Installing The Sanding Belt
First, unplug the sander to avoid accidents. Open the belt cover by releasing the latch or screws. Remove the old belt by sliding it off the rollers.
Check the new belt for the correct size and grit. Slide the new belt onto the rollers, aligning the arrows on the belt with the machine’s rotation direction.
- Open the belt cover
- Remove old sanding belt
- Check new belt size and grit
- Align belt arrows with rotation
- Place belt onto rollers
- Close the belt cover securely
Adjusting Belt Tension
Proper belt tension keeps the belt tight and prevents slipping during sanding. Locate the tension adjustment knob or lever on your sander.
Turn the knob or move the lever to increase tension until the belt feels firm but not too tight. Too much tension can damage the belt or motor.
| Tension Level | Effect |
|---|---|
| Too Loose | Belt slips, uneven sanding |
| Proper Tension | Belt stays tight, smooth operation |
| Too Tight | Strains motor, shortens belt life |
Checking Belt Tracking
Belt tracking keeps the belt centered on the rollers. Turn the sander on and watch the belt movement. It should stay in the middle.
If the belt drifts left or right, adjust the tracking knob. Turn it slowly until the belt runs straight. Stop the sander to check again.
- Turn on the sander
- Observe belt position
- Adjust tracking knob if needed
- Turn off and recheck
- Repeat until belt stays centered

Credit: www.homebuilding.co.uk
Sanding Techniques For Large Surfaces
Using a belt sander on large surfaces can save time and effort. It helps smooth wood quickly and evenly.
Good sanding techniques prevent damage and give a nice finish. Follow simple steps for best results.
Starting With Coarse Grit
Begin sanding with coarse grit sandpaper. This removes rough areas fast and shapes the surface.
Use grit between 40 and 60 for the first pass. It helps prepare the wood for finer sanding later.
Maintaining Even Pressure
Keep steady pressure on the sander to avoid deep marks. Let the tool do the work, not your hands.
Uneven pressure causes dips and scratches. Press evenly across the entire sanding area for smooth results.
Using Smooth, Controlled Movements
Move the sander slowly and steadily. Keep it flat and glide it across the surface without stopping.
Avoid holding the sander in one spot too long. Use long, smooth strokes that overlap slightly each time.
- Move sander in the direction of the wood grain
- Keep speed consistent during sanding
- Overlap strokes by about half the sander’s width
Avoiding Gouges And Uneven Areas
Watch for spots where the sander digs in. Lift the tool gently and adjust your pressure or movement.
Check the surface often. Fix any uneven areas by sanding lightly with finer grit paper after coarse sanding.
- Do not let the sander stay still on one area
- Keep sander moving to prevent deep marks
- Use finer grit to smooth out any uneven spots
Finishing Touches
After sanding large surfaces with a belt sander, finishing touches improve the look. These steps help make the surface smooth and clean.
Taking time on the final sanding stages ensures a better result before painting or staining.
Switching To Finer Grits
Start with coarse grit sandpaper to remove rough spots quickly. Then change to finer grits for a smooth finish.
Use at least two finer grit levels before finishing. This reduces scratches and prepares the wood for finish.
- Begin with 80 or 100 grit for rough sanding
- Switch to 120 or 150 grit for medium smoothing
- Finish with 180 or 220 grit for fine surface
Final Passes For Smoothness
Make slow and even passes with the sander on the last grit. Avoid staying too long in one spot to prevent marks.
Keep the sander moving and use light pressure. This helps create an even and smooth surface.
- Move the sander along the grain of the wood
- Use gentle pressure to avoid gouges
- Overlap passes slightly for even sanding
Cleaning The Surface After Sanding
Remove all dust and debris from the surface before finishing. Dust can ruin paint or stain adhesion.
Use a vacuum, tack cloth, or damp rag to clean the area well.
- Vacuum the surface to pick up loose dust
- Wipe with a tack cloth to remove fine particles
- Use a damp cloth to catch any remaining dust
Troubleshooting Common Issues
Using a belt sander on large surfaces can be quick and effective. Some problems may slow down your work. Fixing these issues keeps your sanding smooth and safe.
This guide helps you solve common problems with belt sanders. Follow simple tips to get the best results without damage or delays.
Belt Slipping Or Misalignment
A slipping or misaligned belt reduces sanding quality and can damage the tool. Check the belt tension and tracking regularly to avoid this.
- Turn off the sander and unplug it before adjustments.
- Check the belt for wear or damage and replace if needed.
- Adjust the tracking knob to center the belt on the rollers.
- Tighten the belt tension according to the manual.
- Run the sander briefly to see if the belt stays aligned.
Uneven Sanding Patterns
Uneven sanding leaves marks and rough spots on your surface. This often happens from poor technique or worn belts.
| Cause | Solution |
| Worn or damaged sanding belt | Replace the belt with a new one |
| Too much pressure on one area | Use even, light pressure during sanding |
| Uneven surface feeding | Keep the sander moving steadily over the surface |
| Incorrect grit for the job | Choose the right grit level for sanding stage |
Overheating And Dust Build-up
Overheating can damage your belt sander. Dust build-up blocks airflow and causes heat. Clean the sander often to avoid this problem.
- Turn off and unplug the sander before cleaning.
- Use a brush or compressed air to clear dust from vents and rollers.
- Replace belts if they show signs of burning or melting.
- Work in a well-ventilated area to help cool the tool.
- Take breaks during long sanding jobs to let the sander cool down.
Maintenance Tips For Your Belt Sander
Keeping your belt sander in good shape helps it last longer. Regular care makes sanding large surfaces easier and safer.
This guide covers simple maintenance tasks. Follow these tips to keep your sander working well every time.
Regular Cleaning
Clean your belt sander after each use to remove dust and debris. Dust buildup can slow the motor and wear parts faster.
- Unplug the sander before cleaning.
- Use a brush or compressed air to clear dust from vents and belt area.
- Wipe the exterior with a dry cloth to remove surface dirt.
- Check the sanding belt for stuck debris and remove it carefully.
Replacing Worn Belts
Change the sanding belt when it becomes worn or torn. A damaged belt reduces sanding quality and strains the motor.
| Signs a Belt Needs Replacing | Reasons to Replace |
| Frayed edges | Can catch and damage the sander |
| Loss of grit | Reduces sanding efficiency |
| Tears or holes | Causes uneven sanding and safety risks |
| Slipping belt | Does not grip the surface properly |
Always follow the user manual for belt replacement instructions. Check belt tension to avoid slipping.
Lubrication And Storage
Lubricate moving parts occasionally to reduce wear. Use the recommended oil or grease from the manual.
Proper storage prevents damage and rust. Follow these tips:
- Store in a dry place to avoid moisture buildup.
- Keep the sander in its case or cover it with a cloth.
- Remove the sanding belt before long storage periods.
- Disconnect power cords to prevent electrical issues.
Frequently Asked Questions
What Is A Belt Sander Used For?
A belt sander is used for sanding large, flat surfaces efficiently. It removes material quickly, making it ideal for smoothing rough wood or leveling surfaces. Its continuous loop of sandpaper provides consistent sanding power, perfect for preparing surfaces for finishing or removing old paint and varnish.
How Do You Operate A Belt Sander Safely?
To operate a belt sander safely, always wear safety goggles and a dust mask. Secure the material firmly, and start the sander before contacting the surface. Keep the sander moving to avoid gouges, and turn it off before setting it down.
Always follow the manufacturer’s safety instructions.
Can A Belt Sander Be Used On Metal?
Yes, a belt sander can be used on metal, but with caution. Use a belt designed for metal to avoid damage. It’s ideal for shaping or smoothing metal surfaces. Ensure proper ventilation to handle metal dust safely. Always check the manufacturer’s guidelines for metal sanding.
How To Choose The Right Grit For Sanding?
Choosing the right grit depends on the project’s needs. Start with coarse grit (40-60) for heavy material removal. Use medium grit (80-120) for smoothing surfaces. Fine grit (150-220) is ideal for finishing touches. Test on a small area to ensure desired results.
Conclusion
Using a belt sander on large surfaces saves time and effort. Keep the sander moving steadily for smooth results. Always wear safety gear to protect yourself. Choose the right grit sandpaper for the job. Practice on scrap wood before starting your project.
With patience and care, your surface will look great. Sanding large areas becomes easier with each try. Remember, safety and control are the keys to success. Keep these tips in mind for better sanding results every time.