Is your cordless drill acting up just when you need it most? Don’t let a small problem turn into a big headache.
You can save time, money, and frustration by learning a few simple repair tips. Imagine fixing your drill quickly and getting back to work without waiting for a professional. You’ll discover easy steps to troubleshoot and repair your cordless drill like a pro.
Keep reading—you’re closer than you think to bringing your drill back to life.
Common Cordless Drill Issues
Cordless drills are handy tools but can face problems over time. Knowing common issues helps you fix them fast.
This guide covers battery problems, chuck malfunctions, motor failures, and trigger or switch issues.
Battery Problems
Batteries often lose charge quickly or do not hold power. This reduces drill performance.
- Check if the battery is fully charged.
- Clean battery contacts to improve connection.
- Replace old or damaged batteries.
- Store batteries in a cool, dry place.
Chuck Malfunctions
The chuck may not hold drill bits tightly or become hard to turn. Dirt or wear can cause this.
Try these fixes for chuck problems:
- Clean the chuck with a brush to remove dust.
- Apply a little lubricant to loosen stuck parts.
- Tighten the chuck firmly when inserting bits.
- Replace the chuck if it is damaged.
Motor Failures
A faulty motor can cause the drill to stop working or run weakly. Dust and wear cause motor issues.
| Problem | Possible Cause | Solution |
| Drill won’t start | Burnt motor brushes | Replace brushes |
| Weak power | Worn motor parts | Service or replace motor |
| Overheating | Blocked vents | Clean vents |
Trigger And Switch Issues
Triggers and switches can fail, causing the drill to stop or run unevenly.
- Check for dirt around the switch.
- Test the trigger for smooth movement.
- Replace faulty switches or triggers.
- Ensure wiring is connected properly.

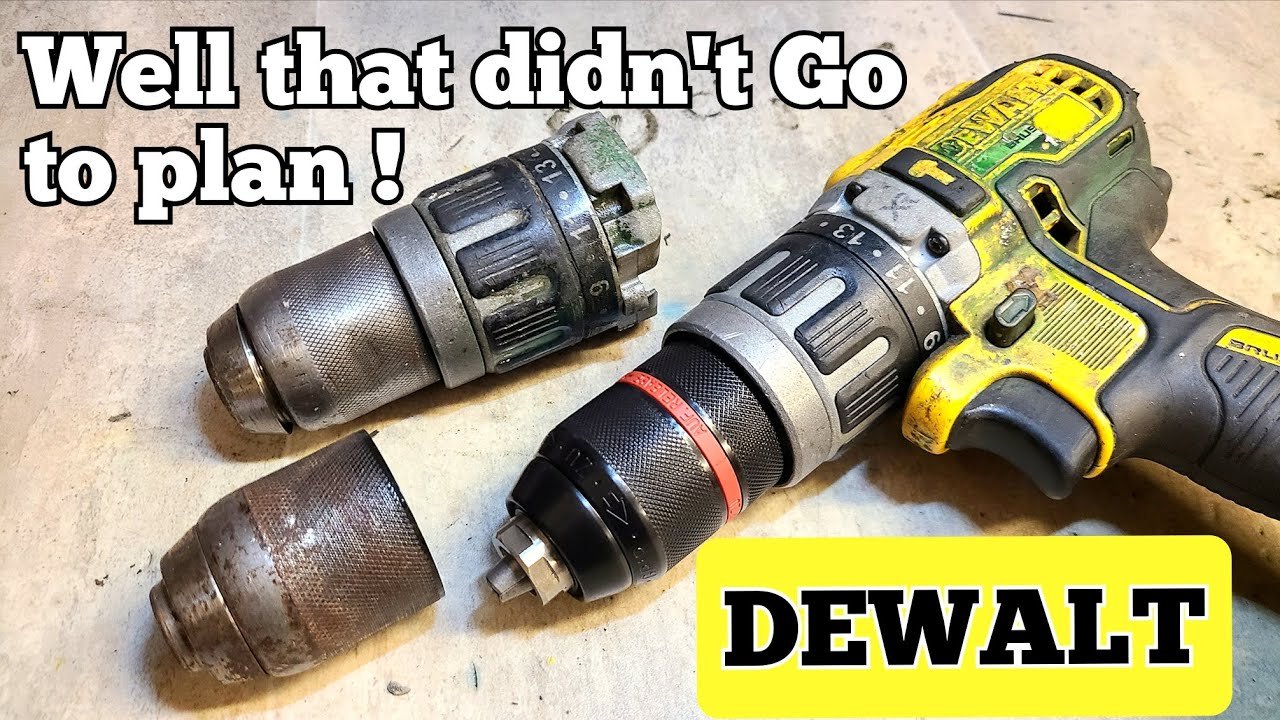
Credit: www.youtube.com
Essential Tools For Drill Repair
Repairing cordless drills needs the right tools. These tools help fix problems safely and correctly.
Using proper tools saves time and keeps your drill working well for a long time.
Basic Hand Tools
Start with simple hand tools. They allow you to open and check your drill easily.
- Screwdrivers (flathead and Phillips)
- Pliers (needle-nose and regular)
- Small adjustable wrench
- Hex keys or Allen wrenches
- Wire cutters
- Utility knife
Specialized Repair Kits
Some parts need special tools to fix. Repair kits often include these.
| Tool | Use |
| Multimeter | Check battery and motor voltage |
| Soldering iron | Fix wires and electrical parts |
| Brush set | Clean small parts and contacts |
| Replacement parts | Switches, brushes, batteries |
Safety Gear
Wear safety gear to protect yourself during repairs.
- Safety glasses to shield your eyes
- Protective gloves to avoid cuts and shocks
- Dust mask to prevent breathing dust
- Work apron or clothes you don’t mind damaging
Quick Battery Fixes
Cordless drills rely on batteries to work well. Fixing battery issues can save time and money.
Simple checks and cleaning often bring back the power your drill needs for jobs.
Cleaning Battery Contacts
Dirt and rust can block the flow of electricity. Clean the battery contacts for better connection.
- Remove the battery from the drill.
- Use a dry cloth to wipe the contacts.
- Apply a small amount of rubbing alcohol on a cotton swab.
- Gently clean the metal parts of the contacts.
- Let the battery dry before reattaching it.
Testing Battery Health
Check if your battery holds charge or needs replacement. Use a multimeter for testing voltage.
| Test Type | Normal Range | Action Needed |
| Voltage Test | 18V to 20V | Battery OK |
| Voltage Test | Below 18V | Charge or Replace Battery |
| Load Test | Voltage drops less than 10% | Battery Healthy |
| Load Test | Voltage drops more than 10% | Battery Weak |
Replacing Battery Packs
If cleaning and testing fail, replace the battery pack. Make sure to buy the correct type.
Replace your battery pack by following these tips:
- Turn off and unplug the drill.
- Remove the old battery pack carefully.
- Check the model number on the battery pack.
- Buy a compatible replacement battery.
- Install the new battery pack securely.
- Test the drill for proper operation.
Chuck Repair And Maintenance
The chuck is a key part of a cordless drill. It holds the drill bit tightly in place. Keeping the chuck in good shape helps the drill work better and last longer.
Regular care and fixing small problems can stop bigger issues. This guide shares easy tips to maintain and repair your drill’s chuck.
Lubricating The Chuck
Lubrication helps the chuck move smoothly. It stops parts from sticking or wearing out too fast. Use a light machine oil or grease made for tools.
Apply a small amount of lubricant inside the chuck jaws and the rotating parts. Open and close the chuck a few times to spread it evenly.
- Clean the chuck first with a dry cloth
- Use a drop or two of light oil or grease
- Move the chuck jaws back and forth
- Wipe off any extra lubricant
Replacing A Worn Chuck
If the chuck does not hold bits tightly, it may be worn out. You can replace it yourself with the right tools. Make sure to buy a chuck that fits your drill model.
Remove the old chuck by loosening the screw inside it. Use a wrench to unscrew the chuck from the drill shaft. Then, screw the new chuck in place and tighten it well.
- Remove the drill bit
- Unscrew the chuck screw counterclockwise
- Use a wrench to turn the chuck off the shaft
- Attach the new chuck by screwing it on
- Tighten the chuck screw to secure it
Adjusting Chuck Tightness
The chuck should hold bits firmly but not too tight. If it is loose, bits slip. If too tight, it can be hard to change bits or damage the chuck.
To adjust tightness, check the tension ring inside the chuck. Turn it clockwise to tighten or counterclockwise to loosen. Test with a drill bit to find the right grip.
- Open the chuck jaws fully
- Locate the tension ring or adjustment screw
- Turn clockwise to increase tightness
- Turn counterclockwise to decrease tightness
- Insert a bit and test grip strength
Motor Troubleshooting Tips
Fixing a cordless drill motor needs careful checking. Understanding common motor problems helps you repair it faster.
This guide covers key tips to find and fix motor issues. You will learn how to check brushes, clean dust, and spot motor burnout.
Checking Brushes And Commutator
The motor brushes and commutator work together to move power. Worn brushes can cause poor drill performance or no power.
- Remove the brush caps to inspect the brushes.
- Check if brushes are shorter than ¼ inch; replace if needed.
- Look for dirt or damage on the commutator surface.
- Clean the commutator with a soft cloth or fine sandpaper.
- Ensure brushes move freely in their holders.
Cleaning Dust And Debris
Dust and debris can block motor parts. Cleaning prevents overheating and motor failure.
| Area | Cleaning Method |
|---|---|
| Air Vents | Use compressed air to blow out dust |
| Brush Holders | Remove debris with a soft brush |
| Commutator | Wipe gently with a dry cloth |
| Motor Housing | Clean inside with a vacuum or air blower |
Identifying Motor Burnout
Motor burnout shows as burning smell or no motor movement. Early signs help avoid full motor damage.
- Unplug the drill and open the motor housing.
- Check for dark or burnt spots on the motor windings.
- Smell the motor area for burnt odors.
- Test the motor with a multimeter for continuity.
- Replace the motor if windings are damaged or no continuity exists.

Credit: www.youtube.com
Fixing Trigger And Switch Problems
Cordless drills sometimes stop working because of trigger or switch problems. These parts control power flow and drill speed.
Fixing these issues can bring your drill back to life. It often takes simple tools and careful checks.
Testing Electrical Connections
Loose or broken wires cause trigger and switch problems. Test connections with a multimeter to find issues.
Check all wires for signs of damage or corrosion. Make sure connectors fit tightly and do not move.
- Turn off and unplug the drill before testing
- Set the multimeter to continuity mode
- Touch probes to each wire connection point
- Look for no beep or high resistance as bad connection
- Replace or reattach wires if needed
Replacing Faulty Switches
If the switch does not work after testing, it may be faulty. Replace it with a new switch that fits your drill model.
Remove the old switch carefully. Note how it connects to wires. Install the new switch and reconnect wires firmly.
- Buy the correct switch part for your drill
- Use a screwdriver to open the drill casing
- Disconnect wires from the old switch
- Attach wires to the new switch in the same order
- Close the casing and test the drill
Ensuring Smooth Trigger Operation
A sticky or hard trigger can stop the drill from working well. Clean and lubricate the trigger parts for smooth movement.
Check for dirt or debris around the trigger. Use a small brush and light oil to clean and lubricate moving parts.
- Remove the drill casing to access the trigger
- Use compressed air to blow out dust
- Apply a small drop of machine oil on the trigger pivot
- Move the trigger several times to spread oil
- Reassemble the drill and test trigger response
Preventive Maintenance Hacks
Taking care of your cordless drill helps it last longer and work better. Simple maintenance can prevent many common problems.
Use these easy tips to keep your drill in good shape. Regular care saves you time and money on repairs.
Regular Cleaning Routines
Clean your cordless drill after each use to remove dust and debris. Dirt can clog the vents and cause overheating.
- Wipe the drill with a dry or slightly damp cloth
- Use a small brush to clean around buttons and vents
- Blow out dust from air vents with compressed air
- Check the chuck for dirt and clean it carefully
Proper Storage Practices
Store your cordless drill in a dry, cool place. Avoid areas with high humidity or extreme temperatures.
| Storage Location | Recommended Conditions |
| Toolbox | Dry, room temperature |
| Workshop shelf | Clean, away from dust |
| Carrying case | Protects from drops and dirt |
Battery Care Tips
Proper battery care keeps your drill running strong. Avoid letting the battery fully drain or stay unused for too long.
- Charge the battery before it is completely empty
- Store batteries in a cool, dry place
- Remove battery from the drill if not used for weeks
- Use the correct charger to avoid damage
When To Seek Professional Help
Repairing cordless drills can save money and extend tool life. Some problems are easy to fix at home.
Other issues need expert knowledge to avoid damage or injury. Knowing when to get help is important.
Complex Electrical Issues
Electrical parts inside cordless drills are delicate and complex. Problems like motor failure or wiring faults require skills.
Without proper tools and knowledge, trying to fix these can cause more damage or electric shock.
- Motor does not run or makes strange noises
- Battery connection problems
- Internal wiring or circuit board damage
Warranty Considerations
Many cordless drills come with a warranty that covers repairs. Opening or fixing the drill yourself may void this warranty.
Contact the manufacturer or authorized service center if your drill is still under warranty. This keeps your coverage valid.
- Check warranty status before repair
- Use authorized repair centers
- Keep proof of purchase and warranty card
Safety Concerns
Safety is the top priority when fixing power tools. Some problems can cause injury if not handled properly.
If you see sparks, smoke, or smell burning, stop using the drill and get professional help immediately.
- Risk of electric shock
- Possible fire hazards
- Injury from unexpected tool movement
Credit: www.gz-supplies.com
Frequently Asked Questions
How Do I Troubleshoot A Cordless Drill That Won’t Start?
Start by checking the battery charge and connections. Ensure it’s properly seated. Inspect the trigger switch for dust or debris. Examine the motor for signs of wear or damage. If issues persist, consult the manual or a professional for further assistance.
What Are Common Cordless Drill Repair Tools?
Common tools include screwdrivers, wrenches, and a multimeter. You might also need replacement parts like brushes or switches. Having a soldering iron can be beneficial for electrical repairs. Ensure you have the correct tools before starting repairs.
How Can I Maintain My Cordless Drill?
Regularly clean the drill’s exterior and interior components. Check for loose parts and tighten them. Charge the battery correctly and store it in a cool, dry place. Lubricate moving parts to ensure smooth operation. Regular maintenance prolongs your drill’s lifespan.
Why Does My Drill Overheat During Use?
Overheating may result from prolonged use or a blocked ventilation system. Ensure vents are clear of debris and dust. Use the drill for recommended durations and let it cool between uses. If overheating persists, check for motor issues or consult a professional.
Conclusion
Repairing cordless drills can save money and extend their life. Start with simple checks like battery and chuck issues. Use the right tools and follow safety steps carefully. Small fixes often solve common problems fast. Practice patience and take your time with each repair.
Regular care keeps drills working smoothly longer. Keep learning and trying new tips to improve skills. Taking these steps helps you get the most from your cordless drill. Easy to fix, easy to use again.
