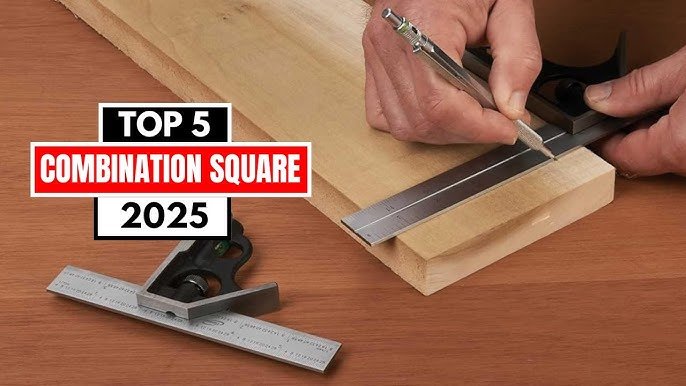
Are you struggling to get precise measurements and perfect angles in your projects? Your combination square can be the game-changer you need.
This simple tool helps you mark straight lines, check angles, and measure depths with ease. In this guide, you’ll discover how to use a combination square like a pro, saving you time and improving the quality of your work. Keep reading to unlock tips and tricks that will make every cut and mark spot-on.
Credit: commonwoodworking.com
Choosing The Right Combination Square
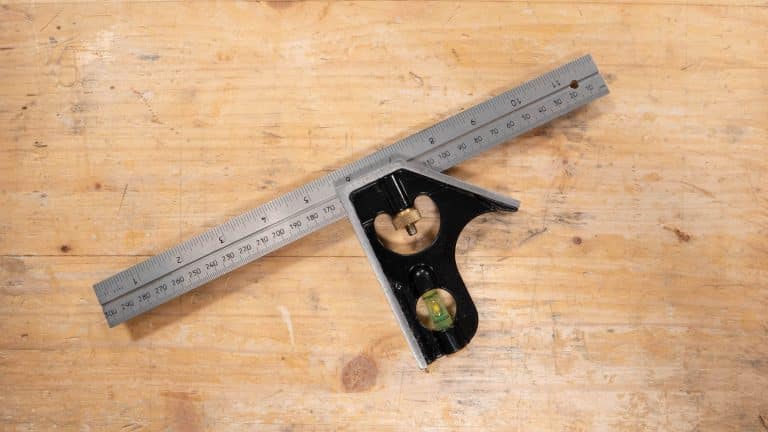
A combination square is a useful tool for marking and measuring. Picking the right one helps you work with accuracy and ease.
Look at the type, material, and features before buying. These factors affect the tool’s performance and durability.
Types Of Combination Squares
There are several types of combination squares. Each type fits different tasks and user needs.
- Standard combination squares with a ruler and adjustable head.
- Engineers squares with precise measuring for metalwork.
- T-bevel squares mainly for angle measurement and transfer.
- Try squares for quick 90-degree checks.
Material And Build Quality
Good material makes the combination square last longer. It also keeps measurements accurate.
| Material | Advantages | Disadvantages |
| Steel | Strong and durable | Can rust if not cared for |
| Stainless Steel | Rust-resistant and sturdy | Usually more expensive |
| Aluminum | Lightweight and rust-proof | Less durable than steel |
| Plastic | Light and cheap | Less accurate and fragile |
Blade And Ruler Features
Check the blade and ruler for clear marks and good length. This helps you measure and mark precisely.
- Look for etched or engraved markings. They last longer than printed ones.
- Choose a blade length that suits your projects.
- Consider rulers with both metric and imperial units for flexibility.
- Ensure the blade locks firmly to avoid errors.

Credit: www.wikihow.com
Setting Up Your Combination Square
A combination square is a useful tool for marking and measuring. Setting it up correctly helps you get accurate results.
Follow simple steps to adjust and calibrate your tool before use. This guide explains how to do it right.
Adjusting The Blade
The blade is the long metal part that slides through the head. Adjust it to the length you need for marking.
Hold the head and slide the blade carefully. Make sure the blade stays straight and does not wobble.
Locking Mechanism
The locking mechanism keeps the blade in place. Tighten it to stop the blade from moving during use.
Use the knob or screw on the head to lock the blade. Check that the blade is secure before marking.
- Slide blade to desired measurement
- Turn locking knob clockwise to tighten
- Test by gently moving blade to confirm lock
Calibrating For Accuracy
Check the tool’s accuracy before use. Place the head at a right angle on a flat surface.
Use a ruler or known square to compare the blade’s angle. Adjust the blade if it does not match 90 degrees.
- Place combination square on flat edge
- Mark a line along the blade
- Use a ruler to check if the line is square
- Adjust blade or head if needed
Marking Straight Lines
A combination square helps you mark straight lines easily and accurately. It ensures your marks are square and true to your workpiece.
Using it correctly saves time and improves the quality of your project. Follow the tips below to get clear, straight marks every time.
Aligning The Square With The Workpiece
Place the head of the combination square firmly against the edge of the workpiece. This keeps the ruler at a perfect 90-degree angle for marking.
Make sure the square does not wobble. Hold it tight so the ruler stays steady while you draw your line.
Using The Ruler For Measurements
- Slide the ruler to the desired measurement on the workpiece.
- Lock the ruler in place using the screw on the head.
- Double-check the measurement before marking the line.
- Use a sharp pencil or marking knife for clear lines.
Tips For Steady Marking
| Tip | Description |
|---|---|
| Firm Grip | Hold the square tightly to avoid movement during marking. |
| Flat Surface | Work on a flat surface to keep your workpiece stable. |
| Use Both Hands | One hand holds the square; the other guides the pencil. |
| Light Marks | Make light pencil marks first, then darken if needed. |
Marking Angles And Squares
A combination square is a handy tool for marking straight lines and angles. It helps you draw perfect squares and angles on wood or metal.
Knowing how to use it properly saves time and makes your work accurate. This guide shows easy ways to mark 90-degree and 45-degree angles.
90-degree Marking Techniques
The combination square is great for marking 90-degree angles. Use the ruler part against the edge of your workpiece.
Slide the square’s head until it fits flush with the edge. Then draw a line along the ruler to get a perfect right angle.
- Place the square’s head firmly against the work edge
- Keep the ruler flat on the surface
- Use a sharp pencil or marking knife for a clear line
45-degree Angle Marking
The combination square head has a 45-degree edge for marking miters. This helps in making angled cuts or joints.
Hold the 45-degree edge against the workpiece’s edge. Draw a line along the ruler to mark the angle.
- Ensure the square head sits flat on the edge
- Mark the line clearly for precise cutting
- Check the angle with a protractor if needed
Combining Angles For Complex Shapes
Sometimes, you need to mark angles other than 45 or 90 degrees. Use the combination square with a protractor or angle finder.
Set the ruler to the desired angle and mark it on your material. You can combine marks to create complex shapes.
- Use the adjustable ruler to measure custom angles
- Mark multiple lines for compound angles
- Double-check angles before cutting or assembling
Using The Combination Square For Depth And Height
The combination square is a versatile tool for woodworking and metalworking. It helps measure depths and heights with accuracy. Learning to use it well can improve your projects.
This guide explains how to measure depths, check heights, and keep measurements consistent using the combination square.
Measuring Depths
To measure depth, extend the ruler past the stock. Place the head of the square on the edge of the material. The ruler will slide down into the hole or groove. Read the depth on the ruler where it meets the head.
- Adjust the ruler to the right length.
- Lock the ruler with the screw.
- Place the head flat on the surface.
- Insert the ruler into the depth to measure.
- Read the measurement where the ruler meets the head.
Checking Heights
Use the combination square to check the height of objects. Place the head on a flat surface. Slide the ruler up to the object. Lock the ruler. Then, read the height measurement from the ruler.
| Height Measurement | How to Measure |
| Mark height | Slide ruler to the required height and mark the material. |
| Check height | Place head on base and measure object height against ruler. |
| Adjust height | Move ruler up or down and lock for precise height setting. |
Ensuring Consistent Measurements
Consistency is key for accurate work. Use the combination square to repeat measurements. Lock the ruler at the needed length. Use the locked setting to mark multiple pieces.
- Set the ruler to the desired measurement.
- Tighten the locking screw to hold the setting.
- Use the square to mark the first piece.
- Repeat marking on other pieces using the locked ruler.
- Check the ruler setting before each marking to avoid errors.
Maintaining And Caring For Your Combination Square
Taking care of your combination square helps it last longer. It also keeps measurements accurate and reliable.
Regular maintenance is simple and only takes a few minutes. Follow these tips to keep your tool in good shape.
Cleaning Tips
Keep your combination square free from dirt and rust by cleaning it after use. Use a soft cloth to wipe off dust and debris.
- Use a dry cloth or soft brush to remove dust.
- Apply light machine oil to metal parts to stop rust.
- Wipe off excess oil to avoid attracting dirt.
- Clean the ruler blade carefully to keep markings clear.
Storage Recommendations
Proper storage protects your combination square from damage and wear. Choose a dry and safe place for it.
| Storage Method | Benefit |
| Toolbox with padding | Prevents scratches and impacts |
| Dry area | Stops rust and corrosion |
| Separate compartment | Avoids mixing with heavy tools |
| Cover with cloth | Keeps dust away |
Regular Calibration Checks
Check your combination square often to keep measurements accurate. Calibration is quick and needed for precise work.
- Place the square on a known flat surface.
- Align the ruler and head to the surface edge.
- Look for gaps or light showing between parts.
- Adjust the head tightness to fix any misalignment.
- Repeat checks after heavy use or drops.
Common Mistakes And How To Avoid Them
Using a combination square seems simple, but mistakes can happen. These errors affect your work’s accuracy and quality.
Knowing common mistakes helps you avoid them. This guide explains three frequent errors and how to fix them.
Misalignment Errors
Misalignment happens when the square’s ruler or head is not set correctly. It causes wrong marking lines and angles.
Check that the ruler sits flush against the workpiece edge. Hold the tool steady to avoid slipping while marking.
- Place the head firmly against the edge of the material
- Keep the ruler flat and aligned with the marking point
- Use light pressure to prevent the square from moving
Inaccurate Locking
The locking mechanism holds the ruler in place. If it is loose or too tight, measurements will shift during use.
Always tighten the lock enough to keep the ruler steady. Avoid over-tightening, which can damage the tool or cause warping.
- Test the lock by gently moving the ruler after tightening
- Adjust the lock if the ruler slips or feels stuck
- Clean the locking parts to remove dust or debris
Improper Measurement Reading
Reading measurements wrong causes incorrect marks and cuts. This happens if you do not look at the scale straight on.
Look directly above the ruler scale to avoid parallax errors. Use clear markings and understand the units on your square.
- Check if the ruler shows inches or millimeters
- Use the smallest scale division for better accuracy
- Keep your eye level with the mark to read correctly

Credit: www.reddit.com
Frequently Asked Questions
What Is A Combination Square Used For?
A combination square is a versatile tool used for marking and measuring. It helps in ensuring precise angles and straight lines. Commonly used in woodworking, metalworking, and stonemasonry, it can verify 90-degree and 45-degree angles. Its ruler serves as a guide for accurate measurements and markings.
How Do You Mark With A Combination Square?
To mark with a combination square, position its ruler against the workpiece edge. Adjust the square head to the desired measurement. Hold the square firmly, and use a pencil or scribe to draw a line along the ruler. This method ensures precise and straight markings for your project.
Why Is A Combination Square Important?
A combination square is crucial for achieving accuracy in projects. It ensures precise measurements and angle verification. Its versatility allows for marking, measuring, and checking right angles. This tool is essential for professionals and DIY enthusiasts aiming for quality results in woodworking, metalworking, or stonemasonry.
How To Choose The Right Combination Square?
When choosing a combination square, consider material quality and size. Look for durable materials like stainless steel. Ensure the scale markings are clear and easy to read. A 12-inch square is versatile for most tasks. Check that the square head moves smoothly and locks securely for accurate measurements.
Conclusion
Using a combination square makes marking easier and more precise. It helps you measure angles and lines clearly. Practice with it often to gain confidence. Small steps lead to better results. Keep your tool clean and store it safely. This simple tool suits many projects and skill levels.
Try using it for your next work. You will see how it improves your accuracy. A combination square is a useful addition to any toolkit.
