Are you ready to tackle your next home project with confidence? Knowing how to use a power drill for installing hardware can save you time, effort, and frustration.
Whether you’re hanging shelves, fixing cabinet handles, or mounting hooks, the right technique makes all the difference. In this guide, you’ll discover simple steps and insider tips that turn a basic tool into your best ally. Keep reading, and you’ll soon master the skill that turns any hardware installation into a quick and easy task.
Choosing The Right Drill
Using a power drill makes installing hardware easier. Picking the right drill helps you work faster and safer.
Not all drills are good for every job. You need to know which one fits your task best.
Types Of Power Drills
There are many types of power drills. Each type works well for different hardware tasks.
Corded drills provide constant power. Cordless drills offer freedom to move around.
- Drill Drivers: Good for light drilling and screwing
- Hammer Drills: Can drill into hard materials like concrete
- Impact Drivers: Best for driving screws and bolts
- Right-Angle Drills: Useful in tight spaces
Selecting Drill Bits
Drill bits come in different shapes and sizes. Choose the right bit for the material you work on.
Wood bits, metal bits, and masonry bits all serve different purposes. Using the wrong bit can damage the material or drill.
- Wood Bits: Sharp and pointed for clean holes in wood
- Metal Bits: Strong and smooth for drilling metal surfaces
- Masonry Bits: Designed to drill into brick or concrete
- Screwdriver Bits: Fit into screws for easy driving
Safety Features To Look For
Safety features protect you while using a power drill. Look for drills with good safety options.
Some drills have built-in lights to see better. Others have automatic shut-off to avoid accidents.
- Ergonomic Grip: Helps you hold the drill comfortably
- Trigger Lock: Prevents the drill from turning on by mistake
- Overload Protection: Stops the drill if it gets too hot
- Built-in LED Light: Illuminates the work area

Credit: iphonedocomoss.com
Preparing For Installation
Using a power drill for installing hardware needs careful preparation. Good setup helps you work safely and quickly.
Before drilling, check your tools and mark the spots clearly. Make sure the workpiece is steady.
Gathering Tools And Materials
Collect all tools and materials before you start drilling. This saves time and avoids interruptions.
- Power drill with charged battery or power cord
- Drill bits in various sizes
- Screwdriver bits or hardware screws
- Measuring tape or ruler
- Pencil or marker
- Safety glasses and gloves
- Clamps to hold the workpiece
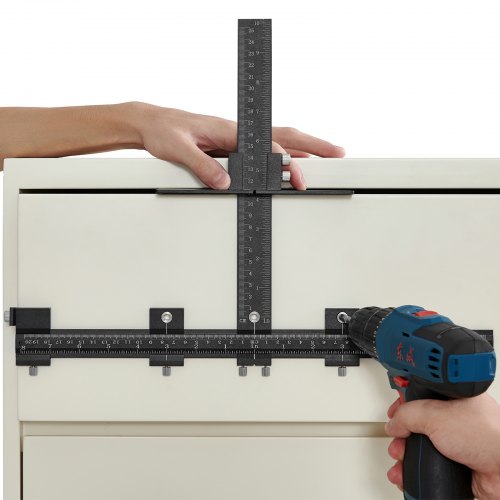
Marking Drill Points
Mark drill points clearly on the surface to avoid mistakes. Use the right tools for accuracy.
| Tool | Purpose |
|---|---|
| Pencil or Marker | Mark exact drill spots |
| Measuring Tape | Measure distances and placement |
| Square or Level | Ensure marks are straight and even |
Securing The Workpiece
Hold the material firmly before drilling to prevent slips. Use clamps or a sturdy surface.
Follow these tips to secure your workpiece:
- Place the piece on a flat, stable workbench
- Use clamps to hold it tightly
- Check that it does not move when pressed
- Avoid holding small pieces by hand while drilling
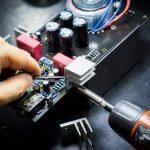
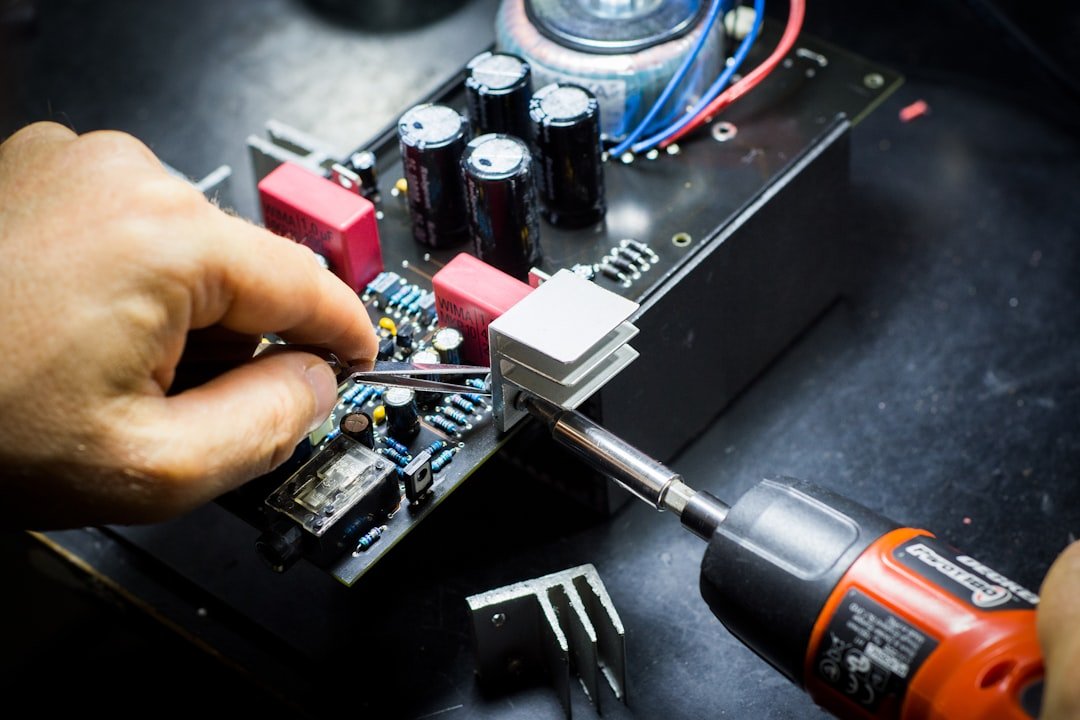
Drilling Techniques
Using a power drill properly makes installing hardware easier. Good drilling techniques help you work safely and get better results.
Learn how to set drill speed and torque, drill pilot holes, and avoid common mistakes. These tips will improve your drilling skills.
Setting Drill Speed And Torque
Adjust the drill speed based on the material you are working with. Use a low speed for hard materials and a higher speed for soft materials.
Torque controls how much force the drill uses. Set lower torque to avoid stripping screws and higher torque for harder tasks.
- Use low speed for metal and hardwood
- Use high speed for softwood and plastic
- Set torque low for small screws
- Increase torque for large screws or tough materials
Drilling Pilot Holes
Drill pilot holes before inserting screws. These holes guide the screws and prevent wood from splitting.
Choose a drill bit slightly smaller than the screw’s diameter. Drill straight and steady to keep the hole clean.
- Mark the spot before drilling
- Use a drill bit 1/16 inch smaller than the screw
- Keep the drill level and steady
- Stop drilling when the hole is deep enough for the screw
Avoiding Common Mistakes
Many beginners push too hard or drill too fast. This can damage the material or the drill bit.
Make sure you hold the drill firmly and keep it straight. Check the drill bit often for wear or damage.
- Do not force the drill; let it work at its own speed
- Hold the drill perpendicular to the surface
- Replace dull or bent drill bits
- Wear safety glasses to protect your eyes

Credit: www.familyhandyman.com
Installing Hardware
Using a power drill makes hardware installation faster and easier. It helps you attach screws securely to wood or other materials.
Follow simple steps to install hardware correctly. This will make sure your work is strong and looks good.
Aligning Hardware Properly
Place the hardware where you want to attach it. Check if it lines up straight and fits well.
Use a pencil to mark the screw holes. This helps guide your drilling and keeps everything even.
- Hold the hardware firmly in place
- Use a level to check horizontal alignment
- Mark all screw holes clearly with a pencil
Driving Screws With A Drill
Attach the correct drill bit for your screws. Use a slow speed to start and increase as needed.
Press the drill straight into the screw head. Keep steady to avoid stripping the screw or damaging the material.
- Choose the right bit size for the screws
- Start drilling slowly to avoid slips
- Apply steady pressure without forcing
- Stop when the screw is flush with the hardware
Checking For Stability
After installing, test the hardware by gently moving it. It should feel secure without any wiggle.
Tighten screws again if the hardware feels loose. Check all screws one more time for safety.
- Push or pull the hardware lightly
- Look for any movement or looseness
- Tighten screws if needed
- Repeat test until fully stable
Maintenance And Safety Tips
Using a power drill safely keeps you and others protected. Regular maintenance helps your drill work well for a long time.
Follow simple steps to clean your drill, store bits properly, and wear safety gear. These habits improve your work and avoid accidents.
Cleaning Your Drill
Clean your drill after each use to remove dust and debris. Dirt can cause the drill to overheat or stop working properly.
Use a dry cloth to wipe the drill’s surface and vents. Avoid water or harsh chemicals that can damage the tool.
- Remove the battery before cleaning
- Use compressed air to clear dust from vents
- Wipe down the body with a dry cloth
- Check for loose parts or damage while cleaning
Storing Drill Bits
Store drill bits in a dry place to stop rust and damage. Keep them organized to find the right size quickly.
Use a case or rack designed for drill bits. Avoid mixing bits with other tools, which can dull or break them.
- Keep bits in a labeled container
- Store bits away from moisture
- Check bits for wear before use
- Replace damaged or worn bits promptly
Personal Protective Equipment
Wear the right safety gear to protect your eyes, ears, and hands while drilling. Safety equipment reduces injury risks.
Always use goggles, gloves, and ear protection. Avoid loose clothing that can catch on the drill.
- Wear safety goggles to protect your eyes
- Use earplugs or earmuffs to protect hearing
- Put on gloves to protect your hands
- Wear close-fitting clothes and tie back long hair
Credit: www.vevor.ca
Frequently Asked Questions
What Is The Best Drill Speed For Hardware?
The best drill speed depends on the material. Use lower speeds for metal and higher for wood. Always refer to your drill’s manual for specific speed settings. This ensures precise and safe drilling when installing hardware.
How Do I Choose The Right Drill Bit?
Choosing the right drill bit is crucial. Match the bit to your hardware and material. For wood, use spade bits; for metal, use cobalt bits. Always ensure the bit size matches the screw or anchor diameter for secure installation.
Can I Use A Power Drill On Drywall?
Yes, you can use a power drill on drywall. Use a drywall-specific bit and avoid excessive pressure. This prevents damage and ensures a clean installation. Consider using anchors for added support when installing hardware on drywall.
How To Maintain A Power Drill?
Maintaining a power drill is easy. Regularly clean the vents and check the battery. Lubricate moving parts and ensure the chuck is free from debris. Proper maintenance extends the drill’s lifespan and performance.
Conclusion
Using a power drill makes installing hardware faster and easier. Always choose the right drill bit for your screws. Keep a steady hand and apply gentle pressure. Drill slowly at first to avoid mistakes. Safety matters—wear goggles and work in a clean area.
Practice a few times if you feel unsure. Soon, you will handle small projects with confidence. Simple steps lead to great results and less frustration. Enjoy your new skills and completed hardware installations.