If you want to make your DIY projects faster and easier, mastering how to use a power drill for installing screws is a must. Imagine saving time and effort while getting perfect results every time.
Whether you’re hanging shelves, building furniture, or fixing things around the house, knowing the right technique can make all the difference. In this guide, you’ll discover simple steps to use your power drill confidently and avoid common mistakes that slow you down.
Ready to boost your skills and get the job done like a pro? Keep reading—you’re about to unlock the full potential of your power drill.
Choosing The Right Drill
Using a power drill to install screws can make your work faster and easier. Picking the right drill is important for good results.
There are many drills available, but not all fit every task. Learn how to choose the best drill for installing screws.
Corded Vs Cordless
Corded drills plug into power outlets. They give constant power without running out of battery.
Cordless drills run on batteries. They are easy to carry and use anywhere but need charging.
- Corded drills offer steady power for long jobs
- Cordless drills give freedom of movement
- Cordless drills are lighter and more portable
- Corded drills need a nearby power source
Drill Size And Power
Drills come in different sizes and power levels. Smaller drills are good for light work and tight spaces.
Bigger drills have more power for tough materials and larger screws. Choose size based on your project needs.
- Light drills weigh less and are easy to handle
- Heavy drills can drive screws faster into hard surfaces
- Match drill power to screw size and material hardness
Selecting Drill Bits
Drill bits attach to the drill and fit the screw head. Using the right bit prevents damage to screws and surfaces.
Bits come in shapes like Phillips, flat, and square. Pick a bit that matches your screw type and size.
- Phillips bits fit cross-shaped screw heads
- Flat bits fit straight-slot screws
- Square bits fit square-shaped screw heads
- Use the correct bit size to avoid slipping
Preparing For Drilling
Using a power drill to install screws requires careful preparation. Doing this helps ensure your work is safe and accurate.
Before you start drilling, you need to select the right screw, mark the locations, and use proper safety gear.
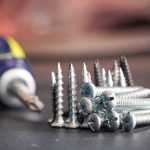
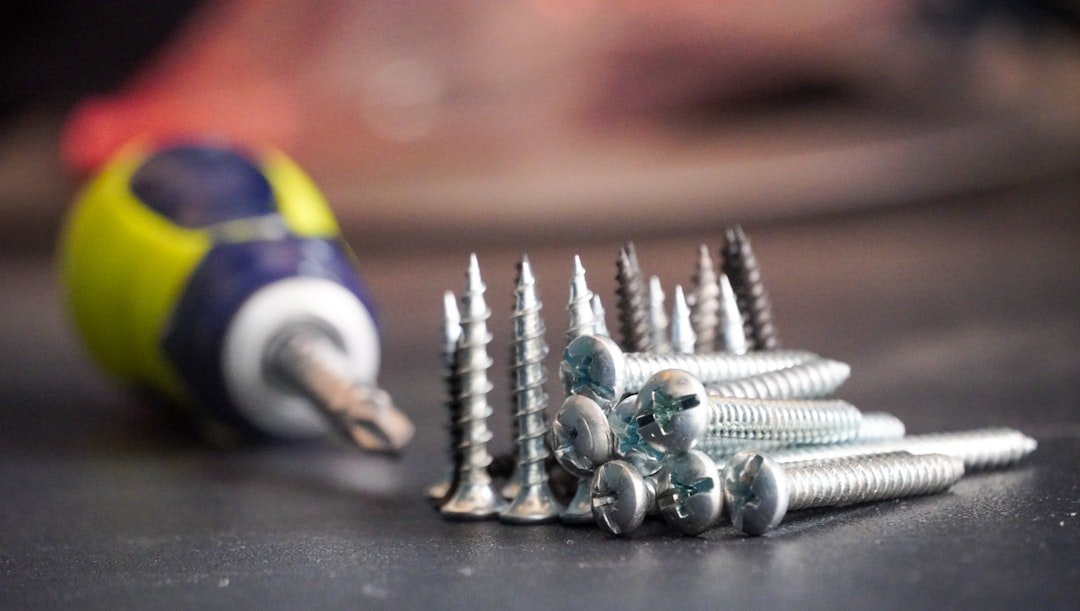
Selecting The Correct Screw
Choose screws that fit the material and the task. The size, length, and type matter for a strong hold.
- Use wood screws for wood projects.
- Choose metal screws for metal surfaces.
- Select the right length to avoid splitting or weak holds.
- Pick screws with the correct head type for your drill bit.
Marking Screw Locations
Mark where each screw will go to keep your work even and precise. This saves time and reduces mistakes.
| Tool | Purpose | Tip |
| Measuring Tape | Measure distances between screws | Double-check measurements |
| Pencil | Mark screw points | Use a sharp pencil for clear marks |
| Level | Ensure marks are straight | Check both vertical and horizontal lines |
Safety Gear Essentials
Wear safety gear to protect yourself from dust, debris, and accidents while drilling.
- Safety glasses protect your eyes from flying particles.
- Ear protection reduces noise impact from the drill.
- Gloves keep your hands safe and improve grip.
- Wear a dust mask if drilling materials that create dust.
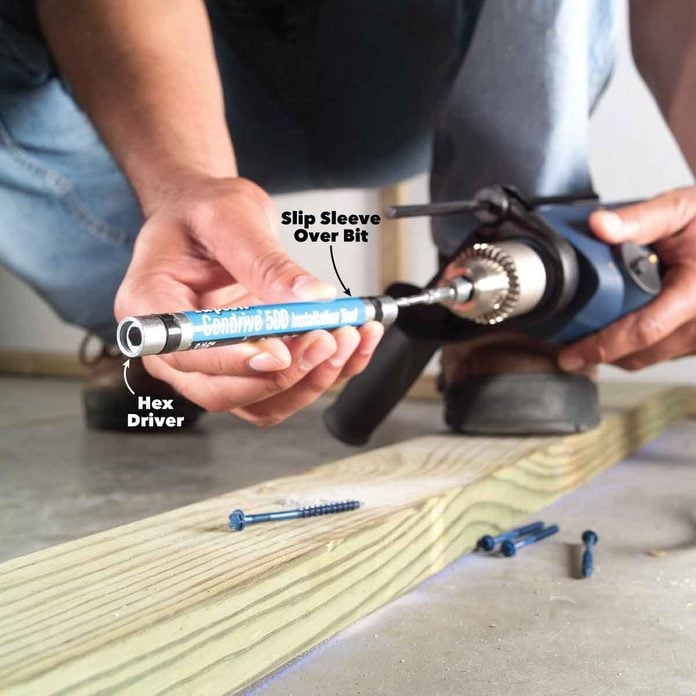
Setting Up The Drill
Before you start installing screws, you need to set up your power drill correctly. A proper setup makes the job easier and safer.
This guide covers how to insert the drill bit, adjust torque, and choose the right speed for your task.
Inserting The Drill Bit
First, choose the right drill bit for the screws you will use. The bit should fit tightly in the chuck.
To insert the bit, open the chuck by turning it counterclockwise. Place the bit in the center, then tighten the chuck by turning it clockwise.
- Make sure the bit is straight before tightening
- Use your hand or the drill’s key to secure the chuck
- Check that the bit does not wobble
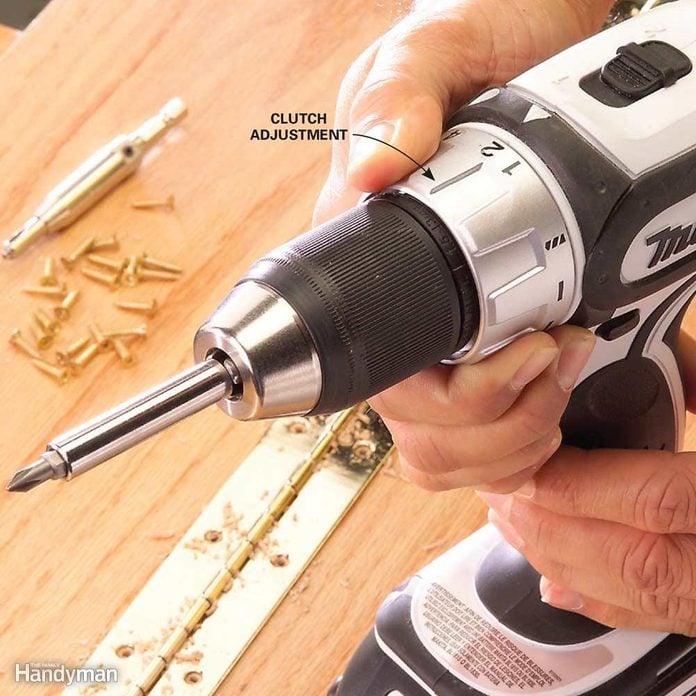
Adjusting Torque Settings
Torque controls how much force the drill uses to turn the screw. Adjust it based on the screw size and material.
Low torque is good for small screws or soft wood. High torque is best for large screws or hard surfaces.
- Start with a low setting to avoid stripping screws
- Increase torque if the drill struggles to drive the screw
- Use the drill’s torque ring to change settings
Choosing Drill Speed
Drill speed affects how fast the bit turns. Choose a speed that matches the screw and material.
Use low speed for harder materials or large screws. Use high speed for soft materials or small screws.
- Low speed prevents damage on tough surfaces
- High speed helps with quick drilling in soft wood
- Most drills have variable speed triggers for control
Credit: www.familyhandyman.com
Drilling Techniques
Using a power drill to install screws needs careful technique. Good drilling helps keep screws straight and secure.
Focus on how you hold the drill, start the screw, and keep control while working. These tips make the job easier and safer.
Holding The Drill Properly
Hold the drill firmly with your dominant hand. Your other hand should support the drill for balance.
Keep your wrist straight to avoid strain. Hold the drill close to the body for better control.
- Use a firm grip, but do not squeeze too tight
- Keep your arms steady and close to your sides
- Hold the drill perpendicular to the surface
Starting The Screw
Place the screw tip on the spot where you want it. Keep the drill bit aligned with the screw head.
Start drilling at a low speed. This helps the screw bite into the material without slipping.
- Line up the drill bit with the screw
- Press the drill gently against the surface
- Start with slow speed to avoid slipping
Maintaining Control
Keep steady pressure while driving the screw. Avoid pushing too hard to prevent stripping the screw head.
Use short bursts of power if needed. Stop once the screw is flush with the surface to avoid damage.
- Apply steady, even pressure
- Use short bursts if the drill slips
- Stop when the screw sits flush
Troubleshooting Common Issues
Using a power drill for screws can be simple. Some problems may slow you down. Fixing these issues helps your work go smoothly.
This guide covers common problems and how to solve them. You will learn to avoid stripped screws, stop slipping bits, and handle tough materials.
Avoiding Stripped Screws
Stripped screws happen when the drill bit slips inside the screw head. This makes it hard to tighten or remove screws.
- Use the right drill bit size for the screw.
- Keep the drill steady and straight while driving screws.
- Apply moderate pressure, not too hard or too soft.
- Set the drill to a low speed for better control.
- Stop drilling if the screw feels loose or spins without grip.
Dealing With Slipping Bits
Bits can slip inside the drill chuck or the screw head. This wastes time and may damage your tools.
| Problem | Cause | Fix |
| Bit slips in chuck | Chuck not tight | Tighten chuck firmly |
| Bit slips in screw | Wrong bit size | Match bit to screw head |
| Bit worn out | Old or damaged bit | Replace with new bit |
| Chuck dirty | Dirt or debris in chuck | Clean chuck before use |
Handling Hard Materials
Hard materials like metal or dense wood make screwing difficult. The drill can stall or bits can wear out fast.
- Choose drill bits made for hard materials.
- Drill a pilot hole before driving screws.
- Use lower speed settings to reduce heat.
- Keep the drill bit cool by pausing often.
- Apply steady, firm pressure without forcing the drill.

Credit: www.familyhandyman.com
Maintenance Tips
Taking care of your power drill helps it last longer. Regular maintenance keeps it working well.
Simple steps like cleaning, storing, and checking the battery improve drill performance.
Cleaning The Drill
Remove dust and dirt from your drill after use. Use a dry cloth to wipe the surface and vents.
Keep the chuck clean to avoid problems when changing bits. Use a small brush to clear debris.
- Unplug or remove the battery before cleaning
- Use compressed air to blow out dust
- Avoid water or liquids on the drill
Storing Properly
Store your drill in a dry place to prevent rust and damage. Avoid places with high humidity.
Keep your drill in its case or on a shelf where it won’t fall. Proper storage protects the tool.
- Use the original case if available
- Keep drill parts organized and secure
- Store away from extreme heat or cold
Checking Battery Health
Check the battery charge before each use. A full battery gives better power and lasts longer.
Inspect the battery for cracks or leaks. Replace damaged batteries to avoid safety risks.
- Charge the battery fully before storing
- Avoid letting the battery drain completely
- Use the correct charger made for your battery
Credit: www.familyhandyman.com
Frequently Asked Questions
What Is The First Step In Using A Power Drill?
Begin by selecting the appropriate drill bit for your screw size. Secure it tightly in the drill’s chuck. Ensure the drill is set to the correct speed and torque setting for the material you are working with. Always wear protective gear and follow safety guidelines before starting.
How Do I Choose The Right Drill Bit?
Select a drill bit that matches the diameter of your screw. For wood, use a wood drill bit, and for metal, use a metal drill bit. Ensure the drill bit is sharp and in good condition to prevent slipping or damage to the material.
How Can I Prevent Screws From Stripping?
To avoid stripping screws, apply consistent pressure while drilling. Use the correct torque setting on your drill. Ensure the drill bit is aligned straight with the screw. If the screw resists, stop and check for any obstructions or adjustments needed.
Why Is Pre-drilling Holes Necessary?
Pre-drilling helps prevent the material from splitting and ensures easier screw insertion. It provides a guide path for the screw, reducing resistance. This step is especially important in hardwoods or when working close to the material’s edge, where splitting is more likely.
Conclusion
Using a power drill to install screws makes work faster and easier. Always choose the right drill bit for the screw size. Keep steady pressure and control your speed for best results. Practice on scrap wood to build confidence. Safety matters—wear goggles and keep fingers clear.
With these steps, you can handle simple projects at home. Enjoy the satisfaction of fixing things yourself. Simple tools, smart moves. You’ve got this.