Are you ready to transform your home with the elegance of crown molding and trim? Mastering the use of a miter saw for these projects can be your ticket to achieving professional-looking results without the hefty price tag of hiring a contractor.
Imagine the satisfaction of walking into a room and knowing you crafted its stunning accents yourself. In this guide, you’ll learn the step-by-step process to use a miter saw effectively, ensuring each cut is precise and every piece fits perfectly.
Whether you’re a seasoned DIY enthusiast or a beginner, this article will provide you with the confidence and skills you need to elevate your home’s aesthetic. Stick around and discover how easy it is to make your living space truly remarkable.
Choosing The Right Miter Saw
Using a miter saw for crown molding and trim makes your cuts clean and precise. Picking the right saw helps you work faster and safer.
There are different types of miter saws and blades. You should also check the safety features before buying.
Types Of Miter Saws
Miter saws come in three main types: standard, compound, and sliding compound. Each type suits different cutting needs.
Standard miter saws cut at various angles but do not tilt. Compound saws tilt and angle for bevel and miter cuts. Sliding compound saws move forward and backward for wider boards.
- Standard Miter Saw:Good for simple angle cuts.
- Compound Miter Saw:Cuts angles and bevels.
- Sliding Compound Miter Saw:Handles larger boards easily.
Blade Selection For Crown Molding
Choosing the right blade helps you get smooth cuts on crown molding and trim. Look for blades with many teeth.
Blades with 60 to 80 teeth give clean edges. Thin kerf blades remove less material and reduce waste.
- High tooth count for smooth finish
- Thin kerf for less wood removal
- Carbide-tipped teeth last longer
Safety Features To Consider
Safety is important when using a miter saw. Look for saws with guards and locks that protect your hands.
Electric brakes stop the blade quickly. A stable base keeps the saw steady during cuts.
- Blade guards to cover the blade
- Electric brake to stop blade fast
- Locking mechanism for safe transport
- Non-slip base for stability
Preparing Your Workspace
Using a miter saw for crown molding and trim needs a clean workspace. A tidy area helps you work safely and accurately.
Before cutting, prepare your tools and materials. This makes the job faster and easier.
Setting Up A Stable Work Surface
A stable work surface keeps your materials steady during cutting. This reduces mistakes and accidents.
Use a strong table or workbench. Make sure it is level and does not wobble.
- Place the miter saw on the workbench securely
- Clear the area around the saw to avoid clutter
- Use clamps to hold the molding firmly in place
- Check that the surface is flat and clean
Measuring And Marking Moldings
Measure your crown molding and trim carefully. Accurate measurements prevent waste and poor fits.
Mark the cutting lines with a pencil. Use a square or protractor to get the right angles.
- Measure twice before marking
- Mark the back side of the molding to hide pencil lines
- Note inside or outside corners for angle cuts
- Use a fine pencil for clear, thin lines
Gathering Essential Tools
Collect all tools before starting your cuts. This keeps you organized and saves time.
Having the right tools helps you work safely and accurately.
- Miter saw with sharp blade
- Measuring tape
- Pencil and square or protractor
- Clamps to hold moldings
- Safety glasses and ear protection
- Work gloves for hand safety
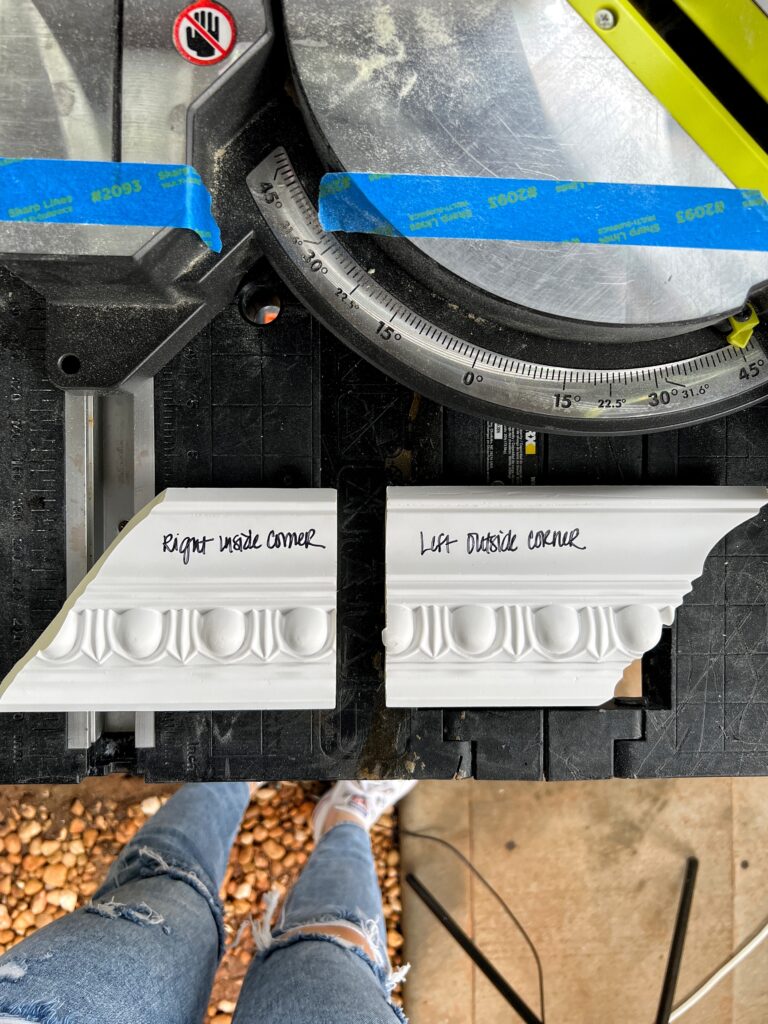
Setting Angles For Crown Molding
Cutting crown molding needs precise angle settings on your miter saw. Getting these angles right helps the molding fit together neatly in corners.
Understanding how to set the bevel and miter angles is key. This guide explains how to calculate spring angles and use angle finder tools for accuracy.
Calculating Spring Angles
The spring angle is the angle between the wall and the back of the crown molding. Most crown molding has spring angles of 38, 45, or 52 degrees.
Knowing this angle helps you set your saw correctly. You use it to find the right bevel and miter settings for clean cuts.
- Check the molding packaging for spring angle info
- If unknown, measure the angle with a protractor
- Use the spring angle to adjust your saw settings
Adjusting Bevel And Miter Settings
Set the bevel and miter angles on your saw based on the spring angle. This ensures the molding corners fit tightly.
For example, with a 38-degree spring angle, set the miter to 31.6 degrees and the bevel to 33.9 degrees. These numbers change with different spring angles.
| Spring Angle | Miter Angle | Bevel Angle |
| 38° | 31.6° | 33.9° |
| 45° | 35.3° | 45° |
| 52° | 38.9° | 26.6° |
Always double-check your saw’s angle scales before cutting. Small errors can cause gaps in the molding joints.
Using Angle Finder Tools
Angle finder tools help measure the angles of your walls and molding. They make setting your saw more accurate and easier.
Digital angle finders give precise readings. Manual angle finders or bevel gauges also work well for most jobs.
- Place the angle finder against the wall corner to measure the wall angle
- Use it to find the exact spring angle of the crown molding
- Transfer these measurements to your miter saw settings
- Practice with scrap pieces before cutting your final molding
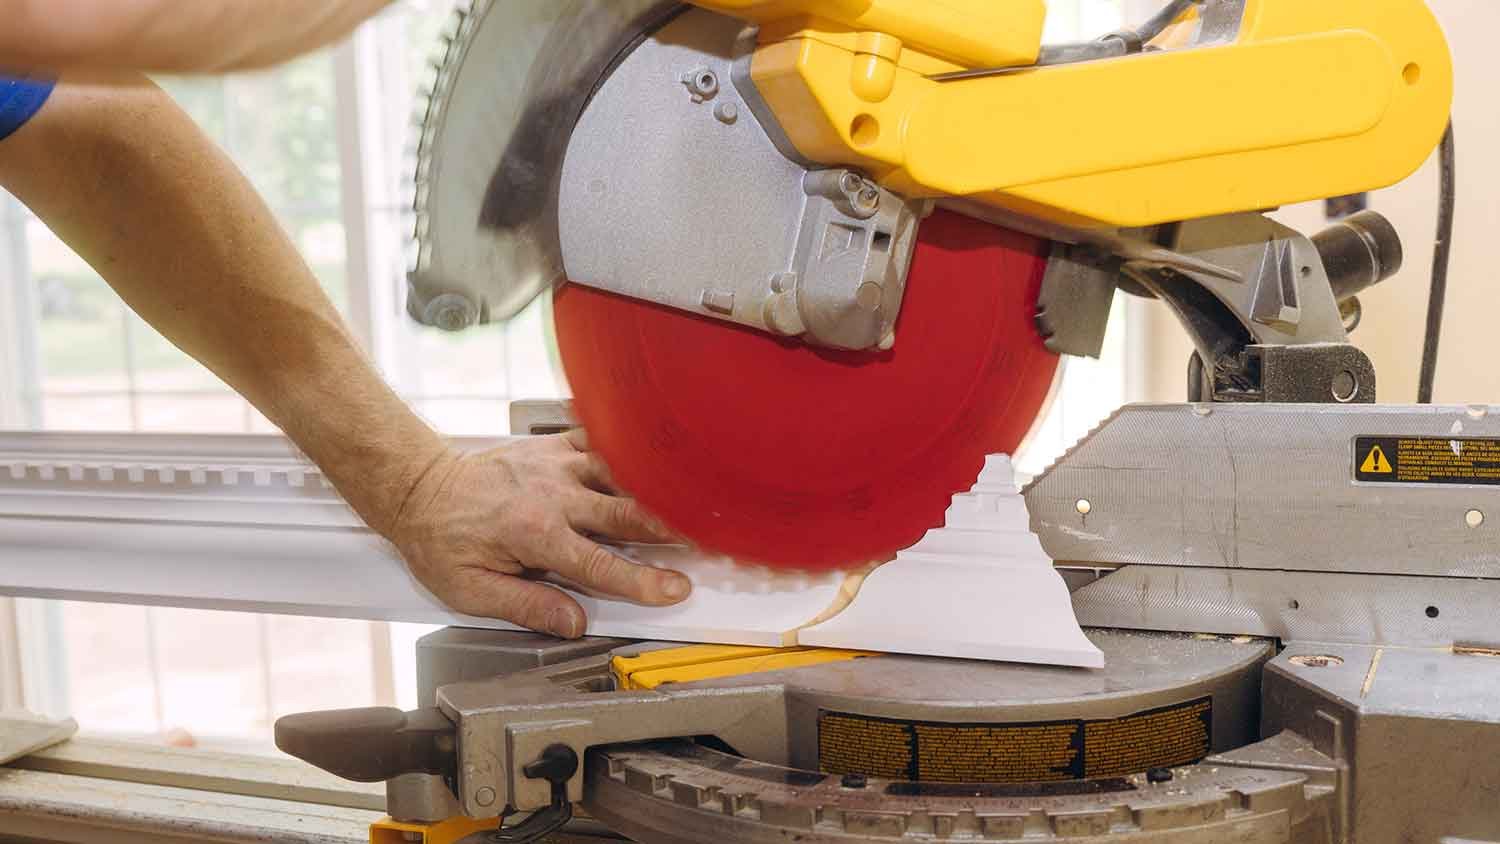
Cutting Techniques For Trim
Cutting crown molding and trim with a miter saw needs care and skill. Using the right techniques helps get clean, precise cuts. This guide focuses on cutting tips for trim pieces.
Trim work often involves different types of cuts to fit corners and edges. Knowing how to handle each cut type makes your project look professional.
Inside Vs Outside Corners
Inside corners are where two walls meet at an angle inside a room. Outside corners are the edges that stick out. Each corner type needs different cutting angles.
For inside corners, cut the trim at a 45-degree angle so pieces fit snugly together. Outside corners require opposite 45-degree cuts to wrap around the corner.
- Inside corners: Both pieces cut with 45° angles facing inward
- Outside corners: Both pieces cut with 45° angles facing outward
- Check angles with a protractor or angle finder
Making Accurate Crosscuts
Crosscuts cut the trim across its width, not along its length. They help make straight ends that fit well against walls or other trim.
Use the miter saw’s fence to hold the trim steady. Mark the cut line clearly on the trim before cutting. Always cut slowly to keep the blade steady.
- Place trim firmly against the saw fence
- Align the blade with the marked cut line
- Hold trim tight to prevent movement
- Make slow, smooth cuts for clean edges
Handling Compound Cuts
Compound cuts combine a miter angle and a bevel angle. These cuts are common for crown molding that sits at an angle on the wall and ceiling.
Set the miter saw to the needed miter angle and tilt the blade to the bevel angle. This lets you cut both angles in one pass for a perfect fit.
- Check crown molding angles before cutting
- Set miter angle on the saw first
- Tilt the saw blade to the bevel angle
- Test cut on scrap wood to confirm
Assembly And Installation Tips
Using a miter saw for crown molding and trim needs careful assembly and installation. Good preparation helps the pieces fit well.
Following simple tips makes the process smoother and the results cleaner. Focus on fitting, securing, and finishing the trim.
Dry Fitting Moldings
Dry fitting means placing the molding pieces without nails or glue. This step checks if cuts are correct before final installation.
Fit the pieces together on the wall or floor. Look for gaps or misalignments and adjust the cuts if needed.
- Cut all pieces with the miter saw first
- Place pieces in the corners to test angles
- Mark problem spots for trimming
- Check for tight joints between pieces
Nailing And Securing Trim
Use finishing nails or a nail gun to attach the molding to the wall. Nails hold the trim firmly in place.
Drive nails into wall studs or use anchors for a strong hold. Countersink nails slightly below the surface.
- Use a nail gun for faster work
- Place nails every 12 to 16 inches
- Make sure molding stays flush to the wall
- Fill nail holes before painting
Filling Gaps And Finishing
Fill any gaps or nail holes with wood filler or caulk. This step makes the trim look smooth and neat.
After filling, sand the surface lightly. Then paint or stain the molding to match your room decor.
- Use paintable caulk for corners and joints
- Sand filler after it dries for a smooth finish
- Apply primer before painting if needed
- Clean dust before painting

Credit: sawdustgirl.com
Common Mistakes To Avoid
Using a miter saw for crown molding and trim requires care and attention. Many people make simple errors that lead to poor results. Avoiding these mistakes will save time and materials.
Below are common problems and tips to help you get clean, precise cuts with your miter saw.
Misaligned Cuts
Misaligned cuts happen when the saw blade or molding is not set correctly. This leads to gaps or uneven edges that are hard to fix.
- Always double-check the angle settings on your saw before cutting.
- Make sure the molding is firmly held against the fence and table.
- Use a square or angle finder to verify your setup.
- Cut slowly and watch the blade line closely as you cut.
Ignoring Safety Precautions
Working with a miter saw can be dangerous if safety is ignored. Injuries can occur from blade contact or flying debris.
| Safety Tip | Reason |
| Wear safety glasses | Protect eyes from dust and chips |
| Keep hands away from blade | Prevent cuts and injuries |
| Use clamps to hold molding | Keep material steady and secure |
| Check blade condition | Sharp blades cut cleanly and safely |
Skipping Test Cuts
Many people skip making test cuts. This causes wasted material and inaccurate fitting pieces.
- Always cut a scrap piece of molding first.
- Check if the angle and length fit your corner.
- Adjust your saw settings if the test cut is off.
- Only cut the final piece once the test fits perfectly.
Maintenance And Care For Miter Saws
Taking care of your miter saw keeps it working well for a long time. Regular maintenance helps you cut accurately and safely.
Here are key tips on cleaning, calibrating, and storing your saw to keep it in good shape.
Cleaning The Blade And Motor
Clean the blade after every use to remove sawdust and resin. This prevents buildup that can slow the blade and cause rough cuts.
- Unplug the saw before cleaning
- Use a brush to clear dust from the blade and motor vents
- Wipe the blade with a soft cloth and a mild cleaner
- Check the motor fan for debris and clean carefully
- Keep the saw dry to avoid rust
Calibrating Angles Regularly
Calibration ensures your miter saw cuts at the right angles. Check the settings often to keep cuts precise.
| Calibration Task | How Often | Tools Needed |
| Check miter angle | Monthly | Angle finder or protractor |
| Check bevel angle | Monthly | Bevel gauge |
| Test fence alignment | Every 3 months | Square tool |
| Tighten loose screws | Monthly | Screwdriver |
Storing The Saw Safely
Store your miter saw in a dry, clean place to avoid damage and rust. Proper storage keeps the saw ready for the next job.
- Cover the saw with a dust cover
- Keep it away from moisture and extreme temperatures
- Store on a stable surface to prevent falls
- Remove the blade if storing for a long time
- Disconnect the power cord safely
Credit: ouraestheticabode.com

Credit: www.youtube.com
Frequently Asked Questions
What Blade Angle Is Best For Crown Molding Cuts?
A 45-degree blade angle is typically best for crown molding. It allows clean, precise inside and outside corner cuts. Adjust the miter and bevel angles according to your molding’s spring angle for perfect fits.
How Do You Position Crown Molding On A Miter Saw?
Place crown molding upside down and tilted against the saw’s fence. This mimics its position on the wall ceiling joint. This setup ensures accurate angle cuts and proper alignment when installed.
Can A Miter Saw Cut Both Trim And Crown Molding?
Yes, a miter saw can cut both trim and crown molding. Adjust the angle settings based on the material profile. It is versatile and ideal for precise angled cuts on various molding types.
What Safety Tips Are Important When Using A Miter Saw?
Always wear safety glasses and keep hands clear of the blade. Secure the molding firmly and use slow, steady cuts. Follow manufacturer instructions to avoid accidents and ensure clean, accurate cuts.
Conclusion
Using a miter saw for crown molding and trim makes your work neater. Measure carefully and set the correct angle before cutting. Take your time to ensure each cut fits perfectly. Practice on scrap pieces to build confidence and skill.
Clean cuts help the molding look professional and sharp. With patience, your room will have a polished, finished look. Keep safety in mind and always wear protective gear. Small steps lead to great results in home projects. Enjoy the process and the beauty it brings to your space.