If you want your trim work to look sharp and professional, mastering the miter saw is key. But cutting trim accurately can feel tricky if you’re unsure how to use your saw the right way.
Don’t worry—you’re about to learn simple steps that will help you make perfect cuts every time. Imagine how satisfying it will be to finish your project with clean, precise edges that fit together flawlessly. Keep reading, and you’ll discover easy tips to boost your confidence and get the job done like a pro.
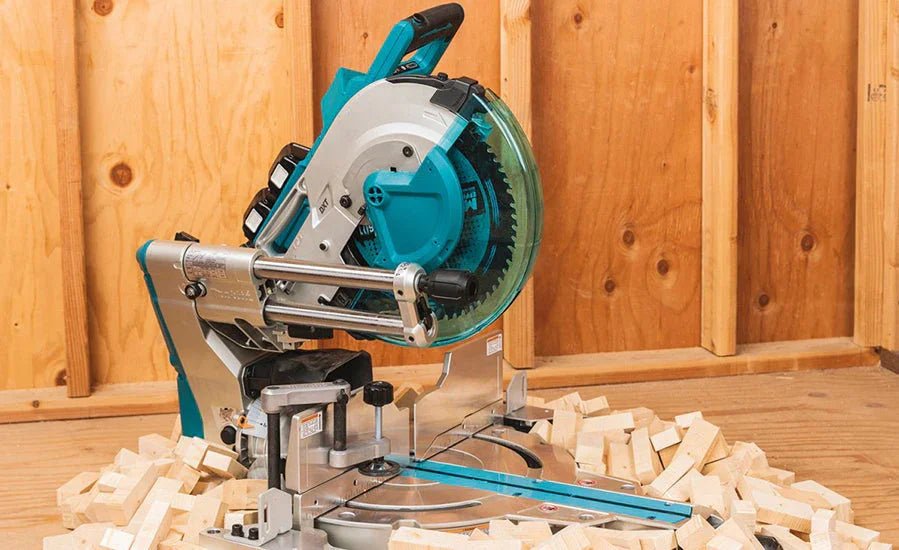
Choosing The Right Miter Saw
Using a miter saw helps you cut trim pieces with precision. Picking the correct saw makes your work easier. This guide explains key points for selecting the right tool.
Look at the types of miter saws and the blades you should use. These choices affect your cutting accuracy and safety.
Types Of Miter Saws
Miter saws come in several styles. Each type suits different cutting needs and job sizes. Knowing these helps you find the best fit for trim work.
- Standard Miter Saw:Cuts angled crosscuts and simple trim pieces.
- Compound Miter Saw:Tilts to cut bevels and angled trims in one pass.
- Sliding Compound Miter Saw:Has a sliding arm to cut wider boards and longer trim.
- Dual-Bevel Miter Saw:Tilts both left and right for complex trim angles.
Blade Selection Tips
Choosing the right blade improves cut quality and blade life. Different blades work better on various materials and cut types.
| Blade Type | Number of Teeth | Best For |
| Crosscut Blade | 60-80 | Fine cuts on trim and molding |
| Combination Blade | 40-50 | General purpose cuts on wood |
| Fine Finish Blade | 80-100 | Very smooth cuts on delicate trim |
| Plywood Blade | 100+ | Cuts veneer without splintering |

Credit: www.findbuytool.com
Preparing Your Workspace
Setting up your workspace is important before using a miter saw. A good workspace helps you cut trim pieces accurately and safely.
Taking time to prepare will make your work easier and protect you from accidents.
Setting Up A Stable Surface
Place your miter saw on a flat, solid surface. Stability stops the saw from moving during cuts.
Use a workbench or a heavy table that does not shake. If needed, clamp the saw down to keep it steady.
- Choose a strong table or bench
- Make sure the surface is level
- Clamp the saw if it can move
- Clear the area around the saw
Ensuring Proper Lighting
Good lighting helps you see the trim and cut lines clearly. This reduces mistakes and improves safety.
Use bright lights directly over your workspace. Avoid shadows that can hide markings or the blade.
- Use overhead lights or a strong lamp
- Position lights to avoid glare
- Check that the blade and markings are easy to see
- Add extra lighting if needed
Safety Precautions
Safety is important when working with a miter saw. Prepare your space to avoid accidents.
Keep the area clean and wear safety gear like goggles and ear protection. Make sure the saw is unplugged when adjusting it.
- Wear safety glasses and hearing protection
- Keep the work area free of clutter
- Unplug the saw before changing blades
- Keep hands away from the blade
- Have a first aid kit nearby
Measuring And Marking Trim
Cutting trim accurately needs good measuring and marking skills. This helps you get clean corners and tight fits.
Learn how to use a tape measure, mark cut lines, and handle angles for the best results.
Using A Tape Measure Correctly
Hold the tape measure tight and straight along the trim. Avoid bending it, as this can give wrong numbers.
- Start measuring from the tape’s end hook.
- Pull the tape firmly to avoid sagging.
- Double-check the number before marking.
- Measure twice to be sure before cutting.
Marking Accurate Cut Lines
Use a sharp pencil or marking tool to make thin lines. Thick lines may cause cutting mistakes.
| Tool | Purpose |
|---|---|
| Sharp Pencil | Make fine, clear lines |
| Square | Draw straight 90-degree lines |
| Combination Square | Mark angles and straight lines |
| Marking Knife | Create precise cut marks |
Always mark the cut line on the waste side of the trim. This keeps your piece the right length.
Accounting For Angles
Trim corners often need angled cuts. Measure the angle with a protractor or angle finder.
- Place the angle finder on the corner.
- Note the degree shown on the tool.
- Set your miter saw to half this angle.
- Mark the trim edge to match the saw angle.
- Cut carefully, following the marked line.
Adjusting The Miter Saw For Precision
Using a miter saw to cut trim requires careful adjustments. Setting the saw correctly helps you make exact cuts every time. This guide covers key adjustments to improve your cutting precision.
Focus on setting the miter angle, adjusting the bevel angle, and locking the saw firmly. These steps keep your cuts clean and accurate.
Setting The Miter Angle
The miter angle controls the horizontal tilt of the saw blade. Adjust it to match the angle needed for your trim corners. Most miter saws have a clear scale to help you set this angle precisely.
- Loosen the miter lock handle to move the saw base.
- Rotate the saw to the desired angle using the scale.
- Align the indicator with the angle mark.
Adjusting The Bevel Angle
The bevel angle controls the tilt of the saw blade from front to back. This helps you make angled cuts on trim edges. Adjusting the bevel lets you create more complex joints.
| Bevel Angle | Use |
|---|---|
| 0° | Straight vertical cuts |
| 15° to 45° | Angled trim edges |
| Over 45° | Special angled joints |
To adjust the bevel angle:
- Unlock the bevel adjustment lever.
- Tilt the saw blade to the needed angle.
- Lock the lever to secure the blade position.
Locking The Saw In Place
Locking the saw after adjustments stops any unwanted movement. This ensures your cut stays accurate throughout the process. Use all locking handles firmly before cutting.
- Check that both miter and bevel locks are tight.
- Test the saw by gently moving it after locking.
- Use clamps for extra stability on the workpiece.
Cutting Techniques For Clean Edges
Using a miter saw to cut trim needs care and good technique. Clean edges make your project look neat and professional.
Focus on how you position the trim, test your cuts, and cut smoothly. This helps avoid mistakes and rough edges.
Positioning The Trim
Place the trim firmly against the saw fence. Make sure it is flat and stable before cutting.
Hold the trim tightly but do not force it. Use clamps if needed to keep it steady.
- Check that the trim is flush with the fence
- Support the trim on both sides of the cut
- Keep your hands away from the blade
Making Test Cuts
Always make a test cut on scrap wood before the real trim. This helps you check the angle and length.
Use the test cut to adjust the saw settings if needed. It saves material and prevents mistakes on your trim.
- Cut a small piece of scrap at the same angle
- Measure the test piece for accuracy
- Adjust the saw angle or trim position as needed
Executing Smooth Cuts
Start the saw before touching the trim. Lower the blade slowly and steadily through the wood.
Do not force the blade. Let the saw cut at its own speed for a clean edge without splinters.
- Keep a firm grip on the saw handle
- Lower the blade smoothly and evenly
- Wait for the blade to stop before raising it

Credit: m.youtube.com
Common Mistakes To Avoid
Using a miter saw to cut trim can be tricky. Many people make simple mistakes that affect their cuts.
Knowing what to avoid helps you get clean and accurate cuts every time.
Misreading Angles
One common error is not reading the angles correctly on the saw. Trim pieces often need precise angle cuts to fit well.
If you guess or do not check the angle carefully, the trim will not fit tight against walls or corners.
- Always set the saw angle to the exact degree needed.
- Double-check the angle setting before each cut.
- Use an angle finder tool if unsure of the angle.
Improper Clamping
Not securing the trim piece firmly can cause movement during cutting. This leads to uneven or inaccurate cuts.
Always clamp the trim tightly to the saw’s fence or work surface before cutting.
- Use a clamp that fits the size of the trim piece.
- Check that the trim does not shift when you apply pressure.
- Keep your hands clear of the blade while clamping.
Rushing The Cut
Cutting too fast can cause splintering or rough edges on your trim. It also increases the risk of mistakes or injury.
Take your time and let the saw do the work. Slow and steady cuts give the best results.
- Start the saw before touching the trim piece.
- Move the blade slowly through the wood.
- Wait for the blade to stop before lifting it after the cut.
Finishing Touches
After cutting trim pieces with a miter saw, the final steps make the project look neat. These finishing touches help the trim fit well and look polished.
Pay close attention to sanding, fitting, and touching up paint or stain. These tasks ensure your trim looks professional and clean.
Sanding Cut Edges
Sanding smooths the edges of your cut trim. It removes rough spots and splinters for a clean look. Use fine-grit sandpaper and sand lightly along the cut.
- Hold the trim firmly to avoid slipping.
- Sand in the direction of the wood grain.
- Check the edges by touch for smoothness.
- Remove dust with a brush or cloth before fitting.
Fitting Trim Pieces Together
Check the fit of your trim pieces before final installation. Proper fitting avoids gaps and uneven joints. Use a table like this to guide your checking process.
| Check Point | What to Look For | Action if Needed |
| Joint Alignment | Edges meet evenly | Slight sanding or recut |
| Angle Accuracy | No gaps at corners | Adjust miter angle |
| Length Fit | Trim fits wall length | Trim ends carefully |
| Surface Contact | Trim lays flat on wall | Check for warps |
Touching Up With Paint Or Stain
After fitting, touch up the trim with paint or stain. This covers small marks and blends cuts with the rest of the trim. Use a small brush for control.
- Choose paint or stain that matches your trim.
- Apply thin coats for an even finish.
- Let each coat dry before adding more.
- Wipe away any excess to avoid drips.
- Inspect in good light to catch missed spots.

Credit: benchmarkabrasives.com
Frequently Asked Questions
How Do I Set The Miter Angle For Trim Cuts?
Adjust the miter saw’s angle gauge to match your trim’s corner angle. Most trim uses 45 degrees. Always double-check with a protractor for accuracy before cutting.
What Blade Type Is Best For Cutting Trim?
Use a fine-toothed blade, preferably 80 to 100 teeth, designed for finish work. It ensures clean, smooth cuts without splintering the trim edges.
How Can I Avoid Splintering When Cutting Trim?
Place painter’s tape along the cut line and cut slowly. Use a sharp blade and support the trim firmly to minimize splintering.
Should I Measure Twice Before Cutting Trim With A Miter Saw?
Yes, always measure twice to avoid mistakes. Accurate measurements prevent wasted material and ensure precise, clean trim cuts.
Conclusion
Using a miter saw for trim cutting boosts your project’s precision. Follow the steps to ensure clean, accurate cuts. Remember to measure twice before cutting. Secure the trim firmly to avoid movement. Practice helps improve your skills over time. Patience and attention to detail are key.
Always prioritize safety; wear protective gear. Keep your work area organized and clean. With these tips, your trim projects will look professional. Enjoy the satisfaction of a job well done. Happy cutting!