Are you ready to transform your home with the elegance of crown molding, but feel a bit intimidated by the miter saw? You’re not alone.
Many DIY enthusiasts and even seasoned woodworkers find crown molding to be a challenging task. But here’s the secret: mastering the miter saw is your golden ticket to achieving those seamless, professional-looking cuts. Imagine the satisfaction of admiring perfectly aligned moldings that elevate the entire room.
In this guide, we’ll break down the process of operating a miter saw for crown molding into simple, manageable steps. You’ll gain the confidence and skills you need to take your home improvement project to the next level. Stay with us, and by the end of this article, you’ll be equipped to turn your vision into reality.
Credit: sawdustgirl.com
Choosing The Right Miter Saw
A miter saw is a key tool for cutting crown molding accurately. Picking the right saw helps you make clean, precise cuts. This guide covers what to look for in a miter saw for crown molding.
Choosing the right miter saw depends on the type of cuts you need and the size of the molding. Use the right blade to avoid damage and get smooth edges.
Types Of Miter Saws
There are several types of miter saws. Each type fits different cutting needs and projects. Knowing the types helps you pick the best saw for crown molding.
- Standard Miter Saw:Cuts at a fixed angle and can tilt to make bevel cuts.
- Compound Miter Saw:Tilts and pivots for angled and bevel cuts. Good for complex molding.
- Sliding Compound Miter Saw:Has a sliding arm for wider cuts. Best for large crown molding pieces.
For crown molding, a sliding compound miter saw offers more flexibility. It can handle wider boards and make precise angle cuts.
Blade Selection For Crown Molding
The right blade makes a big difference in cutting crown molding. Use a blade designed for fine woodworking for smooth cuts.
- Blade Size:A 10 to 12-inch blade works well for most crown molding.
- Number of Teeth:Choose blades with 60 to 80 teeth for clean cuts.
- Tooth Type:Fine-tooth blades reduce splintering on delicate molding.
- Material:Carbide-tipped blades last longer and stay sharp.
Using the correct blade reduces tear-out and gives a neat finish on crown molding edges.
Setting Up Your Workspace
Setting up your workspace properly helps you work safely and efficiently. A clean and organized area makes cutting crown molding easier.
Before using a miter saw, prepare your space to avoid accidents and mistakes. This guide covers safety and tool organization.
Safety Precautions
Safety is the top priority when using a miter saw. A well-planned workspace keeps you safe and prevents injuries.
Wear safety gear like goggles and ear protection. Keep your hands away from the blade at all times.
- Clear the area of clutter before starting
- Check the saw blade for damage
- Secure the molding firmly before cutting
- Make sure the saw is on a stable surface
- Keep a first aid kit nearby
Organizing Tools And Materials
Arrange your tools and materials close to your workspace. This saves time and keeps your area neat.
Use shelves or tables to hold your crown molding and measuring tools. Label your tools if needed for easy access.
- Place the miter saw on a sturdy workbench
- Keep measuring tape, pencil, and speed square nearby
- Stack crown molding pieces in order of use
- Have clamps ready to hold the molding in place
- Keep a trash bin close for scrap pieces
Preparing Crown Molding For Cutting
Preparing crown molding before cutting is important for clean and accurate results. This step helps avoid mistakes and waste.
Take your time to measure and mark the molding carefully. Know the type of corners you will cut to set the saw correctly.
Measuring And Marking
Measure the length of the wall where the crown molding will go. Use a tape measure for exact numbers.
Mark the molding piece with a pencil. Draw clear lines where you will make the cuts.
- Measure twice to avoid errors
- Mark the back side of the molding
- Use a square to draw straight lines
- Label each piece if cutting multiple parts
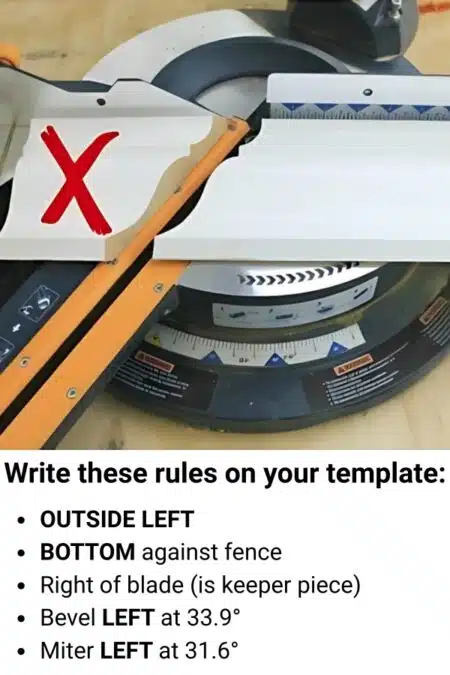
Identifying Inside And Outside Corners
Inside corners are where two walls meet inward. Outside corners are where walls meet outward.
Knowing the corner type helps set the miter saw angle correctly. Different corners need different saw settings.
- Inside corners need a bevel cut towards the wall
- Outside corners require a bevel cut away from the wall
- Check corner angles with a protractor or angle finder
- Label molding pieces by corner type before cutting
Adjusting Miter Saw Angles
Using a miter saw for crown molding needs careful angle adjustments. Angles control how the molding fits in corners.
Setting the right angles helps you cut molding pieces that join smoothly. This guide covers angle basics for crown molding.
Understanding Bevel And Miter Angles
A miter saw uses two main angles: bevel and miter. Bevel angle tilts the blade left or right. Miter angle turns the saw base left or right.
For crown molding, you often need to adjust both angles. This helps you cut the right shape for inside and outside corners.
- Bevel angle:Blade tilt for angled cuts
- Miter angle:Base rotation for corner cuts
- Both angles work together for precise molding joints
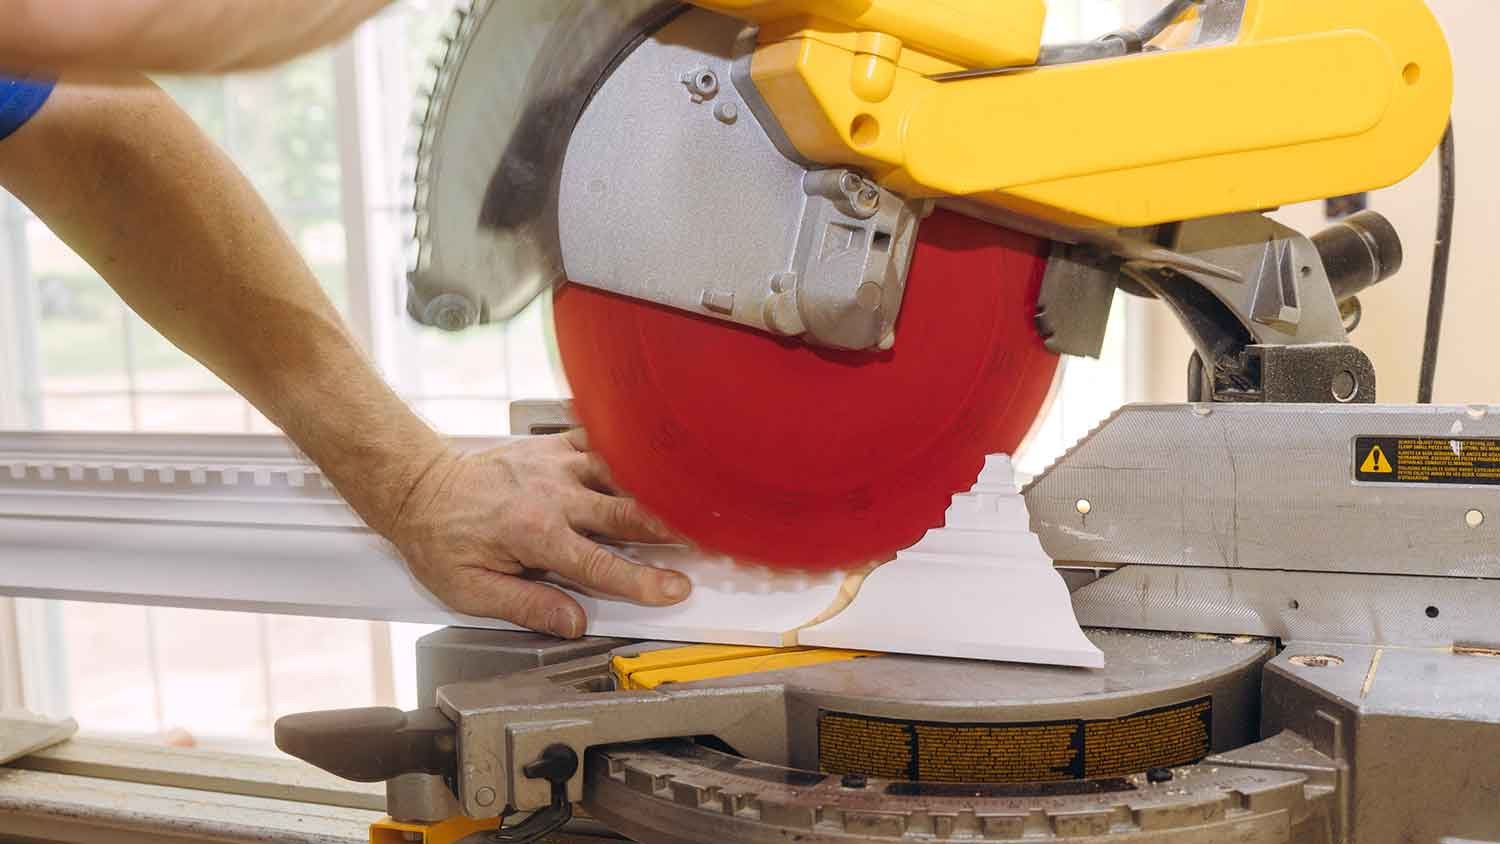
Common Angle Settings For Crown Molding
Crown molding usually sits at a 38 to 45 degree spring angle. This affects your miter saw settings.
Most inside and outside corners use standard angle pairs. These pairs help you cut molding that fits perfectly.
| Cut Type | Miter Angle | Bevel Angle |
|---|---|---|
| Inside Corner (Right Side) | 31.6° | 33.9° |
| Inside Corner (Left Side) | 31.6° | -33.9° |
| Outside Corner (Right Side) | 31.6° | -33.9° |
| Outside Corner (Left Side) | 31.6° | 33.9° |
Cutting Techniques For Crown Molding
Cutting crown molding requires careful handling and precise techniques. Using a miter saw correctly helps ensure clean, accurate cuts.
Understanding how to hold the molding and make compound cuts is key to a professional finish.
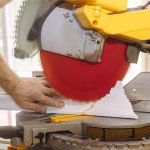
Holding The Molding Correctly
Hold the crown molding upside down against the saw fence. The molding’s back should rest on the saw base. This position matches the angle the molding will sit on the wall.
- Place the bottom edge of the molding on the saw base.
- Lean the top edge against the saw fence.
- Secure the molding firmly to prevent movement.
- Double-check the molding position before cutting.
Making Accurate Cuts
Measure twice and mark your cut clearly. Use the miter saw’s angle settings to match the corner angle. Make sure the blade is sharp to avoid chipping.
| Angle Type | Miter Saw Setting |
| Inside Corner | 45° |
| Outside Corner | 45° opposite direction |
| Straight Cut | 0° |
Handling Compound Cuts
Compound cuts combine bevel and miter angles. These cuts fit the molding perfectly on angled walls or ceilings.
To set compound cuts:
- Adjust the miter angle on the saw.
- Set the bevel angle to match the wall pitch.
- Test the cut on scrap wood before the final cut.
- Hold the molding firmly in the correct upside-down position.
Credit: ouraestheticabode.com
Assembling And Installing Molding
Installing crown molding requires careful assembly and precise cuts. Using a miter saw helps you get the right angles.
This guide covers how to fit and join the molding pieces before final installation.
Dry Fitting Pieces
Dry fitting means placing the molding pieces without glue or nails. It helps check the fit before permanent installation.
Cut each piece at the correct angle with the miter saw. Then hold them in place on the wall and ceiling.
- Cut pieces with the miter saw set to proper angles
- Place pieces together without fastening
- Check all corners and edges for tight fits
- Make small adjustments if gaps appear
Fixing Joints And Seams
Once pieces fit well, secure them with nails or adhesive. Next, fix any gaps at joints and seams.
Use wood filler or caulk to fill small spaces. Sand smooth after drying to hide the seams.
- Secure molding with finishing nails or glue
- Fill gaps with wood filler or caulk
- Sand filled areas smooth after drying
- Paint or stain to match molding color
Troubleshooting Common Issues
Using a miter saw for crown molding can be tricky. Small mistakes cause big problems in fit and finish.
Knowing how to fix common issues helps save time and material. This guide covers two frequent problems.
Dealing With Gaps
Gaps appear when two pieces of crown molding do not meet tightly. This can happen from poor cuts or wrong angles.
To fix gaps, check if the saw blade is sharp and aligned. Also, make sure the molding sits flat on the saw fence.
- Use wood filler to fill small gaps after installation.
- Sand edges lightly to improve the fit before gluing.
- Double-check your measurements before cutting.
- Clamp the molding firmly during cutting to prevent movement.
Correcting Angle Mistakes
Angle mistakes cause corners not to line up, leaving visible cracks. It often comes from incorrect saw settings.
Adjust the miter and bevel angles carefully. Use a protractor or angle finder to set exact cuts.
- Mark the molding clearly before cutting to avoid confusion.
- Make test cuts on scrap wood to check angles.
- Use a stop block to repeat precise cuts.
- Re-measure angles if cuts do not fit well.

Credit: www.findbuytool.com
Frequently Asked Questions
How Do You Set A Miter Saw For Crown Molding?
To set a miter saw for crown molding, adjust the saw to the correct angle. Typically, tilt the blade to 45 degrees and set the miter angle to 33. 9 degrees for common crown molding. Always check your molding’s specifications for precise angles.
What Safety Tips Should I Follow Using A Miter Saw?
Always wear safety goggles and hearing protection. Keep hands away from the blade. Secure the crown molding firmly before cutting. Use a sharp blade and operate the saw on a stable surface. Follow the manufacturer’s safety instructions carefully.
Can I Use A Miter Saw For Inside And Outside Corners?
Yes, a miter saw can cut both inside and outside corners. For inside corners, use a complementary angle setting. For outside corners, set the saw to the exact molding angle. Practice on scrap pieces to ensure accuracy.
How Do I Measure Crown Molding For Accurate Cuts?
Measure the wall length accurately and mark the molding accordingly. Use a tape measure and mark cut lines on the molding. Double-check angles and measurements before cutting to avoid mistakes and material waste.
Conclusion
Operating a miter saw for crown molding takes practice and care. Always measure twice and cut once to avoid mistakes. Use the right angles and hold the molding steady. Safety matters—wear goggles and keep hands clear of the blade. Take your time with each cut to get smooth edges.
With patience, your crown molding will fit perfectly and look great. Keep practicing, and your skills will improve with every project.