Is your trusty cordless drill not working as it should? You rely on this powerful tool for countless projects, from simple home repairs to ambitious DIY creations.
But when it falters, it can put a halt to your progress. The good news is, you don’t always need a professional to get it back up and running. With a little know-how, you can repair your cordless drill yourself and save both time and money.
In this guide, you’ll discover step-by-step instructions to troubleshoot common issues and fix them with ease. Get ready to empower yourself with the skills to revive your essential tool and keep your projects on track. Dive in, and let’s get that drill spinning again!

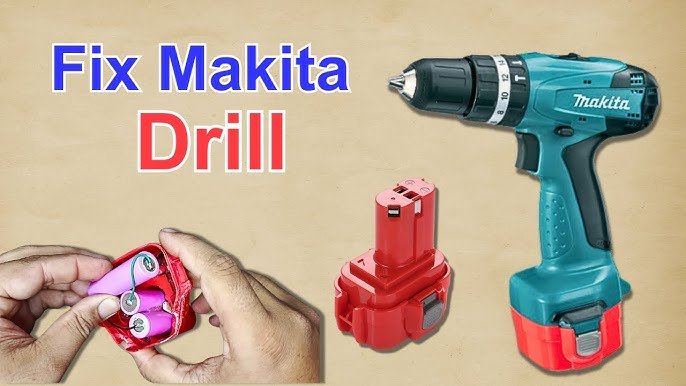
Credit: www.youtube.com
Common Cordless Drill Issues
Cordless drills are handy tools for many jobs. They can stop working properly over time. Knowing common problems helps you fix them faster.
This guide explains usual issues with cordless drills. It covers battery, chuck, trigger, switch, and motor problems.
Battery Problems
The battery is the drill’s power source. If the drill won’t start or runs briefly, the battery may be weak or dead.
Batteries can lose capacity after many charges. Dirt or corrosion on battery contacts also causes problems.
- Check if battery charges fully
- Clean battery and drill contacts
- Replace battery if it won’t hold charge
Chuck Malfunctions
The chuck holds the drill bit in place. If it slips or won’t tighten, the chuck might be faulty or dirty.
Sometimes, dust or debris block the chuck’s movement. Other times, worn parts cause the drill bit to slip during use.
- Clean the chuck regularly
- Check for damaged or worn parts
- Replace the chuck if it won’t hold bits
Trigger And Switch Failures
The trigger controls power to the motor. If the drill won’t start or stops suddenly, the trigger or switch may be broken.
Dirt inside the switch or wear on the trigger can cause these issues. Sometimes the wiring inside is loose or damaged.
- Test the trigger for smooth action
- Inspect switch contacts for dirt or damage
- Fix or replace broken triggers or switches
Motor Troubles
The motor powers the drill bit. If the drill runs slowly or makes strange noises, the motor could have problems.
Brushes inside the motor wear out over time. Dust can also block motor parts and cause overheating.
- Clean dust from the motor area
- Check and replace worn motor brushes
- Listen for unusual motor sounds
Essential Tools And Safety Gear
Repairing cordless drills requires the right tools and safety equipment. Using proper gear helps you fix the drill safely and correctly.
This guide covers the basic tools you need and the protective equipment to keep you safe during repairs.
Basic Repair Tools
You need a set of simple tools to open and fix cordless drills. These tools help you reach inside and replace broken parts.
- Screwdrivers (Phillips and flathead) to remove screws
- Needle-nose pliers for gripping small parts
- Wire cutters to trim damaged wires
- Multimeter to test electrical parts
- Small brushes to clean dust and debris
- Replacement batteries or motors if needed
Protective Equipment
Wearing safety gear protects you from injury while repairing drills. Always use protective equipment to stay safe.
| Equipment | Purpose |
| Safety glasses | Protect eyes from flying debris |
| Gloves | Shield hands from sharp edges and electric shocks |
| Dust mask | Prevent inhalation of dust and particles |
| Work apron | Protect clothes and skin from dirt |
Battery Troubleshooting And Replacement
Cordless drills rely on batteries for power. Over time, batteries may lose charge or stop working. Fixing battery problems can make your drill work like new again.
This guide helps you test battery health, replace battery packs, and use charging tips to keep your drill ready.
Testing Battery Health
Check if your battery holds a charge or runs down quickly. This shows if it needs replacing or just charging.
- Remove the battery from the drill.
- Use a voltmeter to check the battery voltage.
- Compare the voltage to the battery’s rated voltage.
- If voltage is low, try charging the battery fully.
- If voltage drops fast after charging, the battery is weak.
Replacing The Battery Pack
Replacing a faulty battery pack can restore your drill’s power. Use the right type and size for your model.
| Step | Action |
| 1 | Turn off the drill and remove the old battery pack. |
| 2 | Buy a replacement battery with matching voltage and connectors. |
| 3 | Insert the new battery pack firmly into the drill. |
| 4 | Test the drill to ensure the new battery works well. |
Charging Tips
Proper charging keeps batteries healthy and extends their life. Follow these tips to get the best results.
- Use the charger made for your battery type.
- Charge batteries at room temperature.
- Do not overcharge; remove the battery when fully charged.
- Store batteries in a cool, dry place when not in use.
- Avoid letting batteries drain completely before charging.
Fixing Chuck And Bit Issues
Cordless drills often face problems with their chuck and bits. These parts may become loose or stuck. Fixing them helps your drill work better and last longer.
This guide covers cleaning, lubrication, and how to tighten or replace the chuck on your cordless drill.
Cleaning And Lubrication
Dirt and rust can cause the chuck to stick or the bit to slip. Cleaning these parts regularly keeps them working smoothly.
- Remove the drill bit and chuck from the drill.
- Use a brush to clear dirt and dust inside the chuck.
- Apply a small amount of machine oil or lubricant to the chuck’s moving parts.
- Rotate the chuck to spread the lubricant evenly.
- Wipe off any extra oil to avoid attracting more dirt.
- Let the chuck dry before putting it back on the drill.
Tightening Or Replacing The Chuck
A loose chuck causes the bit to slip and reduces drilling power. Tightening it can fix this problem. If the chuck is damaged, you may need to replace it.
| Action | Tools Needed | Notes |
| Tighten Chuck | Chuck key or wrench | Turn clockwise to secure the bit |
| Remove Chuck | Screwdriver, wrench | Unscrew the chuck from the drill shaft |
| Replace Chuck | New chuck, screwdriver | Install the new chuck and tighten firmly |
Repairing Trigger And Switch Problems
Cordless drills may stop working due to trigger or switch problems. Fixing these parts can make your drill work again.
This guide helps you inspect the trigger and replace faulty switches safely and easily.
Inspecting The Trigger Mechanism
First, remove the drill’s battery to avoid accidents. Open the drill casing carefully to access the trigger area.
Look for dirt, damage, or loose parts in the trigger mechanism. Clean any dust with a soft brush or compressed air.
- Check if the trigger moves smoothly
- Look for broken plastic or worn contacts
- Test the trigger with a multimeter for continuity
Replacing Faulty Switches
If the switch is broken or does not conduct electricity, replace it. Buy the correct switch model for your drill.
Remove the old switch by desoldering or unplugging wires. Install the new switch by connecting wires properly and securing it inside the casing.
- Use a soldering iron carefully when needed
- Match wire colors to avoid mistakes
- Test the drill before closing the case
Motor Maintenance And Repairs
Cordless drills rely on their motors to work well. Keeping the motor clean and fixing small problems helps the drill last longer. This guide shows how to maintain and repair the motor safely.
Regular care prevents damage and keeps your drill running at full power. Learn simple steps for cleaning, replacing parts, and handling heat issues.
Cleaning The Motor
Dirt and dust can block the motor’s airflow. Cleaning removes debris and stops damage. Use a soft brush or compressed air to clean the motor parts carefully.
- Remove the drill casing to access the motor.
- Use a small brush to clear dust from the motor coils.
- Blow compressed air to remove stuck particles.
- Check the motor vents and clean them thoroughly.
- Reassemble the drill after cleaning.
Replacing Brushes
Brushes wear out and cause poor contact inside the motor. Changing them keeps the motor running smoothly. Brushes are small but important parts.
| Step | Action |
| 1 | Turn off and unplug the drill. |
| 2 | Open the drill housing to reach the motor brushes. |
| 3 | Remove old brushes carefully. |
| 4 | Insert new brushes in the same position. |
| 5 | Close the housing and test the drill. |
Addressing Overheating
Overheating can damage the motor and shorten drill life. Check for causes and cool the motor quickly to prevent harm.
Follow these tips to stop overheating:
- Do not use the drill for long times without breaks.
- Keep the motor vents open and clean.
- Check the battery condition; weak batteries cause heat.
- Use the right drill speed for the material.
- Let the drill cool down if it feels hot.
Preventive Care Tips
Keeping your cordless drill in good shape extends its life. Simple care helps avoid costly repairs.
Follow these easy tips to maintain your drill and keep it working well for a long time.
Regular Cleaning
Clean your cordless drill after each use. Dirt and dust can cause damage inside the tool.
- Wipe the drill body with a dry cloth
- Use compressed air to clear vents and crevices
- Remove dirt from the chuck with a brush
- Keep battery contacts free of dust
Proper Storage
Store your drill in a dry and cool place. Avoid extreme heat or cold that can harm the battery.
| Storage Tip | Reason |
| Keep drill in its case | Protects from dust and drops |
| Remove battery if not used for long | Prevents battery drain and damage |
| Store away from moisture | Avoids rust and corrosion |
Routine Inspections
Check your drill often for signs of wear or damage. Early fixes stop small problems from growing.
- Look for cracks or loose parts on the drill body
- Test the trigger and switch for proper function
- Check battery charge and contacts
- Listen for unusual sounds during use

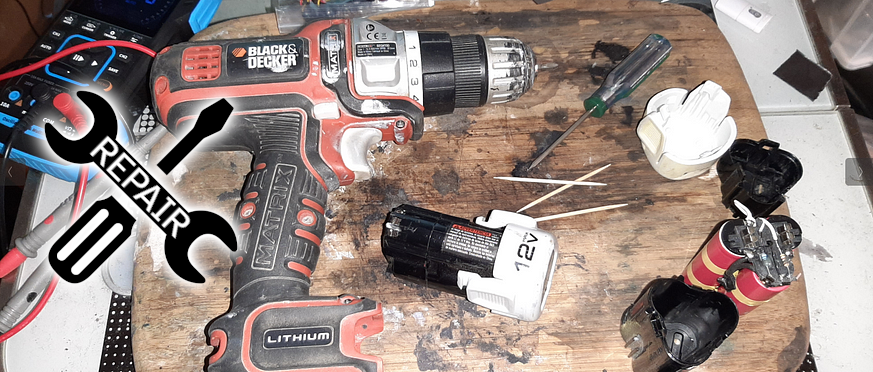
Credit: www.youtube.com
Credit: bigattichouse.medium.com
Frequently Asked Questions
How Do I Fix A Cordless Drill That Won’t Start?
Check the battery charge and connections first. Clean the contacts and ensure the battery is fully charged. If it still won’t start, inspect the trigger switch or motor for damage.
What Causes A Cordless Drill To Lose Power Quickly?
Battery age and usage reduce capacity over time. Poor charging habits or damaged cells also cause power loss. Replace old batteries and charge them properly to maintain performance.
How Can I Replace A Cordless Drill’s Worn-out Chuck?
Unscrew the chuck by loosening the retaining screw inside it. Use a wrench to remove the chuck from the spindle. Install a new chuck by threading it back on securely.
Why Is My Cordless Drill Overheating During Use?
Overheating often results from prolonged use or a faulty motor. Allow the drill to cool periodically and avoid heavy loads. Clean vents and replace worn brushes if necessary.
Conclusion
Repairing cordless drills saves money and extends tool life. Simple steps help fix common problems quickly. Check batteries, brushes, and connections first. Use basic tools and follow safety tips closely. Practice makes the repair process easier over time. Keep your drill ready for any task ahead.
Small fixes prevent bigger issues later on. Stay patient and take your time during repairs. This way, you get the most from your cordless drill.