Ever found yourself rummaging through a mess of sanding discs, wasting time trying to find the right one? You’re not alone.
Properly storing your sanding discs can save you time, preserve their quality, and make your projects run smoother. Imagine opening a container and instantly laying your hands on the exact disc you need. Feels like a dream, right? You’ll discover simple and effective ways to store sanding discs in containers, ensuring they’re always organized and ready for action.
Get ready to transform chaos into order and elevate your DIY experience. Let’s dive in!

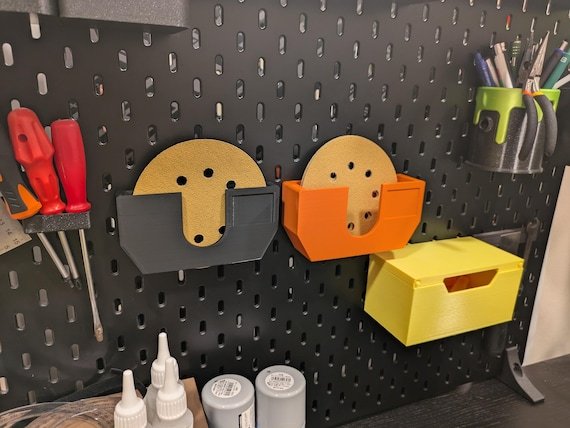
Credit: www.reddit.com
Choosing The Right Containers
Storing sanding discs properly keeps them clean and safe. The right container protects discs from dust and damage.
Choosing good containers helps you find and use discs quickly. It also extends the life of your sanding discs.
Material Options
Containers come in many materials like plastic, metal, and wood. Each type offers different benefits for storing sanding discs.
Plastic containers are lightweight and keep discs dry. Metal containers are strong but may rust. Wooden boxes look nice but can absorb moisture.
- Plastic: Lightweight, moisture-resistant, easy to clean
- Metal: Durable, strong, may rust if not coated
- Wood: Natural look, can absorb moisture, needs care
Size Considerations
Choose containers that fit your sanding discs well. Too large containers waste space. Too small containers can damage discs.
Think about how many discs you have. Pick containers with enough room to add more later. This saves buying new containers often.
- Match container size to disc diameter and thickness
- Leave some space to avoid disc bending
- Consider future disc collection growth
Stackable Designs
Stackable containers save space in your workshop. They keep your sanding discs organized and easy to reach.
Look for containers that lock or fit securely when stacked. This prevents falls and keeps discs safe.
- Choose containers with flat lids or grooves for stacking
- Check if containers lock together for stability
- Stack only when containers are full to avoid damage

Credit: www.reddit.com
Preparing Sanding Discs For Storage
Proper storage of sanding discs helps keep them clean and ready to use. Preparing them well prevents damage and extends their life.
Two key steps in preparing sanding discs are cleaning and drying, then sorting by grit and size. This keeps your workspace organized and your tools effective.
Cleaning And Drying
Before storing sanding discs, remove dust and debris to keep them in good condition. Clean discs last longer and work better.
- Gently wipe discs with a dry cloth to remove loose dust.
- Use compressed air to blow away stuck particles.
- If discs are very dirty, lightly dampen a cloth with water and wipe them.
- Allow discs to air dry completely before storage to prevent moisture damage.
Sorting By Grit And Size
Sorting sanding discs makes it easy to find the right one for your project. Group discs by grit and size to keep your containers organized.
| Grit | Size | Storage Tip |
| Coarse (40-60) | Small (2-4 inches) | Store flat in labeled containers |
| Medium (80-120) | Medium (5-7 inches) | Use divider trays to separate sizes |
| Fine (150-220) | Large (8+ inches) | Keep in rigid folders to avoid bending |
Labeling Techniques
Keeping sanding discs organized saves time and prevents damage. Using clear labeling helps you find the right disc quickly.
This guide covers three easy labeling techniques for storing sanding discs in containers.
Using Color Codes
Color codes make it simple to identify sanding discs at a glance. Assign a color to each grit size or type.
- Red for coarse grits
- Yellow for medium grits
- Blue for fine grits
- Green for specialty discs
Writing Clear Labels
Labels should be easy to read and understand. Use short, clear words and numbers.
| Label Text | Meaning |
| 80 Grit | Coarse sanding disc |
| 120 Grit | Medium sanding disc |
| 220 Grit | Fine sanding disc |
| Wet/Dry | Special wet sanding disc |
Label Placement Tips
Place labels where they are easy to spot without opening containers. Consistent placement helps keep order.
- Stick labels on the container lid
- Use labels on the side for stacked containers
- Keep labels at eye level when possible
- Use waterproof labels for durability

Credit: thangs.com
Organizing Inside Containers
Keeping sanding discs in containers helps save space and protect them. Proper organization inside the container makes finding the right disc fast and easy.
Use simple methods to keep discs neat and safe from damage. This guide explains how to organize sanding discs inside containers.
Using Dividers
Dividers separate sanding discs by size or grit inside the container. They stop discs from rubbing against each other and causing wear.
Use cardboard, plastic, or foam dividers that fit your container. Label each section for quick access to the disc you need.
Layering Discs Safely
Stack discs carefully to avoid bending or cracking. Place softer discs on top of harder ones to reduce pressure damage.
- Place a thin sheet of paper or foam between layers.
- Keep discs flat; do not tilt or fold them.
- Limit the number of discs in each stack to prevent heavy weight.
- Store discs in a dry area to keep them from warping.
Preventing Damage
Protect discs from dust, moisture, and impacts inside the container. Use a tight lid to keep out dirt and water.
| Damage Type | Cause | Prevention |
|---|---|---|
| Bending | Stacking too many discs | Limit stack height and layer with soft material |
| Scratches | Discs rubbing together | Use dividers or paper layers |
| Moisture Damage | Storing in humid places | Keep container dry and sealed |
| Dust Build-up | Open or loose containers | Use containers with tight-fitting lids |
Storing Containers Efficiently
Storing sanding discs properly keeps your workspace tidy. It also protects the discs from damage. Using containers helps in organizing and saving space.
Choosing the right storage method improves your work speed. Let’s look at ways to store containers efficiently.
Maximizing Space
Stack containers vertically to use less floor space. Use clear containers to see contents without opening. Label each container for quick identification.
- Use stackable containers with lids
- Place containers on shelves or racks
- Group sanding discs by size and grit
- Keep frequently used discs at eye level
Easy Access Strategies
Organize containers so you can reach discs quickly. Arrange containers by how often you use the discs. Use transparent boxes for easy viewing.
| Strategy | Description |
| Label Containers | Helps find discs without opening boxes |
| Use Drawer Units | Allows smooth pulling out of discs |
| Sort by Grit | Speeds up finding the right disc |
| Keep Near Work Area | Reduces time searching for discs |
Environmental Considerations
Keep sanding discs dry to prevent damage. Avoid storing in places with extreme heat or sunlight. Use containers that seal out dust and moisture.
- Choose reusable containers
- Recycle old containers properly
- Keep storage area clean and ventilated
- Avoid plastic bags for long-term storage
Maintenance And Upkeep
Keeping sanding discs stored properly is important for their long life. Good maintenance helps avoid damage and saves money.
Using containers for sanding discs makes it easier to keep them clean and organized. Regular care keeps them ready for use.
Regular Inspections
Check your sanding discs often to find any damage or wear. Look for cracks, tears, or uneven edges on the discs.
Inspecting discs helps keep them safe to use and improves sanding results. Remove any discs that show signs of damage.
- Look for cracks or breaks
- Check for worn or uneven surfaces
- Ensure discs fit the sanding tool properly
- Keep discs dry and free from dust
Replacing Damaged Discs
Throw away sanding discs that are damaged or worn out. Using bad discs can harm your tools and work surface.
Replace discs with new ones to keep your sanding smooth and safe. Do not try to fix damaged discs.
- Discard discs with cracks or tears
- Replace discs that do not stick well
- Use new discs for each project if possible
Updating Labels
Keep labels on your sanding disc containers clear and up to date. This helps you find the right discs quickly.
Write the disc type, grit size, and date on each container. Replace labels if they become hard to read.
- Label container with disc type (e.g., aluminum oxide)
- Note grit size for easy selection
- Add storage or purchase date
- Use waterproof labels for durability
Frequently Asked Questions
How Do I Prevent Sanding Discs From Getting Damaged?
Store sanding discs in airtight containers to avoid moisture and dust. Keep them flat and separate by grit for easy access and protection.
What Type Of Container Is Best For Sanding Discs?
Plastic or metal containers with secure lids work best. They protect discs from humidity, dust, and physical damage, keeping them in good condition.
Can I Stack Sanding Discs In One Container?
Yes, but separate discs by grit using dividers or sleeves. This prevents scratches and maintains disc performance during storage and use.
How Should I Label Containers For Sanding Discs?
Label containers clearly with grit size and disc type. This helps you quickly find the right disc and keeps your workspace organized.
Conclusion
Storing sanding discs properly keeps them safe and ready to use. Use clean containers that fit the discs well. Keep them dry and away from dust or moisture. Organize discs by size and grit for quick access. This small effort saves time and avoids damage.
Your tools last longer and work better. Simple storage helps maintain smooth, clean sanding every time. Try these tips to keep your sanding discs in top shape. It makes your projects easier and more enjoyable.