Are you ready to transform your furniture projects with a professional finish? Imagine turning rough, unfinished pieces into smooth, polished works of art with just one tool.
That’s the power of a belt sander. Whether you’re a DIY enthusiast or a seasoned woodworker, mastering the use of a belt sander can elevate your furniture finishing game to a whole new level. In this guide, you’ll discover simple, effective techniques to achieve that perfect finish, making your furniture pieces not just functional, but truly beautiful.
Get ready to unlock the secrets to flawless furniture finishing, and watch as your projects become the envy of everyone who sees them. Dive into the world of belt sanding and see for yourself how easy it is to make your furniture shine!
Credit: www.ecohome.net
Choosing The Right Belt Sander
A belt sander is a useful tool for furniture finishing. Picking the right one makes your work easier.
Different belt sanders suit different jobs. Knowing what to choose helps you get smooth results.
Types Of Belt Sanders
There are several types of belt sanders. Each type works best for certain tasks.
Handheld sanders are good for small areas and quick jobs. Stationary sanders work well for larger pieces.
- Handheld Belt Sander:Portable, good for edges and curves.
- Stationary Belt Sander:Fixed on a table, great for flat surfaces.
- Detail Belt Sander:Small and precise, ideal for tight spots.
Sander Size And Power
Size and power affect how the sander works. Bigger sanders remove material faster.
For furniture, a medium-sized sander with enough power is best. It balances control and speed.
| Size | Power | Use |
|---|---|---|
| 3 x 18 inches | Light (2-3 amps) | Small jobs, detailed work |
| 3 x 21 inches | Medium (3-5 amps) | Most furniture finishing |
| 4 x 24 inches | Heavy (5+ amps) | Large surfaces, fast removal |
Selecting The Correct Grit
The grit of the sanding belt decides how smooth the surface will be. Lower grit removes more wood.
Start with a coarse grit to remove old finish. Then use finer grits to smooth the wood.
- Coarse grit (40-60): Remove old paint or rough wood
- Medium grit (80-120): Smooth surface and remove scratches
- Fine grit (150-220): Prepare wood for finishing

Credit: www.homebuilding.co.uk
Preparing Your Workspace
Using a belt sander for furniture finishing needs a clean and organized workspace. This helps you work safely and get good results.
Before you start, prepare your area well. This makes the sanding process smoother and safer.
Safety Gear Essentials
Wear safety gear to protect your eyes, ears, and lungs. Belt sanders create dust and noise that can harm you.
- Safety goggles to shield your eyes from dust and debris
- Ear protection like earplugs or earmuffs to reduce noise
- A dust mask or respirator to avoid breathing fine dust particles
- Gloves to protect your hands and improve grip
Setting Up A Stable Work Area
Make sure your workbench or table is steady and strong. A stable surface keeps the furniture from moving while sanding.
Use clamps to hold your furniture piece firmly. This helps you sand evenly and safely without slipping.
- Check that your work surface does not wobble
- Use heavy-duty clamps for large furniture parts
- Clear the area of any tools or objects that can cause tripping
Dust Collection Methods
Dust from sanding can spread and make a mess. Use dust collection tools to keep your workspace clean.
Attach a vacuum or dust bag to your belt sander if it has one. This reduces dust in the air and on surfaces.
- Use a shop vacuum connected to the sander’s dust port
- Wear a dust mask even with dust collection tools
- Keep a broom or vacuum nearby to clean up leftover dust
Preparing The Furniture
Using a belt sander on furniture needs careful preparation. You must get the surface ready to avoid damage.
This guide covers cleaning, removing old finish, and fixing loose parts before sanding.
Cleaning And Inspecting The Surface
Start by cleaning the furniture to remove dust, dirt, and grease. Use a soft cloth and mild cleaner. Check for scratches, dents, or cracks that need repair.
- Wipe down all surfaces
- Look closely for damage
- Mark problem areas for repair
- Ensure the surface is dry before sanding
Removing Old Finish
Strip off any old paint, varnish, or stain. This helps the new finish stick better and shows the wood’s true color.
| Finish Type | Recommended Removal Method |
| Paint | Use a chemical stripper or heat gun |
| Varnish | Sand lightly with medium-grit sandpaper |
| Stain | Sand with fine-grit sandpaper to lighten |
Securing Loose Parts
Check all joints, screws, and nails. Tighten or replace any loose parts to keep the furniture stable during sanding.
- Use wood glue on loose joints
- Tighten screws with a screwdriver
- Hammer in nails carefully
- Clamp glued parts until dry
Sanding Techniques
Using a belt sander for furniture finishing needs care and skill. Good sanding makes wood smooth and ready for finishing.
Learn sanding techniques to protect the wood and get even surfaces. These tips help you avoid mistakes and get better results.
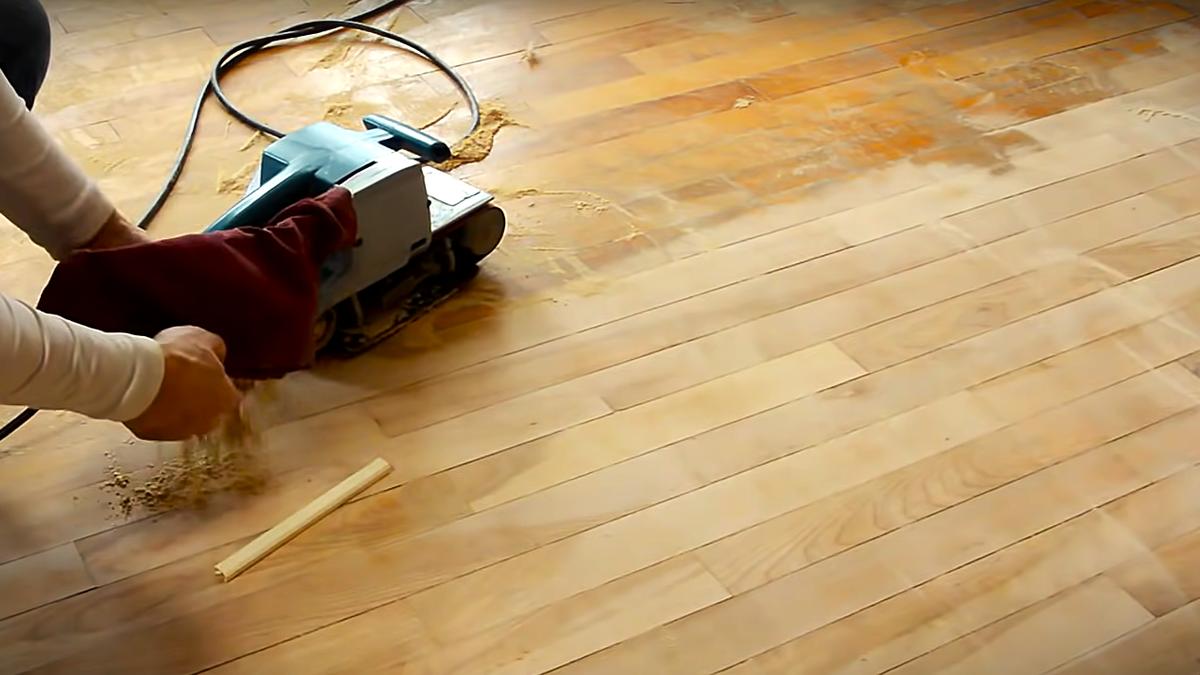
Proper Sander Handling
Hold the belt sander firmly with both hands. Keep your fingers away from the moving belt to stay safe.
Start the sander before touching the wood. Move it steadily without pressing too hard or letting it stop on one spot.
- Grip the front handle with one hand for control
- Hold the back handle with your other hand
- Keep the sander flat on the wood surface
- Turn on the sander before contacting wood
- Move the sander evenly across the wood
Sanding With The Grain
Always sand in the direction of the wood grain. Sanding against the grain can leave scratches that are hard to remove.
Following the grain helps the sander remove old finish and smooth the wood naturally. It also protects the wood’s look.
- Identify the wood grain direction before sanding
- Move the sander along the grain lines
- Avoid circular or cross-grain sanding
- Check for scratches and sand again if needed
Maintaining Even Pressure
Apply light and steady pressure on the sander. Too much force can damage the wood or cause uneven surfaces.
Let the sander do the work. Move it smoothly to avoid gouges or dips in the wood.
- Hold the sander firmly but do not push hard
- Keep pressure even across the sanding belt
- Keep the sander moving to avoid deep marks
- Check the surface often for smoothness
Avoiding Common Mistakes
Using a belt sander on furniture can save time and give smooth results. Many beginners make common errors that damage wood or tools. Learning to avoid these mistakes improves your finish and keeps the sander in good shape.
This guide covers key tips for preventing gouges, managing heat, and avoiding over-sanding. Follow these simple rules for better furniture finishing.
Preventing Gouges And Dents
Gouges happen when the sander presses too hard or stays too long in one spot. Dents can come from dropping the tool or hitting hard edges. Keep the sander moving evenly across the surface.
- Hold the sander firmly but do not push down too hard
- Move the sander in smooth, steady strokes
- Avoid stopping the sander on the wood surface
- Use the right grit sandpaper for the job
- Check the wood often to catch mistakes early
Managing Heat Build-up
Heat builds up when sanding too long in one area or using worn sandpaper. This can burn the wood and ruin the finish. Cool down the sander and replace sandpaper often.
| Cause | Effect | How to Prevent |
| Overuse in one spot | Wood burns or darkens | Keep sander moving |
| Worn sandpaper | More friction and heat | Replace sandpaper regularly |
| High speed setting | Heat builds fast | Use moderate speed |
| Too much pressure | Increased friction | Apply light pressure |
Avoiding Over-sanding
Over-sanding removes too much wood and ruins the shape or edges of furniture. It makes finishing uneven and weakens joints. Be careful and check your progress often.
- Use finer grit sandpaper as you near the finish
- Sand lightly and evenly
- Stop frequently to inspect the surface
- Focus on large flat areas first, then edges
- Do not rush the sanding process
Finishing Touches
Using a belt sander for furniture finishing takes care and precision. Finishing touches make your project smooth and ready for sealing or staining.
This guide covers how to switch to finer grits, hand sand details, and clean before finishing.
Switching To Finer Grits
Start sanding with a coarse grit to remove rough spots. Then change to finer grits to smooth the surface.
- Use 80-grit sandpaper to remove major scratches.
- Switch to 120-grit for smoothing edges.
- Finish with 220-grit for a fine, smooth surface.
Hand Sanding Details
Hand sanding helps reach corners and small details that a belt sander cannot.
Tip:Use a sanding block with fine-grit sandpaper. Move the sandpaper in the wood grain direction.
Cleaning Before Finishing
Remove all dust and debris before applying finish. Dust can ruin the smoothness and appearance.
| Cleaning Method | Purpose |
| Vacuum | Remove loose dust quickly |
| Tack Cloth | Pick up fine dust particles |
| Lint-Free Cloth | Wipe surface clean |
Maintenance And Storage
Taking care of your belt sander helps it work better and last longer. Proper maintenance and storage keep it ready for furniture finishing.
Regular cleaning, changing worn parts, and storing correctly protect your tool from damage and wear.
Cleaning The Belt Sander
Clean your belt sander after each use to remove dust and debris. This stops build-up that can slow the motor or damage the belt.
Use a soft brush or compressed air to clean hard-to-reach areas. Wipe the outside with a damp cloth but avoid water inside the motor.
- Unplug the sander before cleaning
- Use a brush or air blower for dust
- Wipe the surface with a damp cloth
- Keep vents clear to prevent overheating
Replacing Sanding Belts
Change sanding belts when they wear out or tear. A fresh belt gives smooth, even sanding for better furniture finishes.
Release the tension lever to remove the old belt. Fit the new belt in the same direction and tighten the lever to hold it firmly.
- Turn off and unplug the sander
- Locate and release the tension lever
- Remove the worn sanding belt
- Install the new belt with arrows matching rotation
- Tighten the tension lever securely
- Test the belt by running the sander briefly
Proper Storage Tips
Store your belt sander in a dry, clean place. Avoid areas with high humidity or dust to prevent rust and damage.
Keep the sander off the floor and cover it to stop dirt build-up. Remove the sanding belt if storing long-term.
- Unplug before storing
- Keep in a dry, dust-free space
- Place on a shelf or in a toolbox
- Cover with a cloth or case
- Remove sanding belt for long storage

Credit: www.familyhandyman.com
Frequently Asked Questions
How Do I Choose The Right Sandpaper Grit For Furniture?
Start with coarse grit to remove old finishes. Progress to finer grits for smooth surfaces. Use 80-120 grit for initial sanding and 180-220 grit for finishing. This ensures an even and polished look on your furniture.
Can I Use A Belt Sander On Delicate Wood Furniture?
Yes, but use light pressure and fine grit sandpaper. Test on a hidden area first. Avoid sanding too long in one spot to prevent damage or gouges. Patience is key for delicate pieces.
What Safety Gear Is Needed For Belt Sanding Furniture?
Always wear safety goggles and a dust mask. Use ear protection to guard against noise. Gloves can protect your hands but ensure they don’t interfere with control. Proper safety keeps your sanding process safe and efficient.
How Do I Avoid Swirl Marks With A Belt Sander?
Keep the sander moving steadily and avoid staying in one spot. Use finer grit sandpaper in final passes. Sand with the wood grain direction for best results. This reduces visible marks on your furniture.
Conclusion
Using a belt sander for furniture finishing makes the job easier and faster. Keep the sander moving to avoid marks. Choose the right grit for smooth results. Always wear safety gear to protect yourself. Practice on scrap wood before starting your project.
With patience and care, your furniture will look great. Give your pieces a professional touch with simple sanding steps. This tool helps you create smooth, even surfaces every time. Try it out and see the difference it makes.