Are your pliers scattered all over your workbench or hidden in a drawer, making it hard to find them when you need them most? You’re not alone.
Many of us struggle with organizing our tools efficiently. But what if there was a simple, affordable solution that could transform your workspace and save you time? Enter wall hooks. These small yet mighty tools can revolutionize the way you organize your pliers, turning clutter into order.
By using wall hooks, you can keep your pliers within arm’s reach, neatly displayed and easily accessible. Imagine the satisfaction of a tidy workspace where every tool has its place. Intrigued? Read on to discover how wall hooks can streamline your tool organization and make your workbench a model of efficiency.

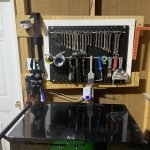
Credit: www.lowes.com
Choosing The Right Wall Hooks
Wall hooks are useful for organizing pliers neatly. Picking the right hooks helps keep your tools safe and easy to find.
Consider the type, material, and place before installing hooks. These factors affect how well the hooks hold your pliers.
Types Of Wall Hooks Suitable For Pliers
Different hooks fit different pliers. Choose hooks that match the size and shape of your tools.
- Single-prong hooks hold one tool securely.
- Double-prong hooks offer extra grip for heavier pliers.
- Magnetic hooks keep metal pliers in place without damage.
- Clip-style hooks hold pliers by the handle for quick access.
Materials And Weight Capacity
| Material | Weight Capacity | Durability |
| Plastic | Light (up to 1 lb) | Low |
| Metal (Steel or Aluminum) | Medium to Heavy (up to 10 lbs) | High |
| Wood | Medium (up to 5 lbs) | Medium |
| Magnetic | Varies (check strength) | High |
Pick hooks made from strong materials for heavy pliers. Check the weight limit to avoid falling tools.
Placement Considerations
Place hooks where you can reach pliers easily. Avoid spots that block other tools or get in the way.
- Mount hooks at a height comfortable for your use.
- Space hooks enough to avoid tool overlap.
- Use a stud or solid surface for strong support.
- Avoid damp areas to prevent rust.

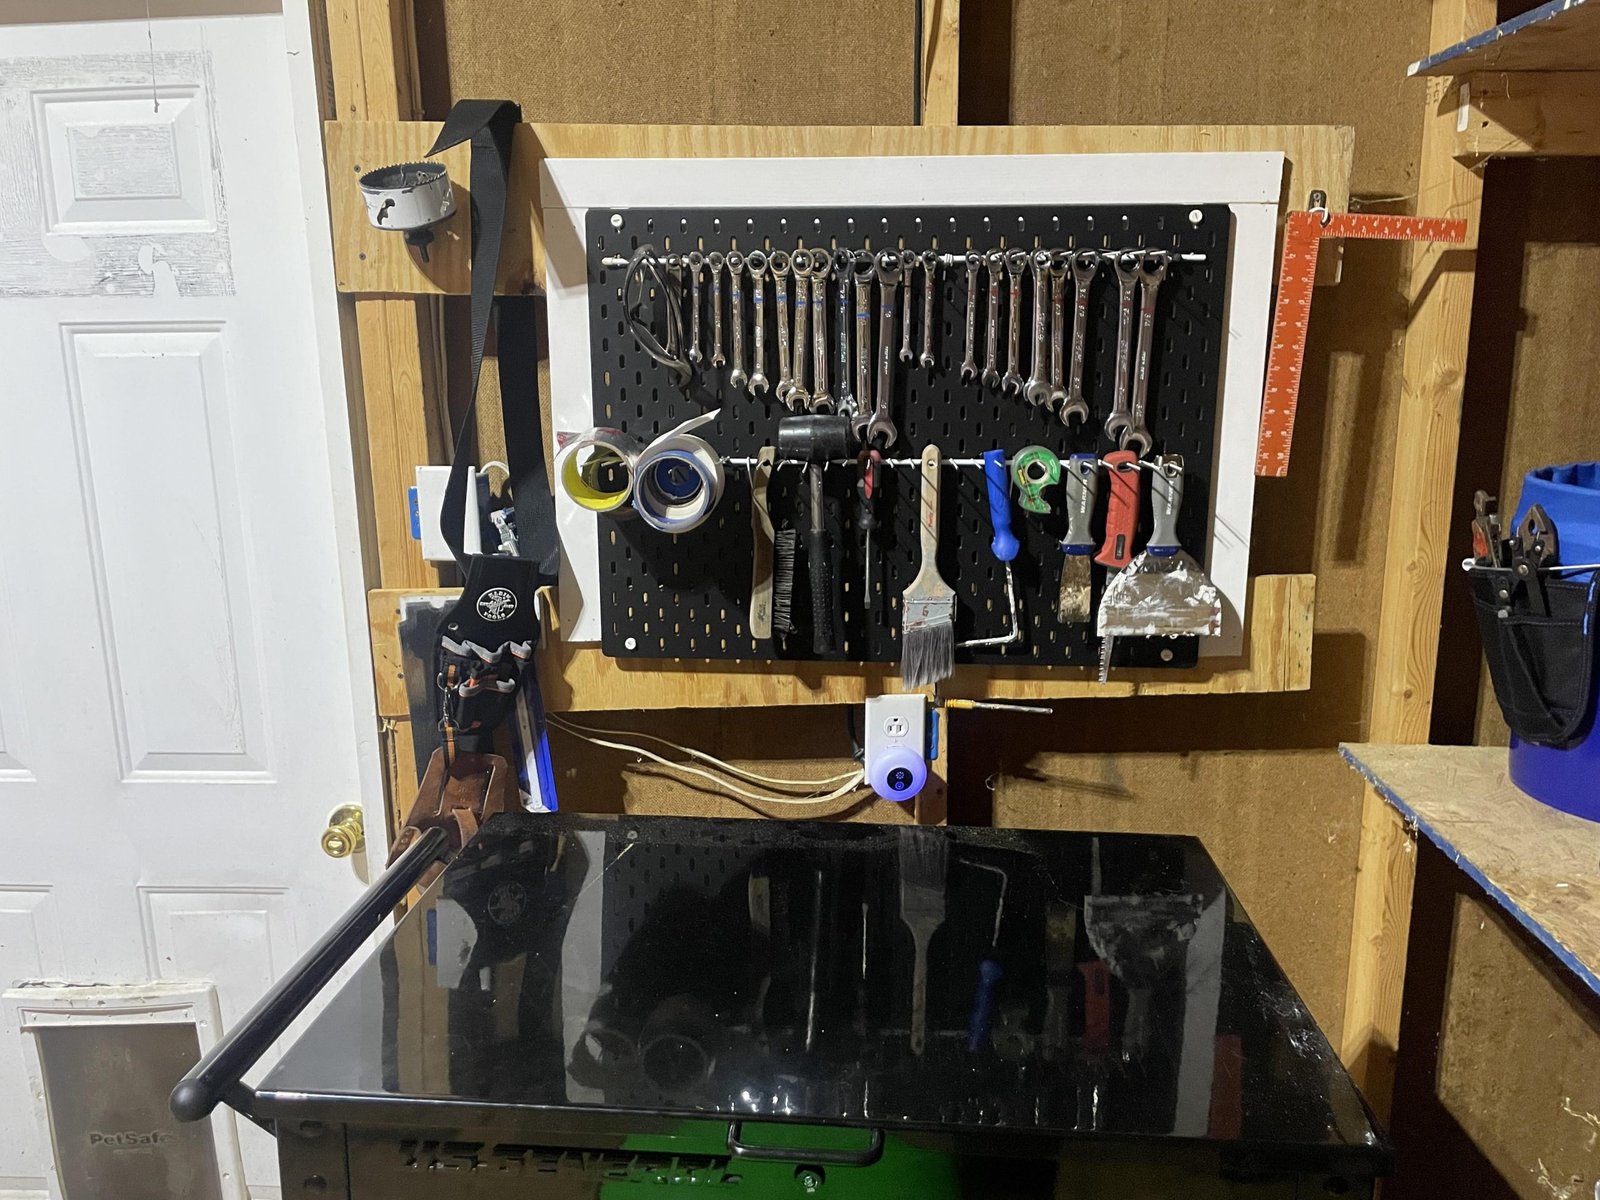
Credit: www.amazon.com
Preparing The Wall Surface
Using wall hooks to organize pliers starts with preparing the wall properly. A clean and sturdy surface ensures hooks hold well and tools stay secure.
Follow simple steps to clean, mark, and find the best spots for your hooks. Proper preparation helps avoid damage and keeps your tools easy to reach.
Cleaning And Marking
Begin by cleaning the wall where you plan to install hooks. Dirt and dust reduce hook strength. Use a damp cloth to wipe the surface and let it dry completely.
Next, mark the spots for each hook with a pencil. Space the marks to fit your pliers comfortably. Measure carefully to keep the layout even and tidy.
- Wipe wall with a damp cloth
- Allow the wall to dry fully
- Use a pencil to mark hook positions
- Space marks to fit pliers size
- Check alignment with a level tool
Finding Studs Or Using Anchors
Locate wall studs to secure hooks firmly. Studs provide strong support for heavy tools. Use a stud finder or tap the wall to find solid spots.
If no studs appear where you want hooks, use wall anchors. Anchors hold screws tightly in drywall or plaster. Choose anchors based on your wall type and hook weight.
| Method | Purpose | Tools Needed |
| Stud Finder | Find solid wood behind wall | Electronic stud finder |
| Tapping | Listen for hollow or solid sound | Knuckles or small hammer |
| Wall Anchors | Support screws without studs | Anchors, drill, screwdriver |
Installing Wall Hooks
Using wall hooks is a smart way to organize pliers. Installing them properly keeps tools easy to find.
Follow simple steps to mount wall hooks safely and securely on your wall.
Tools Needed For Installation
You need a few basic tools to install wall hooks for your pliers. These tools make the process easier and safer.
- Electric drill or screwdriver
- Wall anchors and screws
- Measuring tape
- Level
- Pencil or marker
- Stud finder (optional)
Step-by-step Hook Mounting
Mark the spots where you want to mount the hooks. Use a level to keep hooks straight.
Drill holes at the marked spots. Insert wall anchors if needed for extra support.
- Hold the hook against the wall.
- Use a pencil to mark screw holes.
- Drill holes at the marks.
- Push in wall anchors if the wall is drywall.
- Place the hook and screw it in tightly.
- Check the hook is secure before hanging pliers.
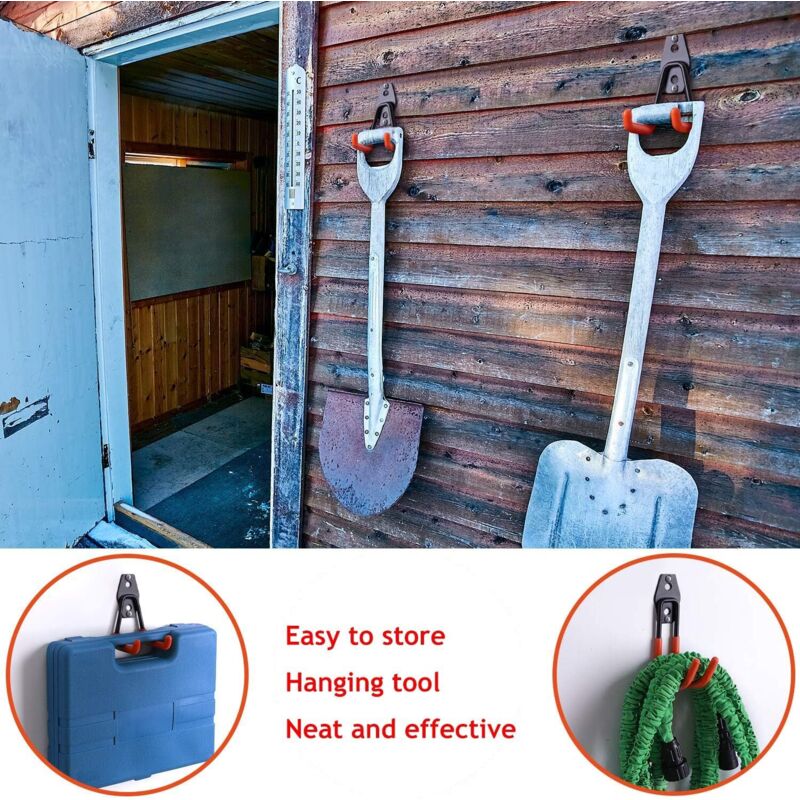
Credit: www.jokersclays.com
Organizing Pliers On Hooks
Wall hooks offer a simple way to keep pliers organized. They save space and keep tools visible.
Using hooks helps you quickly find the right pliers for your task. Let’s see how to organize them well.
Grouping By Size And Function
Group pliers by their size and what they do. This method makes your workspace neat and efficient.
- Small pliers for delicate work
- Medium pliers for general use
- Large pliers for heavy tasks
- Cutting pliers separated from gripping pliers
- Specialty pliers grouped by type
Arranging For Easy Access
Arrange hooks so you can grab pliers without hassle. Place the most used tools in front.
| Hook Position | Pliers Type | Reason |
| Eye level | Frequently used | Quick and easy access |
| Lower row | Occasionally used | Out of the way but reachable |
| Upper row | Rarely used | Safe storage |
Maximizing Space With Creative Hook Arrangements
Wall hooks offer a simple way to organize pliers and save space in your workshop or garage. Using hooks creatively helps keep your tools visible and easy to reach.
By arranging hooks in different patterns, you can fit more pliers on the wall and improve your workspace’s efficiency.
Vertical And Horizontal Layouts
Arranging wall hooks in vertical or horizontal lines changes how you use your wall space. Vertical layouts fit narrow walls or corners well. Horizontal layouts work on wide walls and keep tools at eye level.
- Vertical layouts save floor space and show tools clearly.
- Horizontal layouts make it easy to grab pliers side by side.
- Mixing both layouts can fit odd wall shapes.
Using Multiple Rows
Multiple rows of hooks help use wall height to hold many pliers. Keep heavier pliers on lower rows for safety. Lighter or less-used pliers can go higher.
| Row | Best For | Placement Tip |
| Bottom | Heavy pliers | Easy reach, sturdy hooks |
| Middle | Frequently used pliers | Eye level, quick access |
| Top | Light or spare pliers | Out of the way, safe |
Combining With Other Storage Solutions
Use wall hooks with shelves and bins for neat storage. Hooks hold pliers, shelves store cases, and bins keep small parts. This mix keeps your workspace tidy.
- Place hooks above shelves to save space.
- Use labeled bins below hooks for tool parts.
- Add a pegboard nearby for extra hanging options.
Maintaining Your Organized Pliers
Wall hooks help keep pliers neat and easy to find. To keep your tools in good shape, regular care is important.
Maintaining your organized pliers involves cleaning them and checking the hooks. This keeps your workspace safe and tidy.
Regular Cleaning Tips
Clean your pliers often to stop rust and dirt buildup. Wipe them with a dry cloth after use.
Use a mild cleaner if your pliers get very dirty. Dry them well before placing them back on the hooks.
- Wipe pliers after every use
- Use mild soap for tough dirt
- Dry completely to avoid rust
- Clean the wall hooks too
Checking Hook Stability
Check your wall hooks regularly to keep them strong. Loose hooks can cause pliers to fall and get damaged.
Tighten screws or replace hooks if they feel weak. Make sure hooks hold the weight of your pliers safely.
- Test each hook for firmness
- Tighten loose screws carefully
- Replace damaged hooks quickly
- Use hooks rated for your tools’ weight
Frequently Asked Questions
What Are The Benefits Of Using Wall Hooks For Pliers?
Wall hooks save space and keep pliers organized. They make tools easy to find and reduce clutter in your workspace. Hooks also protect pliers from damage by preventing them from piling up.
How Do I Choose The Right Wall Hooks For Pliers?
Select hooks based on plier size and weight. Strong metal hooks work best for heavy tools. Ensure hooks fit your wall type and provide secure mounting.
Can Wall Hooks Hold Multiple Types Of Pliers?
Yes, wall hooks can hold various pliers like needle-nose, slip-joint, and cutting pliers. Choose adjustable or versatile hooks for mixed tool sizes.
How High Should I Install Wall Hooks For Pliers?
Install hooks at eye level or slightly below for easy access. Ensure enough space between hooks to prevent tool overlap and damage.
Conclusion
Wall hooks help keep pliers neat and easy to find. They save space and reduce clutter in your workspace. Using hooks makes your tools last longer by preventing damage. You can arrange pliers by size or type for quick access.
Small changes like this improve your work efficiency. Try wall hooks to organize pliers and enjoy a tidy workspace. Simple, smart, and effective.