Are your clamps scattered around your workspace, making it hard to find the right one when you need it? Setting up a pegboard for your clamps can transform your cluttered chaos into an organized haven.
Imagine the satisfaction of having every clamp in its place, ready to grab at a moment’s notice. This guide will walk you through the simple steps to create a pegboard setup that not only organizes but also adds a touch of professionalism to your workspace.
Whether you’re a DIY enthusiast or a seasoned craftsman, you’ll find these tips invaluable. Ready to take control and enhance your productivity? Let’s dive in!
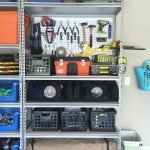
Credit: www.etsy.com
Choosing The Right Pegboard
Setting up a pegboard for clamps helps keep your workspace neat. Picking the right pegboard is important for durability and ease of use.
This guide covers material types, size and thickness, and mounting tips for the best pegboard setup.
Material Options
Pegboards come in different materials. Each material affects strength and appearance.
- MDF (Medium-Density Fiberboard):Smooth surface, easy to paint, cost-effective.
- Hardboard:Thin and flexible, less durable for heavy clamps.
- Metal:Very strong and long-lasting, good for heavy tools.
- Wood:Natural look, sturdy but may need treatment to avoid warping.
Size And Thickness
The size of the pegboard depends on your workspace and how many clamps you have. Thickness affects how well the hooks hold.
| Thickness | Best For |
| 1/4 inch | Light clamps and small tools |
| 1/2 inch | Medium weight clamps |
| 3/4 inch | Heavy-duty clamps and tools |
Mounting Considerations
Mounting your pegboard properly keeps it stable and strong. Use studs or a solid backing.
- Find wall studs for secure attachment.
- Use spacers to create space behind the board.
- Level the pegboard before fixing it in place.
- Use screws long enough to hold the board firmly.
Gathering Essential Tools And Supplies
Setting up a pegboard for clamps helps keep your workspace tidy. Having the right tools and supplies makes the process easier and faster.
This guide covers what you need before you start. Knowing what to gather saves time and avoids interruptions.
Required Tools
These tools are necessary to mount your pegboard and hold clamps safely.
- Drill with drill bits
- Screwdriver or power driver
- Stud finder to locate wall studs
- Level to ensure the pegboard is straight
- Measuring tape for accurate placement
- Pencil for marking spots
- Screws and wall anchors
- Safety glasses and gloves
Recommended Accessories
These accessories improve the pegboard’s function and make clamp storage easier.
| Accessory | Purpose |
| Pegboard hooks | Hold clamps securely on the board |
| Storage bins | Store small clamp parts or accessories |
| Label maker or tags | Identify clamp types and sizes |
| Rubber grips | Protect clamps from scratches |
Preparing The Workspace
Setting up a pegboard for clamps needs a clean and organized workspace. This helps you work safely and fast. Prepare your area before starting the installation.
Focus on picking the best spot and making sure the area is clear and clean. These steps make your project easier and your clamp storage stronger.
Selecting The Location
Choose a place that is easy to reach and has enough wall space for your pegboard. Avoid spots near moisture or direct sunlight to protect your clamps.
- Pick a wall close to your workbench or tool area
- Make sure the wall can hold the pegboard weight
- Check that clamps will hang without blocking pathways
- Avoid damp or very hot areas
Clearing And Cleaning The Area
Clear the wall and surrounding floor space. Remove nails, screws, or hooks. Clean dust and dirt for better pegboard adhesion and safety.
| Task | Reason |
| Remove old hooks or nails | Prevents damage and uneven pegboard fitting |
| Clear floor space | Allows easy movement and safe installation |
| Wipe the wall clean | Improves pegboard grip and looks neat |
| Check for moisture | Avoids pegboard warping or clamp rust |
Installing The Pegboard
Setting up a pegboard for your clamps helps keep your workspace tidy. Installing it correctly makes it strong and safe.
This guide covers marking mounting points and securing the pegboard to the wall.
Marking Mounting Points
Mark the points where you will attach the pegboard to the wall. Use a level to keep the board straight.
- Hold the pegboard against the wall at the desired height.
- Use a pencil to mark the corners and edges.
- Find the wall studs using a stud finder.
- Mark the stud locations on the wall.
- Plan to place screws into the studs for strong support.
Securing The Pegboard To The Wall
Attach the pegboard firmly by following these steps. Use screws and anchors to keep it stable.
| Tool | Purpose |
| Drill | Make holes for screws |
| Level | Ensure pegboard is straight |
| Screws | Secure pegboard to studs |
| Wall Anchors | Support screws in drywall if no stud |
First, drill pilot holes in the marked spots on the pegboard. Next, hold the pegboard and screw it into the wall studs. Use wall anchors if no studs are available.
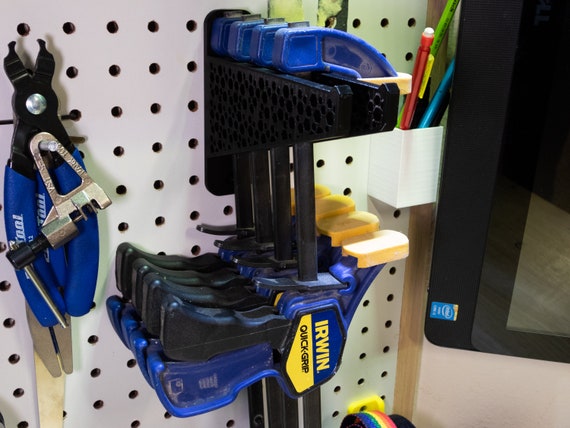
Choosing Pegboard Hooks For Clamps
Setting up a pegboard for clamps helps keep your workspace tidy. Choosing the right hooks is important to hold your clamps safely.
Hooks come in different styles and sizes. Picking the right type and weight capacity makes your clamp storage strong and easy to use.
Types Of Hooks
There are many pegboard hook types to hold clamps. Some fit small clamps, while others hold bigger ones.
- Single Prong Hooks:Good for light clamps and small tools.
- Double Prong Hooks:Stronger and hold bigger clamps safely.
- J-Hooks:Shaped like a “J” to hold clamps with long handles.
- Specialty Clamp Hooks:Made specifically for certain clamp styles, like C-clamps or bar clamps.
Choose hooks that fit your clamp size and shape. This prevents clamps from slipping off.
Hook Weight Capacity
Each pegboard hook has a weight limit. This tells you how much weight the hook can hold safely.
Heavy clamps need hooks with a high weight capacity. Light hooks can bend or fall under heavy loads.
| Hook Type | Typical Weight Capacity |
|---|---|
| Single Prong | 5 to 10 pounds |
| Double Prong | 15 to 30 pounds |
| J-Hooks | 10 to 25 pounds |
| Specialty Clamp Hooks | Varies by design, usually 20+ pounds |
Pick hooks with enough strength for your clamp weight. This keeps your clamps safe and organized.

Credit: www.youtube.com
Organizing Clamps On The Pegboard
Organizing clamps on a pegboard makes your workspace tidy. It also helps you find the right clamp fast.
Using smart methods to group and arrange clamps saves time and space. You can keep your clamps neat and ready to use.
Grouping By Size And Type
Sort your clamps by their size and type. Place similar clamps together on the pegboard.
- Group small clamps like spring clamps in one area
- Hang medium-sized bar clamps nearby for easy reach
- Keep large C-clamps in a separate section
- Arrange specialty clamps in a distinct spot
This method helps you pick the right clamp quickly. It also prevents clutter and mix-ups.
Maximizing Space Efficiency
Use the pegboard space wisely by using hooks and holders. Arrange clamps to use vertical and horizontal space well.
| Tip | Description |
|---|---|
| Use double hooks | Hang two clamps on one hook if possible |
| Stack clamps | Place smaller clamps inside larger clamp openings |
| Use adjustable holders | Fit different clamp sizes securely |
| Keep heavy clamps low | Hang large clamps at the bottom for safety |
Maintaining Your Pegboard Setup
Keeping your pegboard clean and organized helps you find clamps fast. A well-maintained pegboard lasts longer and looks neat.
Regular checks and simple cleaning keep your setup in good shape. This saves time and effort during your projects.
Regular Cleaning Tips
Dust and dirt can build up on your pegboard and clamps. Clean them often to prevent rust and damage.
Use a soft cloth or brush to remove dust. Wipe clamps with a damp cloth and dry them well.
- Remove clamps before cleaning
- Use mild soap for sticky spots
- Dry all parts to avoid rust
- Check hooks for damage
- Clean pegboard holes to keep hooks tight
Adjusting Layout As Needed
As your clamp collection grows, your pegboard layout may need changes. Move hooks to fit new clamps comfortably.
Keep frequently used clamps within easy reach. Group clamps by size or type for quick access.
- Remove unused hooks to clear space
- Test hook placement before hanging clamps
- Use different hook sizes for different clamps
- Leave space for future clamps
- Label sections if needed for better organization

Credit: www.rockler.com
Frequently Asked Questions
What Materials Are Needed To Set Up A Pegboard For Clamps?
You need a pegboard, mounting hardware, hooks, and clamps. Choose sturdy hooks that fit your clamp sizes. Ensure the pegboard is strong enough to hold the weight of your clamps securely.
How Do You Mount A Pegboard On A Wall?
Locate wall studs, drill pilot holes, and use screws to secure the pegboard. Use spacers for clearance if needed. Ensure the pegboard is level and firmly attached to support the clamps safely.
What Is The Best Pegboard Size For Clamp Storage?
Choose a pegboard large enough to hold all your clamps comfortably. A 2×4 or 4×4 feet pegboard is common. Consider your workspace size and clamp quantity when selecting dimensions.
How To Organize Clamps Efficiently On A Pegboard?
Group clamps by type and size for easy access. Use labeled hooks or holders to keep clamps visible. Leave space between clamps to avoid clutter and ensure quick retrieval.
Conclusion
Setting up a pegboard for clamps keeps your workspace neat and safe. You save time by finding clamps quickly. The process is simple and affordable. Choose a strong board and use the right hooks. Arrange clamps by size for easy access.
This setup helps your projects go smoothly. Try it today and enjoy a tidy workshop.