
Are you ready to master the art of using a belt sander? Imagine transforming rough, uneven surfaces into smooth, polished masterpieces with ease and precision.
Whether you’re a seasoned DIY enthusiast or a woodworking novice, understanding how to operate a belt sander efficiently can elevate your projects to a professional level. In this guide, you’ll discover simple, step-by-step instructions and insider tips that make sanding not just a task, but a rewarding experience.
Don’t let the fear of mishaps or mistakes hold you back. Unlock the secrets to achieving flawless finishes and make your next project a success. Dive in and learn how you can turn your sanding challenges into triumphs!
Credit: www.sumake.com
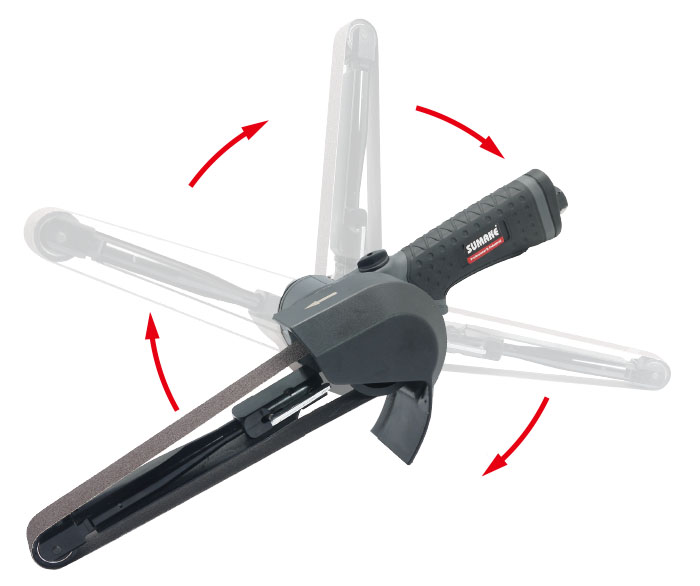
Choosing The Right Belt Sander
Using a belt sander correctly saves time and gives smooth results. Picking the right belt sander is the first step. This guide helps you understand what to look for.
We will cover types of belt sanders, grit selection, and power and speed factors. This knowledge helps you choose the best sander for your project.
Types Of Belt Sanders
Belt sanders come in many styles. Each type fits different tasks and skill levels. Knowing the types helps you find a sander that matches your needs.
- Handheld Belt Sanders:Easy to use for small jobs. Good for furniture and small wood pieces.
- Stationary Belt Sanders:Fixed on a table. Used for shaping and smoothing edges on bigger projects.
- Edge Belt Sanders:Designed to sand edges and tight corners with control.
- Wide Belt Sanders:Used in workshops for sanding large wood panels evenly.
Selecting The Appropriate Grit
The grit of the sanding belt affects how much material you remove and the finish quality. Low grit removes more wood but leaves rough marks. High grit smooths the surface but removes less material.
| Grit Number | Use |
|---|---|
| 40-60 | Heavy material removal, rough shaping |
| 80-100 | General sanding and smoothing |
| 120-150 | Fine finishing and preparing for paint |
| 180-220 | Very fine finishing and polishing |
Power And Speed Considerations
Power and speed affect how well the sander works. Higher power lets you sand faster and handle tough materials. Speed controls help you adjust for different tasks.
Look for these features in power and speed:
- Motor power between 3 to 7 amps suits most jobs.
- Variable speed control lets you work on delicate or hard surfaces.
- Check the belt speed, usually between 500 to 1500 feet per minute.
- Lightweight models reduce user fatigue.
Credit: www.sumake.com
Preparing For Sanding
Using a belt sander is easier and safer when you prepare well. Getting ready helps you work better and avoid problems.
Before you start sanding, check your tools, work area, and safety gear. These steps save time and keep you safe.
Safety Gear Essentials
Always wear the right safety gear before sanding. It protects your eyes, ears, and lungs from harm.
Safety gear helps prevent injuries from dust, noise, and flying wood pieces.
- Wear safety glasses or goggles to protect your eyes.
- Use earplugs or earmuffs to reduce noise.
- Put on a dust mask to avoid breathing dust.
- Wear gloves to protect your hands from splinters.
- Use sturdy clothing that covers your arms and legs.
Workpiece Inspection
Check the wood or material before sanding. Look for nails, screws, or dirt that could damage the belt sander.
Remove any objects stuck in the wood. Clean the surface to get smooth sanding results.
- Look for metal parts like nails or staples.
- Remove dust, paint chips, or glue spots.
- Check for cracks or weak spots in the wood.
- Make sure the wood is dry and stable.
Workspace Setup
Prepare your work area to keep it clean and safe. A good workspace helps you move freely and work faster.
Organize tools and clear clutter. Ensure good lighting and stable support for the workpiece.
- Clear the area of loose items and debris.
- Set up a sturdy workbench or table.
- Make sure there is enough light to see details.
- Keep the power cord away from the sanding path.
- Place dust collection or vacuum nearby if possible.
Operating Techniques
Using a belt sander correctly helps you finish projects faster. Good techniques improve safety and results.
Below are key tips for handling a belt sander with skill and care.
Proper Handling And Grip
Hold the belt sander firmly with both hands. Keep your grip steady to control the tool well.
Use your dominant hand on the main handle. Place your other hand on the front grip for balance.
- Keep your hands dry and clean
- Wear gloves if needed for better grip
- Do not hold the sander too tightly
- Maintain a comfortable wrist position
Optimal Pressure Application
Apply light, even pressure on the belt sander. Too much force can damage the surface or the tool.
Let the sander’s weight do most of the work. Pressing hard causes uneven sanding and shortens belt life.
- Start with gentle pressure
- Add more pressure only if needed
- Avoid pushing down or forcing the tool
- Watch the sanding speed for signs of excess pressure
Maintaining Consistent Movement
Move the belt sander smoothly across the surface. Keep a steady speed for an even finish.
Do not stay in one spot too long. This can cause grooves or burn marks on your workpiece.
- Keep the sander flat against the material
- Use long, even strokes
- Overlap your passes slightly
- Keep a constant speed without rushing
Maximizing Efficiency
Using a belt sander correctly saves time and improves results. Small actions can stop problems and keep the tool running well.
This guide covers how to prevent belt slippage, manage heat build-up, and use dust collection systems.
Preventing Belt Slippage
Belt slippage reduces sanding quality and wastes effort. Keep the belt tight and clean for smooth operation.
Check the belt tension often. Replace worn belts to avoid slipping during use.
- Adjust the tension knob to keep the belt tight
- Clean the rollers and belt regularly
- Avoid sanding with too much pressure
- Use the correct belt size for your sander
Managing Heat Build-up
Heat can damage the belt and the workpiece. It also wears out the sander faster.
Work in short bursts and let the sander cool down between uses. Keep the belt clean to reduce friction.
- Do not press too hard on the sander
- Use a fresh belt if it heats up quickly
- Allow the sander to rest every few minutes
- Sand in a well-ventilated area
Using Dust Collection Systems
Dust slows down sanding and harms your health. Use dust collection to keep your workspace clean.
Connect your belt sander to a vacuum or dust bag. Empty the bag often to keep suction strong.
- Use a vacuum with a HEPA filter for fine dust
- Check the dust port for blockages regularly
- Wear a mask to protect your lungs
- Keep your workspace clean to avoid dust buildup
Maintenance Tips
Keeping your belt sander in good shape helps it work better and last longer.
Regular care prevents problems and keeps sanding smooth and safe.
Cleaning The Belt Sander
Clean the belt sander after every use to remove dust and debris. This stops buildup that can damage parts.
- Unplug the sander before cleaning.
- Use a soft brush to clear dust from the belt and rollers.
- Wipe the outside with a dry cloth.
- Check the air vents and blow out dust if needed.
Replacing Sanding Belts
Change sanding belts when they wear out or tear. Using a worn belt reduces sanding quality and can harm the machine.
| Signs to Replace Belt | Action |
| Belt frayed or torn | Replace immediately |
| Uneven sanding results | Check and change belt |
| Belt slips on rollers | Tighten or replace belt |
| Belt glazing or clogging | Replace or clean belt |
Lubrication And Storage
Lubricate moving parts to keep the sander running smoothly. Store it in a dry, clean place to avoid rust and damage.
Follow these tips for lubrication and storage:
- Apply light oil to bearings and moving parts every few months.
- Do not over-lubricate; wipe off excess oil.
- Store the sander in a case or covered area to keep dust away.
- Keep the belt removed if storing for a long time to avoid belt damage.
Troubleshooting Common Issues
Using a belt sander can speed up your work. Sometimes, problems slow you down. Knowing how to fix common issues helps you work better.
This guide covers fixing belt tracking problems, uneven sanding, and motor overheating. These tips keep your sander running smoothly.
Fixing Belt Tracking Problems
Belt tracking means the belt stays in the right place on the sander. If the belt moves to the side or falls off, fix it quickly. This stops damage to the belt and tool.
- Turn off the sander and unplug it.
- Check if the rollers are clean and free of dust.
- Adjust the tracking knob slowly while the sander runs at low speed.
- Make sure the belt is the right size and not worn out.
- Replace the belt if it is torn or stretched.
Addressing Uneven Sanding
Uneven sanding means some parts are smooth, others are rough. This can happen due to wrong pressure or worn parts. Fixing this improves the finish quality.
| Cause | Solution |
| Too much pressure on the sander | Use light, even pressure when sanding |
| Old or clogged sanding belt | Replace the belt regularly |
| Incorrect belt grit for the job | Choose the right grit for your surface |
| Uneven work surface | Check and prepare the surface before sanding |
Dealing With Motor Overheating
The motor may get hot if you use the sander too long or block airflow. Overheating can damage the motor and stop your work.
Follow these tips to avoid overheating:
- Turn off the sander every 10 minutes to cool it.
- Keep the air vents clean and clear of dust.
- Do not press too hard; let the sander do the work.
- Use the correct sanding belt for your project.
- Check the power cord and plug for damage.
Credit: www.sumake.com
Frequently Asked Questions
How Do I Choose The Right Belt Sander Grit?
Select a grit based on your project needs. Coarse grits (40-60) remove material fast. Medium grits (80-120) smooth surfaces. Fine grits (150+) finish and polish. Match grit to wood type and desired finish for best results.
What Safety Gear Is Essential When Using A Belt Sander?
Always wear safety goggles to protect eyes from dust. Use a dust mask to avoid inhaling particles. Wear hearing protection to reduce noise exposure. Gloves can protect hands but ensure they don’t get caught in the sander.
How Can I Prevent Belt Sander Overheating?
Avoid pressing too hard on the sander; let the belt do the work. Keep the belt moving constantly to prevent heat buildup. Use appropriate grit and speed for the material. Regularly clean dust and debris from the sander.
What Maintenance Keeps A Belt Sander Efficient?
Regularly clean dust and debris from the belt and motor. Check and replace worn sanding belts promptly. Lubricate moving parts as recommended by the manufacturer. Store the sander in a dry place to avoid rust and damage.
Conclusion
Operating a belt sander well saves time and effort. Always keep the belt tight and check it often. Use steady, even pressure to avoid damage. Clean the sander after each use for best results. Choose the right grit for your project.
Safety matters—wear goggles and gloves. Practice makes your work smoother and faster. Follow these tips, and sanding becomes easier. Your projects will look neat and professional. Simple steps lead to great sanding results every time.