Are you looking to add a touch of precision and flair to your woodworking projects? Mastering the miter saw for bevel cuts can be your game-changer.
Imagine effortlessly crafting perfect angles and clean edges, elevating your creations from amateur to professional. Whether you’re a seasoned DIY enthusiast or just starting out, understanding how to use a miter saw for bevel cuts can unlock a new level of craftsmanship.
In this guide, we’ll break down the process into simple steps, making it easy for you to achieve those sharp, professional-looking results. Ready to transform your projects? Let’s dive in and uncover the secrets to making flawless bevel cuts with your miter saw.
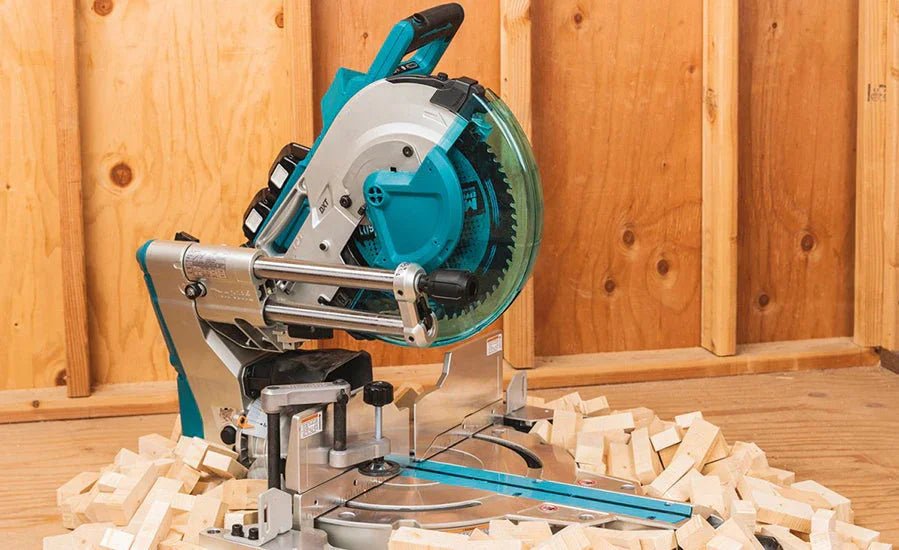
Choosing The Right Miter Saw
Choosing the right miter saw is important for making bevel cuts. The saw you pick affects how easy and precise your cuts will be.
Different types of miter saws have different features. Knowing these helps you pick the best tool for your work.
Types Of Miter Saws
Miter saws come in several types. Each type fits different cutting needs and projects.
- Standard Miter Saw: Cuts at different angles left and right.
- Compound Miter Saw: Can tilt to make bevel cuts and turn for miter cuts.
- Sliding Compound Miter Saw: Has a sliding arm for wider cuts along the wood.
Choose a type based on the size and angle of cuts you need. Sliding saws handle bigger pieces better.
Bevel Cut Capabilities
Bevel cuts tilt the blade to cut wood at an angle. Not all miter saws can make bevel cuts.
- Single-Bevel Saws: Tilt blade in one direction only, usually left.
- Dual-Bevel Saws: Tilt blade both left and right for more angle options.
Dual-bevel saws save time by not needing to flip the wood. Check the bevel angle range for your project needs.
Preparing Your Workspace
Using a miter saw for bevel cuts needs a clean and safe workspace. Preparing your area helps you work more accurately and avoid accidents.
Before starting, arrange tools and materials so you can reach them easily. Clear away anything that might get in your way.
Safety Gear Essentials
Always wear proper safety gear before using the miter saw. This gear protects your eyes, ears, and hands from injury.
Use safety glasses to shield your eyes from flying wood chips. Ear protection reduces noise damage. Gloves protect your hands from cuts.
- Safety glasses or goggles
- Earplugs or earmuffs
- Work gloves
- Dust mask to avoid inhaling sawdust
Setting Up The Saw Station
Place the miter saw on a stable, level surface. A sturdy workbench or stand works best to keep the saw steady.
Make sure there is enough space on both sides of the saw. This space helps support long pieces of wood and keeps your cuts straight.
- Use clamps to hold wood firmly in place
- Check that the saw blade is sharp and clean
- Keep the power cord away from the cutting area
- Have good lighting to see your work clearly
Adjusting The Miter Saw For Bevel Cuts
Making bevel cuts with a miter saw needs careful adjustment. You must set the blade tilt and bevel angle correctly. This helps you cut wood at an angle smoothly and safely.
Understanding how to adjust your saw for bevel cuts improves your woodworking projects. Let’s look at two key parts: tilting the blade and setting the bevel angle.
Tilting The Blade
The blade tilt controls the angle of the cut from the vertical position. You tilt the blade to the left or right to make angled cuts on the wood’s edge.
Most miter saws have a lever or knob near the back. Loosen it to tilt the blade to the desired side. Always make sure the blade is locked tightly before cutting.
- Locate the bevel adjustment lever or knob on the saw’s back.
- Loosen the lever or knob to unlock the blade tilt.
- Gently tilt the blade left or right to the needed angle.
- Secure the lever or knob to lock the blade in place.
- Double-check the blade is firmly locked before use.
Setting The Bevel Angle
The bevel angle shows how far the blade tilts from the vertical line. It is usually measured in degrees, from 0° (straight up) to about 45° or more.
Use the bevel angle scale on the saw to set the exact cut angle. Move the blade tilt until the pointer matches your desired bevel angle. Lock the blade once the angle is set.
- Check the bevel angle scale on your miter saw.
- Adjust the blade tilt until the pointer hits the right degree.
- Common bevel angles range from 0° to 45°.
- Lock the blade in place after setting the angle.
- Test the angle on scrap wood if needed before cutting.

Credit: www.findbuytool.com
Measuring And Marking Your Material
Accurate measuring and marking are key for clean bevel cuts with a miter saw. Taking your time helps avoid mistakes and wasted material.
Use the right tools and follow clear steps to prepare your wood before cutting. This guide covers how to measure and mark for bevel cuts precisely.
Choosing Accurate Measurements
Start by measuring your material with a tape measure or ruler that is easy to read. Mark the length or angle carefully for your bevel cut.
- Place the tape measure flat and straight along the wood.
- Note the exact measurement needed for the cut.
- Double-check your measurement before marking.
- Use a sharp pencil or marking knife for clear lines.
- Mark the wood on the side that will be cut away.
Marking Guidelines For Bevel Cuts
Marking bevel cuts needs special care because the cut is angled. Use a protractor or angle guide to get the right bevel angle on your mark.
| Tool | Purpose | Tip |
| Protractor | Set bevel angle accurately | Align with wood edge for precise marking |
| Combination square | Mark straight lines at specific angles | Use the adjustable arm for bevel angles |
| Sharp pencil | Draw visible cut lines | Use light pressure for fine lines |
| Marking knife | Create thin, precise marks | Helps guide the saw blade exactly |
Executing The Bevel Cut
Making a bevel cut with a miter saw needs care and focus. This type of cut angles the blade to create a sloped edge on wood or other materials.
Setting up your workpiece and cutting smoothly will help you get clean and accurate bevel cuts every time.
Clamping The Material Securely
Hold your material firmly on the saw table before cutting. This stops the wood from moving and keeps you safe.
Use clamps or a vice to fix the material in place. Make sure it is flat against the fence for a straight bevel edge.
- Place the material flat on the saw base.
- Push it against the fence tightly.
- Use clamps to lock the wood in position.
- Double-check that it does not move.
Making The Cut Smoothly
Lower the blade slowly and keep steady pressure during the cut. This prevents rough edges or splintering.
Let the saw blade do the work. Avoid forcing the blade through the wood to keep the cut clean and safe.
- Start the saw before the blade touches the wood.
- Lower the blade at a steady, controlled speed.
- Keep your hands away from the blade path.
- Raise the blade only after the cut is complete.
Common Mistakes To Avoid
Using a miter saw for bevel cuts can be tricky. Avoiding common mistakes helps you get clean and accurate cuts.
Knowing these errors will save material and improve your work quality.
Incorrect Angle Settings
Setting the wrong bevel angle is a top mistake. It leads to cuts that do not fit well.
Always double-check the saw’s angle gauge before cutting. Make sure the bevel angle matches your project needs.
- Do not guess the angle; use the saw’s angle indicator.
- Lock the angle firmly to avoid shifting during the cut.
- Test the angle on scrap wood before the final cut.
Improper Material Support
Not supporting the material correctly causes uneven cuts and safety risks.
Use clamps or supports to hold the wood steady. Keep the material flat and aligned with the fence.
- Support long pieces on both ends to prevent tipping.
- Keep the material flush against the saw’s fence for accuracy.
- Use a stable work surface to avoid movement during cutting.
Maintaining Your Miter Saw
Keeping your miter saw in good shape helps it work better and last longer. Regular care stops problems and keeps cuts clean and safe.
Focus on cleaning the blade and checking the machine’s settings often. These simple steps improve how your miter saw performs.
Blade Care Tips
Clean the blade regularly to remove sawdust and sap. A clean blade cuts smoothly and lasts longer.
Check the blade for damage like cracks or missing teeth. Replace the blade if it is damaged to avoid poor cuts or accidents.
- Use a soft brush to clean the blade
- Remove pitch and resin with a blade cleaner
- Check teeth for wear and sharpness
- Replace blade if cracked or dull
Regular Calibration
Check the saw’s angle settings often. Calibration keeps bevel cuts accurate and safe.
Use a square or angle gauge to test the saw’s angles. Adjust the bevel and miter settings if needed.
- Turn off and unplug the saw before adjusting
- Test the 0-degree bevel and miter angles first
- Adjust screws or knobs to fix any angle errors
- Repeat checks regularly for best results

Credit: www.amazon.com

Credit: benchmarkabrasives.com
Frequently Asked Questions
What Is A Bevel Cut On A Miter Saw?
A bevel cut angles the blade to cut through the wood’s thickness. It creates angled edges for precise joints and decorative trims.
How Do I Set The Bevel Angle On A Miter Saw?
Unlock the bevel adjustment lever, tilt the saw to the desired angle, and lock it securely before cutting.
Can I Make Compound Cuts Using A Miter Saw?
Yes, compound cuts combine bevel and miter angles. This is useful for complex joints like crown molding.
What Safety Tips Should I Follow For Bevel Cuts?
Always wear safety glasses, keep hands clear of the blade, and ensure the workpiece is firmly clamped before cutting.
Conclusion
Using a miter saw for bevel cuts is simple with practice. Always set the angle carefully before cutting. Keep your hands clear and work slowly for safety. Clean cuts make your projects look neat and professional. Remember to check the blade and adjustments each time.
Soon, bevel cuts will feel natural and easy. Try small pieces first to build confidence. Enjoy creating precise angles with your miter saw.