Unlock the power of precision and efficiency with the right tool for your metalworking projects. If you’ve ever wondered how to make clean, accurate holes in metal, a drill press might just be your new best friend.
Imagine transforming your DIY projects or professional tasks with ease, precision, and impressive results. Whether you’re a seasoned metalworker or a curious beginner, mastering the use of a drill press can elevate your craftsmanship to new heights. In this guide, you’ll discover straightforward techniques and insider tips to confidently handle a drill press, ensuring every hole is perfect.
Stay with us, and by the end, you’ll be ready to tackle any metal drilling challenge with the skill and confidence of a pro.

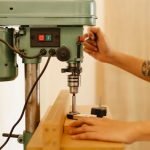
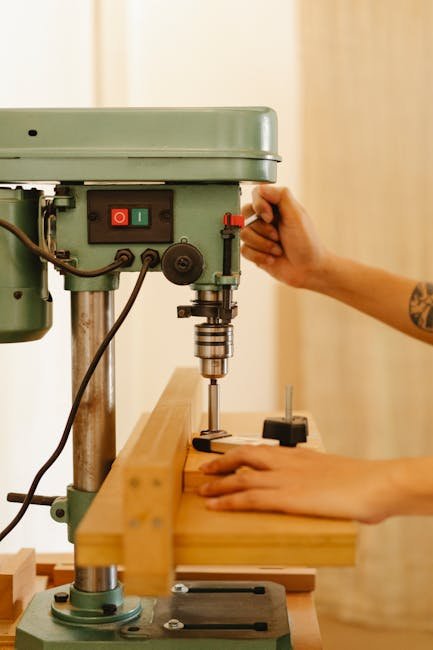
Credit: www.shutterstock.com
Choosing The Right Drill Press
Selecting the right drill press is key for metal drilling tasks. The right tool makes the job safer and easier.
This guide helps you find the best drill press type and features for metal projects.
Types Suitable For Metal
Metal drilling needs a drill press that can handle hard materials. Some types work better than others.
- Benchtop Drill Press:Compact and fits small workshops. Good for light metal work.
- Floor Drill Press:Larger and more powerful. Ideal for heavy metal drilling.
- Magnetic Drill Press:Portable and uses a magnet base. Best for drilling metal sheets and beams.
- Radial Drill Press:Offers adjustable arm reach. Useful for large metal parts.
Key Features To Consider
| Feature | Why It Matters |
| Variable Speed Control | Allows adjusting speed for different metal types and drill bits. |
| Powerful Motor | Ensures smooth drilling through tough metal surfaces. |
| Adjustable Table | Helps position metal pieces accurately and safely. |
| Depth Stop | Controls drilling depth to avoid drilling too deep. |
| Sturdy Base | Prevents movement and vibration during drilling. |

Credit: www.ttp-hard-drills.net
Preparing Your Workspace
Using a drill press to drill metal needs a clean and safe workspace. Prepare your area before starting work.
A proper setup helps you work faster and avoid accidents. Focus on safety gear and a stable workspace.
Safety Gear Essentials
Wear the right safety gear to protect yourself during drilling. Metal shavings and loud noise can cause harm.
- Safety goggles to protect your eyes
- Hearing protection like earplugs or earmuffs
- Work gloves to protect your hands
- Close-fitting clothing to avoid getting caught
- Non-slip shoes for good footing
Setting Up A Stable Work Area
Ensure your drill press is on a flat, solid surface. Stability prevents wobbling and improves drilling accuracy.
| Setup Item | Reason |
| Flat workbench | Prevents drill press movement |
| Clamps or vices | Hold metal pieces steady |
| Good lighting | Allows clear view of work |
| Clear workspace | Reduces risk of tripping or knocking tools |
Selecting The Correct Drill Bit
Choosing the right drill bit is key for drilling metal safely and effectively. The wrong bit can cause damage or slow your work.
Different metals require different bits. Knowing which bit to use helps you get clean holes and avoid breaking the bit.
Best Bits For Metal Drilling
High-speed steel (HSS) bits are common for drilling metal. They are strong and can handle heat well. Cobalt bits are better for harder metals. Titanium-coated bits last longer and reduce friction.
- High-speed steel (HSS): Good for soft to medium metals
- Cobalt: Best for hard metals like stainless steel
- Titanium-coated: Stays sharp longer and cuts smoothly
- Carbide: Used for very hard metals and industrial use
Maintaining Sharpness
Sharp drill bits make clean holes and reduce effort. Dull bits cause heat and damage metal. Keep bits sharp to improve drilling results.
| Tip | Details |
|---|---|
| Use proper speed | Slow speed for hard metals to avoid dulling |
| Cool the bit | Use cutting oil or water to reduce heat |
| Sharpen regularly | Use a bench grinder or sharpening tool |
| Store properly | Keep bits dry and separate to avoid damage |
Securing The Metal Piece
Holding the metal piece firmly is key for safe and accurate drilling. Without good support, the metal can shift or spin.
Use proper tools and methods to keep the metal steady before you start drilling.
Using Clamps And Vises
Clamps and vises hold metal pieces tight on the drill press table. They stop movement and help you drill straight holes.
- Choose clamps or vises that fit your metal size and shape.
- Place the metal flat on the drill press table.
- Secure the metal with clamps or tighten the vise jaws firmly.
- Check that the metal does not wiggle by trying to move it by hand.
Preventing Movement During Drilling
Metal can move if the drill bit catches or if you press too hard. Prevent this by using correct speed and steady pressure.
| Tip | Reason |
|---|---|
| Use a center punch to mark the spot | Helps the drill bit start in place without slipping |
| Start drilling at low speed | Reduces heat and metal movement |
| Apply steady, moderate pressure | Keeps the drill bit biting smoothly |
| Stop and clear metal shavings often | Prevents jamming and slipping |
Adjusting Drill Press Settings
Using a drill press to drill metal needs the right settings. Adjusting speed and depth helps you drill clean holes.
Setting the drill press correctly protects the metal and the drill bit. It also makes the work safer and easier.
Speed Settings For Different Metals
Different metals need different speeds for drilling. Using the wrong speed can damage the metal or the bit.
Soft metals need higher speeds, while hard metals need slower speeds. Adjust the drill press speed dial to match the metal.
| Metal Type | Recommended Speed (RPM) |
|---|---|
| Aluminum (soft metal) | 2500 – 3500 |
| Brass (soft metal) | 2000 – 3000 |
| Steel (medium hardness) | 500 – 1500 |
| Stainless Steel (hard metal) | 100 – 500 |
| Cast Iron (hard metal) | 300 – 800 |
Depth Stop Usage
The depth stop controls how deep the drill bit goes into the metal. It helps make holes with the correct depth.
Set the depth stop before drilling. This prevents drilling too far and damaging the workpiece or drill bit.
- Loosen the depth stop lock
- Move the depth stop collar to desired depth
- Tighten the lock to keep the stop in place
- Test the depth on scrap metal if possible
Drilling Techniques For Metal
Drilling metal with a drill press requires care and the right techniques. This helps you make clean, accurate holes without damaging your tool or material.
Using the correct drilling methods improves your safety and the quality of your work. Learn how to start the hole, apply pressure, and keep your drill cool.
Starting The Hole
Begin by marking the exact spot where you want to drill. Use a center punch to make a small dent. This keeps the drill bit from slipping on the metal surface.
Start the drill press at a low speed and slowly bring the bit down to the metal. This helps the bit bite into the metal smoothly and prevents wandering.
Applying Pressure Correctly
Use steady, moderate pressure on the drill press handle. Pressing too hard can break the bit or damage the metal. Too little pressure slows the drilling down.
Let the drill bit do the cutting. If you feel resistance, slow the speed or back off the pressure slightly to avoid overheating.
Cooling And Lubrication Tips
Metal drilling creates heat that can wear out your drill bit quickly. Use cutting oil or lubricant to cool the bit and reduce friction.
Apply lubricant often, especially during long drilling tasks. Stop the drill every now and then to add more oil and let the bit cool down.
- Use cutting oil designed for metal drilling
- Apply lubricant before starting and during drilling
- Pause drilling to prevent overheating
- Keep the drill bit clean from metal shavings
Troubleshooting Common Issues
Using a drill press for metal can be tricky. You might face some common problems that slow you down.
Knowing how to fix these issues helps you work faster and safer with your drill press.
Avoiding Bit Breakage
Bit breakage happens when the drill bit is too weak or used incorrectly. This can ruin your work and waste bits.
Use the right speed and pressure to keep bits from breaking. Always choose a bit made for metal drilling.
- Use sharp, high-speed steel or cobalt bits for metal.
- Set the drill press to a slow speed for hard metals.
- Apply steady, moderate pressure without forcing the bit.
- Keep the bit cool by using cutting oil or lubricant.
- Check the bit for damage before starting.
Dealing With Metal Burrs
Metal burrs are rough edges left after drilling. They can cause cuts or stop parts from fitting well.
Removing burrs makes your work safer and cleaner. Use tools made for deburring to smooth the edges.
- Use a deburring tool or a file to remove sharp edges.
- Work slowly around the hole to avoid new burrs.
- Wear gloves to protect your hands from sharp bits.
- Check holes carefully before assembling parts.
Fixing Misaligned Holes
Misaligned holes happen when the drill or workpiece moves during drilling. This can cause parts not to fit properly.
To fix this, make sure the metal is firmly clamped and the drill is set correctly before starting.
- Use clamps or a vise to hold the metal tightly.
- Check the drill bit and table alignment before drilling.
- Mark the hole position clearly with a center punch.
- Lower the drill press slowly to keep control.
- If a hole is off, use a larger bit or re-drill carefully.

Credit: medium.com
Maintaining Your Drill Press
Keeping your drill press in good shape helps it last longer. Regular care improves its performance and safety.
Simple maintenance steps can prevent costly repairs. Clean and check your machine after each use.
Cleaning After Use
Clean the drill press to remove metal shavings and dust. This stops rust and keeps parts working well.
Use a brush or cloth to wipe the table, chuck, and spindle area. Avoid using water to prevent rust.
- Turn off and unplug the drill press first
- Remove chips and dust with a brush or air blower
- Wipe surfaces with a dry cloth
- Apply a light machine oil on metal parts to prevent rust
Routine Checks And Lubrication
Check moving parts regularly to keep the drill press running smoothly. Lubricate parts to reduce wear.
Look for loose bolts, worn belts, and damaged cords. Tighten or replace parts as needed to stay safe.
- Inspect belts for cracks or frays
- Tighten all screws and bolts
- Oil the spindle and other moving parts monthly
- Check the power cord for damage
Frequently Asked Questions
What Safety Gear Is Essential When Using A Drill Press For Metal?
Always wear safety glasses, ear protection, and gloves. Secure loose clothing and tie back long hair. Use clamps to hold metal firmly. Proper safety gear prevents injuries from metal shards and drill bits.
How Do I Choose The Right Drill Bit For Metal?
Select high-speed steel or cobalt drill bits for metal. Match bit size to your hole diameter needs. Use sharp, clean bits for precise, efficient drilling. Proper bits ensure smooth, accurate holes without damaging material.
What Speed Settings Work Best For Drilling Metal?
Use low to medium speeds for drilling metal. Higher speeds can overheat the drill bit and damage the metal. Adjust speed based on metal hardness and drill bit type for optimal results.
How Can I Prevent Metal From Slipping During Drilling?
Use clamps or a vise to secure metal firmly. Avoid holding metal by hand to prevent accidents. Proper securing ensures precise drilling and reduces risk of injury.
Conclusion
Using a drill press for metal drilling makes your work precise and safe. Always keep the metal steady and choose the right drill bit. Control the speed to avoid overheating or damage. Wear safety gear to protect your eyes and hands.
Practice these steps to build confidence and improve results. With patience, drilling metal becomes easier and more accurate. Keep your tools clean and well-maintained for the best performance. Trust the process and take your time. You will get better with every project you complete.