Are you ready to master the art of cutting curves with precision? Operating a jigsaw for curved cuts can seem daunting at first, but with the right guidance, you’ll soon be crafting smooth, intricate designs like a pro.
Imagine transforming your DIY projects with ease, creating beautiful, flowing lines that captivate the eye. This guide is your ticket to unlocking the full potential of your jigsaw, turning complex curves into a walk in the park. Dive in, and discover how you can elevate your craftsmanship to new heights with just a few simple steps.
Your next masterpiece awaits!

Credit: www.gz-supplies.com
Choosing The Right Jigsaw
Choosing the right jigsaw helps you cut curves smoothly and safely. The right tool makes your work easier and more accurate.
Look at the types, blades, power, and features before buying. These factors affect your cutting experience and results.
Types Of Jigsaws
There are corded and cordless jigsaws. Corded ones offer constant power. Cordless jigsaws give more freedom to move.
Orbital jigsaws move the blade in a slight forward and backward motion. This helps cut faster on soft materials. Straight-cut jigsaws only move the blade up and down. This gives more control for detailed cuts.
- Corded jigsaws: steady power, no battery limits
- Cordless jigsaws: portable, good for outdoor work
- Orbital action: faster cutting, less control
- Straight action: precise cuts, slower speed
Blade Selection For Curves
Blade choice is very important for curved cuts. Use blades made for curves. They have narrow bodies and fine teeth.
Blades with more teeth per inch (TPI) cut smoother curves. Flexible blades bend with the curve and reduce splintering.
- Use narrow blades for tight curves
- Choose high TPI blades for smooth edges
- Pick flexible blades for bending cuts
- Material of blade should match the wood or plastic
Power And Features To Consider
Power affects how well the jigsaw cuts thick wood. Higher power means easier cutting through hard materials.
Look for features that help control the cut. Variable speed lets you adjust blade speed. A comfortable grip reduces hand fatigue. A dust blower clears your cutting line.
- Choose 4 to 7 amps for good power
- Variable speed control for different materials
- Bevel cutting angle for angled cuts
- Comfortable handle for better control
- Dust blower to keep the line clear
Preparing Your Workspace
Before starting curved cuts with a jigsaw, organize your workspace. A clean area helps you work safely and accurately.
Gather tools and materials nearby to avoid distractions. Proper setup improves your cutting results.
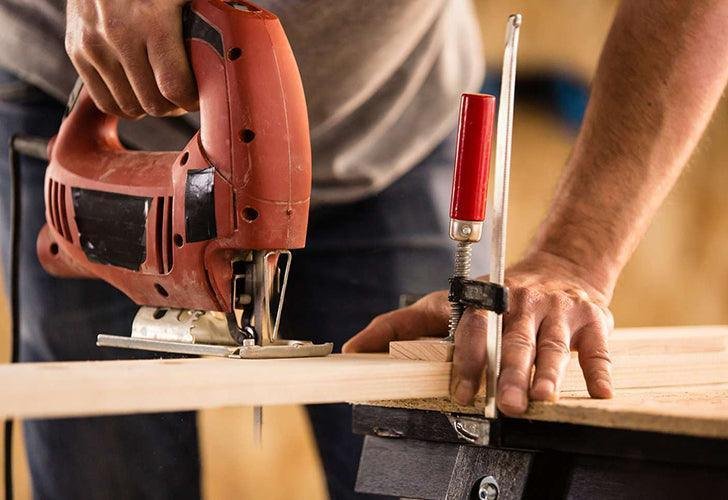
Securing The Material
Hold the wood or material firmly to stop movement. Use clamps or a stable workbench to keep it steady during cuts.
- Place the material flat on the work surface.
- Use clamps on both ends to secure it.
- Make sure clamps do not block the cutting path.
- Check the material is tight and won’t slip.
Marking Curved Lines
Draw clear, smooth curved lines on your material before cutting. Use a pencil or chalk that shows well on the surface.
Safety Gear Essentials
Wear safety gear to protect yourself from dust, noise, and flying debris. Proper gear keeps you safe during jigsaw use.
- Safety goggles to protect your eyes
- Ear protection like earplugs or earmuffs
- Dust mask to avoid inhaling sawdust
- Gloves for hand protection and grip
- Wear snug clothing to prevent snagging
Setting Up The Jigsaw
Setting up your jigsaw correctly is key for smooth curved cuts. This guide covers the basics you need to prepare your tool.
Take time to adjust the blade, speed, and alignment before starting. These steps help improve accuracy and safety.
Installing The Correct Blade
Choose a blade made for curved cuts. Blades with fine teeth and narrow widths work best for curves.
- Select a blade designed for wood or the material you are cutting.
- Use a narrow blade to follow curves easily.
- Make sure the blade is sharp to avoid rough edges.
- Install the blade firmly according to your jigsaw manual.
Adjusting Speed And Settings
Set the jigsaw speed to suit your material. Slower speeds work better for curves and soft materials.
| Material | Recommended Speed | Settings |
| Softwood | Medium | Orbital action off |
| Hardwood | Low to medium | Orbital action off or low |
| Metal | Low | No orbital action |
| Plastic | Low to medium | Orbital action off |
Checking Blade Alignment
Proper blade alignment keeps cuts straight and clean. Check the blade before each use.
- Ensure the blade is perpendicular to the base plate.
- Look for any wobble or looseness in the blade.
- Tighten the blade clamp securely.
- Test the blade movement by running the jigsaw without cutting.

Credit: onevantool.com
Techniques For Curved Cuts
Making curved cuts with a jigsaw takes practice and the right methods. You need to guide the blade carefully to keep the cut smooth and accurate.
This guide covers how to start your cut, control the tool, and handle tight curves for better results.
Starting The Cut Smoothly
Begin your curved cut by marking the curve clearly on the wood. Use a fine pencil or marker for accuracy. Place the jigsaw blade on the waste side of the line to avoid cutting into your final shape.
Before you start cutting, make a small straight plunge cut to get the blade moving steadily. This helps avoid rough starts and keeps the cut clean from the beginning.
Controlling The Jigsaw Movement
Keep your hands steady and guide the jigsaw slowly along the curve. Avoid pushing the tool too hard. Let the blade do the cutting to prevent bending or breaking.
- Hold the jigsaw firmly with both hands.
- Follow the marked line carefully.
- Keep the base plate flat on the surface.
- Adjust speed depending on the wood type.
- Pause to check progress on long curves.
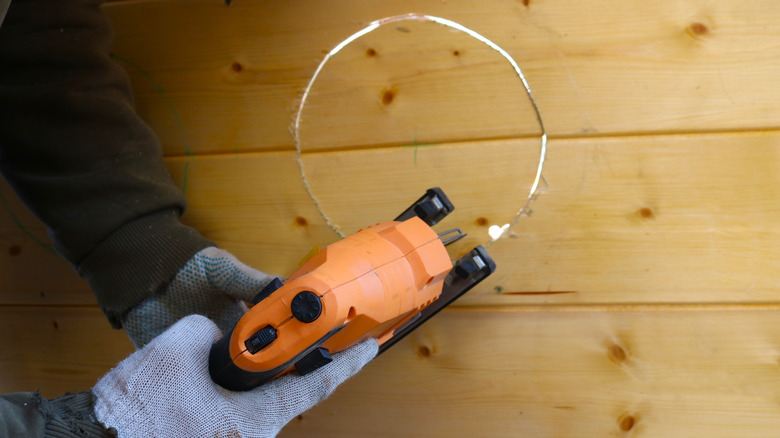
Handling Tight Curves
Tight curves need extra attention. Use a narrow blade made for curves. This blade allows sharper turns without damaging the wood or blade.
| Tip | Reason |
|---|---|
| Use a fine-toothed blade | Better control on tight turns |
| Cut slowly | Prevents blade bending |
| Make relief cuts | Allows sharper curve without strain |
| Support the wood close to the cut | Reduces vibration |
Common Challenges And Fixes
Using a jigsaw for curved cuts can be tricky. You might face problems like blade drift, tear-out, and control issues. Knowing how to fix these helps you cut better and safer.
This guide explains common challenges and simple fixes for smooth, accurate curved cuts with a jigsaw.
Avoiding Blade Drift
Blade drift happens when the blade moves away from your line. It makes cuts uneven and hard to follow. This usually occurs because the blade is dull or the wrong type.
Use a sharp blade made for curves. Keep the jigsaw steady and move slowly along the curve. Make sure to hold the base plate flat on the wood to help guide the blade.
- Choose a narrow blade with many teeth per inch
- Hold the jigsaw firmly and steady
- Cut slowly to keep control
- Keep the shoe flat on the surface
Dealing With Tear-out
Tear-out happens when wood fibers split or chip along the cut line. It makes the edges rough and uneven. Tear-out is common on thin or soft wood and on the exit side of the blade.
To reduce tear-out, use masking tape on the cut line before cutting. Cut from the good side if possible. Use a fine-tooth blade and slow cutting speed for cleaner edges.
- Apply masking tape along the cut line
- Cut from the side that will be visible
- Use fine-toothed blades for smooth cuts
- Cut slowly and steadily
Maintaining Control On Thick Materials
Thick materials are harder to cut smoothly. The jigsaw can jump or slow down, causing uneven cuts. Holding the jigsaw steady is important for thick wood or plywood.
Support the material well to stop movement. Use both hands on the jigsaw for better control. Choose a blade designed for thick wood and cut in slow, steady passes.
- Secure the material firmly on a workbench
- Use both hands to guide the jigsaw
- Select blades made for thick wood
- Cut slowly and don’t force the blade
Finishing Touches
After cutting curved shapes with a jigsaw, the edges may need smoothing. Finishing touches make your work look clean and professional.
Taking time to finish the cuts helps improve the fit and feel of your project. This section covers sanding, cleaning, and checking your curves.
Sanding Curved Edges
Sanding smooths rough edges left by the jigsaw blade. Use fine-grit sandpaper to avoid removing too much wood.
Wrap sandpaper around a flexible object like a sponge to follow curves easily. Sand gently along the curve’s shape.
- Start with 120-grit sandpaper for rough edges
- Use 220-grit for a smooth finish
- Sanding blocks help with smaller curves
- Check edges often to avoid over-sanding
Cleaning Up Cut Lines
Remove any splinters or sawdust from the cut lines. Clean cuts improve how paint or stain sticks to the wood.
Use a small brush or cloth to wipe away dust. If needed, use a file to fix any small bumps or uneven spots.
- Brush away dust with a soft brush
- Use a wood file for tiny rough spots
- Wipe surface with a damp cloth before finishing
Inspecting For Accuracy
Check if your curved cuts match your pattern or design. Accurate cuts help your pieces fit perfectly.
Use a template or ruler to compare curves. Mark any areas that need more sanding or trimming.
- Place your template over the cut edge
- Look for gaps or uneven areas
- Trim or sand spots that are off shape
- Repeat inspection until curves match well
Maintenance Tips For Longevity
Keeping your jigsaw in good shape helps it last longer. Regular care makes curved cuts easier and safer.
Simple maintenance tasks prevent damage and keep your tool working well. Follow these tips to protect your jigsaw.
Blade Care And Replacement
Sharp blades make smooth curved cuts. Dull or damaged blades can cause rough edges and stress the motor.
Check blades before each use. Replace blades if they are bent, chipped, or no longer cut cleanly.
- Use blades designed for curves or fine cuts.
- Keep blades clean and dry to stop rust.
- Change blades regularly for best results.
Cleaning The Jigsaw
Dust and debris can harm your jigsaw’s performance. Clean it after each job to avoid buildup.
Use a small brush or compressed air to remove sawdust from vents and moving parts.
- Unplug the jigsaw before cleaning.
- Wipe the body with a dry cloth.
- Clean the blade clamp to keep blades secure.
Storage Recommendations
Store your jigsaw in a dry, clean place. Proper storage stops rust and damage.
Keep it in its case or on a shelf where it won’t fall or get knocked around.
- Avoid humid areas to prevent rust.
- Remove the blade before long storage.
- Check the tool before use if stored for a long time.
Credit: www.housedigest.com
Frequently Asked Questions
What Is The Best Jigsaw Blade For Curved Cuts?
For curved cuts, use a narrow, fine-toothed blade. It provides better control and cleaner edges on curves.
How Do I Control A Jigsaw For Smooth Curves?
Move the jigsaw slowly and steadily. Follow the marked line closely and avoid forcing the blade.
Can I Use A Jigsaw On Thick Wood For Curves?
Yes, but use a powerful jigsaw and the right blade. Cut slowly to avoid overheating the blade.
How Do I Prevent Splintering While Cutting Curves With A Jigsaw?
Use painter’s tape on the cut line and cut with the good side down. This reduces splinters.
Conclusion
Practicing curved cuts with a jigsaw builds skill and confidence. Always keep your hand steady and follow the marked line closely. Choose the right blade for smooth, clean edges. Safety matters—wear goggles and work in a clear space. Small steps lead to better results and less frustration.
Enjoy the process and watch your projects improve. A jigsaw can be a helpful tool for many creative tasks. Keep learning, and your cutting will get easier every time.